الجمعة، 30 مايو 2014

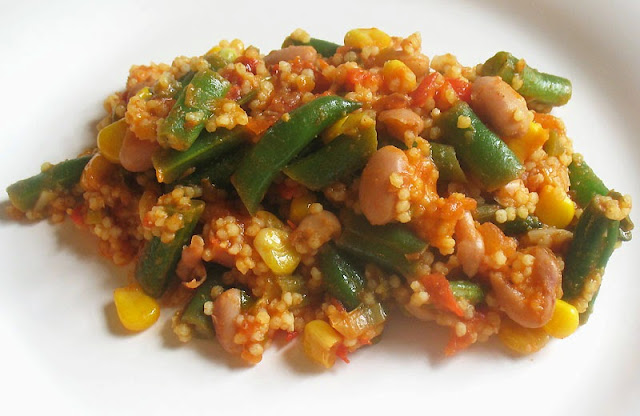
Pinto and Green Bean Fry with Millet

Pinto and Greem Bean Stir-fry

In my opinion, millet is an under-appreciated grain. Lately, I have been guilty of neglecting this nutty-tasting grain that resembles couscous but is packed with more nutrients and flavor. Here it comes together in a simple and zesty Mexican-style stir-fry that is well-balanced with the addition of pinto beans, crunchy green beans and sweet corn.

You may also consider using quinoa in place of the millet though I found the texture of the cooked millet worked quite well in this dish. The spicing and technique could be used for any combination of vegetables and grains that one fancies to serve as a substantial side.

Pinto and Green Bean Fry with MilletPinto and Green Bean Fry with Millet
Recipe by
Cuisine: Mexican
Published on May 30, 2014

Simple, zesty and hearty chili-seasoned pinto bean, green bean, corn and millet stir-fry

Print this recipePrint this recipe

Ingredients:
  • 1/3 cup dried pinto beans (1 cup cooked)
  • 1/3 cup millet
  • 2 tablespoons olive oil
  • 3 to 4 green onions, trimmed and thinly sliced
  • 1 clove garlic, minced or crushed
  • 2 jalapeños, seeded and finely chopped
  • 1 cup green beans, trimmed and cut into 1-inch pieces
  • 1 cup corn, fresh or frozen
  • 1 teaspoon chili powder
  • 1/2 teaspoon chipotle powder
  • 1/2 teaspoon ground cumin
  • 1 teaspoon dried oregano
  • 1 large tomato, finely chopped
  • 1 teaspoon sea salt, or to taste
  • fresh ground black pepper
Instructions:
  • Rinse the pinto beans and soak in enough water to cover for 8 hours or overnight. At the same time, rinse the millet and soak in 2/3 cup of water.

  • Drain the pinto beans and rinse. Transfer to a medium saucepan and cover with fresh water. Bring to a boil, reduce heat to low, cover, and simmer until the beans are tender — about 1 hour. Drain and set aside.

  • Meanwhile, bring the millet to a boil, reduce heat to low, cover, and simmer until the water is absorbed — about 15 minutes. Let sit for 5 minutes and then fluff with a fork. Set aside.

  • Heat the oil in a large skillet over medium heat. When hot, add the green onions, garlic and jalapeños, and stir for a minute. Add the green beans and stir for 4 minutes until they begin to soften. Add the corn, stir for another few minutes, then add the spices and stir to coat the vegetables.

  • Now add the tomatoes to the pan and simmer for a few minutes until the tomato is softened. Stir in the pinto beans and millet and cook for another few minutes until the tomatoes are thickened and everything is heated throughout. Stir often.

  • Season with salt and pepper and serve hot or warm.

Makes 4 to 5 servings
pinto and green bean fry
More millet recipes you may enjoy:
Northeast African Millet Patties
Spicy Curried Millet and Vegetable Soup
Indian-Style Millet

On the top of the reading stack: stacks of recipes

Audio Accompaniment: Nicolas Bacher

الخميس، 29 مايو 2014

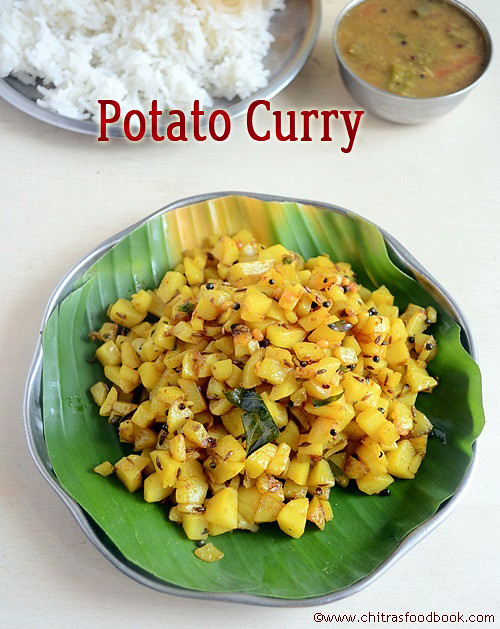
EASY POTATO CURRY/POTATO FRY RECIPE-BRAHMIN STYLE


Potato curry brahmin's style

I am a big fan of this potato curry/Urulai kizhangu varuval recipe.I have already mentioned about this potato fry in my tamil brahmin style arachuvitta sambar post.It is one of the easiest poriyal recipes & the best side dish for sambar and rasam.Apt for bachelor’s cooking.Just 3-4 minutes,this curry would be ready.Moreover it is a No onion No garlic recipe.When i was working,my colleague used to bring this as a side dish for sambar sadam.I learnt this from her.I make this mainly for Raksha.She loves it a lot.I think most of u know & make this at home.But i wanted to have this easy recipe in my food book.So lets proceed how to make this easy n quick potato curry recipe Smile
Do check out my other potato curry recipes
kongunadu style potato fry 
my mom’s easy potato curry recipe
 baby potato curry 
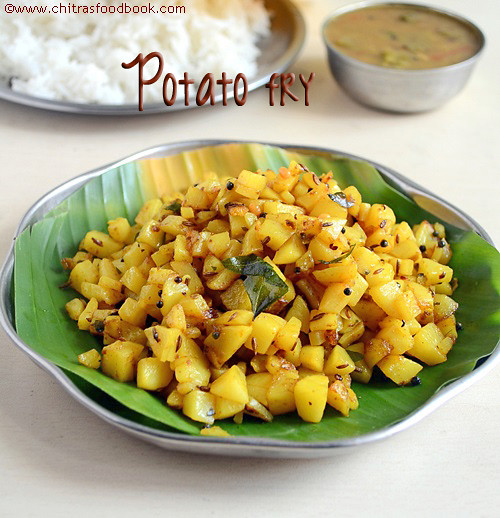
Easy potato curry recipe


Easy potato curry - Brahmin's style


Easy potato curry - Brahmin's style Easy potato fry/Potato curry- Urulai kizhangu varuval without onions and garlic -Brahmin's style
Cuisine: Indian
Category: Curry
Serves: Serves 3
Prep time: 5 Minutes
Cook time: 5 Minutes
Total time: 10 Minutes


INGREDIENTS

  • Potato - 5 nos (medium size)
  • Sambar powder or red chilli powder - 3/4 to 1 tsp
  • Turmeric powder - 1/4 tsp
  • Salt - as needed
  • Lemon juice – few drops (optional)
To temper
  • Cooking oil - 2 tbsp
  • Mustard seeds – 1/2 tsp
  • Urad dal – 1/2 tsp
  • Cumin seeds/jeera – 1/2 tsp
  • Curry leaves – few
  • Asafetida/Hing – a pinch
METHOD

  • Wash and peel the potatoes.Chop into small pieces.
potato curry step1

  • Heat oil in a kadai,temper all the ingredients given above in the same order.
  • Add the chopped potatoes,salt,turmeric powder and fry for a minute in high flame.Then add sambar powder or red chilli powder and fry in medium flame till the powder coats the potatoes well.
potato curry step2

  • Now simmer the flame completely and close the kadai with a lid.Let the potatoes cook in slow fire in oil.After a minute,open the lid, stir well & again close it.It takes nearly 3-4 minutes to cook.After its cooked well and soft,switch off the flame.Add lemon juice if desired.
potato curry step3

Serve with sambar or rasam rice .Tastes yummy !!

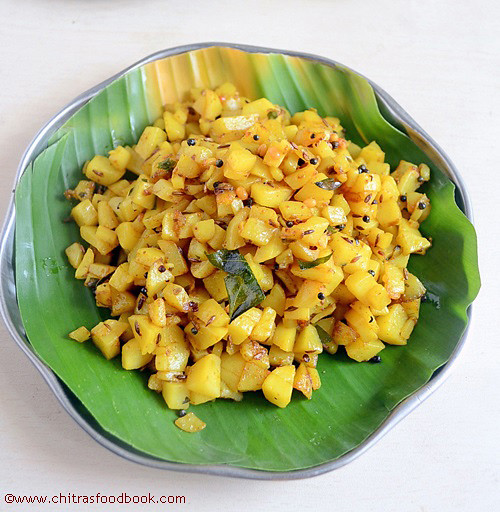
Easy potato fry recipe


Note

  • For variations, u can add finely chopped onions & garlic along with potatoes while sauting.
  • Replace sambar powder with red chilli powder
  • Lemon juice is optional.U can also garnish with finely chopped coriander leaves.

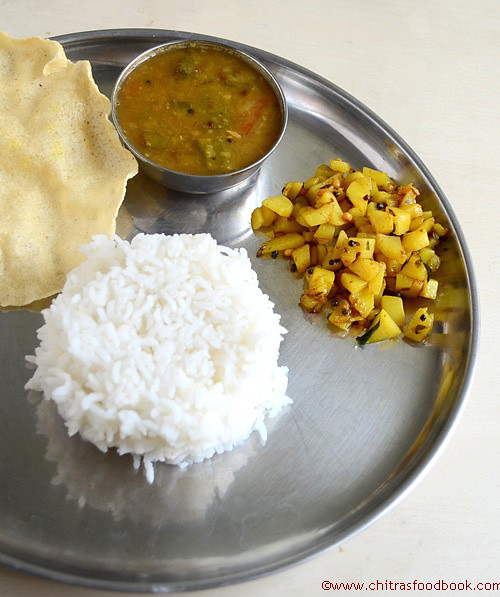
Enjoy this yummy potato poriyal with sambar , rice and papad Smile.Tastes heaven !!

Easy lunch menu


الأربعاء، 28 مايو 2014

No Croutons Vegetarian Soup and Salad Roundup - May 2014

I'm a bit late with the No Croutons Required roundup for May this month, but better late than never. NCR is a vegetarian soup and salad challenge, alternately hosted by myself and my dear friend Jacqueline of Tinned Tomatoes. Each month we ask fellow bloggers to submit a favorite soup or salad that has appeared on their table during the month of the challenge. Thanks as always to all who took the time to send in their mouthwatering dishes.

Now settle in and see what's on the menu this month.


kale salad
Recipe: Jewelled Winter Kale Salad

Chef: Erica
Blog: Healthy Life Lessons
Location: Ontario, Canada

Winter may finally be over, but that is no reason to ignore the goodness of kale. This gem of a salad featuring that treasured leafy green combines here with sweet potato, hemp and pomegranate seeds, and then is lovingly smothered with a warm blueberry balsamic dressing. I'd serve this any season of the year, no matter the temperature outside, for brunch, lunch, or dinner. Erica is right that cooking fresh doesn't have to be complicated, and it is indeed a creative outlet.

carrot salad
Recipe: Moroccan Carrot Salad

Chef: Kellie
Blog: Food to Glow
Location: Scotland, UK

Sweet, savory and delicious and a feast for the eyes, this carrot salad is another one to grace dinner tables anytime of year. This orange powerhouse of a vegetable meets dates and toasted seeds and then is all dressed up with fresh lemon juice, olive oil, pomegranate molasses and a bit of spice and herbs. The possibilities are endless as are the serving pairings. The idea of serving it with hummus-smeared flatbread sounds mighty fine to me as do Kellie's other suggestions.

enoki salad
Recipe: Enoki Mushroom and Mache Salad

Chef: Mayuri
Blog: Mayuri's Jikoni
Location: Kenya

Mushrooms always get my attention so I was intrigued by this salad that includes not only enokis but mache, which I am unfamiliar with. Turns out Mayuri was too as she asked her husband to bring back greens and he brought back mache. It is a leafy green that looks like spinach with a nutty taste that is commonly used in French cuisine. Sounds like a fine pairing with the mushrooms, onions and grapes dressed with a yogurt and orange dressing. I'm intrigued by this creative salad with a medley of distinct flavors.

macedonia salad
Recipe: Macedonia with Apple Blossom and Mint

Chef: Galina
Blog: Chez Maximka
Location: UK

A summery fruit salad is a most refreshing way to finish off a satisfying meal. This gorgeous bowl combines mango, banana, apple, strawberries, raspberries, kiwi, grapes, apple blossoms, a bit of sugar and some fresh lemon juice. That is one fine way to load up on the goodness of fruit, and it is easy to prepare besides and a feast for the eyes and palate.

celery soup
Recipe: Year Old Celery and Oregano Soup

Chef: Dom
Blog: Belleau Kitchen
Location: UK

If the title of Dom's recipe isn't intriguing enough, the recipe is even more so. Celery planted a year ago and nearly faded away is remembered and transformed into this gorgeous bowl of bliss. The subtle flavor of celery gets a boost here with the addition of onions, carrots, garlic, peas and lots of fresh oregano that go into the soup along with plenty of butter and olive oil. This is a fine way to rescue any celery that might be languishing in the crisper and make it shine.

green soup
Recipe: 5 Minute Green Smoothie Soup

Chef: Jacqueline
Blog: Tinned Tomatoes
Location: Scotland, UK

In an attempt to make room in her freezer, my co-host Jac decided some frozen broccoli and cauliflower should make their way into a deliciously green soup. Packed with nutrients and economical too, there is no chopping or prep required. The vegetables, including frozen peas and spinach, are whizzed together with hot stock and in hardly anytime at all, a delicious bowl of soup is born. This is one to be remembered when you don't have much time to fuss over dinner yet don't want to sacrifice flavor.

Indian-style coleslaw
Recipe: Indian-Style Coleslaw

Chef: Lisa
Blog: Lisa's Kitchen
Location: Ontario, Canada

My own contribution this month is a spiced up coleslaw. In an attempt to use up some leftover cabbage, I mixed it up with some carrot, red pepper, cucumber and green onions and then dressed it up with a spicy and tangy yogurt-based dressing. It proved to be a perfect accompaniment to an Indian-themed meal I had planned. Crisp and refreshing, this twist on traditional coleslaw is now a new favorite.

thai chickpea salad
Recipe: Thai Chickpea & Kale Salad Rolls with Peanut Dressing

Chef: Janet
Blog: The Taste Space
Location: US

Janet never fails to impress me with her creative dishes, and here chickpeas and earthy kale are given the Thai treatment in this gorgeous salad. Red peppers and carrots add some contrast and everything is dressed with a peanut dressing. Best of all, the dish was transformed the next day and turned into rice paper wraps — leftovers never need be boring. Enjoyed either way, this salad is sure to please and satisfy.

mushroom soup
Recipe: Cream of Mushroom Soup

Chef: Dena
Blog: Oh! You Cook!
Location: US

A classic for sure, mushroom soup is something I never tire of. This earthy, lightly pureed soup with button mushrooms is seasoned with rosemary, thyme, chives, onion, garlic and filled out with some evaporated milk and some sherry. Dena is quite correct when she notes that once you enjoy homemade, you won't be wanting the condensed version again. Simply lovely and easy too.

taco salad
Recipe: Raw Vegan Taco Salad

Chef: Juliane
Blog: Style Nectar
Location: Unknown

Bursting with flavor and nutrients, this salad is sure to impress. The taco "meat" is made up of nuts and spice, and is served over a salad base consisting of lettuce, red pepper, tomato, cucumber, red onion and avocado. All of this goodness is drizzled with a creamy hemp seed dressing. What a wonderful alternative to traditional tacos and one to be enjoyed anytime of year no doubt.

corn bhel
Recipe: Corn Bhel

Chef: Sweatha
Blog: Tasty Curry Leaf
Location: India

Surely a perfect summer snack, steamed corn features here with tomatoes, onion, mango, potatoes and sprouts. This refreshing combination of vegetables is spiced with chat masala, chili powder and cumin, and then tossed with fresh lemon juice. A very filling and nourishing salad that would work well as a side as well as a snack. The idea of serving it with various chutneys is a very appealing one as well.

And that concludes the May 2014 edition of No Croutons Required. Jacqueline will be hosting the June edition, so be sure to stop by her blog at the beginning of the month for the announcement.

الثلاثاء، 27 مايو 2014

FRUIT CUSTARD RECIPE-CUSTARD POWDER RECIPES


mixed fruit custard

When i posted custard powder ice cream,i wanted to share this easy fruit custard recipe using eggless vanilla custard powder.This is one of the easiest custard powder recipes and its a good replacement for fruit salad to serve your guests at get-together or for birthday parties.I have been making this for years for all my friends & relatives.Its a very simple recipe but it fetches u more credits for sure.Initially i used to add only apple & banana and call it as apple custard.Then i got the idea of adding cherries n cashews from Nags blog.But this is a much simplified version.Addition of nuts & cherries make this dessert richer,tastier n colorful too.As mangoes are around,u can try adding it.Last week when Raksha’s friends came to my house,i made this along with veg fried rice and baby corn fry for lunch.They all loved it.Try this for ur kids n family members & have a delectable dessert after an yummy meal.Everybody will love it and ask for more!!.So Lets see how to make this easy fruit custard recipe Smile.

Fruit custard recipe

Fruit Custard recipe


Fruit Custard recipe Mixed Fruit n nut custard recipe - Easiest dessert recipe !
Cuisine: Indian
Category: Dessert
Serves: Serves 4
Prep time: 10 Minutes
Cook time: 10M+2H
Total time: 20M+2H


INGREDIENTS

 1 cup = 200ml

  • Milk - 500 ml (2.5 cups)  + 1/4 cup
  • Vanilla custard powder - 2 tbsp
  • Sugar - 4-5 tbsp
  • Vanilla essence - 1/2 tsp
  • Mixed fruits and nuts- Apple,Mango,banana,Cherries,tutti frutti,Cashews & Badam
METHOD

  • Boil 2.5 cups of milk and add sugar to it.Take 1/4 cup of milk and mix custard powder without lumps.
fruit custard step1
  • Add this custard mixture to the boiled milk.Mix well in medium flame for few minutes till it thickens like dosa batter.Keep stirring else u will get a burnt layer at the bottom and it spoils the entire recipe.
fruit custard step2
  • Switch off the flame and add vanilla essence.Refrigerate it for 2 hours.
  • Just before serving,chop all the fruits and nuts into small pieces.
  • Mix them with the  chilled custard.Serve immediately.
fruit custard step3


Note

  • Adjust the quantity of custard powder as per the thickness u need.
  • I always like the custard little thinner.Its ur personal choice of making it.
  • Adjust sugar as per ur taste buds.
  • Adding cherries,tutti frutti,cashews and badam gives a nice crunchy taste while eating.So never skip it.

Fruit custard recipe


Enjoy this all time favourite fruit custard with ur loved ones Smile.It tastes yummy !!

Fruit custard recipe

الاثنين، 26 مايو 2014

Spicy Sour Chickpea Masala

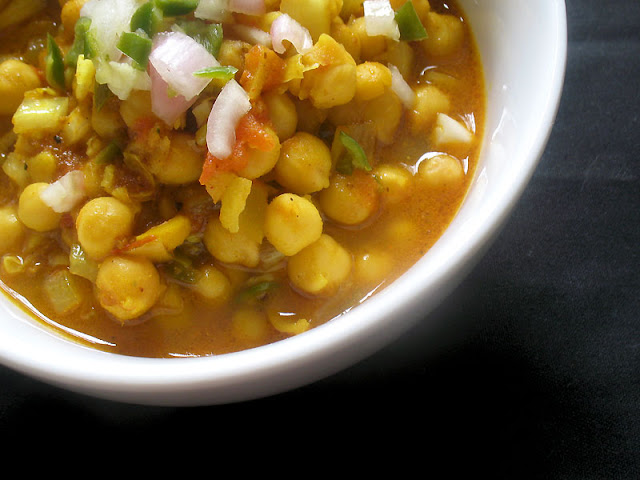
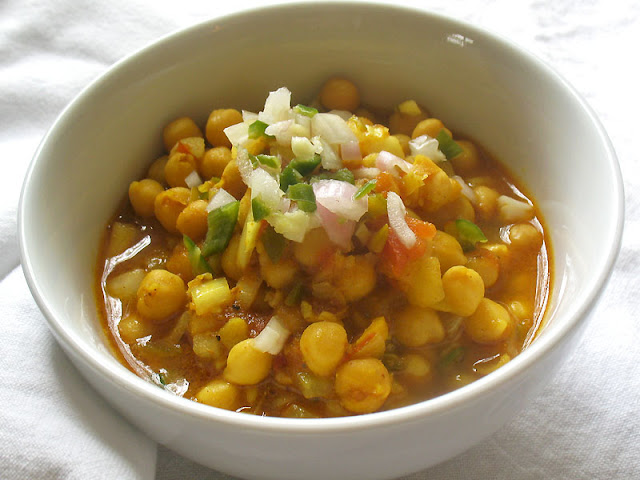
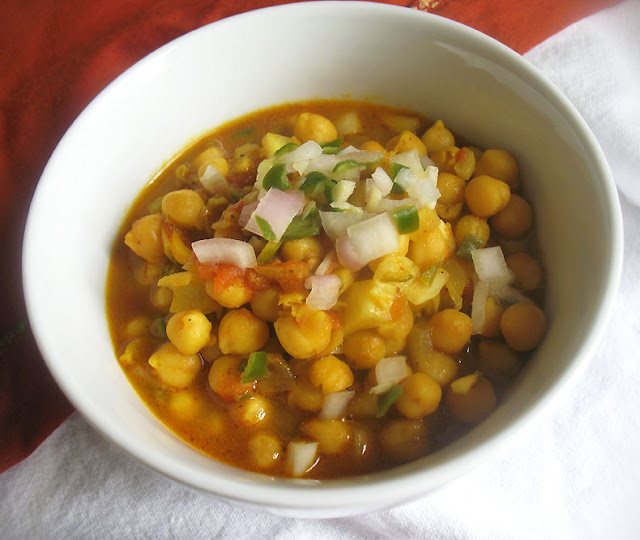
spicy sour chickpeas

This is a slight variation on one of the earliest recipes featured here on Lisa's Kitchen. That was back in March of 2007, the very first day my blog went live. Yes, I have been sharing my kitchen experiments for over 7 years now.

Why do I continue to do so? I'm certainly not getting rich from it, except if you consider many of the lovely folks I have met through my ventures here. The food — that's what it is all about. Of course, I don't make something different each time I cook, but starting Lisa's Kitchen certainly expanded my horizons. So while pursing my passion for cooking I am able to share with others who also believe a healthy vegetarian diet is important, but it has to be delicious too.

spicy sour chickpea masala

Before I started blogging, this recipe was often on the menu, and if there is one regret that I do have about maintaining this space is that many cherished tried and tested recipes don't make their appearance on the table as often any more — oh, and I often have to wait for dinner because I am trying to take photos of the food. But one can only eat so much in a given day, and with all of the cookbooks lining my shelves and bookmarked recipes from other sites, well, nothing more needs to be said really, except that this is a classic recipe that works especially well if you make your own garam masala and chat masala.

That is another thing that I have learned from years of cooking Indian food — there is no comparison between store-bought spice blends and ones that are made in the comfort of your own kitchen.

What I especially like about this simple and flavorful dish, apart from the spicing, is the sour and tart flavor from the lemon, onion and ginger. Adding most of the onion, chilies, ginger and the juice at the end enhances the dish further in terms of texture and flavor.

Spicy Sour Chickpea MasalaSpicy Sour Chickpea Masala
Recipe by
Cuisine: Indian
Published on May 27, 2014

Classic spicy chickpea curry with a bold, fresh, tart and sour flavor from adding onions, chilies and ginger marinated in lemon juice at the very end

Print this recipePrint this recipe

Ingredients:
  • 1 1/2 cups dried chickpeas
  • 3 medium onions, chopped
  • 2 1/2 teaspoons sea salt, or to taste
  • 2 to 3 fresh green chilies, seeded and chopped
  • 1-inch piece fresh ginger, grated or minced
  • juice from 1 large or 2 small lemons (3 tablespoons)
  • 4 tablespoons olive oil
  • 2 medium tomatoes, chopped
  • 1 tablespoon ground coriander
  • 1 tablespoon ground cumin
  • 1 teaspoon turmeric
  • 1 teaspoon homemade garam masala
  • 1 teaspoon homemade chat masala
  • 1/2 teaspoon amchoor powder (optional)
  • 1/2 teaspoon cayenne
Instructions:
  • Rinse the chickpeas and soak overnight in several inches of water with a little yogurt whey or lemon juice added to help break down the peas. Drain and rinse, then transfer to a large saucepan and cover with several inches of fresh water. Bring to a boil, reduce heat to low, cover, and simmer for 1 to 1 1/2 hours or until tender. Drain the chickpeas, reserving the cooking liquid.

  • In a medium bowl, combine half the chopped onions with the salt, chilies, ginger and lemon juice. Set aside.

  • Heat the oil in a large saucepan over medium-high heat. When hot, put in the remaining onions and stir for 3 to 5 minutes or until they begin to brown on the edges. Add the tomatoes and stir for 6 minutes or until the tomatoes are reduced. Toss in the coriander, cumin and turmeric, and stir for 30 seconds.

  • Now add the chickpeas, 1 1/2 cups of the reserved cooking liquid, garam masala, chat masala, amchoor if using, and cayenne. Stir to mix and bring to a simmer. Reduce the heat to low, cover, and simmer gently for 20 minutes, stirring occasionally. Add more of the reserved cooking liquid if desired.

  • Remove from heat and add the onion, salt, chili, ginger and lemon juice mixture. Stir to combine and serve hot.

Makes 8 servings

sour chickpeas

Other spicy Indian chickpea dishes to try from my vegetarian kitchen:
Kashmiri Chickpeas with Mushrooms
Chickpeas Smothered in a Tangy Tomato Gravy
Chickpeas in a Creamy Coconut Tamarind Gravy
Chickpea Vindaloo

On the top of the reading stack: Gogol

Audio Accompaniment: Higher Intelligence Agency

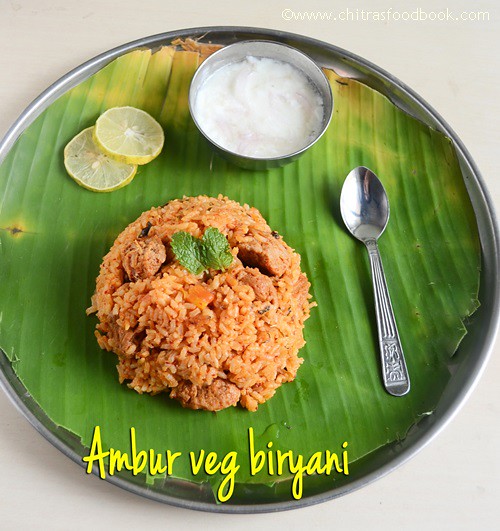
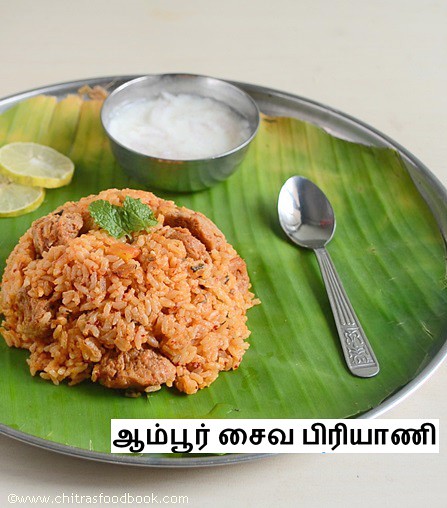
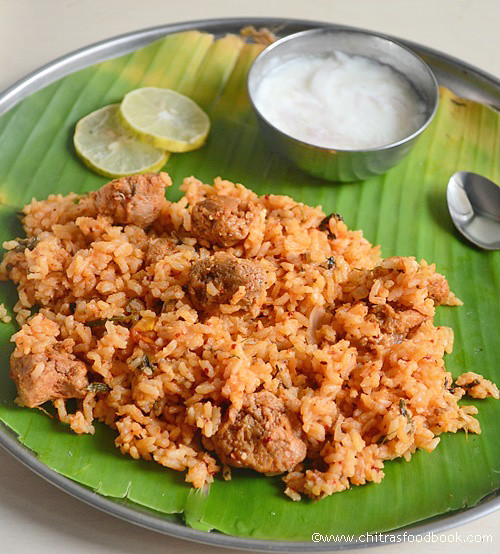
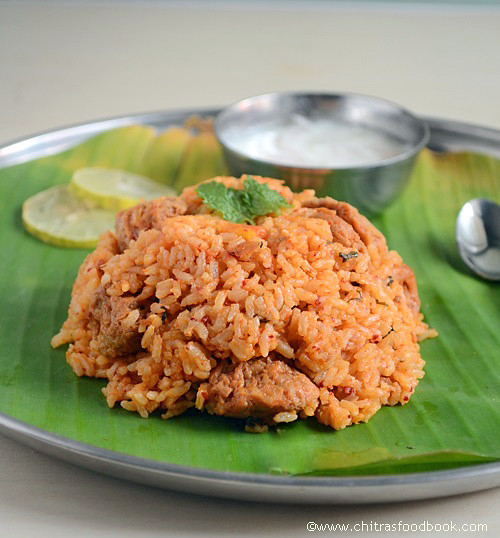
AMBUR VEG BIRYANI RECIPE WITH SOYA CHUNKS

Ambur veg biryani recipe
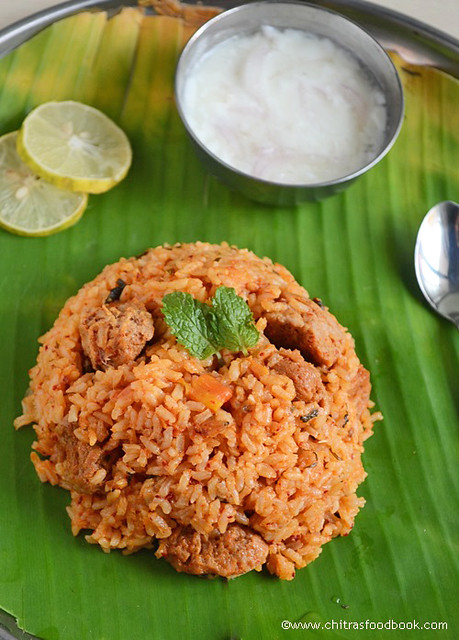
As u all know, the world famous Ambur biryani is a non-veg biryani prepared with mutton or chicken.But u may think how come i post Ambur biryani in my vegetarian blog ? Smile with tongue out.U are right.Being a vegetarian,i can’t try the actual biryani recipe.But somehow i wanted to try this in my kitchen after knowing its popularity.When i asked my non-veg friends,they suggested me to use soya chunks/meal maker instead of mutton.Meal maker very much resembles mutton right,eppuuudddi ? Winking smile.So i just replaced mutton with soya chunks and tried this biryani by referring The Hindu “Food safari” section & Aval vikatan magazine where “Star biryani “ Muneer ahmed has shared the recipe for how to make in small quantities at home.I also watched you tube video by “Puthiya thalaimurai” channel for more details.It came out very well & I started making this regularly.This would be our sunday biryani at least once in a month.I used jeera rice as mentioned in the actual recipe.Without using ghee  & coconut milk,the flavour of just masala & jeera rice while cooking is awesome.Try it,u will come to know Winking smile.Next i have planned to try Dindigul thalapakattu biryani too  Hot smile.
Ambur veg biryani recipe

In the “Notes” section i have shared some of the health benefits of soya nuggets/meal maker.Do read it.As there is no grinding or chopping works,u can do this quickly.Bachelor's can try this too..
Check out my soya chunks gravy if interested Smile
Ambur veg biryani recipe

Ambur Biryani recipe with soya chunks


Ambur Biryani recipe with soya chunks Ambur style Soya chunks biryani recipe – Sunday special biryani !!
Cuisine: Indian
Category: Lunch
Serves: Serves 3
Prep time: 10 Minutes
Cook time: 20 Minutes
Total time: 30 Minutes


INGREDIENTS
1 cup - 200ml
  • Jeera rice/Seeraga sambar arisi - 1 cup
  • Big onions - 2 nos
  • Tomato - 1 no
  • Soya chunks - 2 handful
  • Red chilli paste - 1 tbsp (I used 5-6  byadige chillies & make a paste)
  • Garlic paste - 1.5 tbsp ( grind 20 cloves)
  • Ginger paste -1.5 tbsp ( Grind thumb finger size piece)
  • Mint & coriander leaves - a handful
  • Salt - as needed
  • Water - 1.5 cups( i used 1.75 cups to make it well cooked)
  • Curd - 3 tbsp
  • Lemon juice - as needed
To temper
  • Cooking oil - 4 tbsp
  • Cinnamon – 1 big piece
  • Cloves - 2 nos
  • Cardamom - 2 nos
METHOD

  • Pinch & soak 6 chillies in little hot water and grind into a smooth paste.Use Crushed variety chilli(Byadige) to get this color.Grind ginger to smooth paste adding required water. Similarly grind garlic and make the paste.Keep all the paste separately.
  • Boil water in a pan.Once it starts to roll boil,add the soya chunks and switch off the flame.Let the chunks soak and gets doubled in size.
  • Chop onions,tomato,mint & coriander leaves and keep it ready.
ambur biryani step1
  • In a cooker base,heat oil.Sprinkle a tsp of curd to check whether the oil is heated.Now add cinnamon,cloves,cardamom.Saute for a second and add the garlic paste.Saute for a minute till raw goes off.Now add ginger paste.Saute well for a minute.Mix well.Then add chilli paste & mix well.
ambur biryani step2
  • Now add onions & saute till transparent.Then add tomato pieces.Saute till it turns mushy.Squeeze and add soya chunks.Mix well.
  • Lastly add mint & coriander leaves & salt.Toss well.
ambur biryani step3
  • Add the curd & mentioned quantity of water,lemon juice.Let it boil nicely.Wash the jeera rice and add it to the boiling water.Close the cooker with the lid.Pressure cook in low flame for one whistle(approx 10 mins).
ambur biryani step4
ambur biryani step5
  • After the steam is released,check whether rice is cooked well.U can put **DUM** for 5 minutes if necessary else check for taste and serve hot with raita ! Prepare this rice 30 minutes in advance because all the masala will infuse well & tastes good.
HOW TO PUT DUM
Transfer the rice from cooker to a flat base vessel.Keep the vessel over the low flame and cover it tightly with a lid.Boil water in a bowl and keep this bowl over the rice vessel as a weight.Put the Dum for 5-7 minutes.Keep the flame very low.Remove and serve hot! 


Ambur veg biryani

Note


  • As Muneer ahmed says,the secret & color of this biryani lies in red chilli paste.So i used byadige red chilli to give the natural red color and it is mildly spiced too.I have not used food color here.If u use other chilli varieties,add less based on its spice level.
  • As per the original recipe,u should cook the gravy & rice separately upto 80%,mix & put under DUM.But cooking in pressure cooker suited my family’s taste.So i follow this way.
  • No need to use ghee or coconut milk in this recipe,
  • Use the paste as mentioned above to get the actual taste.Never add G&G paste.It will give a different taste & flavor.I have tried in that way too.
Health benefits of soya nuggets
  1. Soya is rich in protein,minerals & vitamins.Hence it is a good choice for vegetarians
  2. It is high in fiber and aids in weight loss.
  3. It is one of the best sources of omega-3 fatty acid.So it is good for heart.
  4. It is beneficial for women during post menopausal days.
Enjoy Ambur style soya chunks biryani with simple onion raita.Tastes great !
Soya chunks biryani