الأربعاء، 31 أغسطس 2016

Sweet Ammini Kozhukattai Recipe – Easy Kozhukattai Recipes

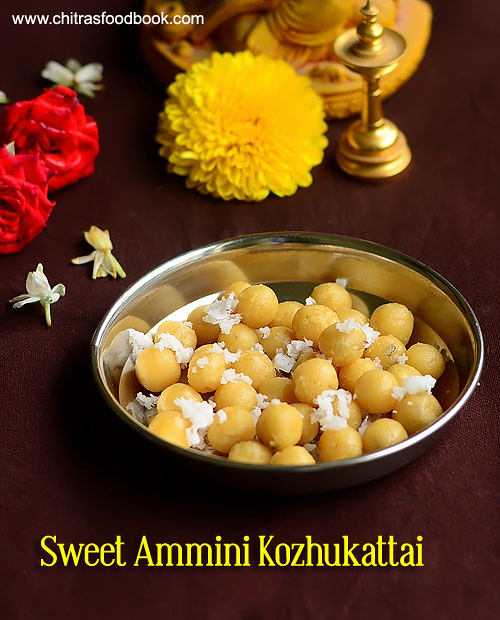
Sweet ammini kozhukattai recipe
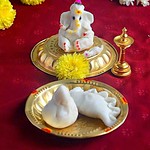
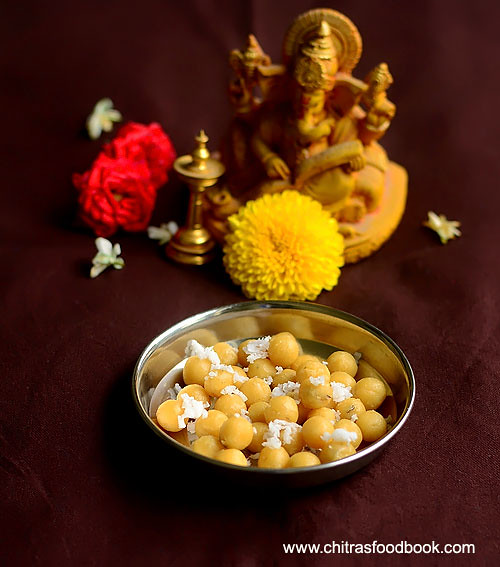
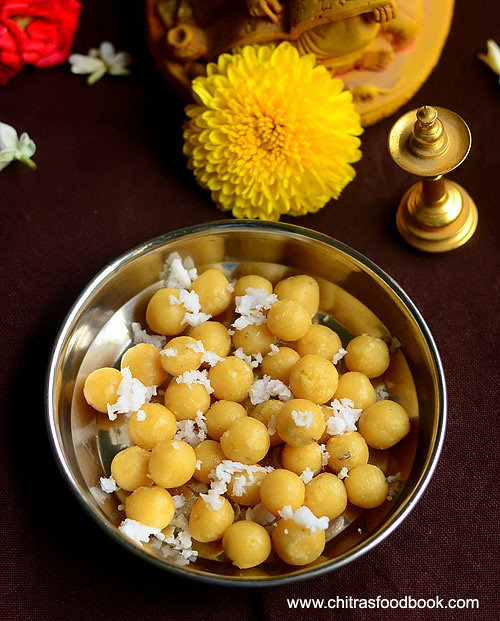
Ammini kozhukattai also known as Ammani / mani kozhukattai in Tamil, mini rice balls in English, Undrallu/Bellam Kudumulu in Telugu is a very easy to make kozhukattai variety. People make sweet and spicy version of this kolukattai for evening snacks and during Ganesh Chaturthi festival as an offering to God. Long back I shared ammini kozhukattai under low calorie snack. But this is the first time I tried sweet ammini kozhukattai i.e Vella Kozhukattai and masala ammini kozhukattai/Spicy kozhukattai. Sweet kozhukattai can be prepared in various ways. I made this with store bought rice flour by directly cooking it in jaggery syrup just like sweet pidi kozhukattai. Usually I make kozhukattai with store bought idiyappam flour but this time I tried with Anil kozhukattai maavu. It came out super soft, delicious and flavorful. If you are looking for an easy sweet kozhukattai recipe without making pooranam/stuffing part, this is the best choice. Kids would love it too. Even bachelors can try this for Ganesha pooja. Make this easy, cute looking sweet ammini kozhukattai/ Inippu kozhukattai for this Vinayaka chaturthi festival and enjoy ! Lets see how to prepare soft and tasty sweet ammini kozhukattai with step by step photos !
Check out my Full collection of Ganesh Chaturthi recipes HERE


Sweet kozhukattai recipe

Sweet Ammini Kozhukattai Recipe


Sweet Ammini Kozhukattai Recipe Ammini kozhukattai/ mani kozhukattai - Sweet version using store bought rice flour and jaggery.
Cuisine: Indian
Category: Sweet
Serves: Serves 2
Prep time: 15 Minutes
Cook time: 5 Minutes
Total time: 20 Minutes


INGREDIENTS
1 cup - 200ml
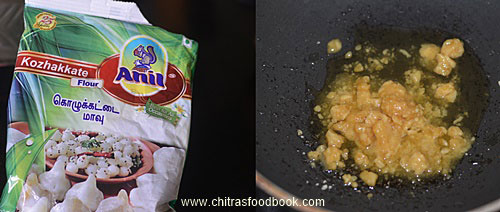
  • Rice flour - 1/2 cup ( I used Anil Kozhukattai flour)
  • Grated jaggery or powdered jaggery - 1/4 cup
  • Water - 3/4 -1 cup
  • Cardamom powder - 1/4 tsp
  • Grated coconut - 1 tbsp
  • Oil - to grease hands and idli plate
METHOD

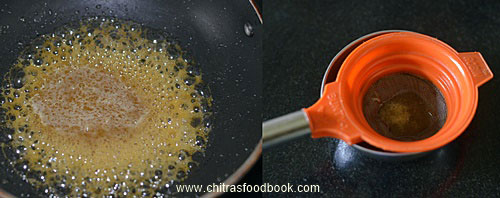
  • Take the powdered jaggery in a kadai. Add 3/4 to 1 cup of water and heat it. Melt the jaggery and strain it with a metal strainer.
Sweet ammini kozhukattai
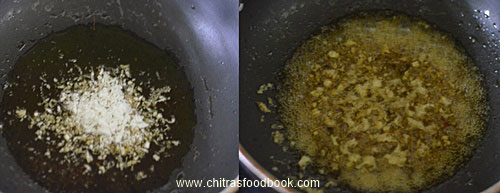
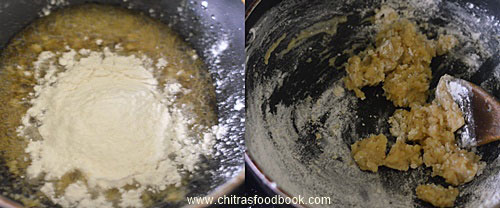
  • After straining the syrup, boil it till frothy. Simmer the flame and add grated coconut, cardamom powder. Mix well & boil. Add the measured rice flour. Mix well till all the syrup is absorbed by the rice flour. It will become a thick, soft dough.
Sweet ammini kozhukattai
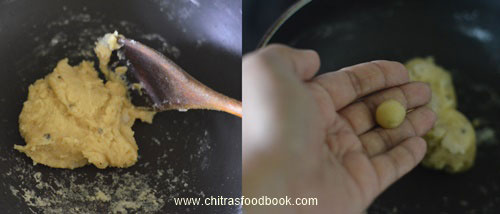
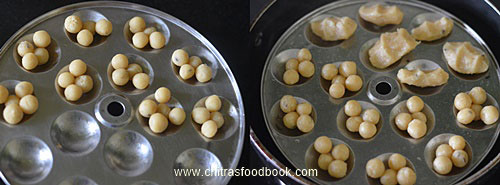
  • After the dough turns warm, make small balls by greasing your hands with oil. Grease the idli plate with gingely oil or cooking oil. Boil the water in an idli pot or kadai. Keep the idli plate only after the water starts to roll boil. Steam it for 5-7 minutes. Do not steam for more time. It will make the balls hard.
Sweet ammini kozhukattai
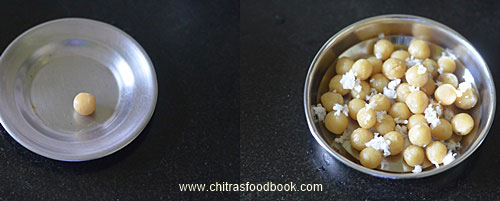
  • To check whether its cooked, take one ball and drop in a plate. If it bounces, ball is cooked. If it sticks to the plate, balls are not cooked. Switch off the flame after the balls are cooked. Let it rest for 5 minutes and then remove the balls in a plate.Enjoy ! I garnished with grated coconut & served it.
Sweet ammini kozhukattai


Note
  • Add more jaggery if you need more sweetness. You can add upto 1/3 cup. I felt adding 1/4 cup itself was sufficient.
  • Water quantity depends on the flour you use
  • Homemade rice flour may need lesser water.
  • Do not steam the balls for more time. It will become hard. To avoid this, place the idli plate only after the water in the idli pot starts to roll boil. By doing this way, kozhukattai gets cooked fast and remains soft too.

Try this easy sweet kozhukattai for this Ganesh chaturthi and enjoy your celebration !
Sweet ammini kozhukattai

الثلاثاء، 30 أغسطس 2016

Ganesh Chaturthi – Pooja Procedure/Puja Vidhi/ Vidhanam

Ganesh chaturthi pooja vidhanam
Last year I made a post on with details about Abishekam things, pooja items along with its procedures and Ganesh chaturthi recipes links. But it is purely based on my family’s tradition and practice. Some people have the practice of keeping Kalasha & Gouri on this day. Recently one of my readers requested me to share Ganesh Chaturthi Pooja Vidhanam/Puja vidhi along with mantras just like my Varalakshmi Vratham pooja post. So I referred my book “Avanai maadha Pooja Vidhanam” ( My friend Shalini’s gift) and shared the slokhas, detailed pooja method with pictures and Ganesha story in PDF format ( you can see at the end of post) to help people who wish to celebrate Ganesh chaturthi pooja in an authentic way. I have shared pooja vidhanam in Tamil. So I have mentioned some useful links for pooja vidhi in Sanskrit, Hindi, Telugu and Kannada at the end of the post. Hope you find them useful.
Ganesh Chaturthi festival is celebrated as the birthday of Lord Ganesha.He is the first worshipped God before any holy puja or occasion.This year 2016, Vinayagar Chaturthi festival falls on September-5th, Monday. This festival is also known as 'Vinayak Chaturthi' or 'Vinayaka Chavithi' .It is observed during the Hindu month of Bhadra in Hindi /Avani in Tamil (mid-August to mid-September). For more information on Ganesh chaturthi festival, click this link
.
Click this Video on how to make Homemade Ganesh using Kozhukattai dough.

For Ganesh chaturthi Kolam/Rangoli designs, please Visit my in-laws blog for Learn kolam.

Disclaimer : The pictures and pooja procedures I shared in this post are from a devotional book gifted by my friend. This is just one of the ways of celebration. It may vary from place to place. Please consult the elders in your family and follow your tradition.Beginners can follow this if you don’t have any specific procedure at home. Thanks for visiting this page.
How to celebrate Ganesh chaturthi at home


Ingredients 

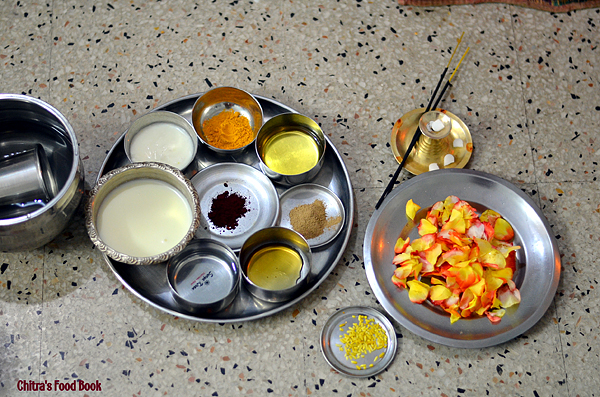
List for Abishekam, pooja & neivedyam
  • Ganesh idol

  • Wooden plank or peeta to place Ganesha

  • Flowers

  • Milk

  • Curd

  • Honey

  • Tender coconut water

  • Water

  • Rice flour

  • Sesame oil

  • Turmeric powder

  • Shikakai powder

  • Kumkum,Sandal paste

  • Panchamirtham (Curd based delicacy consisting of Panch(5) items: Milk, Sugar, Ghee (clarified butter), Honey, Bananas)  Some items are not shown in pic.

    Ganesh chaturthi pooja


    For Decoration & pooja

    • Vastram for Ganesha ( New blouse bit or dhoti cloth)

    • Mupiri nool for poonool ( 3 threaded string)

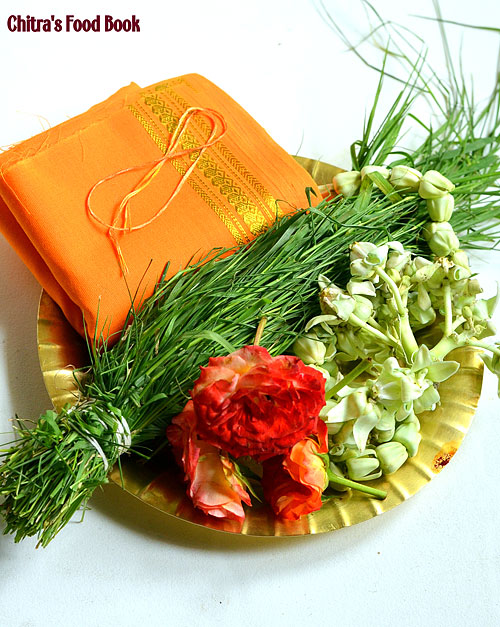
    • ArugamPul (Bermuda grass (English). Arugampul (Tamil), Dhub (Hindi), Durva (Sanskrit). Karuka (Malayalam), Garikagoddi (Telugu), Garikoihallu (Kannada))

    • Tulsi leaves ( Its allowed only on this day)

    • Vellerukku Malai ( White flower garland, refer the above picture)

    • Yellow rice/Akshathai

    • Flowers

    • Kumkum & Sandal powder

    • Incense stick

    • Camphor

    • Sesame oil & ghee for lamp

    • Fruits,coconut,betel leaves & betel nut for offering

    • Banana leaf

    • Turmeric powder for manjal pillayar

        For Neivedyam recipes
        Click THIS LINK for Neivedyam recipes collection.

    • Coconut

    • Jaggery

    • Chana dal/Moong dal

    • Sugar

    • Besan

    • Urad dal

    • Green chillies,ginger,salt ( for pooran)

    • Raw rice for payasam

    • Urad dal for vada

    • Wheat flour,banana & jaggery for appam

    • Sesame seeds for ellu urundai

    • Click HERE to see the no onion no garlic lunch menu cooking with ingredients

    how to celebrate ganesh chaturthi
    Abhishekam Orderhow to celebrate ganesh chaturthi

    Benefits of Abhishekam
    PANCHAGAVYAM - Removes all sins of mankind
    PANCHAMRUTHAM - Gives wealth
    GHEE- Gives Moksha state
    MILK - Gives long life
    CURD - Gives Good Children
    HONEY - Melodious voice
    RICE POWDER - Frees from debts
    SUGAR CANE JUICE - Gives good health and removes enmity
    LIME JUICE - Removes fear of death
    TENDER COCONUT JUICE - Gives enjoyment and full satisfaction in life
    SANDAL PASTE - Gives Lakshmi's Grace
    SUGAR - Removes enmity
    Source : http://www.teluguone.com/devotional/content/what-are-things-used-in-shiva-abhishekam-its-effects-56-27598.html#sthash.kCQAROkq.dpuf
    how to celebrate ganesh chaturthi

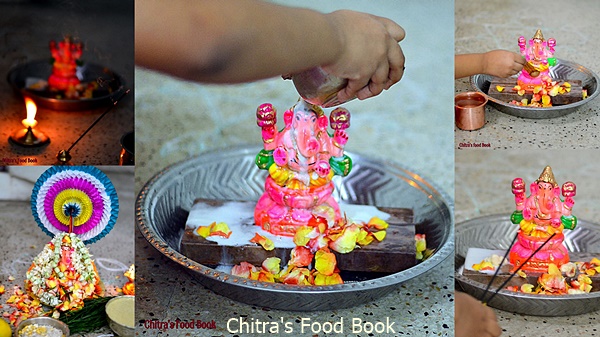
    Abhishekam should be done by the elders of the family. In our house, my daughter sits with my husband and do the abhishekam :)  Refer the above picture. If you are having Ganesha made of Turmeric powder, soft clay or Kozhukattai dough, pour water and other abhishekam items only in spoons else Ganesha will dissolve in water.

    You can chant this Ganesha Gayathri mantram while doing Abhishekam.
    Om Tatpurushaya Vidmahe Vakratundaya dheemahi, Tanno Danti Prachodayat”

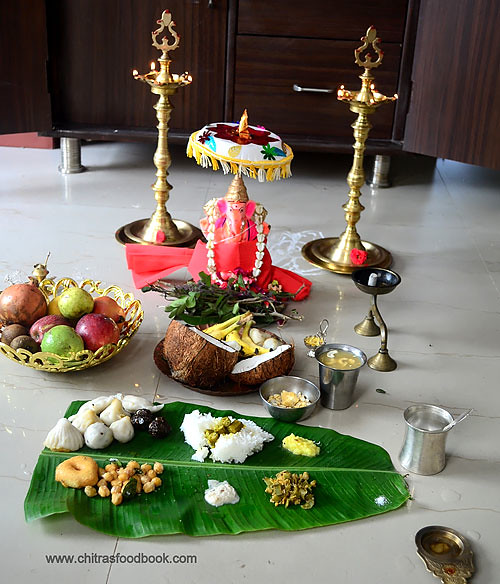
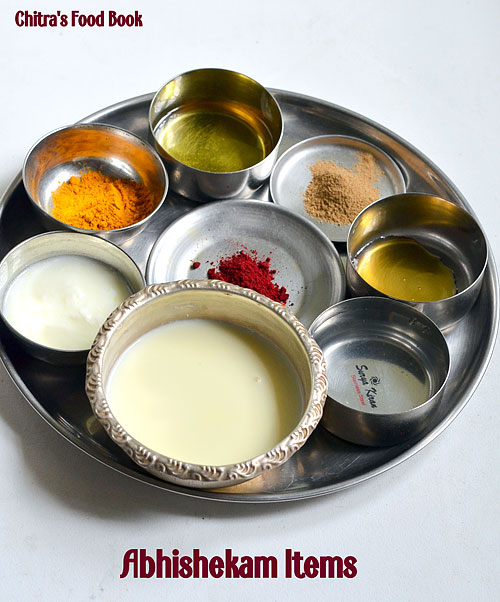
    Draw Kolam/Rangoli on where you are going to do the pooja.Take all the abhishekham items in a plate as shown in the picture. Keep a bowl full of water.Keep some flowers in a plate. Keep an incense stick and a camphor ready.Take a wide plate ( thambaalam). Place a wooden plank inside it and keep the Ganesh idol. Start the abhishekam by putting some flowers and few drops of water. Before doing abhishekam,keep this mind. Ganesh idol should not fall down during abhishekam. So do not pour more water. Touch the idol carefully with support. First do the sesame oil abhishekam, then apply shikakai powder.Wash it well by adding water.Then apply turmeric powder, light the incense stick and show the dhoop & dheep. Mix rice flour in water and do the abhishekam.Then comes milk, lemon juice, tender coconut water, curd, panchamirtham followed by honey. Collect the panchamirtham with honey in a plate.Pour some water and then continue with sandal paste, Kumkum and lastly viboodhi abhishekam. Finish the abhishekam with little milk.Show the dheep. Pour water and start to decorate the Ganesh. Collect all the abhishekam water in the wide plate and pour in tulsi plant or under some trees.


    Lord Ganesha Decoration
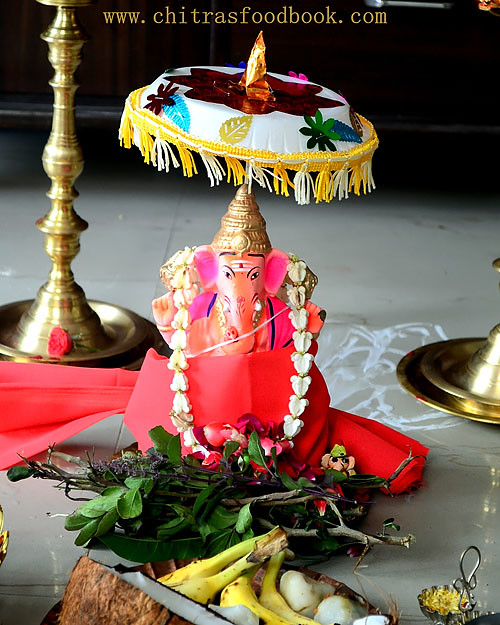
    Wipe the idol with a clean cloth. Put a poonool / Mupiri nool(3 threaded string) from left to right keeping Ganesha facing towards you. Then wear a new cloth for the idol. Decorate with Tulsi leaves (Generally Tulsi should not be used to decorate Ganesha. But it is allowed only on this day.) Vellerukku malai, arugampul malai and flowers. After abhishekam & decoration,start doing the pooja.

    How to do pooja
    Check out this PDF for detailed pooja stotras in Tamil. Please download it and follow the directions.
    Before you start the pooja, keep lots of flowers, leaves and Arugampul in a plate. Make a small cone shaped pillayar/Ganesh with turmeric powder and keep a kumkum dot. Keep a small bowl full of Panchamirtham and a spoonful of honey in a bowl.
    If you are placing Kalash, It should be placed firmly on a Copper/Silver plate with rice spread on it. A Coconut is placed over the mouth of the Kalash. Five mango leaves are placed inside the kalash before placing the coconut (like a skirting).
    The decorated Ganesha Idol can be placed above on a table/stool and the Kalasha and its plate can be placed in the ground. Light the lamp on the sides of Ganesha. Keep the small turmeric Ganesha( made of turmeric powder mixed with little water) nearby the idol. Keep kumkum & flowers. Place a plate with 5 types of fruits, broken coconut, betel leaves & nuts in front of the God.
    In another plate or banana leaf,spread the neivdeyam recipes. Kozhukattai varieties comes to the left side of Ganesha. Rice and other items has to be kept in the usual order. Refer picture for the idea. Keep payasam and aval.pori kadalai/Puffed rice with peanuts in small bowls. Start doing the pooja.
    For any pooja, Poorvanga pooja is considered as Pradhana pooja. So keep the turmeric Ganesha before the Ganesh idol and start the poorvanga pooja mantra. Check out this PDF for detailed pooja stotras with method in Tamil. Please download it and follow the directions. For complete Puja vidhi in Hindi, Tamil, English, Kannada, Telugu and Malayalam, Please refer THIS LINKFinish the pooja with mangala aarti !

    Ganesha Chaturthi pooja vidhi with mantras in sanskrit / english
     http://www.drikpanchang.com/festivals/ganesh-chaturthi/ganesha-chaturthi-puja-vidhi.html
    Please use http://www.virtualvinodh.com/aksharamkh/aksharamukha2.php to transliterate the mantras to your script (tamil / telugu / kannada ) from Devanagari.


    Siddhi Vinayaka Ashtottara sata namavali  in other languages


    Sanskrit -  http://sanskritdocuments.org/doc_ganesha/vinaayaka108-5.html?lang=sa
    Tamil -  http://sanskritdocuments.org/doc_ganesha/vinaayaka108-5.html?lang=ta
    Telugu -  http://sanskritdocuments.org/doc_ganesha/vinaayaka108-5.html?lang=te
    English - IAST - http://sanskritdocuments.org/doc_ganesha/ganesha108.html?lang=iast

    AUDIO,VIDEO LINKS FOR OTHER LANGUAGES
    • Click this LINK for Pooja Vidhanam Audio in Telugu
    • Check this LINK , LINKfor Pooja Vidhanam Audio in Tamil
    • For Hindi version,check this youtube video LINK
     After celebration procedures ( Visarjanam)

    On Chaturthi evening, make wheat flour appam and do the neivedyam.The next day morning, you can keep idli for neivedyam or simply fruits would do. On afternoon,keep dal & rice with ghee for neivedyam. Continue this neivedyam till Ganesha stays in your house.The next day or the third day, take the ganesha idol along with flowers & vastram,some puffed rice,jaggery and fried gram dal(Do not remove anything from idol) and put it in water.Let the Ganesh idol dissolve  in water and take away all the misfortunes of people.
      Click THIS LINK for Neivedyam recipes collection.
    ganesh chaturthi pooja vidhanam

    Neivedyam Recipes


    Please click this LINK for full collection of neivedyam recipes.This is the LINK for Kozhukattai making Videos & Homemade Ganesh idol using rice flour dough.

    Disclaimer : The pictures and pooja procedures I shared in this post are from a devotional book gifted by my friend. This is just one of the ways of celebration. It may vary from place to place. Please consult the elders in your family and follow your tradition.Beginners can follow this if you don’t have any specific procedure at home. Thanks for visiting this page.
    Wish you all a very happy Ganesh chaturthi ! Happy
    Thanks for visiting this page !


    الاثنين، 29 أغسطس 2016

    Cashew-Cream Filled Raspberry Chocolates

    Cream Filled Raspberry Chocolates

    I think we are all familiar with those stale sugar-laden filled chocolates that make their appearance in a box, especially around Christmas. You know, the neighbor who thinks that gifting something is better than not, but the rather pathetic excuse for chocolates usually ends up in a staff room or languishing in a pantry until someone in the house gets desperate for a chocolate fix. To no avail, I say, will you get your needed dose of chocolate — just a heavy bite of processed sugar.

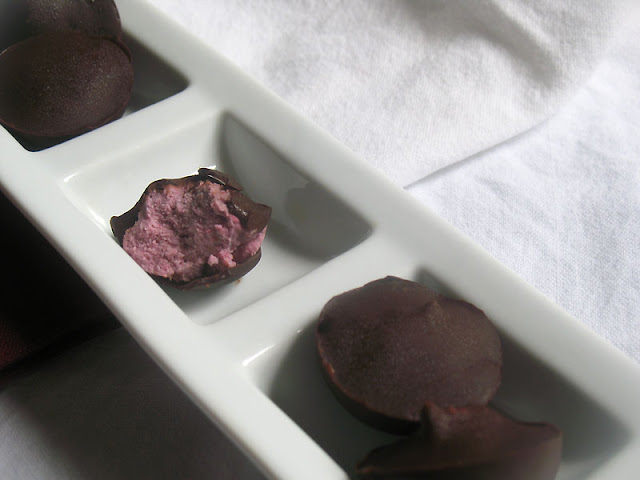
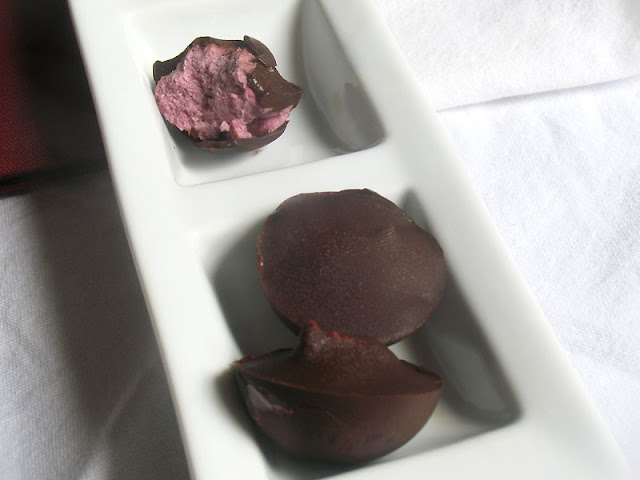
    More of a savory girl for sure, I still like a small dose of chocolate on occasion. And creamy filled chocolates are still a special treat, especially when they are essentially raw and filled with a healthy dose of homemade raspberry cashew filling. No need to feel guilty about these. If you really want the melt-in-your-mouth experience, then just leave the chocolates out of the freezer for a few minutes before biting into one or two. A fine quality dark chocolate is essential here and I assure you won't be disappointed.

    Note: If you don't have a candy mold, try using a lined mini-muffin cup tin. My kitchen is more than well stocked, but I actually purchased an inexpensive silicone candy mold from Amazon to complete the experience. It was well worth it.

    Raspberry Chocolates

    Cashew-Cream Filled Raspberry ChocolatesCashew-Cream Filled Raspberry Chocolates
    Recipe by
    Published on August 29, 2016

    Rich and decadent but essentially raw and healthy raspberry cashew-cream filled chocolates

    Print this recipePrint this recipe
    Filling:
    • 1/2 cup raw cashews, soaked overnight in enough water to cover
    • 2/3 cup fresh raspberries
    • 1 teaspoon fresh lemon juice
    • 1/4 cup maple syrup or honey
    • 1 teaspoon vanilla
    • 2 tablespoons coconut butter
    Chocolate coating:
    • 7 oz (100 g) fine quality dark chocolate, or more as needed
    Instructions:
    • Begin by making the filling. Drain and rinse the cashews. Transfer to a food processor and add the remaining filling ingredients. Process until smooth. Set aside.

    • Lightly coat a silicone candy mold with a little coconut butter.

    • Melt half of the chocolate in a small saucepan over low heat. Coat the bottom and sides of the mold with the chocolate. Place in the freezer for 15 to 20 minutes.

    • When the chocolate is set, remove the mold from the freezer and fill the cups with the cashew raspberry cream until they are about 3/4 full. Return to the freezer for 1 1/2 hours, until the filling has firmed up somewhat.

    • Melt the remaining chocolate in a small saucepan over low heat. Spoon the chocolate over the filling. If you find you are short on chocolate, depending on the size of your mold, melt a little more. Place the finished chocolates in the freezer for at least 5 hours or overnight before removing from the mold. Store in the freezer and have a bite when the craving hits.

    Makes 15 1-inch chocolates

    Creamy Raspberry Chocolates

    Other chocolate treats to enjoy from Lisa's Kitchen:
    4 Ingredient Raw Peanut Butter Chocolate Cups
    Chocolate Chili Cake
    Flourless Chocolate Cake with Bittersweet Chocolate Glaze
    Cocoa Nut Butter No-Bake Fudge

    الأحد، 28 أغسطس 2016

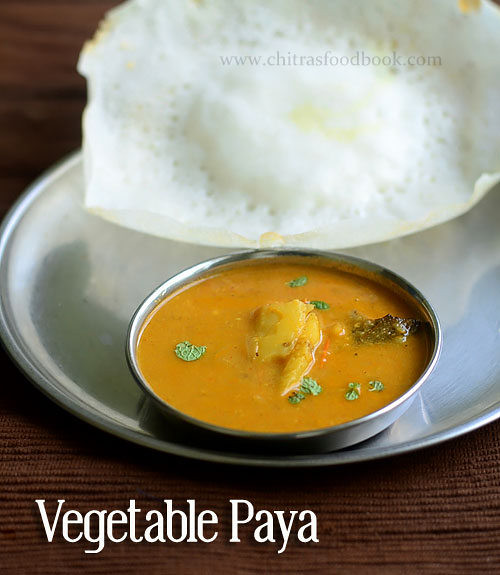
    Vegetable Paya Recipe - Side dish For Appam, Idiyappam

    Vegetable paya recipe
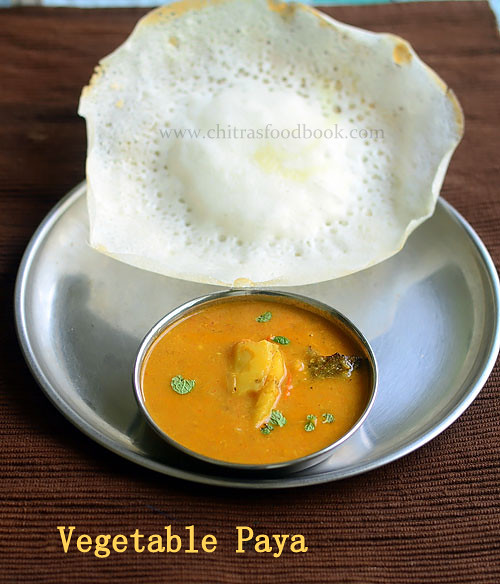
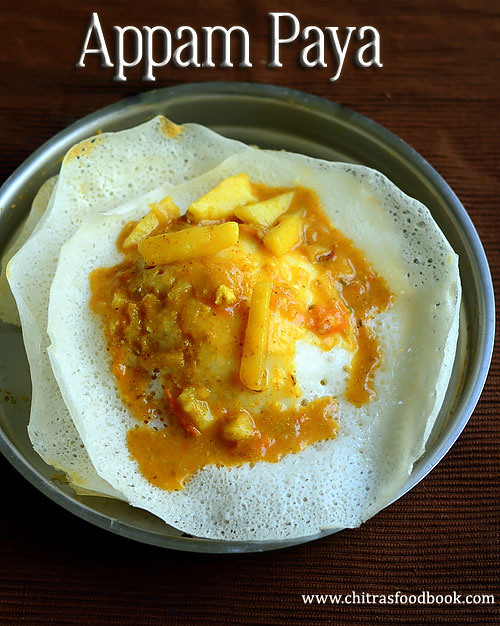
    Appam paya – Many of you would have heard this combo or even tasted in restaurant. Paya – Popularly known as “Attukal Paya” is one of the most popular side dish for appam & idiyappam in Tamil nadu. It is basically a South Asian food that is served in festivals and occasions. Paaya means “Feet” in Urdu and Hindi.This dish is prepared by cooking goat legs (Trotters in English) in a spicy masala curry.This dish is adapted in local cuisines and this paya recipe vary regionally.The cooked leg pieces is served as soup for patients as it is considered to be healthy.I have heard about this dish from my Chennai friends. I thought it would taste more like Parota Salna. Recently my friend Shalini told she tasted appam with vegetable paya in Saravana bhavan Grand style hotel in Salem. It tempted me to try this recipe at homeHappy. I browsed few mutton paya recipes and got this particular version from Mullai’s blog. I tweaked the recipe slightly as per my convenience and used potato instead of mutton.I made it for our Sunday breakfast as a side dish for South Indian appam recipe.It came out finger licking delicious. Sendhil and myself loved it a lot. I am sure, I will make this vegetable paya recipe often in my kitchen. Friends, do try this side dish for appam and idiyappam for a change. You will love it like usLove Struck. You can prepare this gravy with mixed vegetables too. Ok, Lets see how to prepare paya recipe with potato ( Vegetarian version) with step by step photo !
    From tomorrow I will start posting Ganesh chaturthi recipes Happy
    Vegetable paya

    Paya recipe - Vegetarian version with potato


    Paya recipe - Vegetarian version with potato Paya recipe - Side dish for appam with potato
    Cuisine: Indian
    Category: Side dish
    Serves: Serves 2-3
    Prep time: 10 Minutes
    Cook time: 20 Minutes
    Total time: 30 Minutes
    1 cup – 250ml 

    • Potato - 2 nos
    • Big onion - 1 no
    • Tomato - 1 no (Use 2 if small)
    • Cooking oil - 2 tbsp
    • Cinnamon - 1 inch
    • Cloves - 2 no
    • G&G paste - 1 tsp
    • Cardamom - 1 no
    • Bayleaf - 1 no
    • Black stone flower - 1 no
    • Fennel seeds - 1/4 tsp
    • Turmeric powder - 1/8 tsp
    • Red chilli powder - 1 tsp ( I used kashmiri chilli pwd)
    • Garam masala powder – 1/2 tsp
    • Salt & water - as needed
    To saute & grind : Paste 1
    • Cooking oil - 1 tbsp
    • Medium sized Big onion - 1 no or small onion - 6 nos
    • Coriander seeds/Dhania - 1.5 tsp
    • Green chillies - 2-3 nos ( use 4 for more spicy taste)
    For paste-2
    • Grated coconut - 1/4 cup
    • Pottukadalai/Fried gram - 1 tbsp
    • Water – to grind
    Mint + coriander leaves – to garnish
    METHOD

    • Wash and peel the skin of potato. Cut into strips of 2 inches and set aside.I chopped it lengthwise to resemble goat legs ; )) Chop onion,tomato and keep apart.
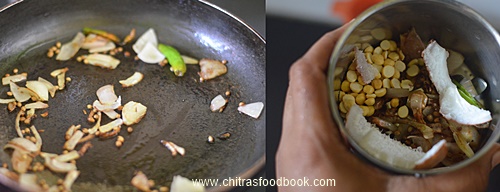
    • In a kadai, heat oil and saute one chopped big onion, dhania seeds and green chillies. Switch off the flame and let it cool. Grind it along with coconut + Fried gram dal as I did. OR As per the original recipe, you should grind Dhania+green chilli+ onion to a smooth paste (Paste 1). Grind coconut + fried gram dal to a smooth paste separately ( Paste 2).But I ground everything together.
    Vegetable paya
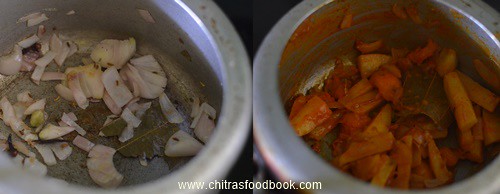
    • In a cooker base, heat oil and saute cinnamon, cloves, bayleaf, black stone flower, cardamom and fennel seeds. Add the chopped onions, g&g paste ( If you grind dhania+ chillies+onion paste separately, add it at this stage. Saute until its raw smell goes off.) Now add tomato, red chilli powder, turmeric powder, salt and saute until mushy.To this, add the sliced potato strips. Mix well for sometime. (Add coconut paste.i.e paste 2 if you have ground it seperately)
    Vegetable paya
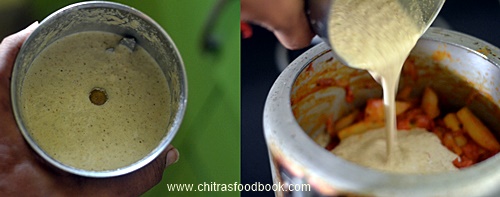
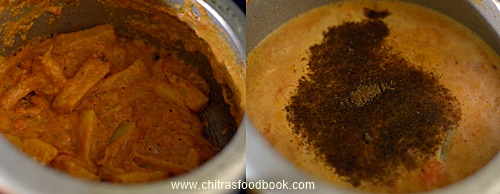
    • Now add the ground coconut paste and saute for a minute. Add 1.5 cups of water and garam masala powder. Mix well and pressure cook for 2 one whistle in low flame or till the potato cooks soft but retain its shape.
    Vegetable paya

    Vegetable paya
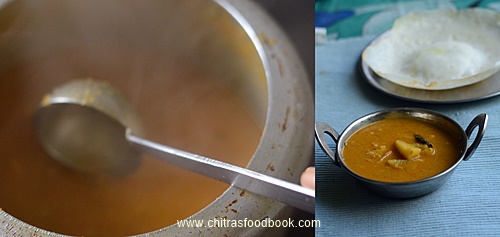
    • Open the cooker after the steam is released. Mix well and check for taste and consistency. Add more salt, water and chilli powder if needed. Give a boil and finally garnish with mint+coriander leaves. This gravy thickens over time. So add more water accordingly.
    Vegetable paya

    Enjoy !


    Note
    • Adjust the quantity of chilli powder and green chillies as per your taste.
    • You can skip adding coconut paste and make a watery gravy too.
    • Instead of potato, you can use mixed vegetables like carrot, cauliflower, peas and beans.
    Delicious Vegetable paya with appam is a delectable combo. Do try it and enjoy !
    Appam paya - Paya curry recipe

    الثلاثاء، 23 أغسطس 2016

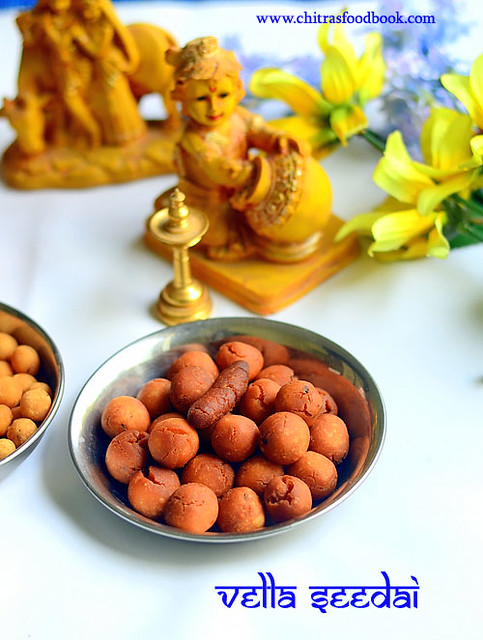
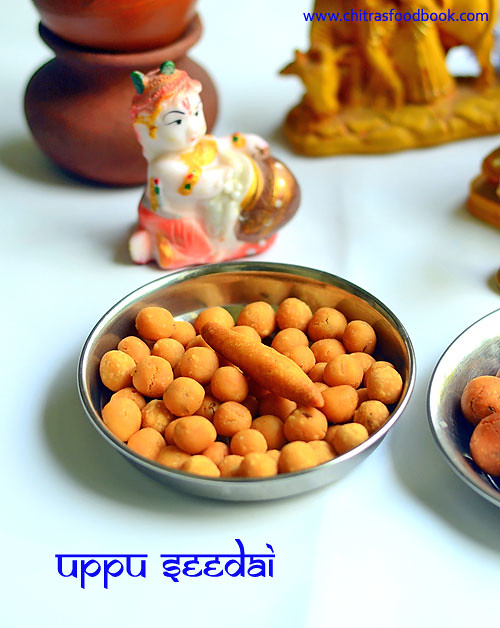
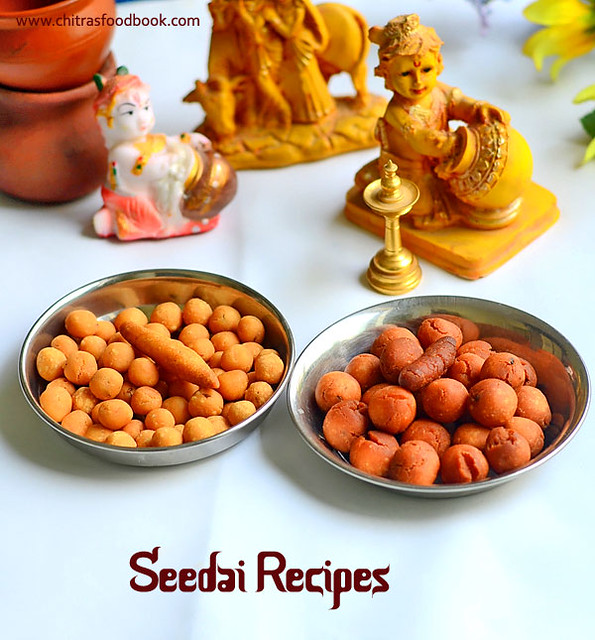
    Uppu Seedai & Vella Seedai Recipe With Store Bought Rice Flour

    Uppu seedai - Vella seedai
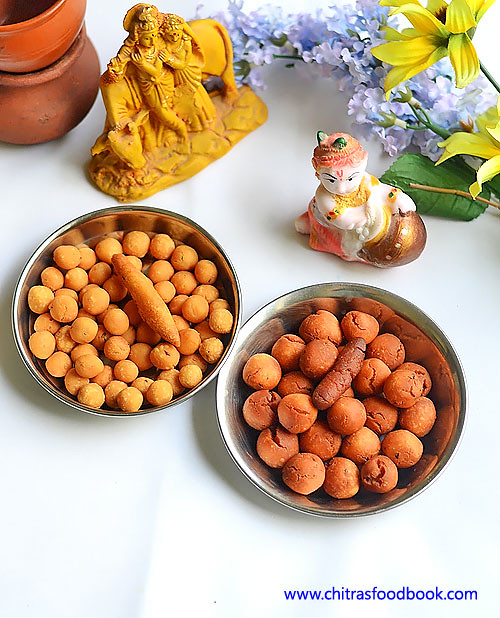
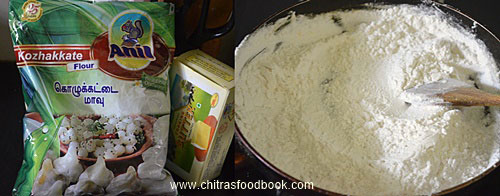
    Uppu Seedai/Salt seedai and Vella seedai/Sweet seedai recipes using store bought rice flour with tips and tricks to avoid bursting. Seedai is one of the most important Neivedyam recipes for Krishna Jayanthi @ Gokulashtami festival in Tamil nadu. Usually we make seedai recipes with homemade processed rice flour and roasted urad dal flour. I have already shared our traditional uppu seedai and vella seedai recipes long back. This year, I tried cheedai using store bought rice flour as it is easy and quick to make. I used Anil Kozhukattai flour. I guess Idiyappam flour works well too. I won't say this seedai will melt-in-mouth like Adayar Ananda bhavan seedai, but it came out equally crispy and crunchy when compared with the traditional ones. Above all, It din’t burst Happy. Cracks in the sweet seedai is unavoidable though. If you are a beginner, use the same quantity I mentioned here. Once you got them right, go for doubling the quantity. Friends, If you don’t have enough time to make processed rice flour but still want to make seedai, try this easy version with store bought rice flour. Follow the steps carefully if you are a beginner. You can make it really well. Have a great Krishna Jayanthi celebration Happy . Check out my other Krishna jayanthi recipes in THIS LINK. Lets see how to make uppu seedai and vella seedai with rice flour ( Kozhukattai flour) & tips to make it without bursting.

    Vella seedai recipe

    Uppu seedai recipe

    Uppu seedai and Vella seedai recipes


    Uppu seedai and Vella seedai recipes Uppu seedai and vella seedai recipe with store bought rice flour/Kozhukattai flour
    Cuisine: Indian
    Category: Snacks
    Serves: -
    Prep time: 10 Minutes
    Cook time: 20 Minutes
    Total time: 30 Minutes


    INGREDIENTS
    For vella seedai : 1 cup - 250ml

    For Vella Seedai
    • Idiyappam flour OR Kozhukattai flour - 1/2 cup
    • Roasted urad dal flour or Powdered gram flour – 1/2 tbsp 
    • Softened butter – 1/2 tbsp (at room temperature)
    • Sesame seeds or cumin seeds - 1/2 tsp
    • Ground coconut – 1 tsp
    • Grated jaggery - 1/4 cup + Water – 2 tbsp ( to melt jaggery)
    • Cardamom seeds - 1 no
    • Water - as needed
    For Uppu seedai
    • Idiyappam flour OR Kozhukattai flour - 1/2 cup
    • Roasted urad dal flour or Powdered gram flour – 1 tbsp
    • Softened butter – 1/2 tbsp ( at room temperature)
    • Ground coconut – 1 tsp
    • Sesame seeds or cumin seeds - 1/2 tsp
    • Asafetida/Hing - 1/8 tsp
    • Salt & Water - as needed
    Cooking oil – to deep fry
    METHOD

    • Dry roast 1 cup( 250ml cup) of  rice flour till it starts to emit vapour. Keep roasting in medium flame for few minutes to see the vapour. Try to draw a line to check if the flour is roasted well. Do not burn the flour.  Let the flour cool down. Follow the same steps for Idiyappam flour as well. If you have dry rice flour, you don't have to roast it.
    Vella seedai

    For Vella seedai/Sweet seedai 
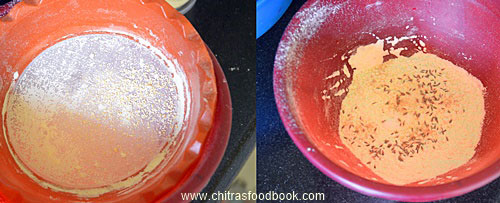
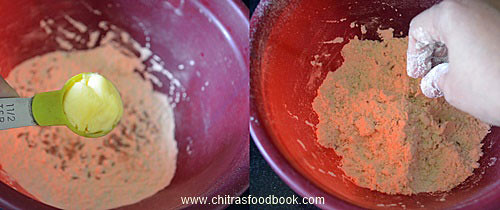
    • Measure 1/2 cup of roasted rice flour in a sieve. To this, add either roasted urad dal flour OR roasted gram flour ( Pottukadalai maavu). Sieve them very well in a bowl. This step helps to avoid bursting. So do not skip this step. Add sesame seeds or cumin seeds, salt, hing, ground coconut (optional) and softened butter ( unmelted butter, optional). Mix well with your fingers. Make sure butter is well spread with the flour if you add it. Set aside.
    Vella seedai
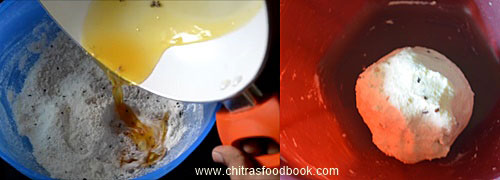
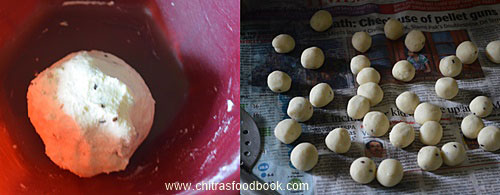
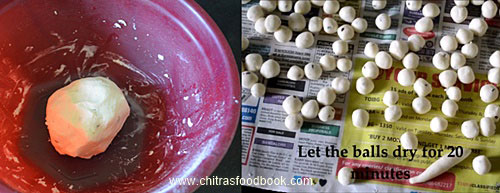
    • In a kadai, take the grated jaggery. Add 2 tbsp of water and melt the jaggery by boiling it. Strain the syrup through a metal strainer. Mix this syrup, cardamom powder with the sieved rice flour mixture. Mix well. Add little water and make a non-sticky smooth dough. Make small balls out of it and spread them in a newspaper. Make one or two small cylindrical shaped Seepankuzhal too ( Refer main picture). Let it air dry for 20 minutes. ( If you are a beginner, go for frying seedai in a mini kadai ( tadka pan) with little oil to check whether seedai burst or disperses in oil. Put just 2 balls and stay a feet away. Check if the seedai burst or disperses in oil. If seedai disperses in oil, either oil temperature may be too low or jaggery syrup or butter may be more. In that case, add little more rice flour and make a non-sticky dough. Make balls and again fry them in little oil. If it works fine, go ahead with batch frying. 
    Vella seedai
    Vella seedai
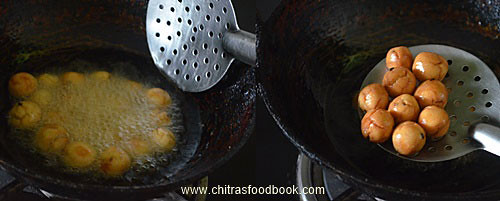
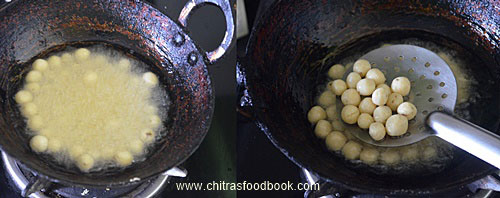
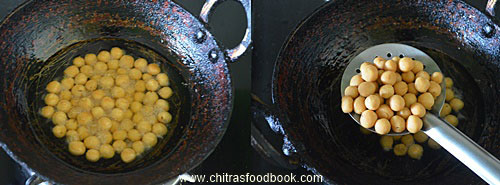
    • Heat oil in a kadai and when it gets heated, put a pinch of seedai dough and check the oil temperature. If it comes up immediately, oil temperature is correct. Now simmer the flame to medium and drop seedai balls. Stay 2 feets away for safer side. Do not disturb for few seconds. Then toss the balls and  put the balls and deep fry for few minutes.Keep turning both the sides for even cooking.Remove after it turns golden brown. Do not wait for the bubbles to stop. Drain them in a tissue. Cracks are unavoidable in sweet seedai. Store after it cools down.Enjoy !
    Vella seedai
    Vella seedai

    For Uppu Seedai Recipe / Salt seedai
    • In a wide bowl, take 1/2 cup of roasted rice flour, urad dal powder or fried gram flour( pottukadalai maavu). Sieve twice to avoid bursting. Add cumin seeds, asafetida, salt and mix well. Add in soft butter and mix well with your finger tips. Make sure butter is well spread with the flour. Add water little by little and make a dough. Make small balls using three fingers. Do not give pressure while rolling. Let the balls dry in a newspaper for 15-20 minutes.
    Uppu seedai
    Uppu seedai
    Uppu seedai
    • Heat oil & check the oil temperature by dropping a pinch of dough. When it rises to the top, simmer the flame to medium & put a handful of seedai balls.Stay 2 feet away. Do not disturb the balls for few seconds. Then toss the seedai & cook till bubbles cease to 90%. Remove when the seedai turns golden. Let it cool down completely & then store in a box. Enjoy !
    Uppu seedai
    Uppu seedai


    Note
    • First important thing to avoid bursting is to “SIEVE” the flour once or twice. U should sieve all the flour ( urad dal flour, rice flour). Sieving the flour properly reduces 90% of bursting.
    • Second thing, you should not roll the seedai very tightly. U should roll it to a loose ball using three fingers. No problem if its not a proper round.
    • One more tip is to prick the seedai with a small needle to avoid bursting. Dry the seedai in a paper or towel for 20 mins before frying.This is also very important.
    • Dry roast the flour till it starts to release vapour. Try to draw a line using the roasted flour.
    • Beginners can try deep frying few seedai in “small tempering kadai” .If it comes out well , proceed in a big kadai. Color variations may be there slightly. But u can check whether it bursts or disperses in oil.
    • If sweet seedai breaks or dissolves in oil , it means jaggery may be more or oil temperature is too high or too low.
    • If Seedai bubbles too much after u drop into oil ,it shows the fat ( ghee or butter or oil) content is more.So add more rice flour to the dough & make again.
    • The color of seedai depends on the color of urad dal flour. If u roast the dal to golden brown, seedai will also turn brown.
    • Uniform heating is also important. In my observation, I feel medium flame is enough to get a nice colored and crispy seedai.


    Try this easy seedai recipes for this Krishna jayanthi and have a great celebration !
    Seedai recipes