‏إظهار الرسائل ذات التسميات SNACK RECIPES. إظهار كافة الرسائل

الأربعاء، 23 نوفمبر 2016

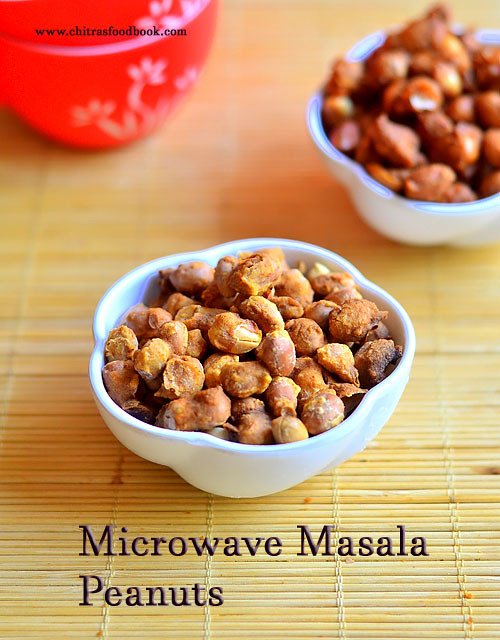
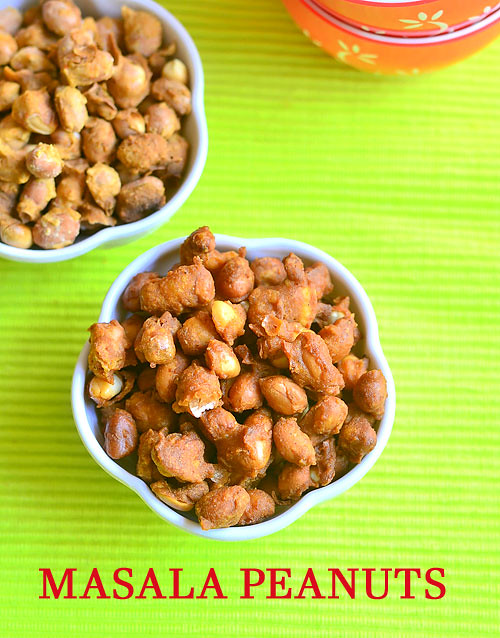
Masala Peanuts Recipe – Masala Kadalai (Microwave & Deep fried Versions)

masala peanuts recipe
When I was young, my dad to buy this besan coated, red colored, deep fried, spicy, dry masala peanuts( masala kadalai in Tamil) and roasted green peas ( Kara Pattani ) that is sold in small packets along with cone ice cream in cinema theatres to munch on during interval time Happy . Nowadays we could find mostly popcorn & boiled sweet corn ( butter cup corn) in most of the theaters which I am not fond ofTongue.So we buy it only for my daughter Raksha. She likes Haldirams masala peanuts and moong dal as well. But I feel the quantity of salt is high in it. So I started making them at home either in microwave or by deep frying in oil depending on the time in hand. Mostly I make it for Raksha’s school snack box or for her evening snacks after coming back from school. Yesterday I prepared this masala peanuts for our teatime. I took a video recipe by making one batch in microwave and deep frying the other batch. Both came out really well, equally crunchy and tasty. Kids would like the deep fried version more than microwave onesWinking . For people under diet or calorie conscious, you can opt for baked version in oven to cut down the calories.I have shared both of them with step by step pictures and a video below. Do try this easy, quick and yummy evening snack for your kids & elders in your family. Enjoy your teatime ! Now Lets see how to make this yummy South Indian Masala peanuts / masala kadalai at home Happy.
microwave masala peanuts recipe


Masala Peanuts Recipe - Microwave & Deep Fried Versions


Masala Peanuts Recipe - Microwave & Deep Fried Versions How to make besan coated masala peanuts - Deep fried version & microwave versions !
Cuisine: Indian
Category: Snacks
Serves: Serves 2-3
Prep time: 20 Minutes
Cook time: 20 Minutes
Total time: 40 Minutes


INGREDIENTS
1 cup - 250ml
  • Raw peanuts - 1/2 cup
  • Besan flour / Kadalai maavu - 3 tbsp
  • Rice flour - 1.5 tbsp
  • Red chilli powder - 1 tsp ( Add 1.5 tsp for spicy taste)
  • Garam masala powder - 1 tsp
  • Ginger & Garlic Paste - 1/2 tsp
  • Salt & water - as needed
  • Asafetida/ Hing – 2 pinches
  • Cooking oil - 1 tsp ( to mix in the batter)
  • Cooking oil - to deep fry
METHOD

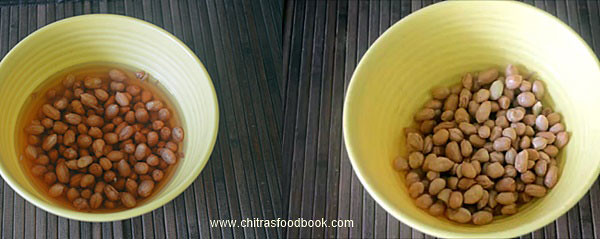
  • Wash and soak raw peanuts in water for 15 minutes. Soaking helps to skin to remain intact with peanuts while frying. The masala won’t come off with the skin after frying. After soaking drain the soaked water completely.
    masala peanuts recipe
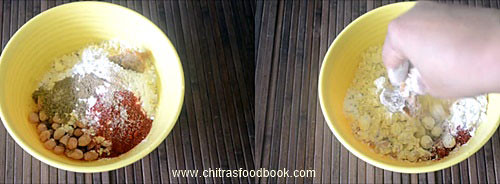
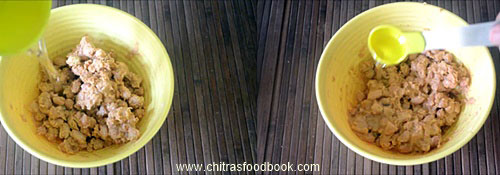
  • Take them in a wide bowl and add the besan, rice flour, red chilli powder, Garam masala powder, Ginger & garlic paste, hing and required salt. Mix well. Then add water little by little and mix well till all the peanuts are well coated with the masala. Do not make the batter too thick or too thin. Now add 1 tsp of cooking oil all over the batter. Mix well and set aside.
    masala peanuts recipe
    masala peanuts recipe
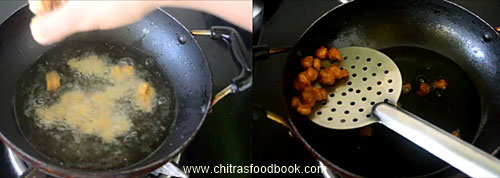
  • For deep frying : Heat cooking oil to deep fry and drop a pinch of batter to check its temperature. When its hot, it will rise to the top immediately. Now sprinkle the masala coated peanuts in oil and deep fry till it becomes golden in color and crunchy. Cook in medium flame and toss them in oil whenever needed, cook till bubbles cease. Remove in a tissue paper.
    masala peanuts recipe
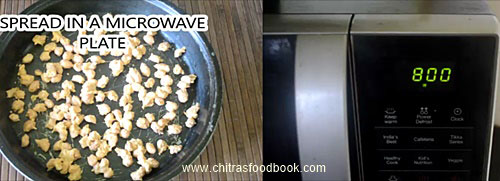
  • For microwave version : Grease a microwave plate with oil and spread the masala coated peanuts in the plate.You can spread them directly on the glass plate inside the microwave.  Microwave in high power for 6-7 minutes and cook till its roasted. Keep an eye to avoid burning of peanuts. You should remove the plate once in the middle( after 3 minutes) and flip them to cook the other side as well. Again microwave for 3-4 minutes. Mine took totally 7 minutes in 800w power. Roasted Peanuts will be soft to touch when hot. But it will become very crispy once it cools down. So let it cool down completely before you munch. Serve with tea !
    Microwave masala peanuts recipe
Enjoy !

Note
  • Adjust the quantity of spice powders as per your taste buds.
  • If you don’t have enough time for soaking, just wash the peanuts and mix all the flours in the wet peanuts and proceed as given above.
  • Timings in microwave depends on the power of microwave. So please keep an eye. It will burn off suddenly.
Microwave masala peanuts recipe
Enjoy this crunchy masala peanuts for your teatime !
Masala peanuts recipe

الخميس، 10 نوفمبر 2016

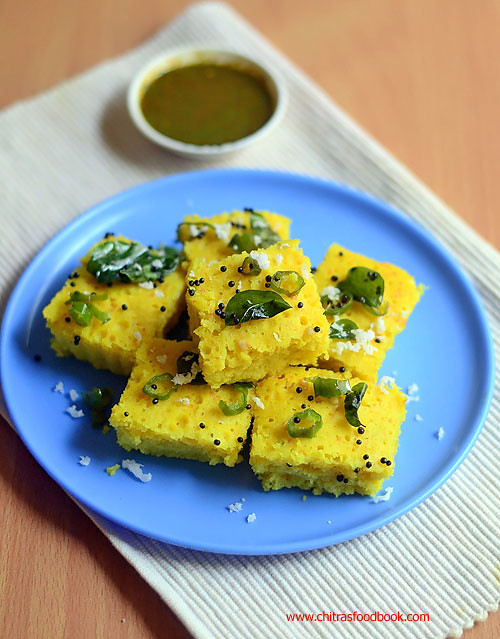
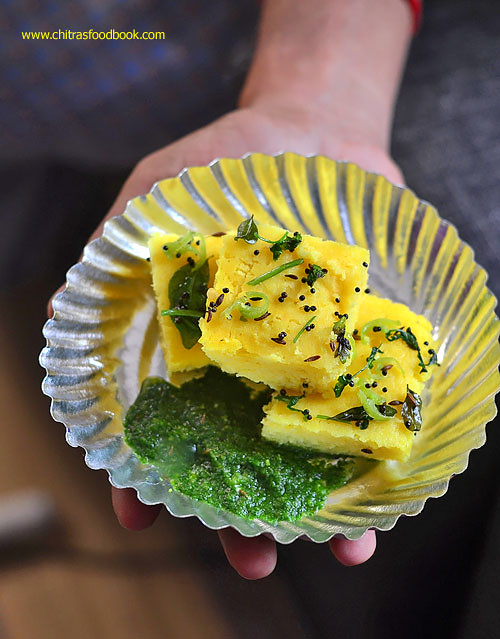
Microwave Dhokla Recipe – How To Make Easy,Instant Khaman Dhokla

Easy dhokla recipe in microwave
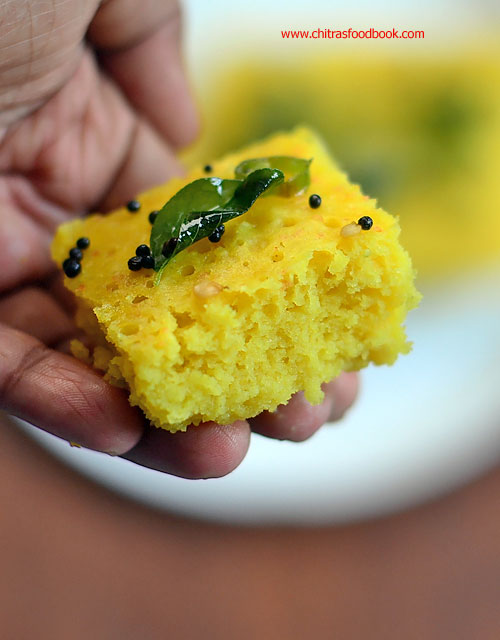
Gujarati special snack Khaman Dhokla recipe was in my try list for years. Once I had tried steamed dhokla recipe using my pressure cooker but it was not up to the mark. Then I left the idea of trying dhokla at home. Recently my friend Shalini took me to a chat shop in BDA complex, Banashankari where Khaman dhokla is very popular. After tasting there, I got tempted to try it again. But this time, I tried an easy Instant dhokla in microwave.Yes, I watched this 4 minutes microwave dhokla recipe in a YouTube video and prepared it for our teatime snack yesterday. I made green chutney as well. I halved the original recipe, made a slight change and tried it. Its so easy to make. It came out soft, porous, spongy and fluffy. This is really a good recipe for Microwave dhokla. I am very happy with the result. In this recipe, ENO fruit salt is used to bring the softness.You can replace it with equal quantity of baking powder and baking soda if you want to make it without ENO. Friends do try this easy, microwave dhokla recipe at home and share your feedback with me.Ok, Now lets see microwave dhokla recipe with step by step photos and a detailed video!


Microwave khaman dhokla recipe

Microwave dhokla recipe


Microwave dhokla recipe Khaman dhokla recipe in microwave in 4 minutes
Cuisine: Indian
Category: Snack
Serves: 6 pieces
Prep time: 5 Minutes
Cook time: 4 Minutes
Total time: 9 Minutes


INGREDIENTS
1 cup - 250ml
  • Besan flour - 1/2 cup
  • Curd - 1/4 cup ( semi solid)
  • Water - 3 tbsp
  • Lemon juice - 1/2 tsp
  • Cooking oil - 1/2 tbsp ( 1.5 tsp)
  • Turmeric powder - a pinch
  • Sugar - 1/2 tsp
  • Salt - as needed
  • Chilli+Ginger paste - 1 tsp OR Green chilli -1 no ( finely chopped) + Ginger - 1/2 inch piece ( finely chopped)
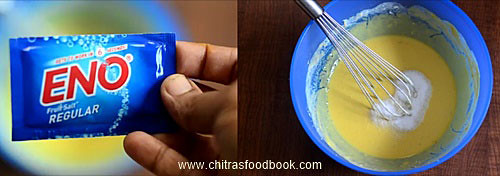
  • Plain ENO - 1/2 tsp (Use fresh, active ENO)
To Temper
  • Cooking oil - 1/2 tbsp
  • Mustard seeds - 1/2 tsp
  • Green chilli - 1 no ( small, finely chopped)
  • Curry leaves - few
  • Coriander leaves - 1 sprig
  • Sugar - 1 tsp
  • Water - 1/2 cup
  • Grated coconut - to garnish
METHOD

  • Keep all the ingredients ready before you start making.Take a microwave safe bowl ( Preferably square pan to make pieces) and grease it with oil. I used a thermal foil box as shown in the picture. Make sure the sides of box doesn’t touch the walls of microwave oven while cooking. Sparks may appear.So use any microwave safe dish if you have it or follow as I did.
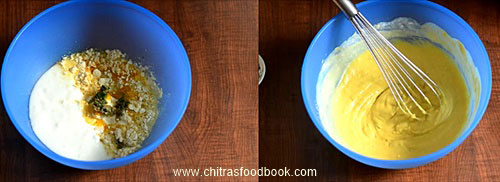
  • In a wide bowl, add besan flour, curd, water, turmeric powder, chilli+ginger paste or finely chopped green chilli and ginger, salt, sugar and cooking oil. Mix everything well using a whisk. Batter should be of bajji batter consistency. So If needed add 1 tbsp water extra. Do not make the batter runny or too watery. Dhokla won’t cook properly. So add only the mentioned quantity of ingredients.
    Microwave dhokla recipe
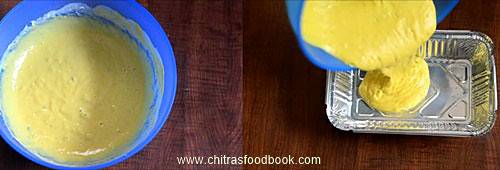
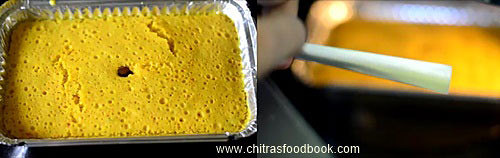
  • To the dhokla batter, add ENO fruit salt and mix well. Batter will become fluffy and becomes almost double in quantity. Pour the batter immediately to the greased microwave bowl. Microwave in high powder ( I Kept in 800W) for 4 minutes.(Check it once at 3 minutes). After 4 minutes, remove the dhokla and insert the back of a spoon. If it comes out clean, dhokla is done else keep it for another 30 seconds or 1 minute. Run a knife in the corners and invert the dhokla in a plate after it becomes warm. Cut into pieces.
    Microwave dhokla recipe
    Microwave dhokla recipe
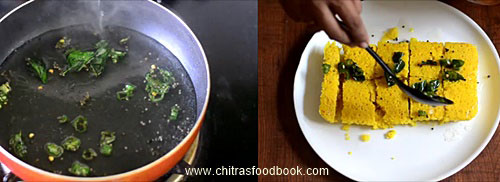
  • Heat oil in a kadai and splutter mustard seeds, curry leaves and finely chopped green chillies and coriander leaves. Add water, sugar. Boil for 2 minutes. Add this water over the dhokla pieces and serve with green chutney. Garnish with grated coconut if you like !
    Microwave dhokla recipe
    Microwave dhokla recipe
  • For Green chutney : Grind a handful of coriander leaves, 1-2 green chilli, 3 garlic cloves, 1/2 tsp sugar, few drops of lemon juice and required salt to a smooth paste. You can add a tbsp of grated coconut of you wish.Make this chutney and serve it as a side dish for dhokla. Enjoy ! ( Once you get this recipe perfect, you can double the quantity of ingredients and try it.Please follow the mentioned quantity if you are a beginner)

Note
  • Use all the ingredients of mentioned quantity not less than that. It will give you perfect result.
  • Do not skip ENO. If you don’t have ENO, add 1/4 tsp baking powder + 1/4 tsp baking soda. Mix the batter and cook immediately.
  • Do not rest the batter for long time after adding ENO.
  • The quantity of water may vary slightly as per the thickness of curd. I used semi solid curd not thick.
  • You can use vinegar instead of lemon juice. But do not avoid it.
  • If your microwave high power is more than 800w, reduce the cooking time.

Try this easy, instant microwave dhokla recipe at home and enjoy your teatime ! In the chat shop, Dhokla with green chutney was served in a paper plate.So I too did the sameHappy
Microwave dhokla recipe

الاثنين، 7 نوفمبر 2016

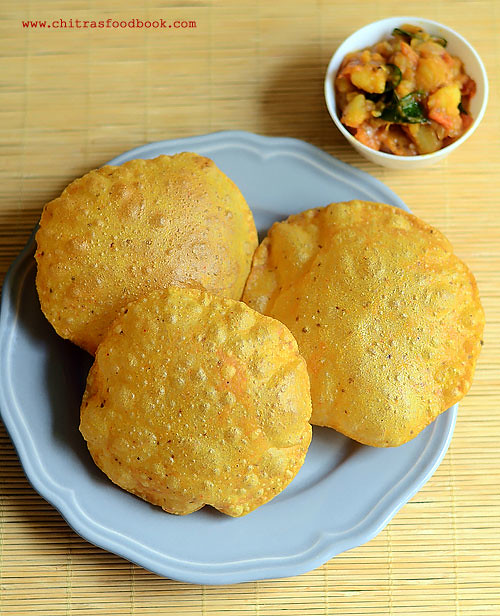
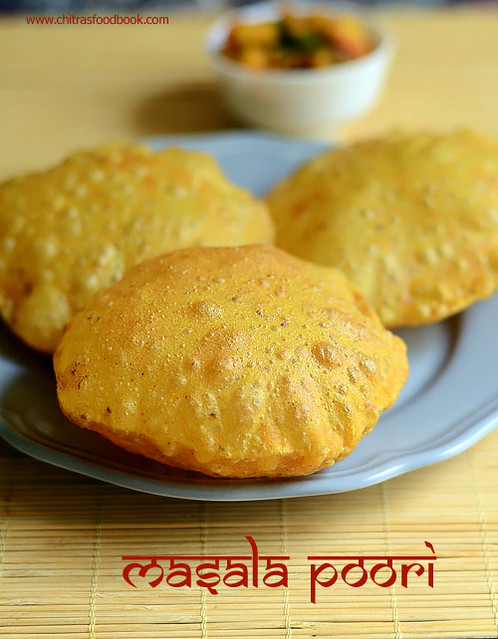
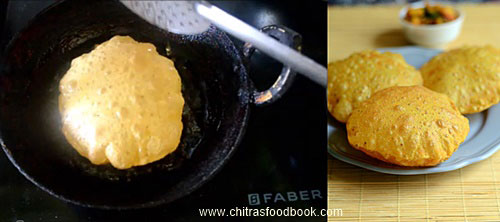
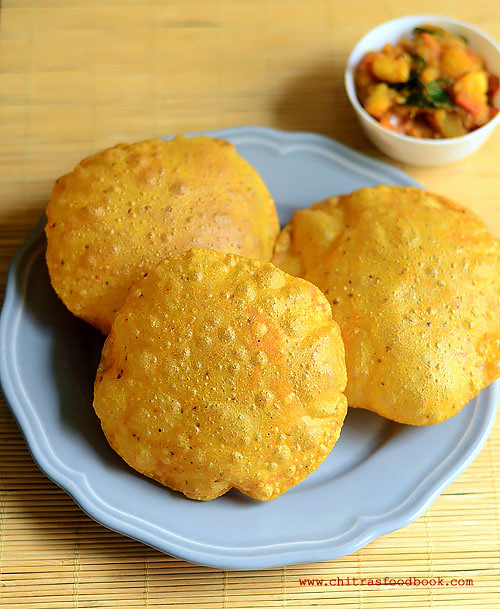
Masala Poori Recipe – Masala Puri - Poori Varieties

masala puri recipe
Recently I tasted a spicy masala poori in a restaurant lunch buffet. It was very tasty. We all loved it. I wanted to try this yummy poori recipe at home.When I browsed for the recipe, I found masala puri is a popular Gujarati snack recipe. I watched a YouTube video and tried it for our Sunday breakfast along with aloo bhaji / Potato masala as side dish. Actual recipe called for amchoor powder. I din’t use it as I had no stock.I have used garam masala powder to make it more flavorful. But its not used in the authentic version. So this recipe has a slight variation from the original recipe. But it came out very well and we loved the combination of masala poori with Bhaji.Gujarati people carry this masala puri for travel to have it as breakfast or teatime snack. As it tastes spicy, you don’t need any specific side dish for this poori. But if you wish to have it for breakfast, you can try it with aloo bhaji, Batata nu shaak, Aamras or even with pickles. When I tried this recipe, I reminded about the famous roadside masala puri chat recipe. Of course, both are completely different recipes but the name masala poori tempted me to try that chat recipe as well. I should make it very soon and share in my space. Today we will see how to make this yummy Gujarati special masala puri recipe with step by step photos and a video !
Do check out my other poori recipes
Gujarati masala puri recipe

Masala Poori Recipe


Masala Poori Recipe Gujarati special Masala poori recipe - Unleavened deep-fried Indian bread with spices
Cuisine: Indian
Category: Breakfast/Snack
Serves: 12 nos
Prep time: 30 Minutes
Cook time: 15 Minutes
Total time: 45 Minutes


INGREDIENTS
1 cup - 250ml
  • Wheat flour/ Atta - 1.5 cups
  • Besan flour - 1.5 tbsp
  • Cooking oil - 1/2 tbsp ( 1.5 tsp)
  • Turmeric powder – 1/4 tsp
  • Red chilli powder - 1.5 tsp
  • Dhania powder - 2 tsp
  • Garam masala powder - 1 tsp (optional)
  • Amchoor powder - 1/2 tsp (optional)
  • Carom seeds/Ajwain - 1 tsp
  • Salt & Water - as needed
  • Crushed kasoori methi - 2 tsp (  you can add for variations)
METHOD

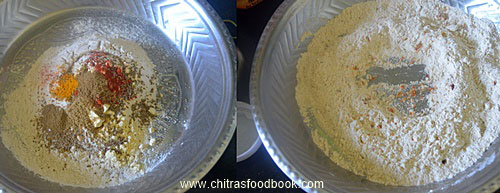
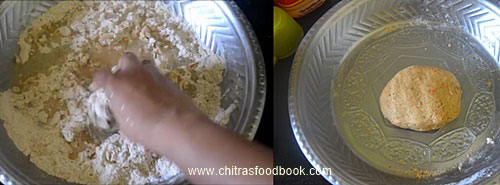
  • In a wide bowl, take the atta/Whole wheat flour, besan flour,turmeric powder, red chilli powder, dhania powder, garam masala powder, amchur powder( If adding), carom seeds, salt and cooking oil.Mix well.
    Masala poori recipe
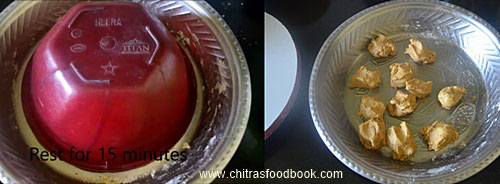
  • To this add water little by little and make a soft, non-sticky dough. Grease the dough with oil lightly and keep it covered with a lid for 15-30 minutes. 
    Masala poori recipe
    Masala poori recipe
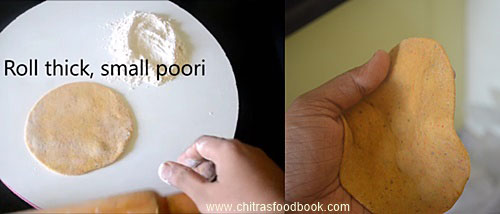
  • After the resting time, take the dough and make golf ball size.Roll a dough ball and dust in the wheat flour. Roll it thick and make small, thick circle. Poori will not puff up if you roll it thin. If there is any hole in the poori, then poori won’t puff up well.So make sure to roll it accordingly. Make all the poori and arrange them in  a plate.
  • In the mean time, heat oil in a kadai to deep fry the poori. 
    Masala poori recipe
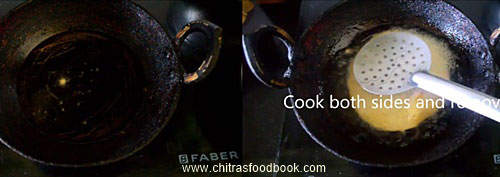
  • When the oil is heated, drop a pinch of dough. If it rises to the top immediately without browning, oil temperature is right.Take a rolled poori, pat it well to remove the excess dusting and drop the rolled poori in oil. Deep fry one at a time. As soon as you drop the poori in oil, it will rise to the top. At that time, press it gently with a ladle. It will puff up nicely.Flip the poori and cook for a  minute. Remove in a tissue and serve hot with Poori bhaji or Aamras.
  • Stack the poori one above the other and store it when its warm. Poori will turn soft and stays good for hours. If you let the poori  dry in air, it will become chewy. So if you carry this puri for travel,store it when warm.
    Masala poori recipe
    Masala poori recipe
Enjoy !
Note
  • You can skip besan flour and make with atta alone.
  • You can replace oil with ghee.
  • Garam masala powder is not mentioned in the original recipe. But I used it to make the poori more flavorful.
  • Do not make a sticky dough. Poori will absorb more oil.
  • Keep the dough covered till use. Do not let it dry.
  • You can add 2 tsp of crushed kasoori methi to the dough while kneading.
Try this flavorful, spicy masala poori for your breakfast and enjoy with potato kurma, potato masala / Aloo Bhaji or aamras !
Masala poori recipe

الجمعة، 4 نوفمبر 2016

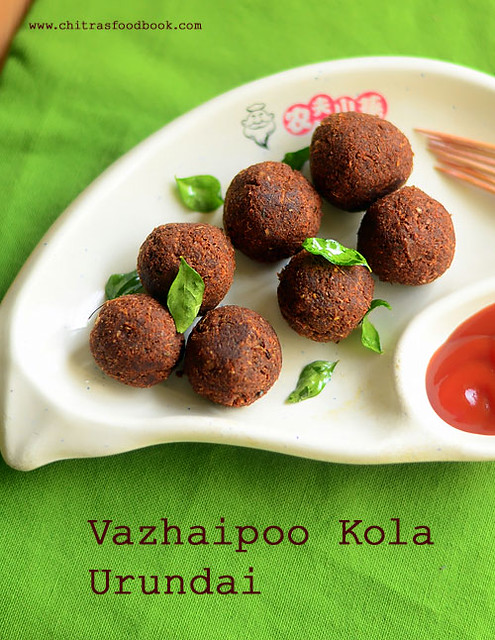
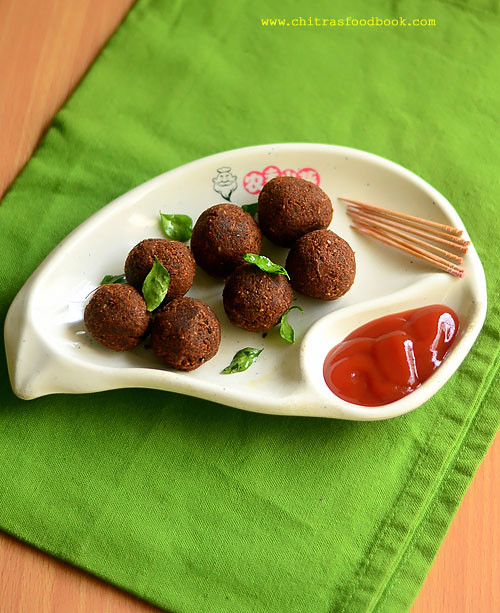
Vazhaipoo Kola Urundai Recipe – Banana Flower Recipes

Vazhaipoo kola urundai
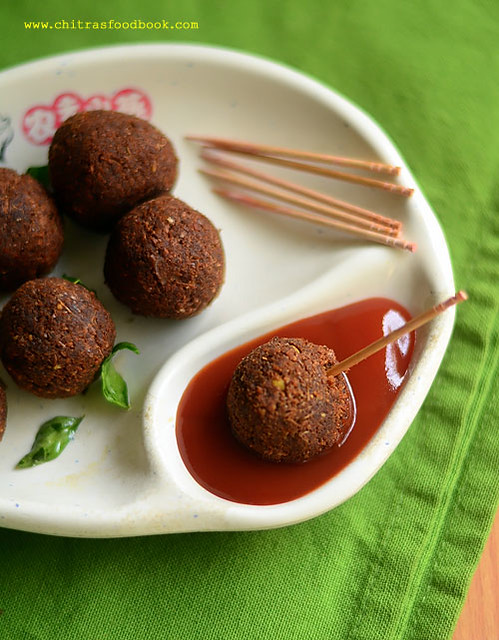
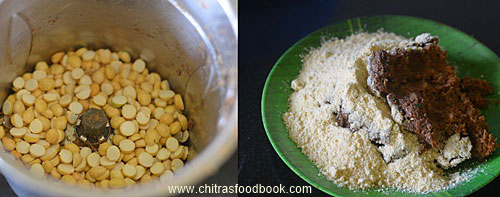
Recent days I have been exploring varieties of vazhaipoo recipes ( Plantain flower/Banana flower in English) in my kitchen. Most of the South Indians especially Tamil people make Vazhaipoo vadai and Vazhaipoo paruppu usili using this vegetable and it would be their favorites as well. Me too not an exception. But apart from these usual recipes, I wanted to try some interesting and unique recipes with vazhaipoo. As a result of which I have tried and posted Vazhaipoo Kuzhambu / Banana flower gravy and Vazhaipoo dosa recipes in my blog. Here comes yet another yummy, kids friendly snack with banana flower. Yes, Its Vazhaipoo Kola urundai i.e Spicy fried plantain balls. I found this recipe in Nalini’s blog and I have tried it thrice so far. Once I made these balls for preparing Vazhaipoo kola Urundai kuzhambu ( Will post the recipe soon) for our lunch and made the same twice for my daughter’s evening teatime snack. This vazhaipoo kola urundai is sure a welcome change from vazhaipoo vadai. It can be made instantly without soaking dals. But it tastes crispy and the best only when hot. My daughter Raksha likes to relish these balls with her favorite tomato ketchup. Friends, do try this healthy snack with banana flower for your kids when they come back from school. I am sure they will love it a lot. Ok, Now lets check how to make Vazhaipoo kola urundai with step by step photos !
Vazhaipoo kola urundai recipe

Vazhaipoo Kola Urundai recipe


Vazhaipoo Kola Urundai recipe Spicy fried plantain balls/ Banana flower balls - Vazhaipoo kola urundai - Instant version
Cuisine: Indian
Category: Snacks
Serves: 15 nos
Prep time: 15 Minutes
Cook time: 5 Minutes
Total time: 20 Minutes


INGREDIENTS
1 cup - 250ml
  • Vazhaipoo/ Banana flower - 1/2 no ( 40 - 50 florets)
  • Grated coconut – 1/4 cup
  • Big onion – 1/2 no
  • Red chilli powder - 1 tsp
  • Fennel seeds/ Soambu - 1 tsp
  • Ginger & Garlic paste - 1 tsp
  • Curry leaves – 1 sprig
  • Fried Gram Dal/ Pottukadalai - 1/2 cup
  • Salt - as needed
  • Rice flour - 1 tbsp
  • Water - 1 tbsp ( only if needed)
  • Cooking oil - to deep fry
METHOD

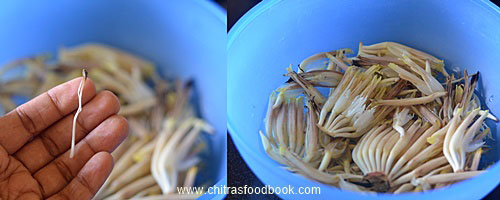
  • Remove the florets from the banana flower and set aside. Remove the Kalan(black colored stamen) from the florets and soak the florets in water or buttermilk till use.
    Vazhaipoo kola urundai recipe
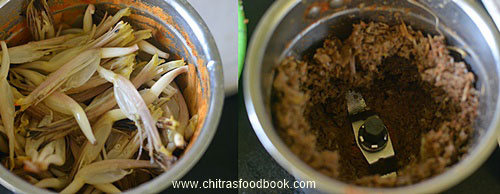
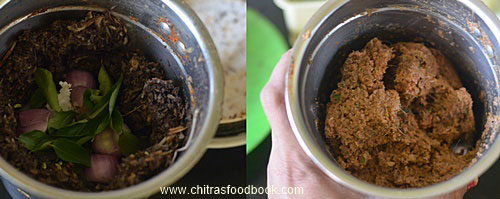
  • Pressure cook the banana flower adding little water in high flame for one whistle. Drain the excess water, squeeze it and remove from the cooker.Grind them in batches in a dry mixie jar. You should wipe the sides of jar every time for proper grinding. (I din’t cook the banana flower. I ground them directly as raw florets) Once the florets are coarsely ground, add the red chilli powder, grated coconut, fennel seeds, salt, g&g paste and big onion. Grind everything nicely to a smooth paste. Add 1 tbsp of water if necessary while grinding. 
  • In another mixie jar, powder the fried gram dal and set aside.
    Vazhaipoo kola urundai recipe
    Vazhaipoo kola urundai recipe
  • Take the ground batter in a wide plate.Add the powdered fried gram dal and rice flour. Mix well without adding water. Fried gram flour and rice flour absorbs the moisture content in the banana flower mixture and becomes dry. Make small balls out of the dough and arrange it.
    Vazhaipoo kola urundai recipe
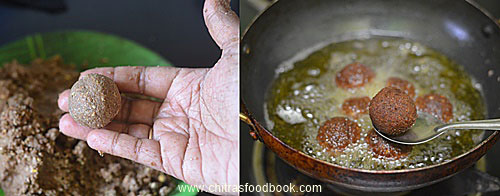
  • Heat oil in a kadai and when it gets heated ,drop a pinch of dough. If it comes up immediately, heat of the oil is perfect. Now put the balls ( 3-4 at a time) and deep fry in medium flame for few minutes. Keep turning both the sides for even cooking. Remove when the balls turn golden brown in color. Serve them hot to enjoy its best taste. serve with tomato ketchup. ( you can prepare the dough in advance, refrigerate it and make balls whenever needed)
    Vazhaipoo kola urundai recipe
Enjoy your teatime!

Note
  • Add more chilli powder based on your taste.
  • Check for salt & spice and adjust them while mixing the dough.
  • Try to grind the vazhaipoo mixture to a smooth paste without adding water. At worst case, you can add 1-2 tbsp.
  • If the dough is sticky and too wet, add more fried gram dal flour and little rice flour to adjust the consistency.
Try this snack with banana flower for a change and enjoy !
Vazhaipoo kola urundai - Banana flower recipes

الجمعة، 21 أكتوبر 2016

Kara Boondi Recipe – Spicy Boondi Recipe - Diwali Snacks Recipes

Kara boondi recipe
In this post, I have shared the recipes of basic Boondi recipe along with South Indian Kara boondi recipe and North Indian style Boondi namkeen recipes with step by step photo & troubleshooting tips.
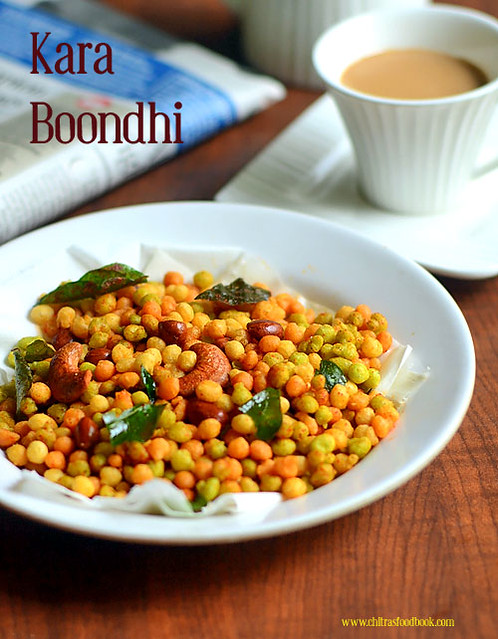
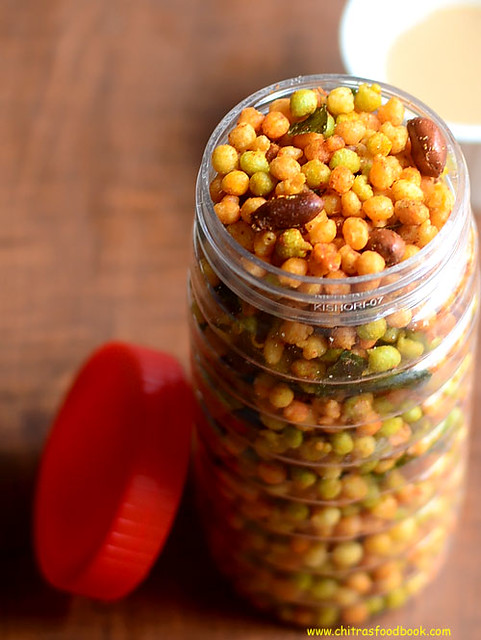
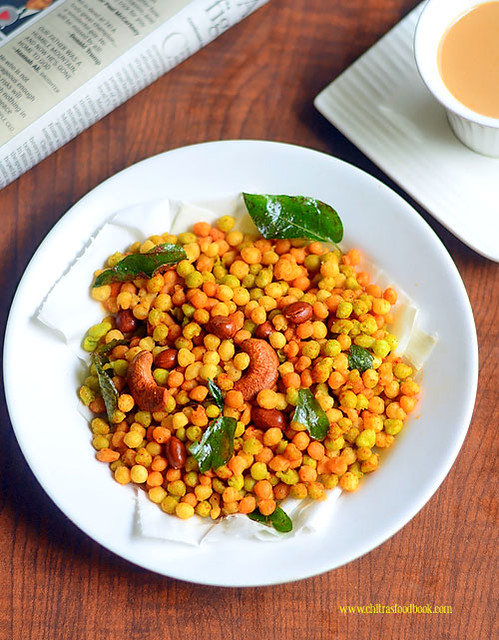
Kara boondi & oma podi are Raksha’s most favorite snacks recipes. So we used to buy them from snacks shops very often. Recently we bought a pack of colorful kara boondi from Lakshmi Sweets. We call this as muttai kara boondhiTongue as it is round in shape. For every Diwali, I used to make oma podi. But the colorful and spicy boondi tempted me to give a try.So I prepared Kara boondi recipe at home for the first time. I have tried it thrice since yesterday. First I made boondi adding besan flour, rice flour and cooking soda just like my bajji recipe. It came out crispy, crunchy but it was oily too. So this morning,I again tried it by watching Nisha Madhulika & Vahchef’s basic boondi recipe video. The recipe was so simple with just 2 ingredients. When I tried it ,I was extremely happy with the results.It was so crunchy and not oily at all Happy.I was very happy that I learnt how to make perfect boondi recipe without tails or flat boondi.This is an all rounder recipe. By following this recipe, you can make sweet boondi, boondi ladoo, South Indian kara boondi/Spicy boondi mixture ( Tamil nadu style), North Indian style boondi namkeen, boondi raita & boondi chaat as well. One can make so many yummy teatime boondi snacks. I too made it colorful like in shops. Raksha and Sendhil loved it a lot. We enjoyed it with Sambar rice & munched it in my teatime Love Struck.
Now Lets see how to make boondi recipe at home along with the recipes of South Indian style Kara boondi and North Indian style Boondi namkeen with step by step pictures !!
Kara boondi recipe

Boondi Recipe - Kara boondi/ boondi namkeen recipe

Boondi Recipe - Kara boondi/ boondi namkeen recipe How to make Boondi at home and prepare kara boondi and boondi namkeen with it !
Cuisine: Indian
Category: Snacks
Serves: -
Prep time: 5 Minutes
Cook time: 20 Minutes
Total time: 25 Minutes


INGREDIENTS
1 cup - 250ml
Basic boondi recipe
  • Besan flour - 1 cup ( I used fine variety)
  • Cooking oil - 1.5 tsp
  • Water - around 1/2 cup + 2 tbsp ( Approx)
  • Salt - as needed
  • Food color – Green & Red ( To make colorful boondi)
South Indian Kara boondi recipe
  • Fried Boondi - 1.5 cups
  • Red chilli powder - 1/2 tsp
  • Hing/Asafetida - 1/8 tsp
  • Salt - 2 pinches
  • Roasted peanut and cashews - a fistful
  • Roasted curry leaves - few
North Indian Boondi Namkeen recipe
  • Fried Boondi - 1.5 cups
  • Red chilli powder - 1/2 tsp
  • Dhania powder - 1/4 tsp
  • Chat masala powder – 1/8 tsp
  • Amchur powder – a big pinch
  • Black salt – 1/8 tsp
  • Sugar – 2 pinches
  • Cumin powder - 1/4 tsp
  • Roasted peanut and cashews - a fistful
  • Roasted curry leaves - few
METHOD

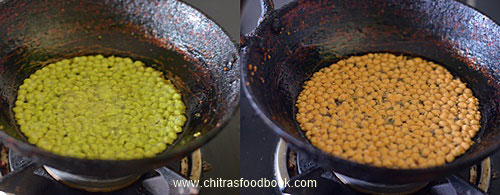
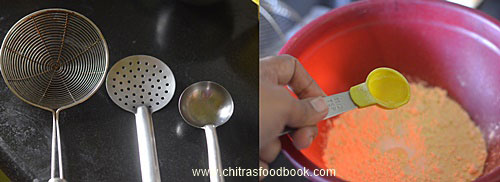
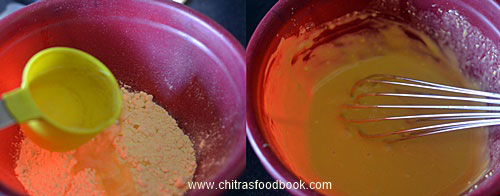
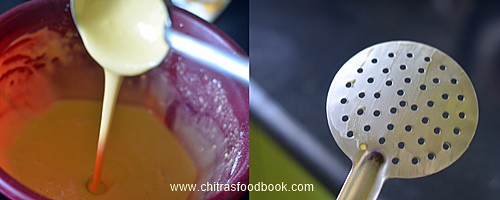
  • You need three ladles for making boondi. Refer the picture below.Take 1 cup of besan flour in a wide bowl. Add salt and cooking oil. Add some water ( Say 1/4 cup) and make a thick paste.Use a whisk and make a lump free paste.
    Kara boondi recipe
    Kara boondi recipe
  • Again add 1/4 cup of water and make a smooth batter. It should be slightly thinner than bajji batter consistency. Add 1-2 tbsp extra if needed.Beat the batter vigorously with a whisk for 2-3 minutes. This step is more important to make the batter smooth.Set the batter aside for 5 minutes.
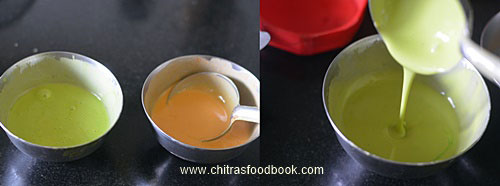
  • If you want to make colorful boondi, divide the batter into 3 parts and add green food color to one, red food color to the other one. Let the third one be plain.
    Kara boondi recipe
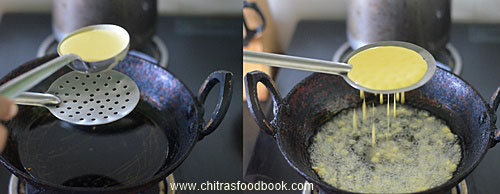
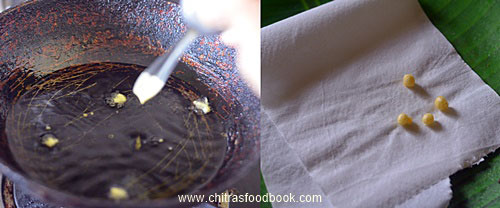
  • Heat oil in a kadai to deep fry the boondi. Take a spoon and dip the back of spoon in the batter. Hold the back of spoon at 10 cms distance from the kadai. Batter will fall in the oil and If it rises to the top immediately, oil temperature is prefect. Now check whether the boondi looks flat, with tails or a perfect round. Based on that, you can adjust the consistency of batter. If the boondi is flat, batter is thick or oil temperature is low. In that case, add some water and beat it well and try it. If boondi has tails, it may be due to either of these two reasons. 1. The distance of spoon is less from oil. So hold it slightly high and try it. 2. The batter is slightly thin.So add a tsp of gram flour, beat it well and again try it. Keep checking until you get round boondi.
    Kara boondi recipe
  • Now take the batter and beat it really well. Take the slotted ladle and hold it above the oil. Distance should be around 10 cms from the kadai. Now pour half a ladle of batter to the slotted ladle.Let the batter fall as drops automatically. It shows the correct consistency. No need to spread it with another ladle or tap it. Remember to pour only the required batter for the oil you kept for deep frying. If you try to fry more boondi in less oil, it may clutter together in the middle. As soon as you pour the batter, boondi should fall immediately, rises up and moves to the corner of kadai. It shows the right consistency and perfect temperature of oil.
    Kara boondi recipe
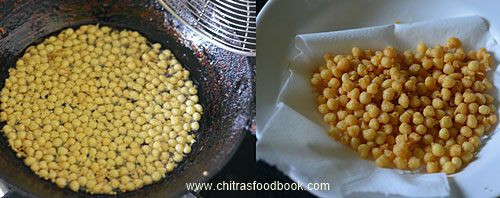
  • Flip the boondi in oil and cook till the Sshh sound stops completely. Keep the flame medium while frying. If you remove it before cooking properly, boondi will become soggy and spoils the entire snack. So please be careful while frying.
    Kara boondi recipe
    Kara boondi recipe
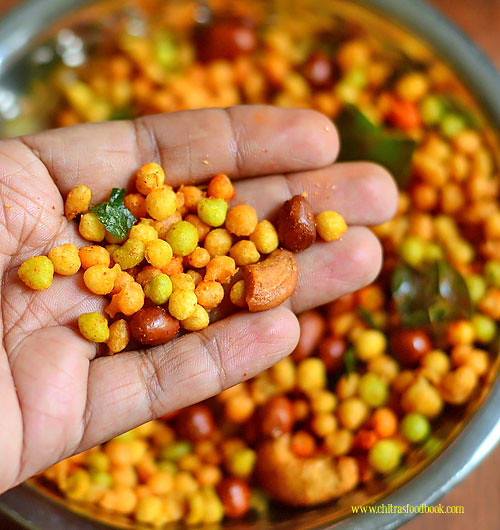
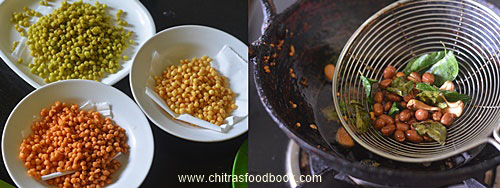
  • Before making the next batch, wipe the slotted ladle with a cloth or tissue paper and again pour a ladleful of batter.Beat the batter every time before you deep fry. Deep dry all the boondi and keep it in a tissue. Now take a handful of raw peanuts and deep fry in oil. When it is half fried, add the broken cashews. When the cashews starts to turn golden, add the curry leaves. Fry till crispy. Remove everything and keep in a tissue paper. Mix all the 3 color boondi, fried nuts and curry leaves.
    Kara boondi recipe
    Kara boondi recipe
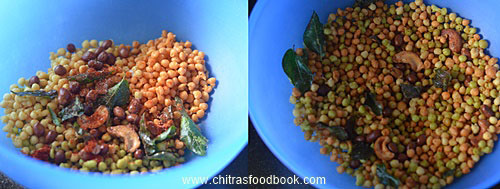
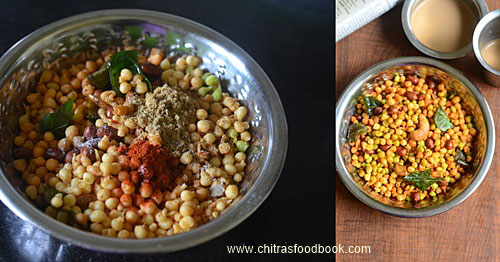
  • For South Indian Kara boondi, take half of the cooked boondi mixture, roasted nuts, curry leaves.Add red chilli powder, hing, salt and mix well with a ladle.Do not use your hands for mixing.
  • For North Indian style boondi namkeen, take the remaining half of the cooked boondi, roasted nuts, add red chilli powder, dhania powder, cumin powder, amchoor powder, chat masala and sugar, salt. Mix well with a ladle and Set aside.Store in an air tight box after the mixture cools down completely.It stays crispy for weeks.. Enjoy with your tea/Coffee or with sambar rice, rasam rice !
    Kara boondi recipe
Enjoy !

    Note
    • No need to use rice flour or cooking soda in this recipe. If you wish, you can add 1 tsp rice flour for 1 cup of besan. Adding oil is a must.
    • The consistency of boondi batter and the distance of ladle you hold from the oil is more important to make perfect round boondi.
    • Boondi making comes by practice and with some trial & error. You cannot make perfect  roundels every time. Some tails may be here and there but you can make 90% perfect boondi even in your first attempt if you follow the steps carefully.
    • Do not forget to beat the batter every time before frying.
    Kara boondi recipe
    Enjoy this colorful, crunchy, spicy kara boondi with rice, tea/coffee ! Tastes yumm !!
    Kara boondi recipe