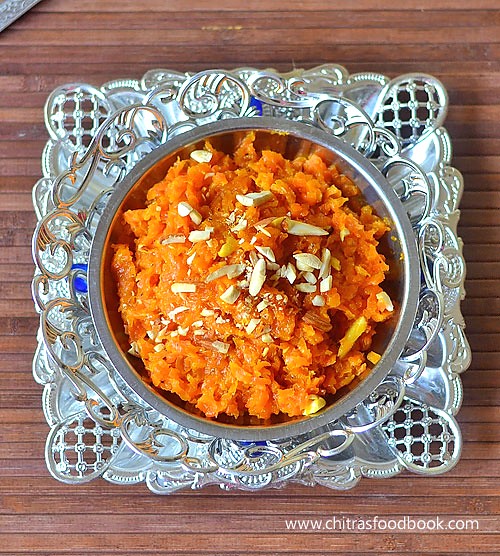
Carrot halwa recipe with step by step photo and a video ! Carrot halwa (Gajar Ka halwa In Hindi) is one of the most popular Indian desserts that is loved by all. Long back I had shared “How to prepare carrot halwa in pressure cooker”. That’s my go-to recipe for making easy and quick carrot halwa. Yesterday for a change, I prepared this traditional method of making carrot halwa in a kadai by using milk,sugar and ghee. I offered it as prasadam for my Friday Lakshmi Pooja. For making carrot halwa, Delhi carrots are mostly used by North Indians whereas I made it with our South Indian orange carrots(Ooty carrot). Traditionally it is prepared in a big iron kadai but I used my non-stick kadai that suits my Induction stove as I wanted to make a video recipe as well. So there are mild deviations from the perfect traditional ones but this one tastes and looks equally good. I have not used condensed milk ( Milk maid) Or Khoya/ mawa. So the preparation time and cooking time takes a bit longer that pressure cooker version. Still the final result makes you forget all the pain .Lets see how to make carrot halwa/ Gajar Halwa at home with step by step photos and video !!
Carrot Halwa Recipe - Gajar Ka Halwa
How to make carrot halwa - Gajar Halwa Recipe using milk
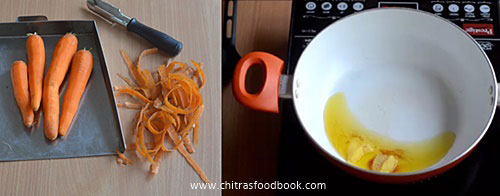
Wash and peel the skin of carrots. Grate it using a big sized holes grater.Do not use a small hole grater because halwa turns mushy and the end of cooking.Grate and keep in a plate.
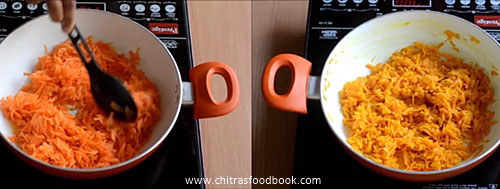
In a kadai, heat 2 tbsp ghee and add the grated carrot.Saute well till the raw smell goes off and color of carrot changes to pale orange. It takes nearly 3-5 minutes.
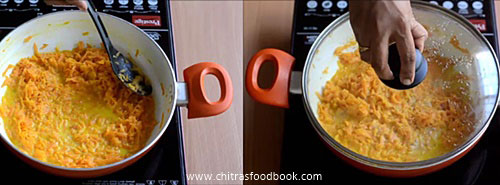
Now add 1 cup of milk and mix well.Keep the flame medium and cover the kadai with a lid. Carrots get cooked in milk. Wait till all the milk is absorbed by the milk. Open the kadai every now & then, stir till bottom to avoid burning. Cooking takes nearly 10-15 minutes.
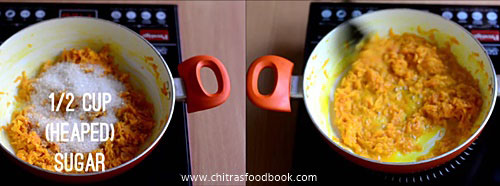
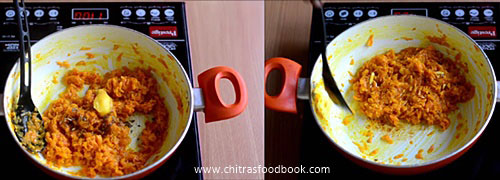
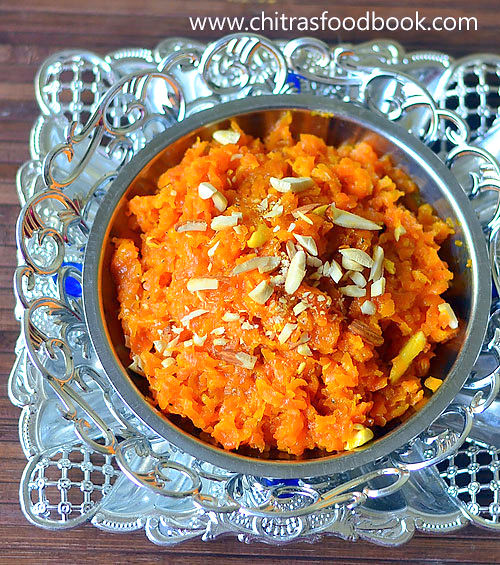
Now add 1/2 cup (heaped)sugar and mix well. Sugar melts and mixture will become watery.Check for taste and add 2 tbsp more sugar if needed. Keep the flame medium and keep stirring till 3/4th of the moisture is lost. When the halwa becomes thick and starts to leave the sides of kadai, add cardamom powder, 1tbsp ghee and mix well. When the halwa becomes thick, gathers in the center with very little moisture, remove it and sprinkle chopped nuts. Serve warm with ice cream or cold !
** Do not stir the halwa for long time to become thick & dry because when the halwa cools down, it will become hard & chewy.So remove it when there is very little moisture content. This halwa can be refrigerated and stored for a week.Reheat in a microwave for 1 minute and serve warm if needed.
Enjoy !
Note
Add more sugar ( 2 tbsp extra) for more sweetness.Sugar can be added any time while cooking carrot halwa.
You can use Delhi carrots instead of the regular orange carrot for bright color.
Serve warm with your favorite ice cream to enjoy its best taste !
Enjoy this delicious carrot halwa with a scoop of vanilla ice cream. Its a blissful combo !!
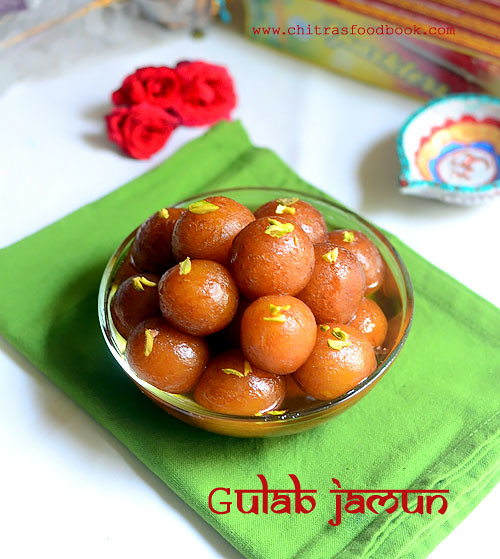
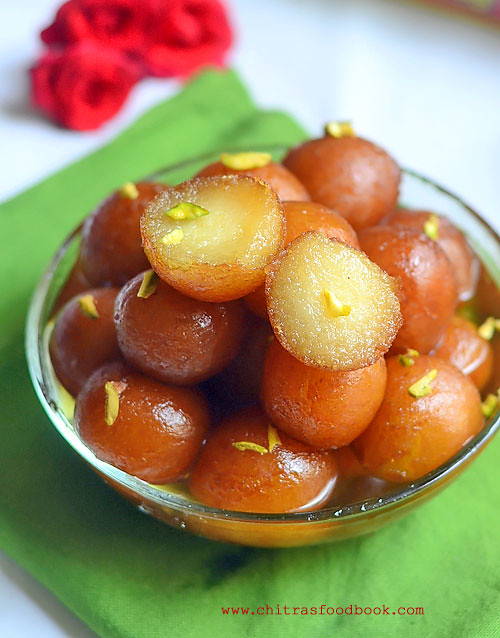
Diwali celebration is incomplete without these yummy Gulab jamun. Its an universally loved Indian dessert recipe. In most of the Indian households, Gulab jamun recipe will be in the Diwali sweets menu for sure. Many people make it as the last minute sweet for Diwali and other special occasions like birthday, anniversary, New year celebration and even for Valentine’s day . Most of us opt for Gulab jamun recipe using readymade, store bought Instant mix as its easy and quick to make, cheap in price compared to other sweets in shops.Even though the ingredients used in the gulab jamun mix are the same, there are many brands available in the market with their own variations & style. Some of the most popular ones are MTR, GITS, Aachi, Bambino and Orkay. Recently my reader friend Harini requested me to share Gulab jamun recipe using MTR jamun mix. So I bought a pack of jamun mix in buy one get one offer and tried it yesterday by getting some inputs from my friends Tara, Megha and Swarna. They make Gulab jamun using readymade mix very often. So they shared some useful tips to make soft, smooth gulab jamun without breaking and cracks.I watched this YouTube video tutorial as well. I followed the steps carefully and the result was awesome, perfect !! I was elated to see my soft, Gundu Gundu gulab jamun and jumped out of joy . Raksha and Sendhil relished this yummy dessert recipe with ice cream. Most of you may think, making gulab jamun using instant mix is not a big deal or rocket science. Yes, its true. But beginners may face some difficulties to prepare a perfect Gulab jamun. So this post is explicitly for them. Even bachelors can also give a try. Experts, please excuse me and do share your favorite jamun mix along with some tips if any. Lets see how to make Gulab jamun recipe with MTR instant mix at home with step by step photos and a video tutorial !
Gulab jamun recipe with instant mix
How to make Gulab jamun using readymade, Instant, store bought mix
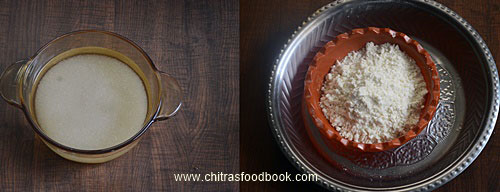
Read the instructions given on the pack. In MTR mix, its mentioned to add 1 part of water for 4 parts of mix. 400gms of sugar for 150 gms mix packet. So i followed the recipe accordingly.
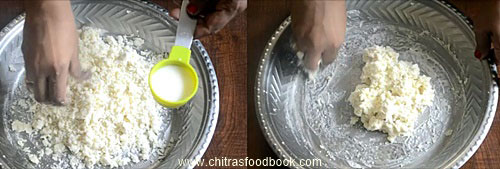
Take sugar and water in a wide bowl and mix well. Keep aside, let it dissolve. In the mean time, take the gulab jamun mix in a wide plate. I used my thambalam/ big round plate. Usually I make chapati dough and other dough in my thambalam as its spacious and convenient to mix well. If the mix has more lumps, sieve it once. Break the lumps with your fingers while sieving. Do not discard the residue. Add it to the mix again. I got around 1.5 cups of powder.
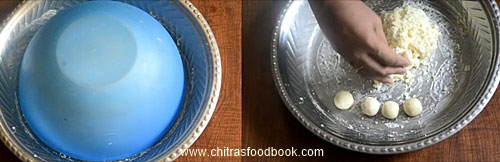
Now add the milk little by little and gather all the flour with your fingers. The mixture will become wet and very sticky. Do not worry. Gulab jamun will come out soft if the dough is sticky. I used 1/4 cup + 2 tbsp + 1 tsp milk. So add milk carefully at the end. If you add more milk, jamun will flatten and break. Do not knead the dough using your palm.Mixing should be done only with your fingers. Cover the dough with a plate or invert a bowl. Let it rest for 15 minutes to 1 hour.
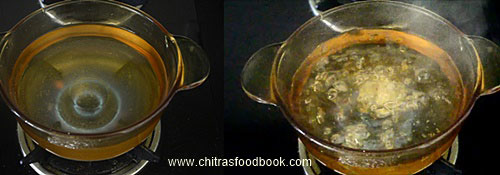
In the mean time, heat sugar + water and melt it. Add saffron threads, cardamom or rose essence. Boil the syrup for 10 minutes in medium flame till the syrup turns slightly sticky to touch, glossy & resembles oil in consistency. Keep aside. Let the syrup becomes warm.
After 30 minutes, take the dough.It will be soft to touch.Do not knead it. Grease your palm with ghee. Make a big gooseberry sized ball by rolling the dough between your palm. Give gentle pressure and roll it continuously for 30 seconds to make it smooth and crack free. As the dough is sticky, jamun balls will not get cracks. If you feel there are cracks, just roll it tight. Cracks will disappear. I made around 20 balls.
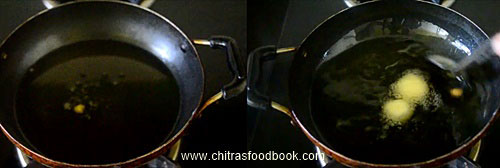
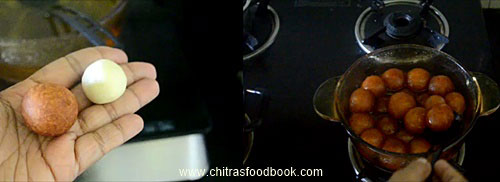
Heat oil in a kadai and when it gets heated , put a pinch of dough in the oil. If it rises to the top slowly, oil heat is perfect. Now stir the oil with a ladle in the corners. When the oil starts to rotate, drop the jamun balls. I cooked 4 per batch. Stir the oil continuously without touching the gulab jamun. You will find jamun rotate with oil and turns bigger in size. The color of jamun balls change slowly and it cooks uniformly. Once it turns golden brown, remove it in a tissue paper. Do not fry for long time. Jamun will become hard and it will not absorb the syrup. After frying, open & check if its cooked well. Leave the cooked jamun for 2-3 minutes in tissue paper and then drop in the sugar syrup. ( If you feel difficult to stir the oil, just keep the flame low, add the balls, flip every now and then till jamun turns golden. Then remove it)
If the sugar syrup becomes cold, heat till it becomes medium hot. i.e vapor should start to come from the syrup slightly. Deep fry all the balls in batches, drain in the tissue and drop in the syrup. Let the balls soak in syrup for minimum 3-4 hours. It will soak well and double in size. Remove and serve in a bowl. Transfer the gulab jamun to a tight box and store it for days.No need to refrigerate.
Enjoy !
Tips
Adding milk for making the dough helps to give soft jamun. You can use water as well. My friend Swarna adds just a tsp of milk in the beginning and add then water to make the dough.
Dough should be really sticky to get soft Gulab jamun. If you have added more milk by mistake, don’t panic. Just cover the dough with a lid and let it rest for an hour.Grease your hands and make smooth balls.If it comes out without cracks, then proceed and deep fry only one ball for a trial. If it disperses in oil, then add a tsp of maida, mix well and make another ball. Test it and proceed further. But adding more milk flatten the jamun. So please be careful while adding milk.
Jamun balls should be crack free. Roll it for 30 seconds continuously.This helps to seal the cracks while rolling. Do not press it too hard while rolling, but give gentle pressure.
Deep fry the balls only at low temperature else balls will get browned quickly without cooking inside.
Gulab jamun balls will disperse in oil or cracks more if the oil temperature is too low. So Check the temperature before you drop the balls.
Similarly cracks will form if the jamun balls become dry.so keep it covered all the time till you finish the procedure.
Sugar syrup should not be too hot while you drop the jamun. It should be medium hot or warm. Similarly Gulab jamun should not be too cold.
Gulab jamun will flatten if you add more milk. It will also flatten if the sugar syrup is less. Make sure the sugar syrup is enough for all the balls to absorb and dunk in completely.
If the quantity of sugar syrup is less, then jamun will not turn soft and double in size.
Try this delicious, yummy cute Gulab Jamun recipe for your Family and have a great Diwali Celebration.
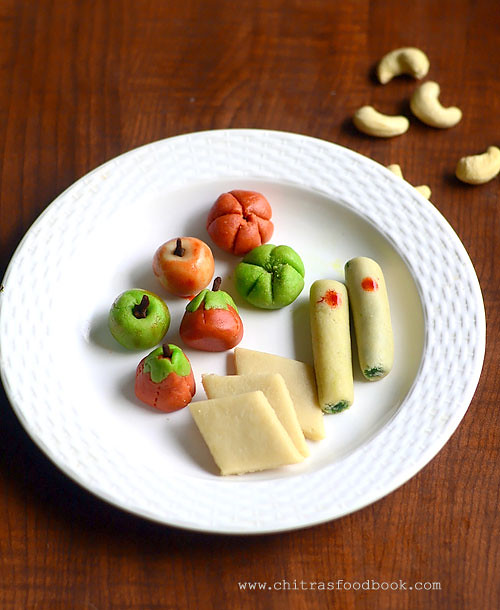
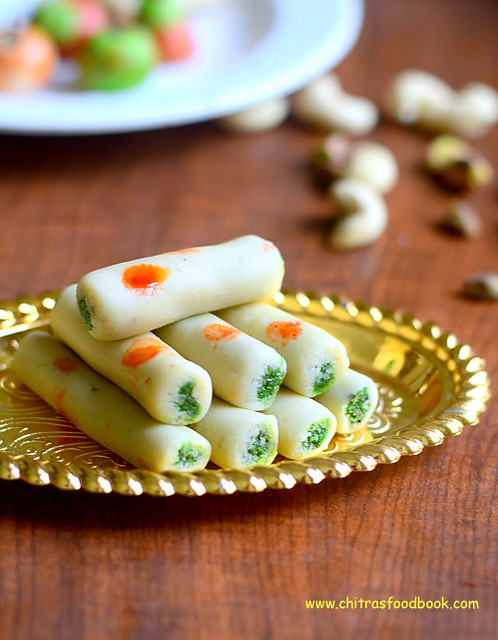
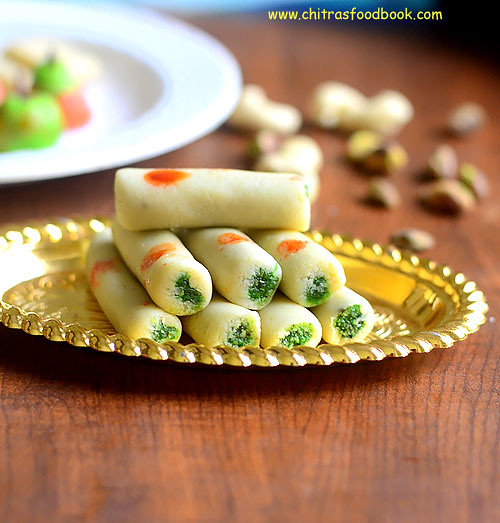
Kaju sweets are one of the costliest sweets in sweet stalls. No matter about its price or calories, we never say no to sweets made with cashews. Its our family favorite. So I used to make kaju katli for all the special occasions like birthday, anniversary. When I asked Raksha about her choice for Diwali sweets, her first reply was “Kaju Katli”. Then came gulab jamun, Badam halwa etc etc. So this morning, I made kaju katli for her, Kaju roll for my blog posting, kaju strawberry, kaju flower and kaju apple just for myself . Yes, I used the same cashew dough for all these varieties. Basically the ingredients & the method of cooking Kaju katli and Kaju roll are almost the same. Additionally, pista stuffing is to be made and rolled in cashew dough for Kaju pista roll. If you can make a perfect cashew dough, all these sweets can be made in no time. Making Kaju dough is not so difficult. Troubleshooting is also easy.This is a no-fail recipe. I am sure anyone can get it right. For variations, badam or dates can be used for the filling and prepared as Kaju badam roll or Kaju khajur roll. In general, Kaju roll is really a good alternative for Kaju katli or kaju burfi If you are bored with it.So try this easy, interesting sweet for Diwali and have a great celebration.Generally kaju pista rolls are wrapped with silver varaq in sweet stalls. As i din’t have it, I just kept a colored dot and made a simple presentation by seeing the picture of Nestle Milk Maid Kaju roll recipe. It looked really attractive. Try this decoration if you don’t have silver varaq.Ok, Lets see how to prepare perfect Kaju roll recipe with step by step images along with some tips for trouble shooting. Here is the picture of all the Kaju sweets I made
Kaju pista roll recipe
How to prepare kaju pista roll - Easy kaju sweets for diwali
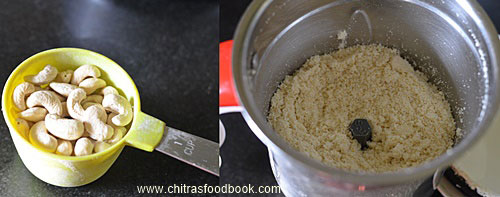
If you have kept the cashews in refrigerator, take it out and let it dry completely.Powder the dry cashews in a suitable mixer. For this, grind the cashews continuously for a minute till it becomes smooth powder. Do not grind for long time because cashews release oil and it becomes a paste. You can also grind it by using pulse option. i.e grind for few seconds, wipe the sides and repeat until it becomes a powder. Both the method works well. After grinding the powder, sieve with a wire mesh if needed. Keep the powder aside.
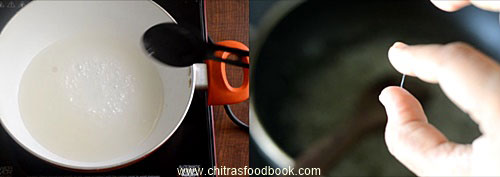
In a kadai, heat sugar + water and melt it.Boil till it reaches one string consistency. String should be thin. To this, add the powdered cashews and mix well. It will become watery at first. Keep mixing in medium flame by staying nearby.
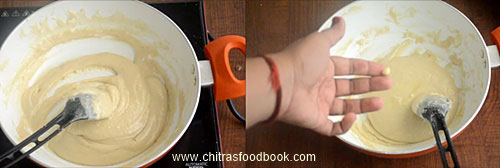
The mixture will thicken and start to leave the sides of pan. At that time, simmer the flame completely. Take a pinch of cashew dough by greasing your fingers. Try to make a soft, smooth ball. If you are able to do it, cashew dough is done. Immediately transfer it to a greased plate.
Using a spoon, just mix the cashew dough to turn thick and warm. Once its heat is enough to handle, grease your hands with ghee and keep kneading for few minutes. It will turn soft, smooth like a dough ball.
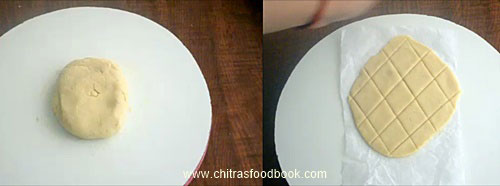
For Making kaju katli : Place a butter paper and keep the kneaded cashew dough over the butter paper. Cover it with another butter sheet and start rolling it with a rolling pin. Roll the thickness you desire. Now make diamond shapes and remove after its cool down.
For making Kaju Pista roll : Cover the kneaded cashew dough with a dry cloth and set aside.
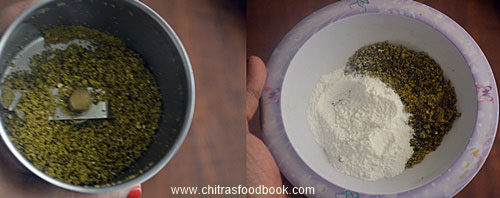
Powder the pista to a smooth powder. Follow the method of making cashew powder. Do not grind for long time . To the pista powder, add powdered sugar, green food color, cardamom essence and mix it.
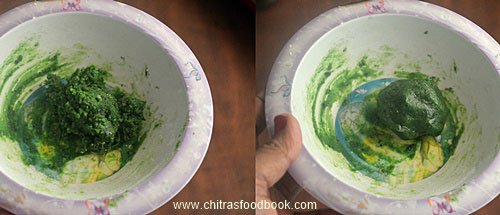
Add few drops of water and make a smooth dough.Grease your hands with ghee and make a dough. Do not add more water, pista dough would become very sticky. If its too sticky, add a tbsp of maida and mix it in a kadai in very low flame to make it non-sticky and thick.
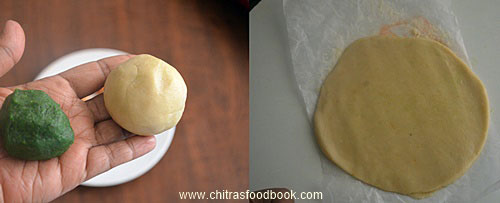
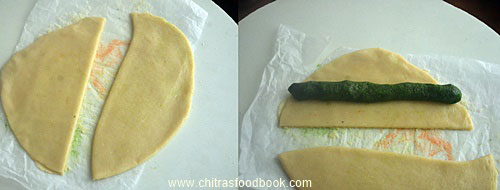
Grease your hands with ghee and knead it soft. Divide the dough into 2 parts and make two logs/ cylinder shaped by rolling with your palm on a plate or counter top. Keep it aside.
Now take the cashew dough and place it in between the butter paper. Roll it thin with a rolling pin/chapati roller. Cut the circle into 2 parts as shown in the pic.
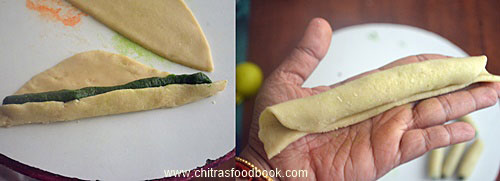
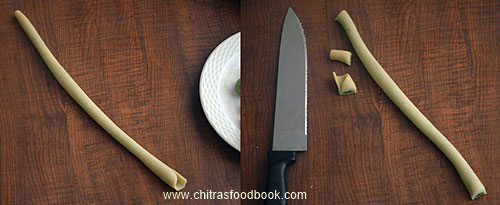
Take one half of the circle, place one of the pista log in the center.The size of pista log and the cashew dough circle should be the same. Fold it once from above and below the log. It will resemble a log. Now roll the log gently. The more you roll, it will elongate and becomes a perfect log.It will stretch double, triple in size. Cut both the ends and taste it ; ))
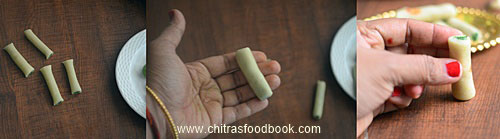
Cut the log into small cylinders by keeping your finger as reference size.Then take one roll and press both the ends gently on a plate or counter top to get perfect round shape.Refer the pictures for clear understanding. Repeat the same with the other half of cashew dough and pista dough. Arrange the kaju pista roll in a plate and let it set for an hour. Enjoy it !
Enjoy !
Note
Trouble shooting tips
In case, u missed the right consistency and if the dough becomes crumbly and hard, just break them into pieces. Grind in a big mixie jar adding little water or milk and make a smooth paste. Transfer the mixture to the kadai and again cook it till you attain the correct stage.You can easily identify the right stage as you know where you went wrong. So do it patiently and remove it at the right stage. Note
Cashews should be completely dry before grinding.While powdering the cashews please be careful in running the mixie. Over doing it makes the cashews sticky & wet.U wont get the perfect smooth powder.
One string consistency is very important. If sugar reaches more than one string consistency , katli will become hard. U have to add more milk to make it soft. Adding more than the required milk makes the dough wet & sticky.It reduces the shelf life of the sweet.
U can check the consistency of dough by making a small ball out of it.The ball should be non-sticky.Suppose if u over mix the dough and if it becomes hard,no worries.Just keep the dough in a plate and let it warm.Add few tsp of little milk to it and knead it well by greasing your hands with ghee.It will become soft.Then u can roll it and make pieces as mentioned above.
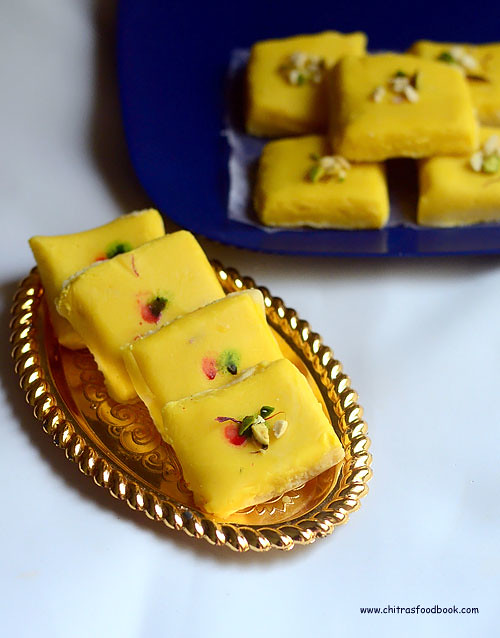
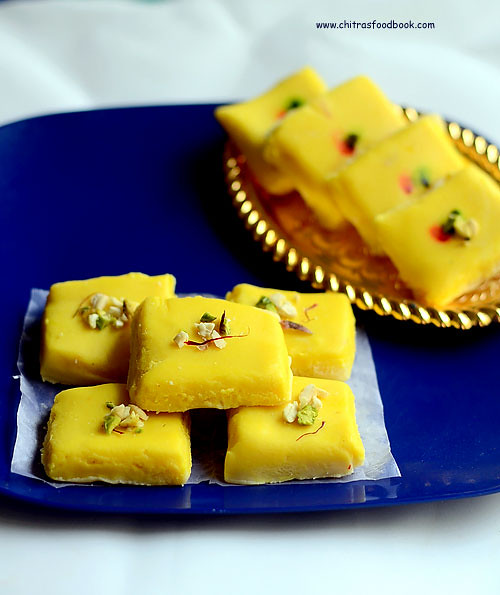
Last year during diwali, I posted double layered chocolate burfi with khoya. So this year I wanted to attempt some sweets with milk powder. I tried Kesar burfi recipe with milk powder as my reader friend Harini requested me to share some burfi recipes with milk powder. I followed the recipe from Mullai’s blog and referred Nisha madhulika ji’s youtube video as well. Actually I made a two layered burfi just like the original recipe but simplified the cooking procedure. Instead of making the layers separately, I made the dough once, divided them into two parts, applied kesar milk with yellow color to one part and kept the other one as plain. This helped to make the burfi very quickly. But this kesar burfi takes one day time to set completely. It tastes chewy if you eat it on the same day. But it sets perfectly the next day and melts in your mouth. I have tried kesar burfi with khoya and the setting time is the same for khoya as well. Friends, if you don’t get khoya in your place, you can opt for this milk powder burfi. There will be no compromise in taste or flavor. Lets see how to make this colorful kesar burfi with milk powder with step by step photos !
Cardamom powder or rose essence or kewra water - few drops
Kesar/saffron threads - few
Milk - 1 tbsp ( to soak saffron)
Yellow food color - few drops ( optional)
METHOD
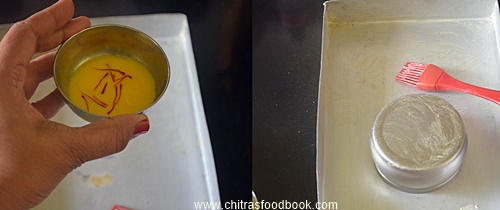
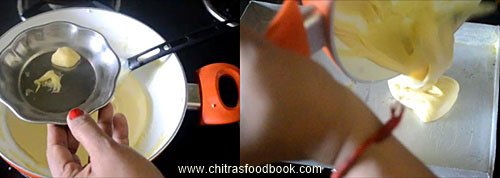
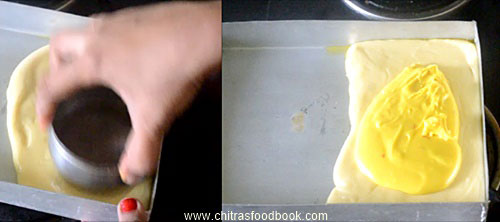
Heat 1 tbsp milk and add saffron threads, few drops of yellow food color to it. Grease a pan with ghee & grease a flat bottomed bowl with ghee for levelling the dough. Keep it ready. Refer picture below for the idea.
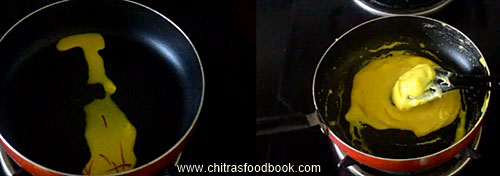
In a small non-stick kadai , pour the saffron milk and set aside. We need it for later use.
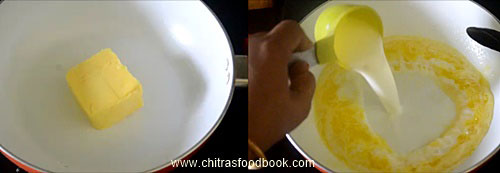
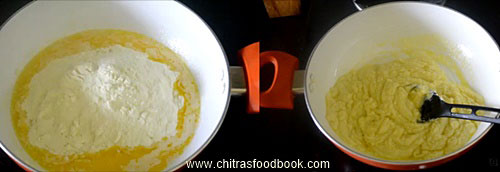
Heat unmelted butter in another big non-stick kadai in low flame. When its melting, add the milk. Mix well. When the milk and butter are mixed well, add the milk powder and stir it without lumps. Milk powder will absorb all the milk & butter and it looks like a thick paste/ khoya.Stir the mixture to become smooth.
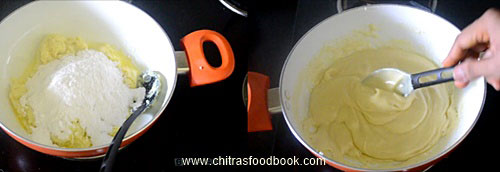
Now add the powdered sugar and stir well. Sugar gets melted and the paste becomes thin. Keep mixing in low to medium flame. Never increase the flame and do not go away. Stay nearby and keep mixing else the bottom layer gets burnt very quickly. Add the rose water or cardamom powder and keep mixing for 5-6 minutes. The burfi mixture starts to thicken and leaves the sides of kadai.
When it starts to leaves the sides and becomes semi thick, take a small portion in plate. It will be very sticky. Grease your fingers with ghee and try to make a ball out of it. If you are able to do make a soft, non sticky ball, its the right consistency. Immediately switch off the flame and stir for few seconds. The heat of kadai is sufficient to thicken the burfi mixture.Mixture will be very sticky and tastes slightly chewy too. But don’t worry.
Remove 1/3rd portion of burfi mixture using a ladle and add it to the kesar milk we kept in the kadai earlier. Transfer the remaining mixture to the greased plate, it will fall like a ribbon. Spread it well with the bottom of greased bowl. Let it cool down.
In my burfi, two layers were not clearly visible. So its better to add the yellow layer less than half the quantity of white layer.
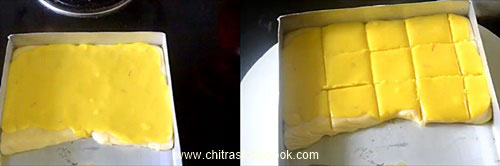
Now take the dough mixed with kesar milk. Keep mixing till all the milk is absorbed by the burfi dough and its color changes to yellow. If you wish, add more yellow color if needed. Switch on the flame and mix it for one minute in very low flame. This is to absorb the extra moisture in the burfi. Transfer it to the greased tray and spread it over the plain white layer. Use the greased bowl and spread it well to cover the white layer. Set it to become warm for 2-3 hours.
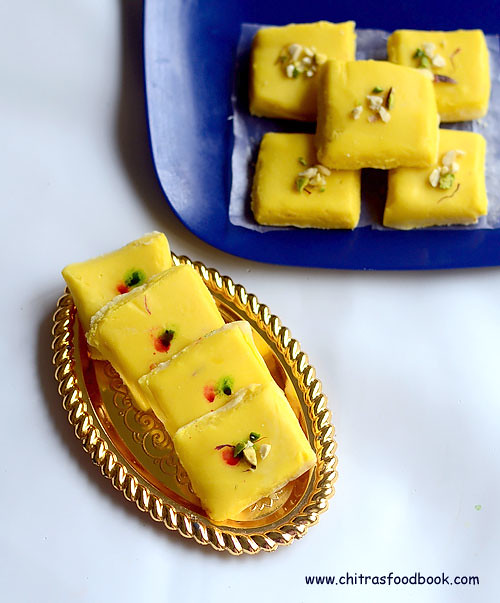
Grease a knife with ghee and make shapes once the mixture becomes warm. Do not remove the pieces now.This burfi tastes chewy if consumed hot. So Let it rest over night or at least 8 hours by covering with a plastic sheet. The next day, run a knife in the corners and invert the plate. All the pieces will fall easily. Remove and stack it. Store in a box and enjoy for a week. No need to refrigerate. Melt in mouth kesar burfi with milk powder is ready !
Note
Remember this burfi tastes mildly chewy when hot. It tastes great only the next day.
Do not forget to add rose essence or cardamom powder to the burfi mixture else it will taste like eating milk powder.
Troubleshooting : If you feel, the mixture is not set even after its warm, don’t panic. Again heat the mixture for a minute and spread it OR Just add a tbsp of milk powder to the mixture, knead well to make a smooth dough and spread in a plate. Make shapes and allow it to set for 8 hours .
If you have over done the mixture and made it very hard or chewy, add more milk to the mixture, make a paste and again stir it to reach right consistency. But it will take more time to cook.
Try this colorful, kesar burfi with milk powder and celebrate the occasions !
 .Lets see how to make carrot halwa/ Gajar Halwa at home with step by step photos and video !!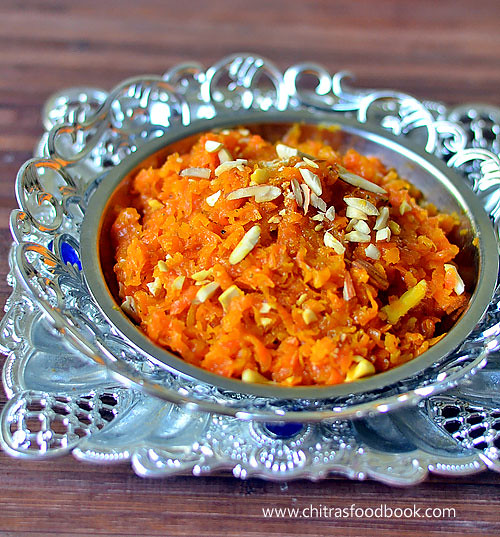


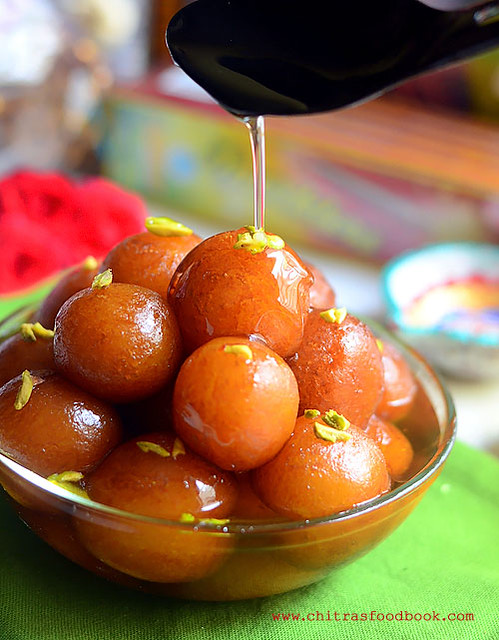
 . Most of us opt for Gulab jamun recipe using readymade, store bought Instant mix as its easy and quick to make, cheap in price compared to other sweets in shops.Even though the ingredients used in the gulab jamun mix are the same, there are many brands available in the market with their own variations & style. Some of the most popular ones are MTR, GITS, Aachi, Bambino and Orkay. Recently my reader friend Harini requested me to share Gulab jamun recipe using MTR jamun mix. So I bought a pack of jamun mix in buy one get one offer
 and tried it yesterday by getting some inputs from my friends Tara, Megha and Swarna. They make Gulab jamun using readymade mix very often. So they shared some useful tips to make soft, smooth gulab jamun without breaking and cracks.I watched
  . Raksha and Sendhil relished this yummy dessert recipe with ice cream. Most of you may think, making gulab jamun using instant mix is not a big deal or rocket science. Yes, its true. But beginners may face some difficulties to prepare a perfect Gulab jamun. So this post is explicitly for them. Even bachelors can also give a try. Experts, please excuse me
 and do share your favorite jamun mix along with some tips if any. Lets see how to make Gulab jamun recipe with MTR instant mix at home with step by step photos and a video tutorial !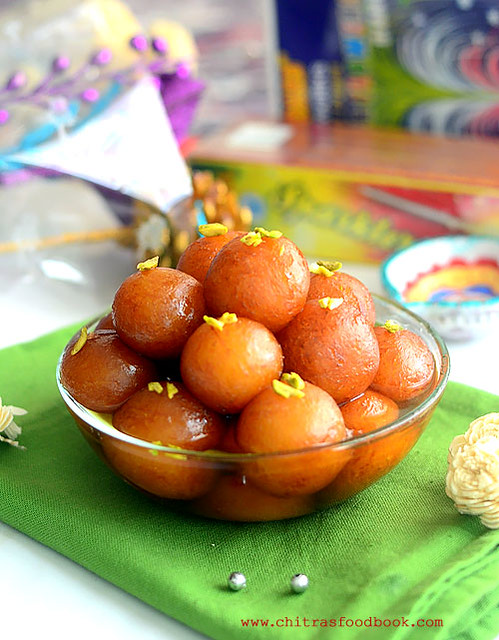
 . Its our family favorite. So I used to make kaju katli for all the special occasions like birthday, anniversary. When I asked Raksha about her choice for Diwali sweets, her first reply was “Kaju Katli”
 . Yes, I used the same cashew dough for all these varieties. Basically the ingredients & the method of cooking Kaju katli and Kaju roll are almost the same. Additionally, pista stuffing is to be made and rolled in cashew dough for Kaju pista roll. If you can make a perfect cashew dough, all these sweets can be made in no time. Making Kaju dough is not so difficult. Troubleshooting is also easy.This is a no-fail recipe. I am sure anyone can get it right. For variations, badam or dates can be used for the filling and prepared as Kaju badam roll or Kaju khajur roll. In general, Kaju roll is really a good alternative for Kaju katli or kaju burfi If you are bored with it.So try this easy, interesting sweet for Diwali and have a great celebration