‏إظهار الرسائل ذات التسميات STARTER RECIPES. إظهار كافة الرسائل

الجمعة، 4 نوفمبر 2016

Vazhaipoo Kola Urundai Recipe – Banana Flower Recipes

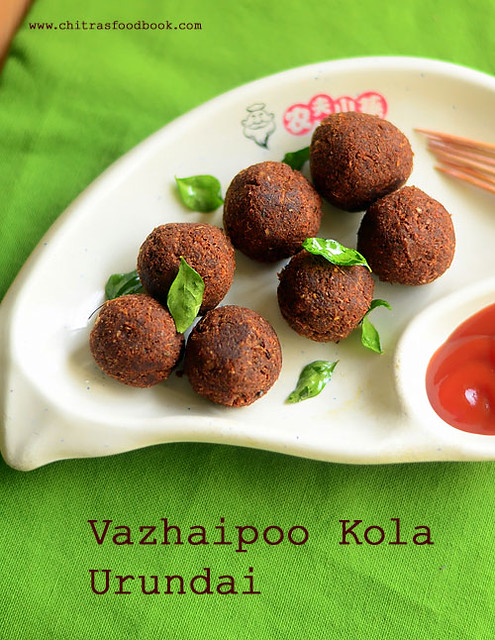
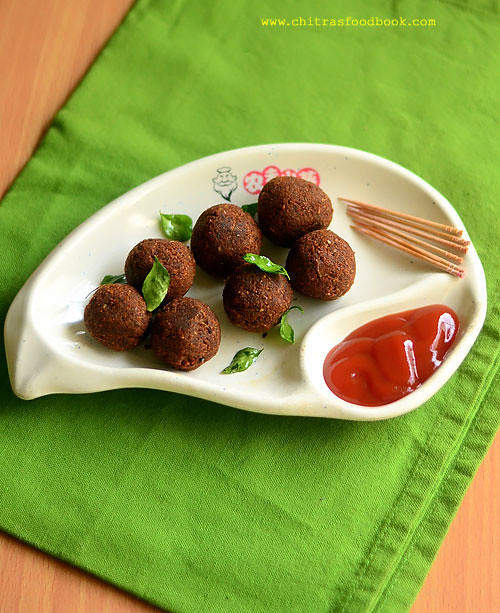
Vazhaipoo kola urundai
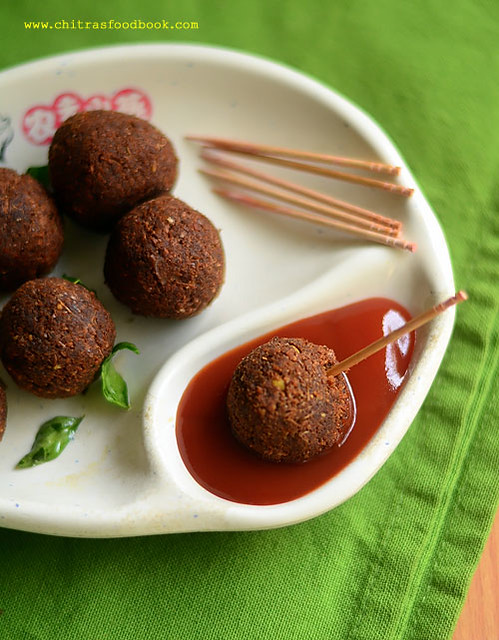
Recent days I have been exploring varieties of vazhaipoo recipes ( Plantain flower/Banana flower in English) in my kitchen. Most of the South Indians especially Tamil people make Vazhaipoo vadai and Vazhaipoo paruppu usili using this vegetable and it would be their favorites as well. Me too not an exception. But apart from these usual recipes, I wanted to try some interesting and unique recipes with vazhaipoo. As a result of which I have tried and posted Vazhaipoo Kuzhambu / Banana flower gravy and Vazhaipoo dosa recipes in my blog. Here comes yet another yummy, kids friendly snack with banana flower. Yes, Its Vazhaipoo Kola urundai i.e Spicy fried plantain balls. I found this recipe in Nalini’s blog and I have tried it thrice so far. Once I made these balls for preparing Vazhaipoo kola Urundai kuzhambu ( Will post the recipe soon) for our lunch and made the same twice for my daughter’s evening teatime snack. This vazhaipoo kola urundai is sure a welcome change from vazhaipoo vadai. It can be made instantly without soaking dals. But it tastes crispy and the best only when hot. My daughter Raksha likes to relish these balls with her favorite tomato ketchup. Friends, do try this healthy snack with banana flower for your kids when they come back from school. I am sure they will love it a lot. Ok, Now lets check how to make Vazhaipoo kola urundai with step by step photos !
Vazhaipoo kola urundai recipe

Vazhaipoo Kola Urundai recipe


Vazhaipoo Kola Urundai recipe Spicy fried plantain balls/ Banana flower balls - Vazhaipoo kola urundai - Instant version
Cuisine: Indian
Category: Snacks
Serves: 15 nos
Prep time: 15 Minutes
Cook time: 5 Minutes
Total time: 20 Minutes


INGREDIENTS
1 cup - 250ml
  • Vazhaipoo/ Banana flower - 1/2 no ( 40 - 50 florets)
  • Grated coconut – 1/4 cup
  • Big onion – 1/2 no
  • Red chilli powder - 1 tsp
  • Fennel seeds/ Soambu - 1 tsp
  • Ginger & Garlic paste - 1 tsp
  • Curry leaves – 1 sprig
  • Fried Gram Dal/ Pottukadalai - 1/2 cup
  • Salt - as needed
  • Rice flour - 1 tbsp
  • Water - 1 tbsp ( only if needed)
  • Cooking oil - to deep fry
METHOD

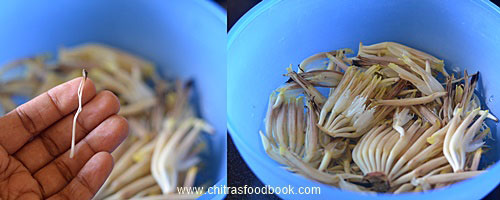
  • Remove the florets from the banana flower and set aside. Remove the Kalan(black colored stamen) from the florets and soak the florets in water or buttermilk till use.
    Vazhaipoo kola urundai recipe
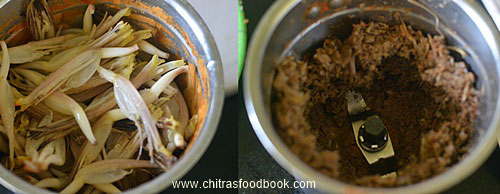
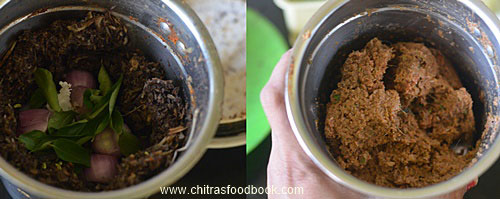
  • Pressure cook the banana flower adding little water in high flame for one whistle. Drain the excess water, squeeze it and remove from the cooker.Grind them in batches in a dry mixie jar. You should wipe the sides of jar every time for proper grinding. (I din’t cook the banana flower. I ground them directly as raw florets) Once the florets are coarsely ground, add the red chilli powder, grated coconut, fennel seeds, salt, g&g paste and big onion. Grind everything nicely to a smooth paste. Add 1 tbsp of water if necessary while grinding. 
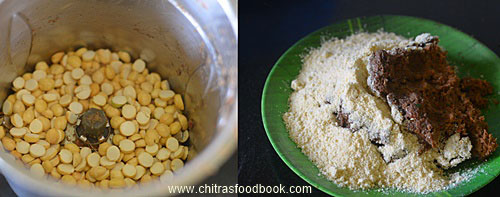
  • In another mixie jar, powder the fried gram dal and set aside.
    Vazhaipoo kola urundai recipe
    Vazhaipoo kola urundai recipe
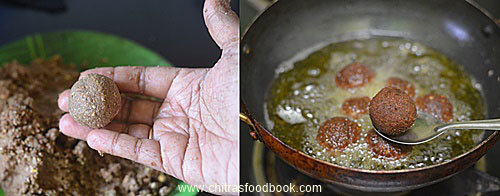
  • Take the ground batter in a wide plate.Add the powdered fried gram dal and rice flour. Mix well without adding water. Fried gram flour and rice flour absorbs the moisture content in the banana flower mixture and becomes dry. Make small balls out of the dough and arrange it.
    Vazhaipoo kola urundai recipe
  • Heat oil in a kadai and when it gets heated ,drop a pinch of dough. If it comes up immediately, heat of the oil is perfect. Now put the balls ( 3-4 at a time) and deep fry in medium flame for few minutes. Keep turning both the sides for even cooking. Remove when the balls turn golden brown in color. Serve them hot to enjoy its best taste. serve with tomato ketchup. ( you can prepare the dough in advance, refrigerate it and make balls whenever needed)
    Vazhaipoo kola urundai recipe
Enjoy your teatime!

Note
  • Add more chilli powder based on your taste.
  • Check for salt & spice and adjust them while mixing the dough.
  • Try to grind the vazhaipoo mixture to a smooth paste without adding water. At worst case, you can add 1-2 tbsp.
  • If the dough is sticky and too wet, add more fried gram dal flour and little rice flour to adjust the consistency.
Try this snack with banana flower for a change and enjoy !
Vazhaipoo kola urundai - Banana flower recipes

الأربعاء، 21 سبتمبر 2016

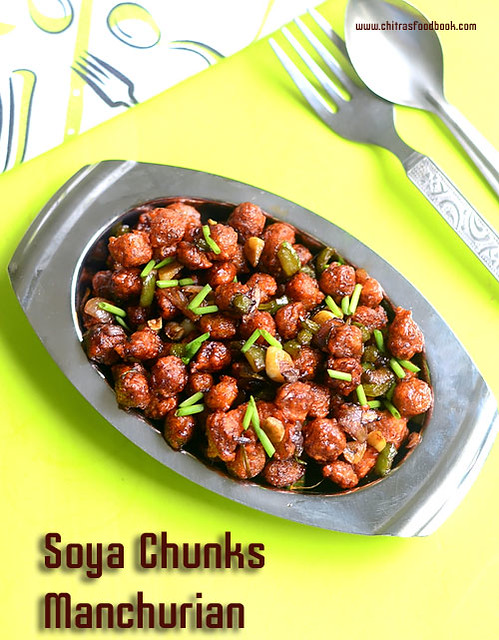
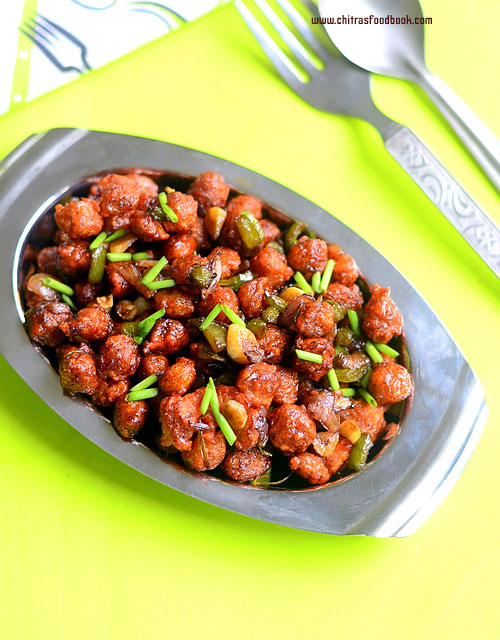
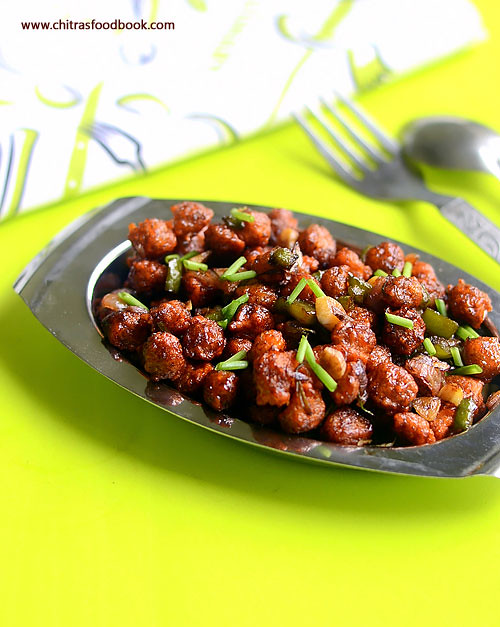
Soya Chunks Manchurian – Soya Chunks Recipes

How to make Soya chunks manchurian/ meal maker manchurian – Dry version with step by step pictures !
Soya chunks also known as meal maker & soya nuggets is a good source of protein for vegetarians. Usually I add them in biryani. Recently I bought a pack of mini soya chunks(Soya chunks nano) to try some curry or gravy with it. But I got tempted to make soya chunks Manchurian after watching Vahrevah Youtube video. Soya chunks fry came out very crispy like Gobi 65 and tasted great when hot.I made a dry Manchurian sauce and it stayed crispy for sometime even after adding in gravy. But It became slightly chewy and soft after its cooled down. So make and serve it hot to enjoy its actual taste because the moisture content inside the soya chunks makes it soft soon. Use mini soya chunks for best results.If you use big sized soya chunks, chop it after soaking in water to make a crispy fry. Do try this for your kids. I am sure they will love it. Lets see how to prepare Soya chunks Manchurian also known as meal maker Manchurian with step by step photos !
Check out my other Manchurian recipes

Gobi manchurian

Baby corn manchurian

Idli manchurian

Mixed vegetable manchurian


soya chunks manchurian recipe

Soya chunks manchurian recipe


Soya chunks manchurian recipe Soya chunks manchurian recipe - Meal maker manchurian - Soya chunks recipes
Cuisine: Indian
Category: Snacks
Serves: Serves 2
Prep time: 10 Minutes
Cook time: 20 Minutes
Total time: 30 Minutes


INGREDIENTS
1 cup - 200ml
  • Mini Soya chunks - 1 cup (Soya Nano, I used double horse brand)
  • Water – 3 cups ( to boil soya chunks)
  • Maida/All purpose flour - 3 tbsp
  • Corn flour - 1/4 cup
  • Red chilli powder - 1 tsp
  • Ginger-garlic paste - 1 tsp
  • Cooking oil – to deep fry
  • Salt - as needed
For manchurian sauce
  • Cooking oil - 1 tbsp
  • Garlic cloves - 5 nos ( finely chopped)
  • Big onion - 1 no ( finely chopped)
  • Capsicum - 1/4 no ( finely chopped)
  • Spring onion - 2 sprig ( finely chopped)
  • Soya sauce - 1/2 tsp
  • Tomato sauce – 1.5 tbsp
  • Red chilli sauce or red chilli powder - 1 tsp
  • Sugar - a pinch
  • Salt - as needed
METHOD

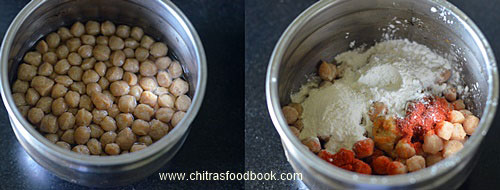
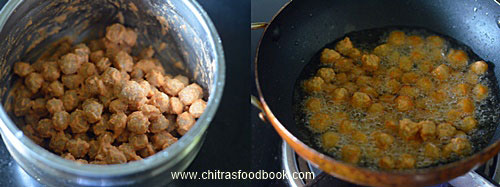
  • Boil 3 cups of water and add the soya chunks in hot water.Let it soak for 10 minutes. It becomes soft and doubles in size. Squeeze the chunks and drain the excess water( If using big sized soya chunks, chop them into small pieces after squeezing the water).Take them in a bowl.To this, add maida, corn flour or rice flour ( OR use 50/50), red chilli powder, g&g paste and required salt. DO NOT ADD WATER. Just mix everything well. The moisture content of soya chunks would be enough to coat the flour. Add more flour if the chunks are not coated properly.
    soya chunks manchurian recipe
  • Make sure the flour is well coated over soya chunks. Let it rest for 10 –15 minutes.
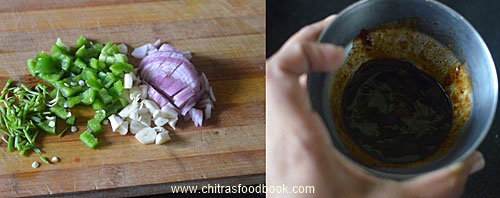
  • In the mean time, finely chop the garlic, big onion, spring onion and capsicum. Set aside.
  • Prepare sauce mix first. For this, take red chilli sauce or chilli powder, soya sauce, tomato sauce, sugar and salt.Mix well.
  •  soya chunks manchurian recipe
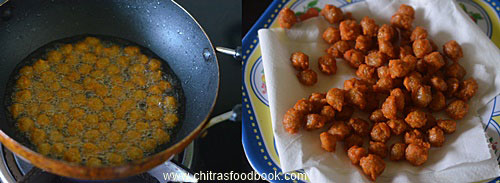
  • Heat oil to deep fry.Drop one soya to check the heat of oil. If it rises to the top immediately, oil temperature is just right. Reduce the flame to medium and drop a batch of soya chunks in a sprinkled manner in oil. Keep tossing them for uniform cooking. Fry them until the bubbles cease and soya chunks turn golden brown with a crispy texture. Remove in a tissue paper. Repeat the same and deep fry all the chunks. If you wish, you can serve this crispy, fried chunks as soya 65 with tomato sauce. Kids would love it. If you want to make manchurian, proceed to the next step.
    soya chunks manchurian recipe
    soya chunks manchurian recipe
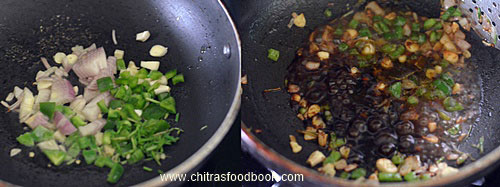
  • Heat oil in a kadai and when it gets heated, add the finely chopped garlic, big onion, spring onion and capsicum.Saute until onion turns transparent. Add the sauce mix. Add little water if needed.Mix well and check for taste. Add more tomato sauce or red chilli powder as per your taste. Add the fried soya chunks.Toss well and remove in a plate. Garnish with finely chopped spring onion or coriander leaves. Serve hot immediately !
    soya chunks manchurian recipe
    soya chunks manchurian recipe
Enjoy !

Note
  • Adjust the quantity of chilli powder as per your taste.
  • You can replace corn flour with rice flour or use 50/50 corn flour and rice flour.
  • Serve hot to enjoy its best taste because  soya chunks becomes chewy and soft after it cools down.

Try this yummy soya chunks manchurian dry at home. You will love it !
meal maker manchurian

الجمعة، 11 مارس 2016

Paneer 65 Recipe – Dry Paneer Fry

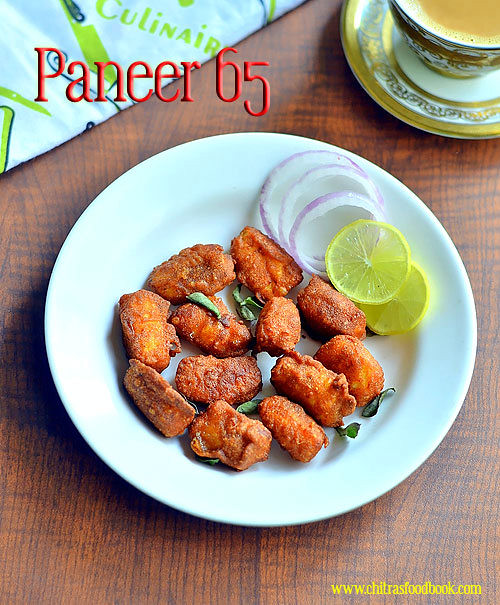
Paneer 65 recipe
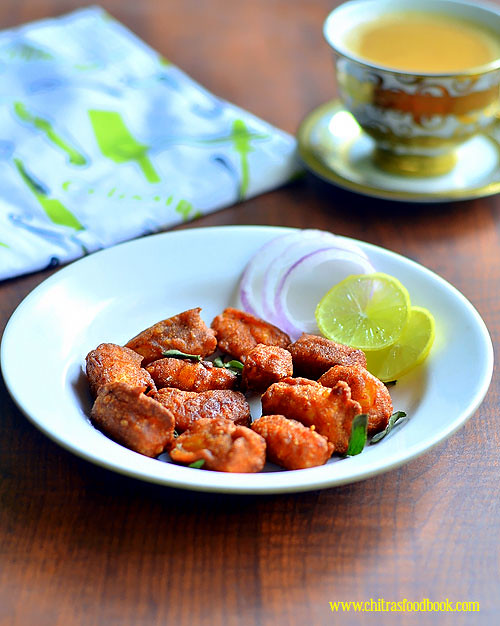
I am planning to share a collection of Paneer recipes from my blog. But before that, I wanted to post some more yummy and interesting paneer recipes which are in my try list for long time. Recently I tasted paneer 65 in a restaurant buffet lunch under starters. Raksha & myself loved it so much. So I tried to recreate the same at home after watching few YouTube videos.Actually Paneer 65 ( Dry Paneer fry) can be made in Chinese or Indian style.Here I followed Indian version and added masala powders. If you want to make in Chinese style, add tomato sauce, soya sauce, chilli sauce and pepper powder. As I wished, It came out with super crispy exterior and soft interior. As a general rule, this deep fried starter recipe should be eaten hot to enjoy its best taste. Summer vacation is going to start in another 2 weeks in India. Kids would demand varieties of snacks recipes from their moms. So friends, make this yummy, kids friendly Paneer snacks for them.Serve it with a fresh juice.They are going to enjoy it for sure. You too can enjoy a plate of paneer 65 with a cup of hot tea/coffee as I did. Lets see how to make this crispy, homemade Paneer 65 for evening snack or as a starter for lunch/dinner.
Do check out my Gobi 65, Baby corn fry, Chilli Idli fry
Paneer 65 recipe

Paneer 65 recipe


Paneer 65 recipe How to make paneer 65 at home - Kids friendly evening snack !!
Cuisine: Indian
Category: Snacks
Serves: Serves 2
Prep time: 30 Minutes
Cook time: 10 Minutes
Total time: 40 Minutes
INGREDIENTS

For marination
  • All purpose flour/Maida - 3 tbsp
  • Rice flour - 2 tbsp
  • Corn flour - 2 tbsp
  • Curd – 1/2 tbsp or lemon juice – 1 tsp
  • Ginger & garlic paste - 1/2 tsp
  • Dhania powder - 1 tsp
  • Red chilli powder - 1 tsp ( Use Kashmiri chilli powder to get the same color)
  • Garam masala powder - 1/2 tsp
  • Salt, water - as needed
METHOD

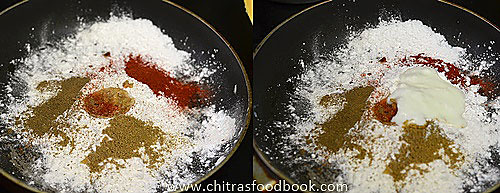
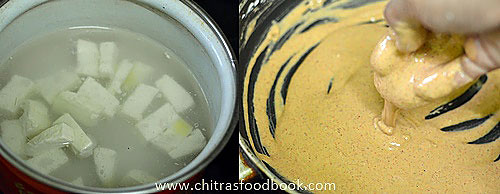
  • Take the paneer block and cut into strips of 2 inches length. Boil water till it starts to bubble. Add the paneer pieces to hot water and set aside.In a wide bowl, take the flours, red chilli powder, dhania powder, garam masala powder, G&G paste, curd & salt. Mix well without adding water.
Paneer 65
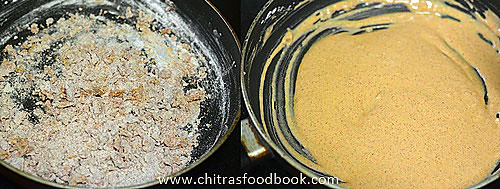
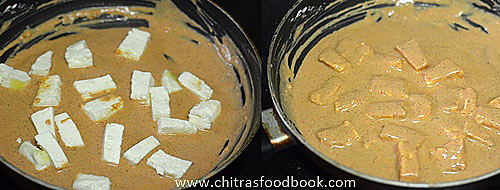
  • Then add the required water and make a batter similar to dosa batter. Check the consistency in the picture below.
Paneer 65
Paneer 65
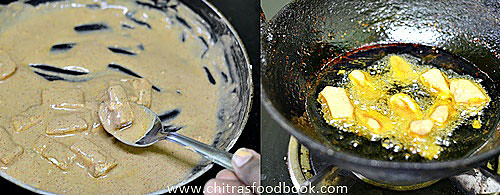
  • Now remove the paneer pieces from the hot water and squeeze the excess water gently.Do not squeeze too hard. Add the paneer pieces to the batter and coat it well.
Paneer 65
  • Let it marinate for 15 minutes.Do not marinate for more than an hour. Batter will become sour.It spoils the taste of dish. ( If you want to marinate for long time, refrigerate the marinated mixture till you fry them)
  • Heat oil to deep fry. Drop a pinch of batter and if it raises to the top immediately, oil temperature is just right. Now keep the flame low to medium and take the paneer pieces using a spoon. If you take it using your fingers, the coating may go off. So take it with a spoon and make sure the paneer piece is completely coated with the batter.
Paneer 65 recipe
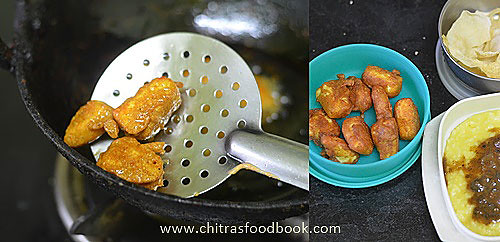
  • Drop the paneer pieces and cook in batches. Do not crowd the oil. After dropping the paneer pieces, let it cook for few seconds. Then try to move the pieces with a slotted ladle else they will stick to the bottom of kadai. Keep moving them in between. Cook for a minute in medium flame and turn the pieces upside down. Cook the other side for a minute and remove when the bubbles start to cease and paneer pieces turn golden brown.Do not wait for all the bubbles to stop.If you over fry, paneer will become chewy. So remove at the right time.
Paneer 65 recipe
  • Remove in a tissue paper. Enjoy serving & eating hot !!

Note
  • If you don’t have corn flour in hand, use 4 tbsp of rice flour alone.
  • You can replace curd with a tsp of lemon juice.
  • Marination gives a nice crispy exterior and soft interior. If you are in a hurry, you can make it immediately too. If you want to keep the marinated paneer for long time, its better to refrigerate the batter till you deep fry.
  • Do not over fry the paneer pieces, it would turn chewy & hard.
  • Its better to use low fat paneer cubes to avoid becoming too soft or crumbly.
  • Frying in low to medium heat is important. If the oil is too hot n smoky, paneer 65 would turn dark brown in color.
  • Use Kashmiri chilli powder to get this color. I have not used any coloring agent here.
Enjoy this crispy, yummy snack/starter recipe at home with tea/coffee/Juice!!
Paneer 65 dry

الخميس، 16 يوليو 2015

Vegetable Spring Rolls Recipe-Baked-Airfryer Recipes

Vegetable spring rolls baked

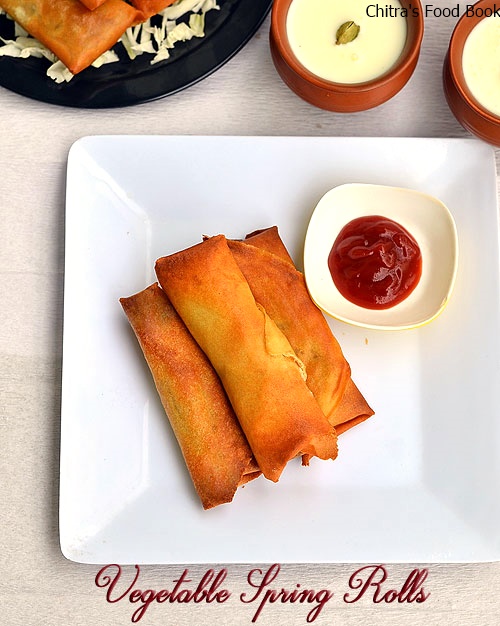
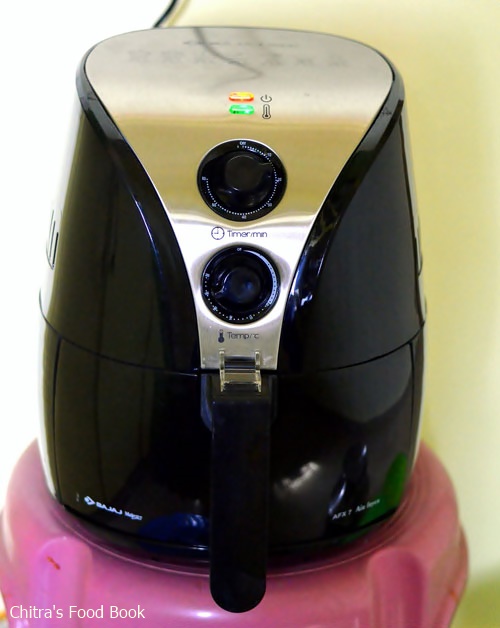
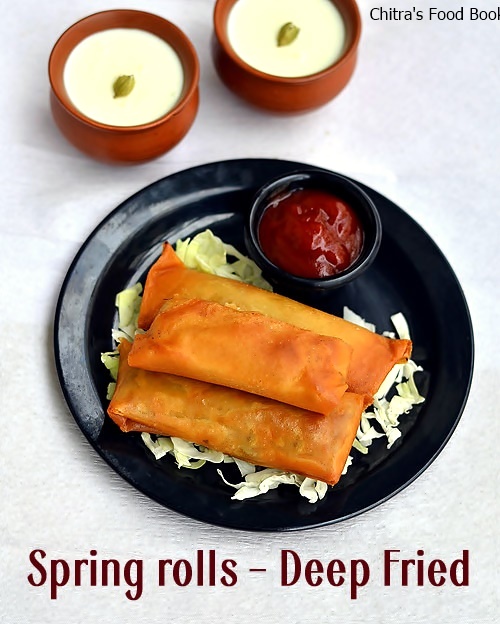
Recently I won a Bajaj air fryer in Mother’s recipe contest and shared the pictures on my Facebook & Google plus pages.Some of my readers told me to post some airfryer recipes.I tried french fries,Bitter gourd chips,Lady’s finger fries and bread rolls in my air fryer.Everything came out very well but I couldn’t post them here as everything vanished even before I clickTongue.Yesterday evening I tried vegetable Spring rolls using store bought spring roll pastry sheets for the first time.I baked a few in air fryer and deep fried the remaining to compare the results.I prepared a simple and easy vegetable stuffing using cabbage,carrot and capsicum.I made everything quickly and finished clicking before Raksha and Sendhil came homeHee hee.Believe me,I loved the air fryer version more than the deep fried ones.Air fried ones were very very crispy compared to the otherSurprise.Moreover its crispness was maintained for long time.Sendhil came 2 hours after I made the spring rolls.Even then they were crispy.I think you can make the same using convection oven too.


Air fryer

I was very happy that I served him a low calorie,oil less evening snack recipe.Friends,if you have any plans to buy an air fryer,just go for it without any hesitationPeace Sign.I am sure you won’t regret for the buy.These spring rolls can be served as a starter for small birthday parties and family functions.Everything can be prepared ( including rolling) well in advance and refrigerated.So here you go,my first recipe using air fryer – Crispy Veg Spring rolls !
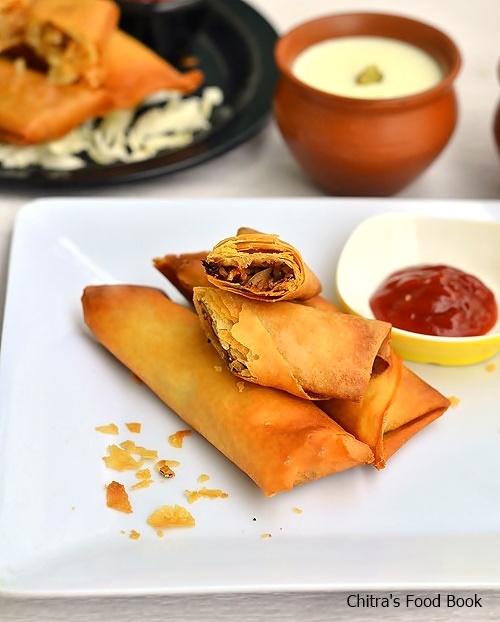
Vegetable spring rolls baked

Vegetable Spring Rolls Recipe


Vegetable Spring Roll Recipe Vegetable Spring rolls recipe - Yummy starter recipe!!
Cuisine: Indian
Category: Starter
Serves: 8 nos
Prep time: 15 Minutes
Cook time: 25 Minutes
Total time: 40 Minutes


INGREDIENTS
For Stuffing
  • Shredded cabbage - 2 cups
  • Carrot - 1 big
  • Big onions - 2 nos ( optional)
  • Capsicum - 1/2 no
  • Ginger - 2 inch piece
  • Garlic - 8 nos
  • Sugar – a big pinch
  • Pepper powder - 1 tbsp
  • Soya sauce - 1 tsp
  • Salt - as needed
  • Cooking oil - 2 tbsp
  • Spring onion – to garnish
For the sheet
  • Spring roll sheet – 10 nos
  • Corn flour or maida – 2 tbsp
  • Water – as needed
METHOD
  • Take out the spring roll sheet from the freezer and keep it outside for 1 hour.In the mean time,prepare the stuffing part.
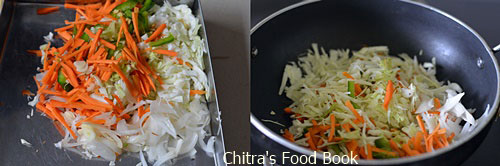
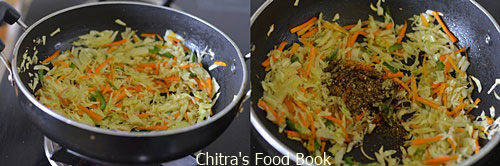
  • Grate the cabbage thinly.Chop the carrot and onion into thin strips.Slice the capsicum thinly.Chop the ginger and garlic very finely.Make sure everything should be of same size and thickness.Try to chop them as thin as possible to ensure quick cooking.
Vegetable spring rolls recipe

  • Heat oil in a kadai and saute all the chopped vegetables adding some salt and sugar. Sugar helps to maintain the color of veggies.Saute in high flame continuously for 2-3 minutes.Veggies would get cooked and reduce in quantity.Lastly add the soya sauce and pepper powder.Mix well and switch off the flame.Garnish with finely chopped spring onions if u have.Stuffing for the spring roll is ready.
Vegetable spring rolls recipe

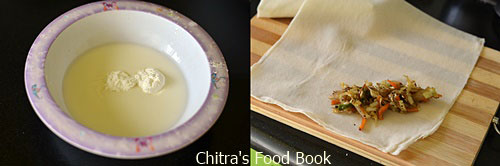
  • In a wide bowl, take the maida or corn flour and add some water to make a cream like paste.
  • Now the spring roll sheet must be ready to use.Take a sheet and cut into 4 if you want to make small sized spring rolls.Cover the remaining sheets with a wet cloth to avoid drying.If you want big spring rolls as in the picture,no need to cut the sheet.
Vegetable spring rolls recipe
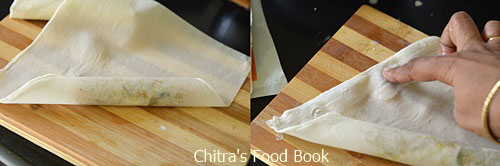
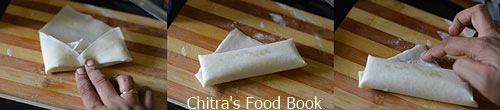
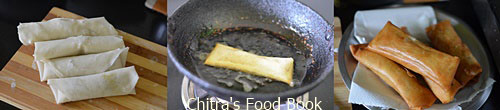
  • Place a tbsp of stuffing in one corner of the sheet.Roll it tight and fold the sides as shown in the picture.If you don’t roll it tight,spring roll becomes flat.
  • Apply the corn flour paste in the other corner and stick it.Repeat the same process with all the sheets and arrange them in a plate.
Vegetable spring rolls recipe
  • Heat oil to deep fry.Put the spring rolls and cook them in medium flame till they turn golden brown.Turn it whenever needed.Remove in a tissue paper and serve with tomato sauce. Enjoy !
Vegetable spring rolls recipe

    AIR FRYER VERSION
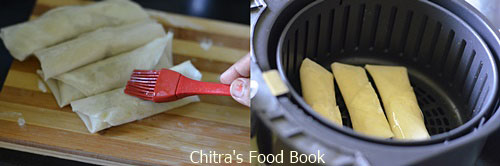
    Preheat the air fryer in 180c for 5 minutes.Roll the sheets as mentioned above and arrange them.Brush the spring rolls with some oil.Place the sheets in the Air fryer basket.
    Vegetable spring rolls recipe
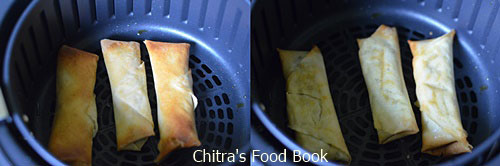
    Set the timing to 20 minutes and temperature to 180c.Bake it for 10 minutes.Remove the basket and flip the spring rolls to bake the other side.Bake for the remaining 10 minutes and check the color of spring rolls.If it remains white,bake it for another 2-3 minutes or more.Remove and serve hot ! It stays crispy for long time.So you can store the baked spring rolls in the air fryer basket till you serve.
Vegetable spring rolls recipe
Note
  • Do not keep less stuffing and roll it tight.Keep the stuffing according to the size of sheet.
  • To make the stuffing more spicy ,add some chilli sauce.
  • Jain readers can skip the onions,garlic and use more cabbage.There won’t be much difference in taste.

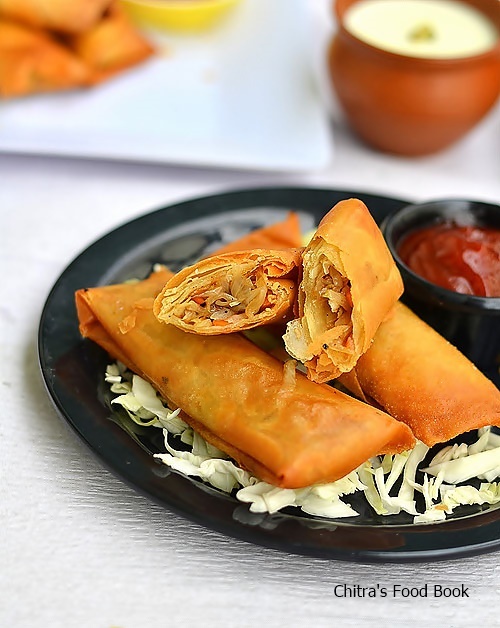
Pictures of deep fried vegetable spring rolls Happy


Try this kids friendly starter recipe this weekend and enjoy your tea time !