الأحد، 31 ديسمبر 2017

Guide Flash Firmware Di Smartfren Andromax-Z Yang Bootloop menggunakan SP Flash Tool.

Guide Flash Firmware Di Smartfren Andromax-Z Yang Bootloop menggunakan SP Flash Tool.


Flash Firmware Smartfren Andromax-Z. Kali ini guidebelajar akan berbagi cara mudah untuk melakukan flash atau install firmware baru step by step pada perangkat Smartfren Andromax-Z. Pada dasarnya melakukan proses Flashing pada perangkat android sama halnya anda melakukan install OS baru seperti di komputer. Sehingga dengan melakukan flash pada perangkat android, anda akan mendapatkan performa seperti perangakt yang masih baru. Alasan mengapa anda harus melakukan Flash pada perangkat android adalah terjadinya bootloop, atau bahkan terjadinya kegagalan saat menginstall Stock ROM Mod.

Guide yang guidebelajar share disini menggunakan flash tool yang sudah saya siapkan linknya dibawah, sehingga anda dapat langsung mendownload tool tersebut. Dengan guide yang tertata rapi memudahkan anda untuk memahami step by stepnya, dan juga dilengkapi gambar agar anda mudah untuk mengikuti guide yang guidebelajar berikan. 

Smartfren Andromax-Z adalah android smartphone yang memiliki layar LCD 5.5 inch, bekerja pada sistem operasi android 4.2.2 Jelly Bean dan menggunakan CPU prosesor quad-core 1.5 GHz MT6589E, GPU PowerVR SGX 544 sebagai mesin pacunya. Serta dikombinasikan dengan kekuatan kamera 8 MP pada kamera utama dan 2 MP pada kamera sekundernya.

Persiapan Flash Android Andromax-Z.

  1. Karena proses flash di Smartfren Andromax-Z akan menghapus semua data yang tersimpan di internal memory, disarankan anda untuk membackup semua data yang tersimpan di dalamnya,.
  2. Silahkan anda download beberapa file dan tool dibawah ini, untuk mendukung proses flash pada Smartfren Andromax-Z
    • SP Flash tool terbaru, disini 
    • http://www.mediafire.com/download/5f5h3owa7s7y6g2/SP-Flash-Tool-v5.1352.01.zip
    • Driver USB VCOM, disini 
    • https://drive.google.com/file/d/0BxbORw-fbNCVckpQa2xhMFBUZW8/view
    • Driver Auto Installer, Disini 
    • https://drive.google.com/file/d/0BxbORw-fbNCVaEhFTGJocHhpN0U/view
    • Andromax V ROM, disini 
    • http://www.mediafire.com/download/g2lt4aw1opmjjt2/STOCK_ROM_EG680_FlashTools.zip
  3. Langkah berikutnya adalah, meng-extract driver USB Vcom dan menginstallnya pda komputer anda.
  4. Kemudian, extract dan install file driver_auto_installer_v1.1236.00.rar dengan cara klik dua kali pada file install.bat.
  5. Lalu, extract SP Flash tool, kemudian anda jalankan program tersebut dengan cara membuka file flash_tool.exe.
  6. Kemudian extract Andromax_V_ROM.rar

Guide untuk Install Firmware Di Smartphone Smartfren Andromax-Z

  1. Power Off atau matikan Smartfren Andromax-Z ,
  2. Masukan USB cable / microUSB ke port USB- di komputer anda
  3. Hubungkan Smartfren Andromax-Z (dalam keadaan mati) ke komputer menggunakan USB cable.,
  4. Jika diatas tadi anda sudah berhasil install driver, maka komputer anda akan mengisntall driver untuk Smartfren Andromax-Z secara otomatis.
  5. Ini bekerja pada komputer berbasis windows 7.
follows this step to install the Firmware on the Smartfren Andromax-Z Smartphone ;
  1. Jalankan SP Flash Tool yang sudah di extract pada langkah sebelumnya.
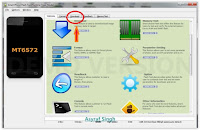
  2. Setelah program berjalan, kemudian anda click scatter loading.
    How To Flash Firmware Smartfren Andromax-Z
    How To Flash Firmware Smartfren Andromax-Z
  3. Arahkan ke folder dimana anda menyimpan file Rom atau firmware Andromax V ROM.
    • MTK6589_Andriod_scatter_emmc.txt 
    • How To Flash Firmware Smartfren Andromax-Z
      How To Flash Firmware Smartfren Andromax-Z
  4. Kemudian click  Firmware -> Upgrade.
    How To Flash Firmware Smartfren Andromax-Z
    How To Flash Firmware Smartfren Andromax-Z
  5. Proses flash akan berjalan otomatis, tanpa campur tangan kita.
  6. How To Flash Firmware Smartfren Andromax-Z
    How To Flash Firmware Smartfren Andromax-Z
  7. Tunggu proses sampai komplit, . dan anda akan melihat gambar lingkaran hijau seperti gamabr dibawah ini.
    How To Flash Firmware Smartfren Andromax-Z
    How To Flash Firmware Smartfren Andromax-Z
  8. Jika semua sudah selesai, Lepaskan USB cable dari PC ke Smartfren Andromax-Z.
  9. Pada saat pertama kali Smartfren Andromax-Z dinyalakan setelah proses flash, biasanya akan memakan waktu yang cukup lama dari biasanya.

Guide Flash Firmware Di Smartfren Andromax-V Yang Bootloop menggunakan SP Flash Tool.

Guide Flash Firmware Di Smartfren Andromax-V Yang Bootloop menggunakan SP Flash Tool.


Flash Firmware Smartfren Andromax-V. Kali ini guidebelajar akan berbagi cara mudah untuk melakukan flash atau install firmware baru step by step pada perangkat Smartfren Andromax-V. Pada dasarnya melakukan proses Flashing pada perangkat android sama halnya anda melakukan install OS baru seperti di komputer. Sehingga dengan melakukan flash pada perangkat android, anda akan mendapatkan performa seperti perangakt yang masih baru. Alasan mengapa anda harus melakukan Flash pada perangkat android adalah terjadinya bootloop, atau bahkan terjadinya kegagalan saat menginstall Stock ROM Mod.

Guide yang guidebelajar share disini menggunakan flash tool yang sudah saya siapkan linknya dibawah, sehingga anda dapat langsung mendownload tool tersebut. Dengan guide yang tertata rapi memudahkan anda untuk memahami step by stepnya, dan juga dilengkapi gambar agar anda mudah untuk mengikuti guide yang guidebelajar berikan. 

Smartfren Andromax-V adalah android smartphone yang memiliki layar LCD 5.0 inch, bekerja pada sistem operasi android 4.4.1 Kitkat, dan menggunakan CPU Snapdragon MSM8612 Quad-core 1.2GHz, GPU Adreno 302 sebagai mesin pacunya. Serta dikombinasikan dengan kekuatan kamera 8 MP pada kamera utama dan 2 MP pada kamera sekundernya.

Persiapan Flash Android Andromax-V.

  1. Karena proses flash di Smartfren Andromax-V akan menghapus semua data yang tersimpan di internal memory, disarankan anda untuk membackup semua data yang tersimpan di dalamnya,.
  2. Silahkan anda download beberapa file dan tool dibwah ini, untuk mendukung proses flash pada Smartfren Andromax-V
    • SP Flash tool terbaru, disini 
    • http://www.mediafire.com/download/5f5h3owa7s7y6g2/SP-Flash-Tool-v5.1352.01.zip
    • Driver USB VCOM, disini 
    • https://drive.google.com/file/d/0BxbORw-fbNCVckpQa2xhMFBUZW8/view
    • Driver Auto Installer, Disini 
    • https://drive.google.com/file/d/0BxbORw-fbNCVaEhFTGJocHhpN0U/view
    • Andromax V ROM, disini
    • http://kumpulbagi.com/yudeha/stock-firmware-android-66235/andromaxvrom,428552,gallery,1,1.rar
  3. Langkah berikutnya adalah, meng-extract driver USB Vcom dan menginstallnya pda komputer anda.
  4. Kemudian, extract dan install file driver_auto_installer_v1.1236.00.rar dengan cara klik dua kali pada file install.bat.
  5. Lalu, extract SP Flash tool, kemudian anda jalankan program tersebut dengan cara membuka file flash_tool.exe.
  6. Kemudian extract Andromax_V_ROM.rar

Guide untuk Install Firmware Di Smartphone Smartfren Andromax-V

  1. Power Off atau matikan Smartfren Andromax-V ,
  2. Masukan USB cable / microUSB ke port USB- di komputer anda
  3. Hubungkan Smartfren Andromax-V (dalam keadaan mati) ke komputer menggunakan USB cable.,
  4. Jika diatas tadi anda sudah berhasil install driver, maka komputer anda akan mengisntall driver untuk Smartfren Andromax-V secara otomatis.
  5. Ini bekerja pada komputer berbasis windows 7.
follows this step to install the Firmware on the Smartfren Andromax-V Smartphone ;
  1. Jalankan SP Flash Tool yang sudah di extract pada langkah sebelumnya.
  2. Setelah program berjalan, kemudian anda click scatter loading.
    How To Flash Firmware Smartfren Andromax-V
    How To Flash Firmware Smartfren Andromax-V
  3. Arahkan ke folder dimana anda menyimpan file Rom atau firmware Andromax V ROM.
    • MTK6589_Andriod_scatter_emmc.txt 
    • How To Flash Firmware Smartfren Andromax-V
      How To Flash Firmware Smartfren Andromax-V
  4. Kemudian click  Firmware -> Upgrade.
    How To Flash Firmware Smartfren Andromax-V
    How To Flash Firmware Smartfren Andromax-V
  5. Proses flash akan berjalan otomatis, tanpa campur tangan kita.
  6. How To Flash Firmware Smartfren Andromax-V
    How To Flash Firmware Smartfren Andromax-V
  7. Tunggu proses sampai komplit, . dan anda akan melihat gambar lingkaran hijau seperti gamabr dibawah ini.
    How To Flash Firmware Smartfren Andromax-V
    How To Flash Firmware Smartfren Andromax-V
  8. Jika semua sudah selesai, Lepaskan USB cable dari PC ke Smartfren Andromax-V.
  9. Pada saat pertama kali Smartfren Andromax-V dinyalakan setelah proses flash, biasanya akan memakan waktu yang cukup lama dari biasanya.

Guide Untuk Install CWM dan Root Android Smartfren Andromax C3.

Guide Untuk Install CWM dan Root Android Smartfren Andromax C3.

Install CWM dan Root Smartfren Andromax C3. guidebelajar kali ini akan berbagi tentang cara memasang CWM dan melakukan root pada Smartfren Andromax C3. Dengan melakukan pemasangan CWM dan root pada perangkat Andromax C3 ini, anda nantinya dapat melakukan recovery pada Andromax C3 jika mengalami bootloop atau bahkan mati total.

Melakukan root adalah proses yang memungkinkan pengguna smartphone, tablet dan perangkat lain yang menjalankan sistem operasi mobile Android untuk mencapai kontrol khusus (dikenal sebagai akses root) atas berbagai subsistem Android. Satu hal yang harus Anda tahu bahwa rooting pada Andromax C3 dapat menyebabkan hilangnya garansi. 

Pastinya jika anda sudah memiliki smartfren Andromax C3 ini sudah pasti mengetahui beberapa detail spesifikasi dari smartphone ini, Smartphone Android smartfren Andromax C3 ini dirilis pada tahun 2015, Smartfren Andromax C3 adalah perangkat android yang bekerja pada sistem android Android OS, v4.4 KitKat, dengan berbekal Snapdragon Dual-core 1.2 GHz, Cortex A7 sebagai CPU nya, dilengkapi juga dengan GPU Adreno 302, Ram sebesar 512 MB, dan lebar screnn 4,0inches, serta tertanam kamera utama dengan kemampuan pengambilan gambar sebesar 5 MP, ditambah juga dengan kamera sekundernya yang lumayan buat foto selfi yaitu sebesar 3 MP. Maka boleh dikatakan perangkat Smartfren Andromax C3 sudah cukup mampu untuk menopang kebutuhan telekomunikasi anda sehari-hari.

Persiapan Install CWM di Android Andromax C3.

Sekarang kita mulai guide untuk menginstall CWM pada android Andromax C3, untuk itu persiapkan dulu bahan-bahan berikut : 
  1. Donwload Tool untuk Root Andromax C3 disini
    https://drive.google.com/file/d/0B1wYZ5Lb11BVLUtaZWlVWWlOajA/view?usp=sharing
    Root Android Smartfren Andromax C3.
    Root Android Smartfren Andromax C3.
  2. Setelah anda selesai mendownload tool diatas, Extract tool tersebut di folder komputer anda, 
  3. Lalu masukkan file "SuperSU.zip" ke dalam "sdcard" letakan file tersebut di bagian luar saja, tidak usah di dalam folder.
  4. Original USB cable bawaan Andromax C3
  5. Komputer atau laptop berbasis sistem operasi windows
  6. Tenang dan sabar dalam memngikuti tutorial ini, dan resiko anda tanggung sendiri :)

Guide Install CWM di Android Andromax C3.

  1. Langkah pertama yang harus anda kerjakan adalah mengaktifkan usb debuging.
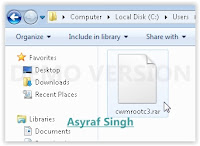
  2. Extract semua tool yang terdapat di file "cwmrootc3.rar"
    Root Android Smartfren Andromax C3.
    Root Android Smartfren Andromax C3.
  3. Kemudian letakan file adb-fastboot di drive C (C:\adb-fastboot).
  4. Buka folder "driver c3" kemudian install pada komputer anda. 
  5. Matikan atau power Off Andromax C3
  6. Kemudian hubungkan USB kabel dari komputer ke Andromax C3, 
  7. Selanjutnya tekan dan tahan tombol "Volume UP dan Volume Down" secara bersamaan.
  8. Kemudian buka folder adb-fasboot tadi, sambil menekan dan menahan tombol shift + klik kanan, pilih "open command window here" tips ini bekerja pada windows 7.
    open command window here
    open command window here
  9. Sehingga muncul jendela command prompt seperti gambar berikut ini.
    jendela command prompt
    jendela command prompt
  10. Pada jendela command prompt yang muncul, ketik "fastboot devices" lalu tekan enter (tanpa tanda petik)
  11. Setelah Andromax C3 terdeteksi, ketik "fastboot flash recovery cwm.img" lalu tekan enter (tanpa tanda petik)
  12. Tunggu proses berjalan beberapa saat, 
  13. Sekarang Andromax C3 anda sudah terpasang CWM,
  14. Anda dapat melepaskan USB kable dari komputer.

Guide Root Android Andromax C3.

Setelah anda berhasil memasang atau menginstall CWM pada Andromax C3, sekarang kita lanjutkan untuk melakukan root pada perangkat Andromax C3 ini. Adapun langkah-langkahnya adalah sebagai berikut ;
  1. Langkah pertama yang anda kerjakan adalah masuk Andromax C3 ke mode CWM, 
  2. Untuk masuk ke mode CWM caranya adalah sebagai berikut :
    • Power Off Andromax C3 anda
    • jika sudah dalam keadaan Off.
    • Tekan dan tahan "tombol power dan volume Up" secara bersamaan.
  3. Selanjutnya Pilih "install zip form sdcrad", 
  4. Lalu pilih file "SuperSU.zip"
  5. Untuk menavigasi menu yang ada di dalam layar, gunakan tombol volume Up dan volume down. Untuk eksekusi gunakan tombol Power
  6. Kemudian tunggu proses hingga selesai.
  7. Langkah terkahir adalah pilih reboot system
  8. Sekarang Andromax C3 anda sudah berhasil di root.

Guide Ampuh Flash Smartfren Andromax C3 Untuk Mengatasi Bootloop / Error / Mati total.

Guide Ampuh Flash Smartfren Andromax C3 Untuk Mengatasi Bootloop / Error / Mati Total.

Flash Smartfren Andromax C3 Untuk Mengatasi Bootloop. Smartphone Android smartfren ini dirilis pada tahun 2015, Smartfren Andromax C3 adalah perangkat android yang bekerja pada sistem android Android OS, v4.4 KitKat, dengan berbekal Snapdragon Dual-core 1.2 GHz, Cortex A7 sebagai CPU nya, dilengkapi juga dengan GPU Adreno 302, Ram sebesar 512 MB, dan lebar screnn 4,0inches, serta tertanam kamera utama dengan kemampuan pengambilan gambar sebesar 5 MP, ditambah juga dengan kamera sekundernya yang lumayan buat foto selfi yaitu sebesar 3 MP. Maka boleh dikatakan perangkat Smartfren Andromax C3 sudah cukup mampu untuk menopang kebutuhan telekomunikasi anda sehari-hari.
flash bootloop andromax C3

Namun, Jika terjadi masalah pada Smartfren Andromax C3 anda, misalkan terjadi bootloop atau mati total, anda harus melakukan flash atau isntall ulang pada pernagkat Smartfren Andromax tersebut. Proses flash atau flashing sama halnya dengan proses install ulang pada perangkat komputer atau PC, sehingga dengan melakukan flashing anda akan mendapatkan performa awal seperti halnya baru saja keluar dari pabrik. Jadi flash Smartfen Andromax C3 ini dapat anda lakukan jika Smartfen Andromax C3 sudah tidak merespon dan tidak bisa nyala, atau istilah lain adalah bootloop.

Flash Smartfen Andromax C3 [Guide]

Perhatian untuk anda yang hendak mengikuti guide ini, mohon diperhatikan beberapa hal berikut ini :
  • guidebelajar tidak bertanggung jawab terhadap kondisi smartphone Andromax C3 dalam mengikuti guide yang saya sampaikan ini.
  • guidebelajar menyarankan untuk membawa perangkat Andromax C3 anda ke service centre resmi atau ke ahli reparasi jika terjadi masalah seperti pada judul artikel ini.
  • Perhatikan juga bahwa semua data yang tersimpan di internal memory akan terhapus semua, untuk itu saya sarankan anda membackup semua data penting yang anda miliki.
  • Untuk mendownload semua file yang dibutuhkan dalam proses flash, sebaiknya anda menggunakan komputer atau laptop, sehingga dapat mengurangi terjadinya file yang korup saat proses download dari internet.
  • Sediakan ruang kosong minimal 3 GB pada SD Card yang anda miliki.

Guide Metode Pertama.

Ok, jika anda sudah memahami semua resiko yang terjadi pada proses flash pada Andromax C3,  langsung saja ikuti tutorialnya berikut ini.
  1. Download Sdimage untuk Andromax C3 AD6B1H disini 
  2. http://www.mediafire.com/download/dku375mjvv363pd/sdimage_Andromax_C3.rar

  3. Setelah anda selesai mendownload file diatas, sekarang extract file tersebut, lalu pindahkan folder sdimage ke SD card yang anda miliki. 
  4. Dalam memindah folder sdimage jangan sampai anda masukan ke folder lain, cukup taruh folder tersebut di luar saja.
  5. Setelah beres, kemudian lanjutkan untuk memasang SD Card ke dalam perangkat Andromax C3 
  6. Kemudian nyalakan Andromax C3 anda,
  7. Setelah Andromax C3  menyala dan pada posisi siap digunakan, anda akan menemukan pesan read more dan ikon kotak yang berwarna biru. anda dapat klik atau tap pada tulisan tersebut.
  8. Proses flash akan dimulai, dan berlangsung selama 15 sampai 20 menitan.
  9. Jika anda melihat pesan update success, maka proses flash sudah selesai.
  10. Anda dapat mencabut baterai, kemudian lepaskan SD Card.
  11. Dalam keadaan Andromax C3 tanpa SD Card, sekarang hidupkan kembali perangakt tersebut.
  12. Pada saat pertama menghidupkan, biasanya akan memkan waktu yang agak lama dari biasanya.
  13. Jika anda bermaksud untuk memasang kembali SD Card ke dalam Andromax C3, maka anda harus menghapus folder sdimage terlebih dahulu.

Guide Metode Kedua.

Jika cara pertama diatas tidak dapat mengatasi masalah yang terjadi pada perangakt Andromax C3 anda, silahkan anda mengikuti guide yang ke dua ini, tetapi sebelum anda melanjutkan untuk menyimak guide yang ke dua ini, terdapat beberapa syarat yang harus anda penuhi pada perangkat Andromax C3.
  • Perangkat Andromax C3 harus sudah terinstal CWM
  • Perangakt Andromax C3 harus sudah dalam keadaan root
  • Guide untuk install CWM dan Root Andromax C3, Lihat disini 
  • http://guidebelajar.blogspot.com/2015/10/guide-install-cwm-dan-root-andromax-c3.html
Kalau semua syarat sudah terpenuhi, silahkan ikuti guide berikut ini :
  1. Langkah pertama, silahkan anda download file STOCK ROM Andromax C3 asli dari pabrik pembuat. Disini.
  2. https://docs.google.com/uc?export=download&id=0B6ADPD6N9AvYakVVOWcyeWN1MHM
  3. Sebaiknya jangan anda Ekstrak file stock tersebut.
  4. Silahkan anda pindah atau copy ke SDcard (External memory) dan Letakan pada bagian luar saja jangan di dalam Folder
  5. Contoh di : stroage/sdcard1/ini adalah lokasi Stock Rom anda)
  6. Matikan perangkat Andromax C3 dan masuk ke Mode CWM, 
  7. Cara masuk ke mode CWM adalah dengan cara menekan dan menahan tombol "Power dan Volume Up (+)" secara bersamaan.
  8. Jika Andromax C3 sudah masuk Mode CWM Pilih :
    • "Wipe data, cache, dan dalvik cache" 
    • Pilih "Yes"
    • Untuk menavigasi menu naik dan turun silahkan gunakan tombol Volume Atas/Volume Bawah, dan untuk eksekusi pilihan Yes anda dapat menekan tombol Power.
  9. Kemudian Pilih Instal zip dan choose zip from /stroage/sdcard0 
  10. Dimana sdcard0 adalah memory external anda
  11. Lalu pilih Stock ROM Andromax C3 dan pilih yes.
  12. Tunggu proses flash berjalan saat sampai Selesai,
  13. Jika proses flash sudah selesai anda bisa Go back dan Pilih "Reboot System Now".
  14. Proses boot setelah flash akan memakan waktu yang lumayan lama, jadi bersabarlah. Tunggu sampai Andromax C3 anda siap untuk digunakan dan Andromax C3 anda bekerja seperti baru.
  15. Selesai.

    السبت، 30 ديسمبر 2017

    Guide To Flash or Install Stock Rom On Bricked / Bootloop Micromax Canvas A1 AQ4502.

    Guide To Flash or Install Stock Rom On Bricked / Bootloop Micromax Canvas A1 AQ4502.


    Install Stock Rom Micromax Canvas A1 AQ4502. (This guide just for Micromax Canvas A1 AQ4502) Guidebelajar on this guide will explain to you how to flashing android device on Micromax Canvas A1 AQ4502 with easy and simple stepMicromax Canvas A1 AQ4502 comes with IPS LCD capacitive touchscreen 16 M colors, 4,5 Inches wides, Android OS, v5.1 (Lollipop) and supported with Mediatek MT6582 chipset, Quad-core 1 GHz CPU Cortex A7, Mali 400MP2 GPU, combined with 1 GB of RAM as their engine. And you can enjoy exciting 5 MP on main camera, and 2 MP on secondary camera. And this devices released 2015, June.
    Flash Bricked / Bootloop Micromax Canvas A1 AQ4502.
    Flash Bricked / Bootloop Micromax Canvas A1 AQ4502.
    Flashing in android is the same way like fresh install on the windows PC, So by perform a flash on Android you will give a new performance like a new phone. One reason that you should perform a flash your android is because your android get bootloop or when you failed to install Stock ROM Mod.

    Do you know what is bootloop, Ok.. now I will explain to you what si bootloop. Some people say that bootloop is a problem that occured on an android system which the android system could not start up going to the homescreen menu. And it's happened is automatically return to the initial state on the first time when you turn on the Micromax Canvas A1 AQ4502And the device will stop to display on the smartphone logo. 

    Now, follow the isntruction list bellow, do it with your own risk.

    Prepare Flash Micromax Canvas A1 AQ4502.

    1. A computer with windows OS,
    2. Original USB Cable Micromax Canvas A1 AQ4502
    3. MTK Driver_Auto_Installer_v5.1453.03, Here 
    4. http://click.xda-developers.com/api/click?format=go&jsonp=vglnk_144523601869011&key=f0a7f91912ae2b52e0700f73990eb321&libId=ifxjdny501000n4o000DAbgi8x5bo&loc=http%3A%2F%2Fforum.xda-developers.com%2Fgeneral%2Fhelp%2Fmicromax-canvas-spark-q380-stock-rom-t3131362&v=1&out=http%3A%2F%2Fwww.needrom.com%2Fwp-content%2Fuploads%2F2015%2F04%2FDriver_Auto_Installer_v5.1453.03.rar&ref=https%3A%2F%2Fwww.google.com%2F&title=Micromax%20canvas%20spark%20q380%20stock%20rom%20installation%20-%20XDA%20Forums&txt=MTK%20Driver_Auto_Installer_v5.1453.03
    5. SPFlash Tool for windows Here (you must be a registered user)
    6. http://www.needrom.com/wp-content/uploads/2015/06/SP_Flash_Tool_exe_Windows_v5.1516.00.rar
    7. Stock Rom Lollipop For Micromax Canvas A1 AQ4502. Here 
    8. http://firmwarefile.com/micromax-aq4502
      • To ensure what is firmware used by your device now, you can check by go to Setting ->About -> Software Information ->Build Number.

      Flashing Micromax Canvas A1 AQ4502.

      1. At the first time,download the linked file from above. 
      2. If your Micromax Canvas A1 AQ4502 in normal condition, Power Off now
      3. But, If your device in bootloop state, you can try reboot to stock recovery by pressing both volume up and power button, then press power down option to turn off your phone.
      4. Remove battery from your phone.
      5. Extract and install MTK Driver_Auto_Installer_v5.1453.03.
      6. Then extract SPFlash Tool for windows, and run as administrator on flashtool.exe
      7. Once SP Flashtool is launched, click on the download tab.
        sp flash tool - download tab
        sp flash tool - download tab
      8. Then click scatter load. find Micromax Canvas A1 AQ4502 scatter storage location earlier. (the scatter file can be found by extracting 'Micromax Canvas A1 AQ4502 stock rom lollipop.rar')
      9. In the Scatter Loading field go to the folder where you extracted the Flash Tool and select scatter.txt 
        Install Stock Rom Micromax Canvas A1 AQ4502.
        Install Stock Rom Micromax Canvas A1 AQ4502.
      10. Then you click options ->Download -> then check DA DL all with checksum.
        Install Stock Rom Micromax Canvas A1 AQ4502.
        Install Stock Rom Micromax Canvas A1 AQ4502.
      11. On download tab, ensure you have selected download only option from dropdown menu, see below picture.
        Install Stock Rom Micromax Canvas A1 AQ4502.
        Install Stock Rom Micromax Canvas A1 AQ4502.
      12. Then, click download button on top right and connect your Micromax Canvas A1 AQ4502 with USB cable in phone switch off position.
        Install Stock Rom Micromax Canvas A1 AQ4502.
        Install Stock Rom Micromax Canvas A1 AQ4502.
      13. Process will run automatic, and you can see the red stripe showing download percentage at bellow
      14. When your process complete, you can see a green circle with tick mark. 
        Install Stock Rom Micromax Canvas A1 AQ4502.
        Install Stock Rom Micromax Canvas A1 AQ4502.
      15. Now disconnect your Micromax Canvas A1 AQ4502
      16. Install you battery again. 
      17. Then, start your Micromax Canvas A1 AQ4502. (remember, on the first booting it will take a long time to start)
      18. When everything complete you must go to settings and do a factory data reset, this will make your phone go faster and becomes normal.
      19. Success. enjoy

      Guide To Flash or Install Stock Rom On Bricked / Bootloop Micromax Q391 Canvas Doodle 4.

      Guide To Flash or Install Stock Rom On Bricked / Bootloop Micromax Q391 Canvas Doodle 4.


      Install Stock Rom Micromax Q391 Canvas Doodle 4. (This guide just for Micromax Q391 Canvas Doodle 4) Guidebelajar on this guide will explain to you how to flashing android device on Micromax Q391 Canvas Doodle 4 with easy and simple stepMicromax Q391 Canvas Doodle 4 comes with IPS LCD capacitive touchscreen 16 M colors, 6,0 Inches wides, Android OS, v5.0 (Lollipop) and supported with Mediatek MT6582 chipset, Quad-core 1,3 GHz CPU, Mali 400MP2 GPU, combined with 1 GB of RAM as their engine. And you can enjoy exciting 8 MP on main camera, and 2 MP on secondary camera. And this devices released 2015, May.
      Flash Bricked / Bootloop Micromax Q391 Canvas Doodle 4.
      Flash Bricked / Bootloop Micromax Q391 Canvas Doodle 4.
      Flashing in android is the same way like fresh install on the windows PC, So by perform a flash on Android you will give a new performance like a new phone. One reason that you should perform a flash your android is because your android get bootloop or when you failed to install Stock ROM Mod.

      Do you know what is bootloop, Ok.. now I will explain to you what si bootloop. Some people say that bootloop is a problem that occured on an android system which the android system could not start up going to the homescreen menu. And it's happened is automatically return to the initial state on the first time when you turn on the Micromax Q391 Canvas Doodle 4And the device will stop to display on the smartphone logo. 

      Now, follow the isntruction list bellow, do it with your own risk.

      Prepare Flash Micromax Q391 Canvas Doodle 4.

      1. A computer with windows OS,
      2. Original USB Cable Micromax Q391 Canvas Doodle 4
      3. MTK Driver_Auto_Installer_v5.1453.03, Here 
      4. http://click.xda-developers.com/api/click?format=go&jsonp=vglnk_144523601869011&key=f0a7f91912ae2b52e0700f73990eb321&libId=ifxjdny501000n4o000DAbgi8x5bo&loc=http%3A%2F%2Fforum.xda-developers.com%2Fgeneral%2Fhelp%2Fmicromax-canvas-spark-q380-stock-rom-t3131362&v=1&out=http%3A%2F%2Fwww.needrom.com%2Fwp-content%2Fuploads%2F2015%2F04%2FDriver_Auto_Installer_v5.1453.03.rar&ref=https%3A%2F%2Fwww.google.com%2F&title=Micromax%20canvas%20spark%20q380%20stock%20rom%20installation%20-%20XDA%20Forums&txt=MTK%20Driver_Auto_Installer_v5.1453.03
      5. SPFlash Tool for windows Here (you must be a registered user)
      6. http://www.needrom.com/wp-content/uploads/2015/06/SP_Flash_Tool_exe_Windows_v5.1516.00.rar
      7. Stock Rom Lollipop For Micromax Q391 Canvas Doodle 4. Here 
      8. http://firmwarefile.com/micromax-q391
        • To ensure what is firmware used by your device now, you can check by go to Setting ->About -> Software Information ->Build Number.

        Flashing Micromax Q391 Canvas Doodle 4.

        1. At the first time,download the linked file from above. 
        2. If your Micromax Q391 Canvas Doodle 4 in normal condition, Power Off now
        3. But, If your device in bootloop state, you can try reboot to stock recovery by pressing both volume up and power button, then press power down option to turn off your phone.
        4. Remove battery from your phone.
        5. Extract and install MTK Driver_Auto_Installer_v5.1453.03.
        6. Then extract SPFlash Tool for windows, and run as administrator on flashtool.exe
        7. Once SP Flashtool is launched, click on the download tab.
          sp flash tool - download tab
          sp flash tool - download tab
        8. Then click scatter load. find Micromax Q391 Canvas Doodle 4 scatter storage location earlier. (the scatter file can be found by extracting 'Micromax Q391 Canvas Doodle 4 stock rom lollipop.rar')
        9. In the Scatter Loading field go to the folder where you extracted the Flash Tool and select scatter.txt 
          Install Stock Rom Micromax Q391 Canvas Doodle 4.
          Install Stock Rom Micromax Q391 Canvas Doodle 4.
        10. Then you click options ->Download -> then check DA DL all with checksum.
          Install Stock Rom Micromax Q391 Canvas Doodle 4.
          Install Stock Rom Micromax Q391 Canvas Doodle 4.
        11. On download tab, ensure you have selected download only option from dropdown menu, see below picture.
          Install Stock Rom Micromax Q391 Canvas Doodle 4.
          Install Stock Rom Micromax Q391 Canvas Doodle 4.
        12. Then, click download button on top right and connect your Micromax Q391 Canvas Doodle 4 with USB cable in phone switch off position.
          Install Stock Rom Micromax Q391 Canvas Doodle 4.
          Install Stock Rom Micromax Q391 Canvas Doodle 4.
        13. Process will run automatic, and you can see the red stripe showing download percentage at bellow
        14. When your process complete, you can see a green circle with tick mark. 
          Install Stock Rom Micromax Q391 Canvas Doodle 4.
          Install Stock Rom Micromax Q391 Canvas Doodle 4.
        15. Now disconnect your Micromax Q391 Canvas Doodle 4
        16. Install you battery again. 
        17. Then, start your Micromax Q391 Canvas Doodle 4. (remember, on the first booting it will take a long time to start)
        18. When everything complete you must go to settings and do a factory data reset, this will make your phone go faster and becomes normal.
        19. Success. enjoy

        Guide To Flash Android Smartphone Run On Spreadtrum Chipset Using .Pac File And Spreadtrum Upgrade Tool.

        Guide To Flash Android Smartphone Run On Spreadtrum Chipset Using .Pac File And Spreadtrum Upgrade Tool.

        Flash Android On Spreadtrum Chipset Using .Pac File. If you have any android smartphone run on Spreadtrum Chipset, you must follow this guide to install or flash your android system. To start flash android system you need .Pac file, which you can download it from the official vendor site. This method is different than using flash tool. We know that flash android system using flash tool is used for the android system that run on Mediatek chipset.

        On this guide, guidebelajar will show to you how to flash a new firmware on android system that run on spreadtrum chipset, and this firmware is called .pac file. And use computer based windows operating system. Now read and follow this guide carefully

        Guide To Flash Android On Spreadtrum Chipset Using .Pac File.

        This is step to flash Android Smartphone Run On Spreadtrum Chipset Using .Pac File,
        1. You need a computer with windows OS
        2. Turn Off your android device.
        3. Download .Pac file (this file is like a firmware) from officila vendor website.
        4. Download appropriate Spreadtrum USB Driver for your android devices.(If needed), here
        5. http://www.mediafire.com/download/183aujf9a9atp2d/Spreadtrum_Drivers.zip
        6. After you finish download spreadtrum USB driver, now install it on your computer. (you can skip this step if this driver already installed)
        7. Download latest SPD Upgrade Tool sometimes this tool called with Spreadtrum Flash Tool. (Spreadtrum Upgrade tool R.2.9.2015) Here
        8. https://drive.google.com/file/d/0B1wYZ5Lb11BVSVZRREJfdFkyWk0/view?usp=sharing
        9. When download is done. extract this tool on specified folder on your computer.
        10. After this tool extracted, you will able to see picture like shown below.
          Spreadtrum upgrade tool
          Spreadtrum upgrade tool
        11. Then, Double click on upgradedownload.exe to open Spreadtrum Flash Tool.
          Spreadtrum upgrade tool
          Spreadtrum upgrade tool
        12. When this tool is launched, now connect your android smartphone to your computer .
          Spreadtrum upgrade tool
          Spreadtrum upgrade tool
        13. Once your android is successfully connected to your computer, Now click load packed button to add .Pac file (this is firmware or stock Rom that comes as .pac).
          Spreadtrum upgrade tool
          Spreadtrum upgrade tool
        14. When you have successfully added the .Pac file in Spreadtrum Upgrade Tool, click on the Start Downloading button to begin the flashing.
          Spreadtrum upgrade tool
          Spreadtrum upgrade tool
        15. During the flashing process your device will restart automatically.
          Spreadtrum upgrade tool
          Spreadtrum upgrade tool
        16. Once flashing your android is completed, you will be able to see the Green Passed Message in Spreadtrum Upgrade Tool.
          Spreadtrum upgrade tool
          Spreadtrum upgrade tool
        17. Now you have successfully flashed your Android Device using Spreadtrum Upgrade Tool.
        18. To check your new firmware, you can go to settings -> About Phone ->Check Firmware

        الجمعة، 29 ديسمبر 2017

        Guide How To Flash Or Install Firmware Lenovo VIBE SHOT Z90-7 With Original Chinese ROM.

        Guide How To Flash Or Install Firmware Lenovo VIBE SHOT Z90-7 With Original Chinese ROM.


        Flash Or Install Firmware Lenovo VIBE SHOT Z90-7(This guide just for Lenovo VIBE SHOT) This devices also known as with z90-7 and now Guidebelajar on this guide will explain to you how to flashing android device on Lenovo VIBE SHOT Z90-7 with easy and simple stepFlashing in android is the same way like fresh install on the windows PC, So by perform a flash on Android you will give a new performance like a new phone. One reason that you should perform a flash your android is because your android get bootloop or when you failed to install Stock ROM Mod.

        I will explain to you step by step guide on Install firmware on Lenovo VIBE SHOT Z90-7 smartphone using the two methods on new original firmware or a custom firmware using SP Flash Tool installation program from the Custom Recovery or TWRP Recovery. Perform Flash on Android devices have nearly the same risk with the hard reset which will erase all data and files and applications stored in the internal memory, to avoid this before you perform flash, you must backup all data store in it. Flash on Android is like reinstall on Windows or Linux computer. here we use ROM or firmware, both the original or customized, and people call these two terms is a custom rom and stock rom.

        Lenovo VIBE SHOT Z90-7 Android is a smartphone with a 5,0-inch PS LCD capacitive touchscreen, works on Android OS, v5.0.2 (Lollipop) system and powered Quad-core 1.7 GHz Cortex-A53 & quad-core 1.0 GHz Cortex-A53 CPU, Qualcomm MSM8939 Snapdragon 615 chipset and Mali GPU-Adreno 405 as their engine, and combined with 3 GB RAM, and 16 MP on main camera, and 8 MP on secondary camera.

        How to Install Firmware On Smartphone Lenovo VIBE SHOT Z90-7

        follows this step to install the Firmware on the Lenovo VIBE SHOT Z90-7 Smartphone ;
        1. Before you flash your device you must release SD Card form your Lenovo VIBE SHOT Z90-7, otherwise your device will black shock.
        2. Download all tool for flashing Lenovo VIBE SHOT Z90-7, this tool are :
          • Miflash
          • firmware version 20150619_VIBEUI_V2.5_1525_5.404.1_ST_Z90-7-Root_Phoenix
          • Google (GAPPS) file 20150628_GAPPS.zip
          • You can download All package of this tool at Here  
        3. You must disable signature on your Windows PC, for more instruction you can visit this :
          • For windows 7 (http://www.sabrent.com/support/knowledgebase.php?article=14)
          • For Windows 8 (http://www.howtogeek.com/167723/how-to-disable-driver-signature-verification-on-64-bit-windows-8.1-so-that-you-can-install-unsigned-drivers/)
        4. After you download all program package, you must install Miflash program first.
        5. Now, you can start to flash or install a new ROM on Lenovo VIBE SHOT Z90-7. follow this guide :
          • your Lenovo VIBE SHOT Z90-7 must in Turn Off state.
          • Press and hold Volume UP, while you plug USB Cable to the computer. (Your device will vibrate once)
          • Right Click My computer on Start Menu > Then select Properties, 
            My computer properties - flash lenovo vibe shot z90-7
            My computer properties - flash lenovo vibe shot z90-7
          • On new window you can click device manager.
            Device manager - flash lenovo vibe shot z90-7
            Device manager - flash lenovo vibe shot z90-7
          • And you must see :  Qualcomm HS-USB QDLoader 9008.
          • Now run Miflash, and you should see appropriate COM port 
          • And you can browse the folder to find where you save your firmware.
          • Then click flash, and just wait.
          • When done, disconnect USB cable from computer, and press POWER button for about 10s (and phone will vibrate).
          • Lenovo VIBE SHOT Z90-7 will restart and load new system. It takes some time - and if it not responds, please press POWER again for 10s, it will reboot again and it should proceed

        GAPPS Installation.

        follow this instruction guide for GAPPS installation : thank's a lot to http://forum.xda-developers.com/android/general/lenovo-z90-7-vibe-shot-root-gapps-t3145793
        1. You must nstall file manager with root accesss (ROOT MANAGER or ES FILE MANAGER) manually from .apk
        2. Then copy to appriopriate catalougeus (root/system) files from downloaded file it's look like 20150628_GAPPS.ZIP
        3. Change files and directories permissions (rwxr-xr-x for directories, rw-r-r-- for files)
        4. Then Go to 
          • root/system/priv-app/GoogleServicesFramework 
        5. And manually install GoogleServicesFramework.apk
        6. Finally reboot your  Lenovo VIBE SHOT Z90-7.

          How To Flash / Install Firmware Lenovo A5000.

          How To Flash / Install Firmware Lenovo A5000.


          Flash / Install Firmware Lenovo A5000. (This guide just for Lenovo A5000Guidebelajar on this guide will explain to you how to flashing android device on Lenovo A5000 with easy and simple stepLenovo A5000 is the smartphone with 5,0 Inchi wide LCD, work on Android OS, v4.4.2 (KitKat),  with Spreadtrum Chipset, supported with Quad-core 1.3 GHz Cortex-A7 CPU and Mali 400 GPU, combined with 1 GB of RAM and 8 MP of  Main camera and 2 MP on secondary camera.


          Do you know what is bootloop, Ok.. now I will explain to you what is bootloop. Some people say that bootloop is a problem that occured on an android system which the android system could not start up going to the homescreen menu. And it's happened is automatically return to the initial state on the first time when you turn on the Lenovo A5000And the device will stop to display on the smartphone logo.

          Now, follow the instruction list bellow, do it with your own risk.

          Prepare Flash Lenovo A5000.

          1. Firmware Lenovo A5000: Here 
          2. Latest Version of flash tool : Here 
          3. VCOM Driver : Here
          4. To ensure what is firmware used by your device, you can check by go to Setting ->About -> Software Information ->Build Number.

          Flashing Lenovo A5000.

          1. At the first time, please Install driver for Lenovo A5000 that already downloaded before. 
          2. Extract the other downloaded file (firmware and flash tool) save in anywhere on your hard drive.
          3. Then remove your back case, battery, sim card and SD Card  if installed
          4. Next, Connect your Lenovo A5000 to Computer, while holding the power button and volume up. The PC will detect the new hardware, just ignore it. 
          5. Then, release USB data cable from the PC.
          6. Open SP flash tool software and click scatter load. find Lenovo A5000 scatter storage location earlier.
          7. In the Scatter Loading field go to the folder where you extracted the Flash Tool and select MT6752_Android_scatter.txt 
            Flash / Install Firmware Lenovo A5000.
            Flash / Install Firmware Lenovo A5000.
          8. Then you click options ->Download -> then check DA DL all with checksum.
            Flash / Install Firmware Lenovo A5000.
            Flash / Install Firmware Lenovo A5000.
          9. On download tab, ensure you have selected download only option from dropdown menu, see below picture.
            Flash / Install Firmware Lenovo A5000.
            Flash / Install Firmware Lenovo A5000.
          10. Then, click download button on top right and connect your Lenovo A5000 with USB cable in phone switch off position.
          11. Flash / Install Firmware Lenovo A5000.
            Flash / Install Firmware Lenovo A5000.
          12. Process will run automatic, and you can see the red stripe showing download percentage at bellow
          13. When your process complete, you can see a green circle with tick mark. 
            Flash / Install Firmware Lenovo A5000.
            Flash / Install Firmware Lenovo A5000.
          14. Now disconnect your Lenovo A5000
          15. Intall you battery again. 
          16. Then, start your Lenovo A5000. (remember, on the first booting it will take a long time to start)
          17. Success. enjoy

          18. Download Firmware Lenovo A5000. Here


          الخميس، 28 ديسمبر 2017

          Guide To Flash or Install Stock Rom On Bricked / Bootloop Micromax Canvas Spark Q380.

          Guide To Flash or Install Stock Rom On Bricked / Bootloop Micromax Canvas Spark Q380.


          Install Stock Rom Micromax Canvas Spark Q380. (This guide just for Micromax Canvas Spark Q380) Guidebelajar on this guide will explain to you how to flashing android device on Micromax Canvas Spark Q380 with easy and simple stepMicromax Canvas Spark Q380 comes with IPS LCD capacitive touchscreen 16 M colors, 4,7 Inches wides, Android OS, v5.0 (Lollipop) and supported with Mediatek MT6582 chipset, Quad-core 1 GHz CPU, Mali 400 GPU, combined with 1 GB of RAM as their engine. And you can enjoy exciting 8 MP on main camera, and 2 MP on secondary camera. And this devices released 2015, April.
          Flash Bricked / Bootloop Micromax Canvas Spark Q380.
          Flash Bricked / Bootloop Micromax Canvas Spark Q380.
          Flashing in android is the same way like fresh install on the windows PC, So by perform a flash on Android you will give a new performance like a new phone. One reason that you should perform a flash your android is because your android get bootloop or when you failed to install Stock ROM Mod.

          Do you know what is bootloop, Ok.. now I will explain to you what si bootloop. Some people say that bootloop is a problem that occured on an android system which the android system could not start up going to the homescreen menu. And it's happened is automatically return to the initial state on the first time when you turn on the Micromax Canvas Spark Q380And the device will stop to display on the smartphone logo. 

          Now, follow the isntruction list bellow, do it with your own risk.

          Prepare Flash Micromax Canvas Spark Q380.

          1. A computer with windows OS,
          2. Original USB Cable Micromax Canvas Spark Q380
          3. MTK Driver_Auto_Installer_v5.1453.03, Here 
          4. http://click.xda-developers.com/api/click?format=go&jsonp=vglnk_144523601869011&key=f0a7f91912ae2b52e0700f73990eb321&libId=ifxjdny501000n4o000DAbgi8x5bo&loc=http%3A%2F%2Fforum.xda-developers.com%2Fgeneral%2Fhelp%2Fmicromax-canvas-spark-q380-stock-rom-t3131362&v=1&out=http%3A%2F%2Fwww.needrom.com%2Fwp-content%2Fuploads%2F2015%2F04%2FDriver_Auto_Installer_v5.1453.03.rar&ref=https%3A%2F%2Fwww.google.com%2F&title=Micromax%20canvas%20spark%20q380%20stock%20rom%20installation%20-%20XDA%20Forums&txt=MTK%20Driver_Auto_Installer_v5.1453.03
          5. SPFlash Tool for windows Here (you must be a registered user)
          6. http://www.needrom.com/wp-content/uploads/2015/06/SP_Flash_Tool_exe_Windows_v5.1516.00.rar
          7. Stock Rom Lollipop For Micromax Canvas Spark Q380. Here 
          8. http://firmwarefile.com/micromax-q380
            • To ensure what is firmware used by your device now, you can check by go to Setting ->About -> Software Information ->Build Number.

            Flashing Micromax Canvas Spark Q380.

            1. At the first time,download the linked file from above. 
            2. If your Micromax Canvas Spark Q380 in normal condition, Power Off now
            3. But, If your device in bootloop state, you can try reboot to stock recovery by pressing both volume up and power button, then press power down option to turn off your phone.
            4. Remove battery from your phone.
            5. Extract and install MTK Driver_Auto_Installer_v5.1453.03.
            6. Then extract SPFlash Tool for windows, and run as administrator on flashtool.exe
            7. Once SP Flashtool is launched, click on the download tab.
              sp flash tool - download tab
              sp flash tool - download tab
            8. Then click scatter load. find Micromax Canvas Spark Q380 scatter storage location earlier. (the scatter file can be found by extracting 'Micromax Canvas Spark Q380 stock rom lollipop.rar')
            9. In the Scatter Loading field go to the folder where you extracted the Flash Tool and select scatter.txt 
              Install Stock Rom Micromax Canvas Spark Q380.
              Install Stock Rom Micromax Canvas Spark Q380.
            10. Then you click options ->Download -> then check DA DL all with checksum.
              Install Stock Rom Micromax Canvas Spark Q380.
              Install Stock Rom Micromax Canvas Spark Q380.
            11. On download tab, ensure you have selected download only option from dropdown menu, see below picture.
              Install Stock Rom Micromax Canvas Spark Q380.
              Install Stock Rom Micromax Canvas Spark Q380.
            12. Then, click download button on top right and connect your Micromax Canvas Spark Q380 with USB cable in phone switch off position.
              Install Stock Rom Micromax Canvas Spark Q380.
              Install Stock Rom Micromax Canvas Spark Q380.
            13. Process will run automatic, and you can see the red stripe showing download percentage at bellow
            14. When your process complete, you can see a green circle with tick mark. 
              Install Stock Rom Micromax Canvas Spark Q380.
              Install Stock Rom Micromax Canvas Spark Q380.
            15. Now disconnect your Micromax Canvas Spark Q380
            16. Install you battery again. 
            17. Then, start your Micromax Canvas Spark Q380. (remember, on the first booting it will take a long time to start)
            18. When everything complete you must go to settings and do a factory data reset, this will make your phone go faster and becomes normal.
            19. Success. enjoy