الأربعاء، 14 أكتوبر 2015

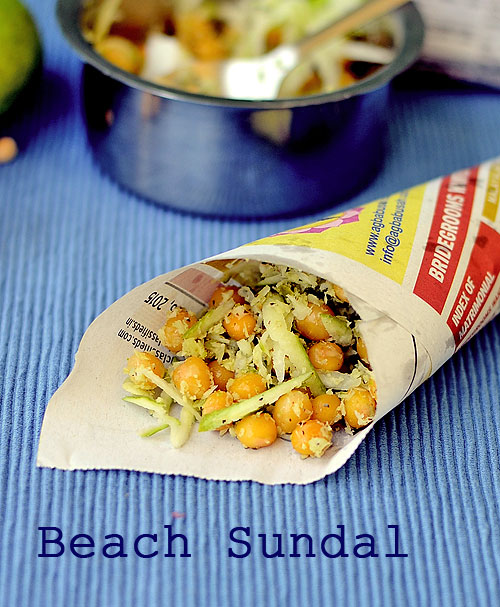
Thenga Manga Pattani Sundal Recipe-Beach Style Sundal

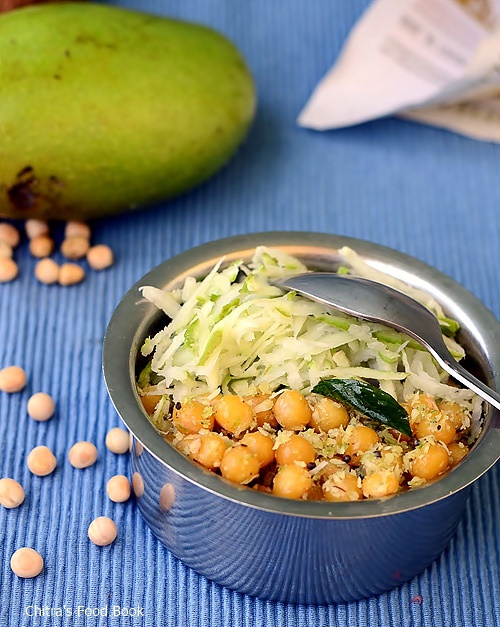
Thenga manga pattani sundal
I wanted to try this thengai mangai pattani sundal(Coconut,Raw mango,peas) during last year Navaratri.But I couldn’t do it.So this year I was very much stubborn & determined to start my Navratri Sundal recipes posts only with this most popular Chennai Marina Beach style sundal recipe.Luckily I found a raw mango in the market yesterday and bought it even though it was too costlyTongue.Generally when we think about Chennai beach, apart from the wonderful sea breeze,snacks like Kara pori,Green peas masala chaat, fire roasted corn, sweet cotton candy ( Panchumittai) and thenga manga pattani sundal flashes in our mind.But frankly speaking,I have never tasted any one of them in the beachSad.I visit Chennai very rarely and that too to attend weddings and other family functions.So when I go there,I directly go to our relatives house.As soon as the function gets over,we would be off to Bangalore immediatelySigh.This year too we have planned for a Chennai trip in a month or two.This time I have demanded few things to Sendhil like Shopping in T Nagar,Food at Saravana Bhavan especially Vada curry & Kaima idli and most importantly,a visit to Marina beach.I think Sendhil would keep up his promise and take me to all these placesWinking.After I taste the real sundal in the beach,I will update this post to match its original taste.Today I made this sundal following the recipe from Radhika’s blog.It came out very well and tasty.With the flavor & tanginess of raw mango,it tasted awesome !! Friends,do try this sundal for Navratri neivedyam and share your feedback.If you don’t have raw mango in hand,add more lemon juice and use grated carrots.After doing the pooja,you can also add finely chopped onions & relish this sundal.Lets see how to make this yummy Beach style Thenga Manga Pattani Sundal .
Check out my beach style Kara pori/Spicy puffed rice recipe if interested !!


Thenga manga pattani sundal

Thenga Manga Pattani Sundal Recipe


Thenga Manga Pattani Sundal Recipe Chennai Marina beach style Thenga manga pattani Sundal
Cuisine: Indian
Category: Snacks
Serves: Serves 2
Prep time: 8 Hours
Cook time: 20 Minutes
Total time: 8H20 Minutes


INGREDIENTS

  • White peas - 1/2 cup
  • Raw mango - 2-3 tbsp ( grated)
  • Grated coconut - 2 tbsp
  • Green chilli –1-2 nos
  • Ginger - 1/2 inch piece
  • Hing/Asafetida - a big pinch
  • Red chilli - 1 no ( pinched optional)
  • Salt - as needed
  • Water - to cook peas
  • Cooking oil - 1 tbsp
  • Lemon juice - few drops
  • Coriander leaves & grated carrots - as needed to garnish (optional)
METHOD
  • Wash and soak the white peas overnight or for 8 hours.Pressure cook it adding enough water and half the salt in very low flame for 2 whistles.Remove and drain the excess water.Set aside.Even though it is white peas,it changes to yellow in color after its cooked.
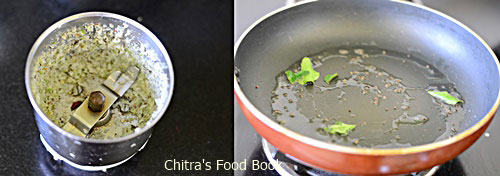
  • Grind grated coconut,ginger and green chilli to a slightly coarse paste without adding water. Wipe the sides of jar and grind it well.( If u want to skip grinding part,use red chilli powder inplace  of green chillies and add the finely chopped ginger & grated coconut while sauting the sundal)
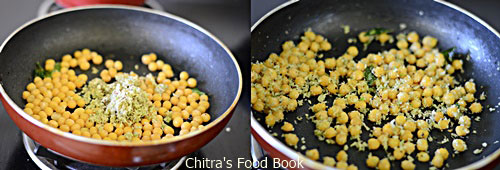
  • In a kadai,heat oil and splutter mustard seeds & curry leaves. Add a pinched red chill (optional) and add the cooked peas.
Thenga manga pattani sundal recipe
  • Add the ground paste and required salt.Mix well for few minutes.Switch off the flame and drizzle few drops of lemon juice.Mix well.Garnish with coriander leaves if you wish.Just before serving,add the grated raw mango and mix well.Serve immediately.You can also add finely chopped mango pieces instead of grated mangoes.

    Thenga manga pattani sundal recipe
Enjoy !
Note
  • You can replace green chillies by red chilli powder & skip grinding part. In that case,add grated coconut at the end & mix well.
  • You can also add grated carrots to make it more colorful.
  • Adding lemon juice gives a nice flavor & tanginess.So don’t skip it.


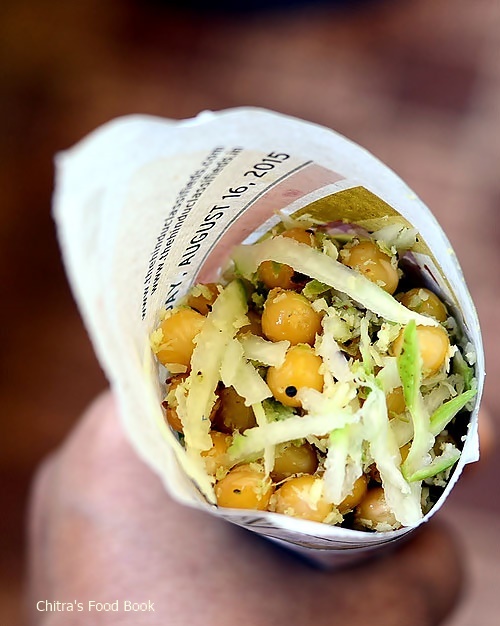
beach style sundal
Enjoy beach style sundal at home Happy
beach style sundal

الثلاثاء، 13 أكتوبر 2015

Baked Mini Vegetable Chickpea Samosas

Baked Vegetable Chickpea Samosas

I've introduced many diners to Indian food and I've always found that one of the best ways to initiate those unfamiliar with Indian cuisine is to offer up some appetizers.

Of all Indian appetizers, samosas are possibly the most popular. Fried savory pastries stuffed with a spicy vegetable filling, or sometimes a meat filling, samosas can be found on the menu in every North Indian restaurant. A combination of potatoes, cauliflower, carrots or green peas is often the favorite choice for the filling. Typically served as an appetizer along with coriander or tamarind chutneys, samosas can also make for a fine small entrée.
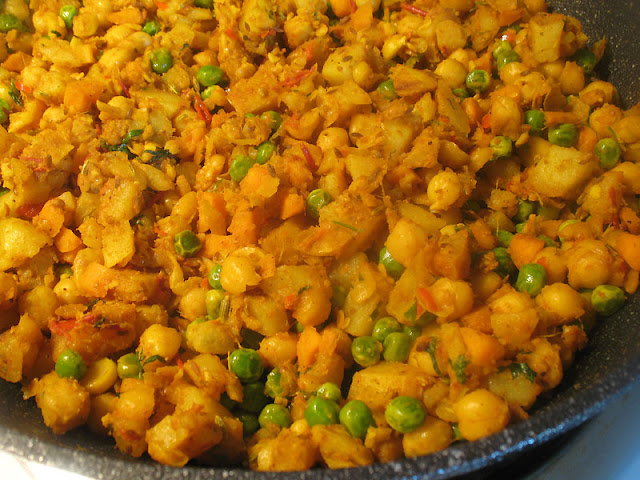

samosa filling

It's actually been quite a number of years since I've gone to the trouble of making homemade samosas, but I wanted to indulge one of my frequent cravings for Indian appetizers with a baked version. I admit to enjoying many restaurant samosas, but I'm less inclined to want to eat greasy foods than I used to be. I'm also less inclined to eat large portions before dinner too, and many of the restaurant samosas are a bit more samosa than I want before dinner. I'm a fan of little bites — they're a great way to serve an appetizer without stuffing your diners before the main entrée.

So coming up with baked mini samosas was just the way to satisfy both my appetite and my interest in experimenting in the kitchen. I consider potatoes and green peas to be the classic vegetable ingredients for a samosa stuffing, but I filled out this combination with some diced carrot and plump tender chickpeas in addition to the Indian spices. Served with a classic restaurant-style tamarind chutney, these were a big hit.

vegetarian samosa

These did take a while to make, I admit. The filling is a snap and the dough is easy to work with, but it's a bit of a fussy process to shape the samosas. But the process becomes faster with a little practice, and by the end of the batch the samosa were flying on to the baking sheet. The effort was worth every bite.

Baked Mini Vegetable Chickpea SamosasBaked Mini Vegetable Chickpea Samosas
Recipe by
Cuisine: Indian
Published on October 13, 2015

Homemade baked mini samosas with a spicy potato, pea and chickpea filling

Print this recipePrint this recipe

Pastry:
  • 1/3 cup unbleached all-purpose flour
  • 2/3 cup spelt flour (or all-purpose)
  • 1 tablespoon semolina flour
  • 1 tablespoon cornstarch
  • 1/4 teaspoon baking soda
  • 1/2 teaspoon ground cumin
  • 1/2 teaspoon sea salt
  • 1/4 teaspoon ground black pepper
  • 1 tablespoon olive oil
  • 1/3 cup cold water
  • flour for rolling and dusting
Filling:
  • 1 tablespoon olive oil
  • 1 teaspoon cumin seeds
  • 1/2 teaspoon fennel seeds
  • 1 to 2 cloves garlic, minced
  • 1-inch piece ginger, grated or minced
  • 2 red chilies, seeded and finely chopped
  • 1 teaspoon turmeric
  • 1 teaspoon ground coriander
  • 1/2 teaspoon garam masala
  • 1/2 teaspoon chat masala
  • 1/4 teaspoon cayenne
  • 1/4 teaspoon asafetida
  • 1 small tomato, seeded and finely chopped
  • 1 teaspoon lemon juice
  • 1 medium carrot, diced
  • 2/3 cup fresh or frozen peas
  • 1 cup cooked chickpeas (1/3 cup dried)
  • 2 medium potatoes, roasted or boiled until just tender and diced
  • 1 teaspoon sea salt, or to taste
  • 2 tablespoons fresh cilantro, finely chopped
Instructions:
  • To make the pastry, whisk together the flours, cornstarch, baking soda, cumin, salt and pepper in a medium bowl. Rub the olive oil into the mixture with your hands. Gradually add the water to the flour mixture, mixing it in with a fork until a dough forms. Add more water if necessary. Knead for a minute or two until a soft dough is formed. Shape into a ball, brush with a bit of olive oil, and cover in plastic wrap. Let rest for 30 to 60 minutes.

  • To make the filling, heat the oil over medium heat in a large non-stick skillet. When hot, add the cumin and fennel seeds and stir for a minute or until the seeds have darkened a few shades and become fragrant. Toss in the garlic, ginger and chilies and fry, stirring often, for another minute or two. Stir in the turmeric, coriander, garam masala, chat masala, cayenne and asafetida, and cook for another minute. Add the tomato and lemon juice and cook for another few minutes. Stir in the carrot and peas and cook for another 5 minutes. Stir in the chickpeas, potato and salt and cook, stirring often, for another 5 minutes. Finally, stir in the cilantro, remove from the heat, and let cool to room temperature.

  • Line a baking sheet with parchment paper. Pour some water into a small bowl. Gently knead the dough a few times and then divide the dough into 8 small balls. Make sure to keep the dough balls covered while you work with each one.

  • On a lightly floured board, roll out a round into a 6-inch oval shape. Cut the oval into half circles. Fold a half circle into a cone shape, moisten the edges of the cone with a dab of water, and gently press the edges together. Scoop 1 tablespoon of the filling into the cone, taking care not to overstuff the pastry, and fold the top over. Moisten the edges with a dab of water and lightly pinchi the edges together. Transfer each piece of stuffed dough onto the prepared pan. Keep the unbaked samosas covered with a clean kitchen towel so the pastry does not dry out.

  • Bake the samosas in a preheated 375° oven for 20 to 25 minutes until golden. Serve with your favorite chutney.

  • Wrap leftovers in foil and reheat in a 300° oven for 10 minutes.

Makes 16 mini samosas

vegetarian samosa with chickpeas

Variations on a theme:
Indian-Style Samosa Potpie
Vegetarian Samosa Cakes with Tamarind Chutney
Samosa-Style Stuffed Baked Potatoes

On the top of the reading stack: Food52 Vegan: 60 Vegetable-Driven Recipes for Any Kitchen

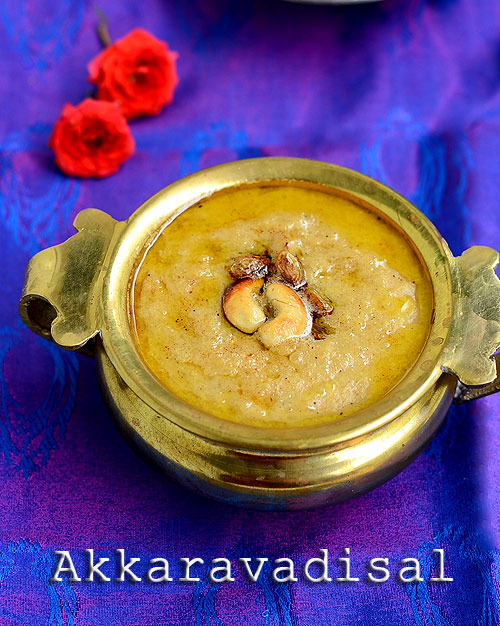
Akkaravadisal (Akkara Adisal) Recipe-Iyengar Recipes

Akkaravadisal recipe
Navratri 2015 is starting from today.I hope most of you would be planning to make some sundal variety along with Sakkarai pongal for today’s neivedyam.Every year we make paasi paruppu sundal and sweet pongal for first day.This year for a change I tried Iyengar special sweet pongal recipe popularly known as “Akkaravadisal/Akkara adisal”.Iyengars make this for Koodaravalli festival during tamil month Margazhi.The term Akkaram is a literary word for Sugar or jaggery and the word Vadisal is a descriptive term for cooking by steaming or boiling.Starting from this explanation till the recipe I have shared here are given by my school friend Sumi Raghavan who is a Tamil Brahmin.Whenever I look for Iyengar Recipes,my first hand source is Sumi.She is so sweet to share her traditional recipes with meHappy.Based on her recipe and method,I start to search for more ideas on net.You could find different recipes for this akkaravadisal.Some people use sugar and make this pongal.Some add equal amounts of jaggery and sugar.But I followed the recipe of my friend which is more of temple style.Actually I came to know about this akkara adisal from a priest in Thirukannapuram Perumal temple.He told us that every morning nearly 12 ladies prepare this akkaravadisal in a wide bronze vessel adding lots of ghee and serve it as kovil prasadam to all the devotees.Though I couldn’t taste the prasadam,I was able to feel its taste from the way he explainedTongue.So I badly wanted to try and share this recipe in my blog.As he told,the taste of this creamy pudding like Akkaravadisal was truly flavorful & very rich in taste.Don’t hesitate to add the amount of ghee mentioned here.Ghee and the edible camphor(Pachai karpooram) are the star ingredients of this recipe.So here you go authentic Iyengar style akkaravadisal preparation with stepwise pictures.Do make this for Navratri neivedyam and offer to God !! 

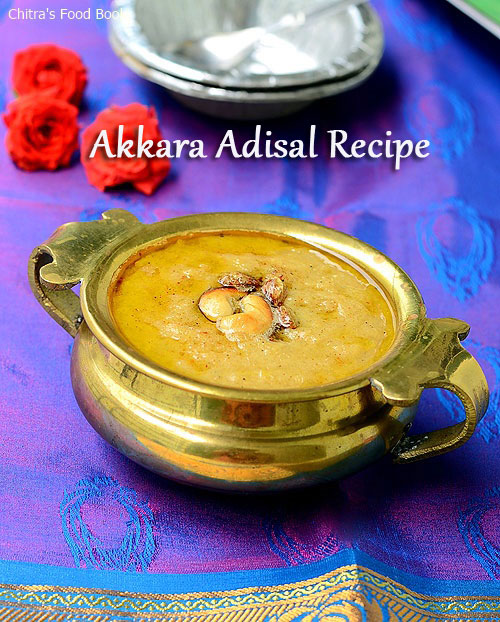
Akkaravadisal Recipe


Akkaravadisal Recipe Iyengar style akkara adisal recipe
Cuisine: Indian
Category: Sweet
Serves: Serves 4
Prep time: 30 Minutes
Cook time: 20 Minutes
Total time: 50 Minutes


INGREDIENTS

  • Raw rice(Good quality sona masoori) - 1/2 cup
  • Milk – 2.5 cups
  • Water – 1/2 cup
  • Grated jaggery - 3/4 cup ( use dark colored jaggery to get this color)
  • Cardamom - 3 nos (crushed)
  • Edible camphor/Pachai karpooram - 2 pinches
  • Ghee - 1/4 cup
  • Cashew nuts & Dry grapes - a fistful
  • Salt - a pinch
METHOD
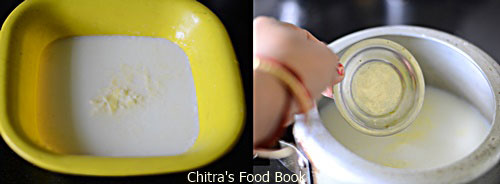
  • Wash and soak the rice in milk for 30 minutes adding 2 cups of milk + 1/2 cup of water, a pinch of salt.You can roast 1 tbsp of moong dal in a tsp of ghee and add to the rice while soaking.But I din’t add moong dal.So its optional to use.( If you want to follow traditional method,cook the rice in open pot by stirring every now & then.Else it will burn in the bottom)
Iyengar akkaravadisal recipe
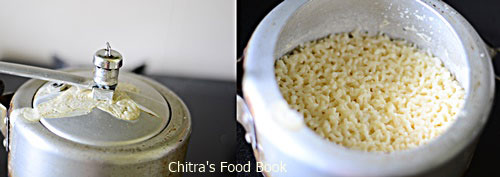
  • Take a pressure cooker and add the soaked rice,milk,water to it.Put a small plate inside the cooker to avoid spilling.Pressure cook in very low flame for 2 whistles.It takes more time to cook as we are cooking rice in milk.So be patient.
Iyengar akkaravadisal recipe 
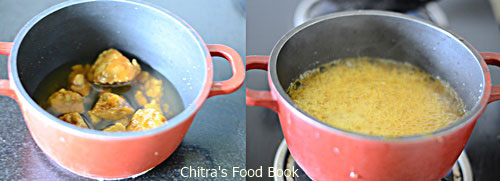
  • In the mean time,boil the jaggery adding 1/2 cup of water and let it melt n boil for a minute.Strain the jaggery syrup using a filter and keep aside.
Iyengar akkaravadisal recipe
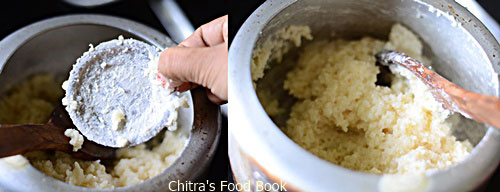
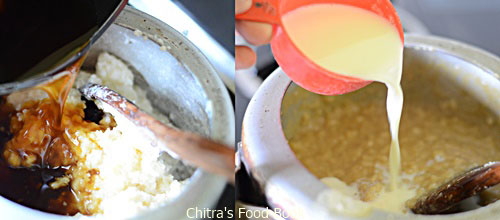
  • After the steam is released from the cooker,remove the plate and mash the rice very well.Add the jaggery syrup to this.Add 1/2 cup of milk and let the mixture boil for a minute.Akkaravadisal should be in semi solid state unlike our usual sweet pongal.It will tend to thicken as time proceeds.So add more milk and adjust its consistency before you serve.
Iyengar akkaravadisal recipe
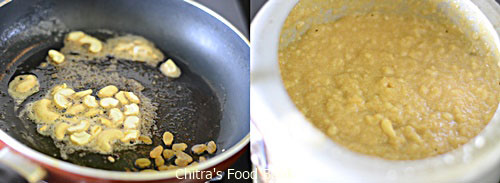
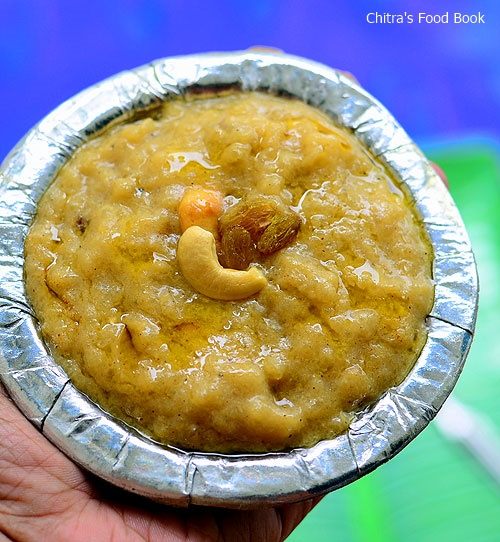
  • Roast the nuts and dry grapes in 1/4 cup of ghee and add to the pongal.Switch off the flame, add cardamom powder, edible camphor, mix well and offer to God. Enjoy ! I drizzled a tbsp of ghee on the serving bowl to give a ghee dripping pongal look ;)
Iyengar akkaravadisal recipe
Note
  • You can add 1 tbsp of roasted moong dal along with rice before soaking.But I din’t use it.
  • Traditionally akkaravadisal is made by cooking rice adding milk in a wide bronze pot.But I used pressure cooker to make it easily.
  • Adding edible camphor gives the temple style flavor.So don’t skip it.But do not add more.Just a big pinch would do.
  • For variations,you can add equal amounts or 1/4th portion of sugar mixed with jaggery.


Iyengar style akkaravadisal is ready to serve !
Akkaravadisal recipe

الجمعة، 9 أكتوبر 2015

Channa Kurma Recipe - Chickpeas Kurma - Side dish for Roti,Poori

Channa kurma recipe
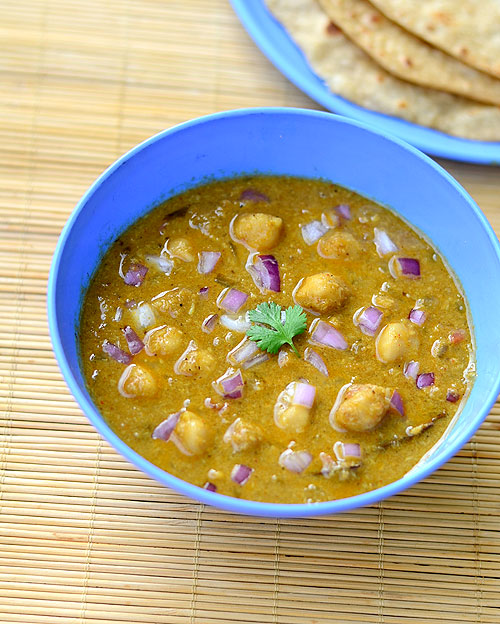
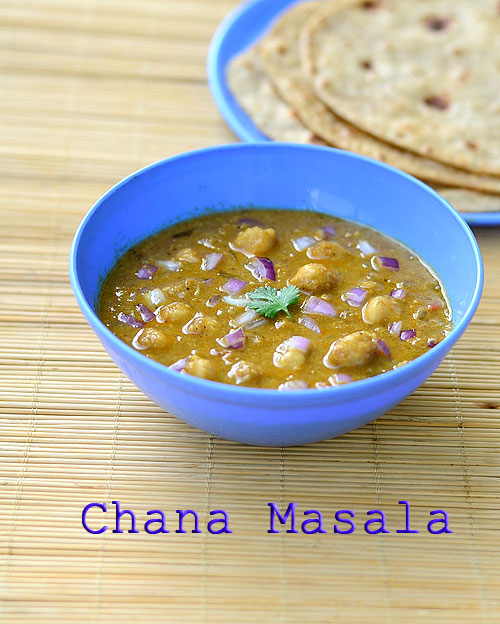
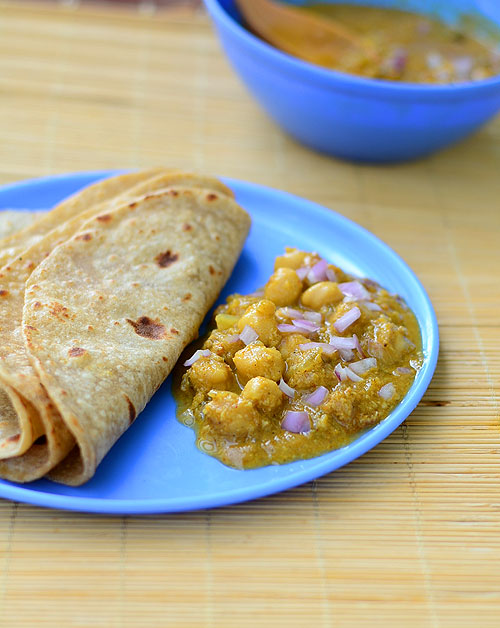
Before going to this recipe,let me tell you,this is not North Indian style Chana masala.This is purely South Indian style kuruma type chana masala (Kondakadalai kurma in Tamil).I followed my Saravana bhavan kurma recipe with small changes and made this korma adding kondakadalai/Chickpeas. You can use black chana as well. It was very flavorful and the addition of chana made it more healthy too.As suggested by my friend Shalini,I serve this kurma garnished with chopped onions.It adds a great taste and goes well with chapathi, poori & dosa.If you like u can mix this kurma with plain rice and enjoy.Soon I will post North Indian restaurant style chana masala.
Chana kurma recipe

Channa Kurma/chickpeas Kurma


Chana Masala / Chana kurma Chana Masala / Chana kurma for chapathi/Roti and Parota
Cuisine: Indian
Category: Side dish for roti
Serves: Serves 3
Prep time: 10 Minutes
Cook time: 20 Minutes
Total time: 30 Minutes


INGREDIENTS
1 cup - 200ml

  • White Chana/Kondakadalai - 1 cup ( Soak for 8 hrs)
  • Cooking oil + ghee – 2 tbsp
  • Bayleaf – 1 no
  • Black stone flower/Kalpasi – 1 no
  • Cinnamon – 1 inch,Cloves – 1 no,Cardamom –1 no
  • Cumin seeds – 1/2 tsp
  • Big onion - 1 no
  • Tomato - 1 no
  • Mint leaves - 1 tbsp (optional)
  • G&G paste - 1/2 tsp
  • Red chilli powder or sambar powder - 1/2 tsp ( Add more for spicy kurma)
  • Turmeric powder - 1/4 tsp
  • Garam masala powder - 1/2 tsp
  • Curd or lemon juice – 1 tsp
  • Kasoori methi – a pinch
  • Salt & water - as needed

To grind
  • Grated coconut - 1/3 cup
  • Green chillies - 2 no
  • Fennel seeds - 1/2 tsp
  • Cinnamon - 1 inch
  • Cloves - 2 nos
  • Cardamom - 1 no
  • Pottukadalai/Fried gram dal - 2 tsp
  • Cashewnuts - 4 nos
  • KhusKhus/Poppy seeds - 1/2 tsp (optional)
METHOD
  • Wash and soak the chana over night.Pressure cook for two whistles in low flame.You can also add the soaked chana directly to the kurma and pressure cook it.Both works.
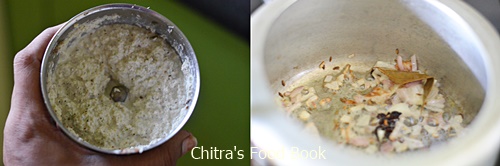
  • Wash and chop the vegetables finely.Chop the onion and tomato.Grind all the ingredients given under “To grind” to a smooth paste adding enough water.
Chana kurma

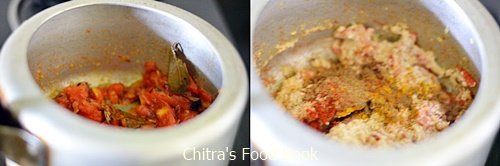
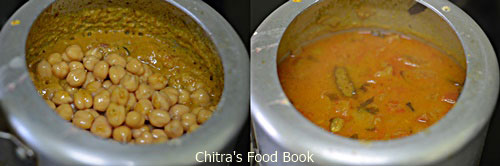
  • Heat a pressure cooker base and add oil + ghee.Saute the bayleaf and black stone flower/Kalpasi.Splutter cumin seeds.Add onions,g&g paste and saute till it turns transparent & raw smell goes off.Add mint leaves.Then add the tomato pieces and saute until mushy.Add the ground coconut paste,turmeric powder,red chilli powder and Garam masala powder.Add the required salt and saute well till the raw smell of masala vanishes.Do in medium flame.
Channa kurma

  • Lastly add the soaked chana( Here I used boiled chana).Mix well and add a 2cups of water. Mix well and add a pinch of kasoori methi and curd.Stir well and pressure cook in low flame for just one whistle.Chana kurma is ready to serve !!
Channa kurma
Enjoy with chapathi ,poori or parota.It tasted great with dosa too!
Note
  • Grinding part is the highlight of this kurma.So please don’t omit any ingredient from it.No worries if you don’t add khus khus.But the remaining are must.
  • Adjust the quantity of chillies and red chilli powder based on your taste.
  • You can try to replace Red chilli powder with chana masala powder if you have.But adjust the quantity as per your wish.
Try this yummy channa kurma for roti/Parota,enjoy your food !!
Chana masala

Essentially Raw Pumpkin Bites

Essentially Raw Pumpkin Bites

Every autumn when pumpkins are in season, I make sure to make a few trips to purchase some small pie pumpkins and roast them so I have pumpkin purée all year long. I keep 1 cup quantities in the freezer in small sealed bags that I can simply thaw before I want to use purée in a recipe. The small pie pumpkins have a sweeter flavor and retain less moisture than large pumpkins that are really more for decorative purposes around Halloween than for cooking or baking. And don't forget to harvest those pumpkin seeds — when roasted they are a wonderful salty yet healthy treat.

And on the subject of treats, as pumpkin happens to be in abundance, a fair amount of it is used in my kitchen even before freezing it. Healthy treats containing nuts and dried fruit are pretty much a staple in my kitchen and here I've topped a chocolaty base of naturally sweet dates and prunes with a topping of protein rich cashews, pumpkin purée, a small amount of maple syrup and aromatic spicing. These squares are surprisingly reminiscent of a layer cake or an upside down cheesecake as the top layer has the crunch while the bottom layer is moister with that melt-in-your-mouth element. No baking is required either, just a bit of patience with the food processor.

pumpkin cheesecake bites

Essentially Raw Pumpkin BitesEssentially Raw Pumpkin Bites
Recipe by
Published on October 9, 2015

No-bake pumpkin and cashew squares on a rich chocolaty cocoa and date base

Print this recipePrint this recipe

Bottom layer:
  • 2/3 cup pitted dates, roughly chopped
  • 1/3 cup pitted prunes, roughly chopped
  • 1 heaping tablespoon cocoa powder
  • 2 teaspoons vanilla
  • 1 tablespoon almond milk
  • 1 1/2 tablespoons coconut butter, melted
Top layer:
  • 1 1/2 cups raw cashews, soaked in warm water for 1 hour and drained
  • 1/3 cup maple syrup
  • 1/3 cup unsweetened pumpkin purée
  • 1/2 teaspoon ground cinnamon
  • 1/4 teaspoon ground nutmeg
  • 1/4 teaspoon ground ginger
  • 1/8 teaspoon ground allspice
Instructions:
  • Line a standard 9-inch loaf pan with parchment paper so that there is an overlap over the sides of the pan. In a food processor, pulse together all of the ingredients for the bottom layer until it all comes together. Transfer to the prepared pan and spread evenly. Let this mixture chill in the freezer while preparing the top layer.

  • Wipe the bowl of the food processor clean and then pulse together of the ingredients for the top layer until smooth. Spread this mixture evenly over the bottom layer and return to the freezer. Freeze for at least 2 to 4 hours. When ready to serve, cut into small squares and let sit for about 10 minutes for before serving. Store any leftovers in a sealed container in the freezer.

Makes about 20 small squares

vegan pumpkin bites

Other vegan treats to try from Lisa's Kitchen:
Raw Peanut Butter Chocolate Nut Squares
Raw Peanut Butter Cocoa Maple Squares
Mini Tahini Cups with a Creamy Coffee Date Filling
No-Bake Coconut Oil Fudge

On the top of the reading stack: The Chickpea Flour Cookbook: Healthy Gluten-Free and Grain-Free Recipes to Power Every Meal of the Day

الأربعاء، 7 أكتوبر 2015

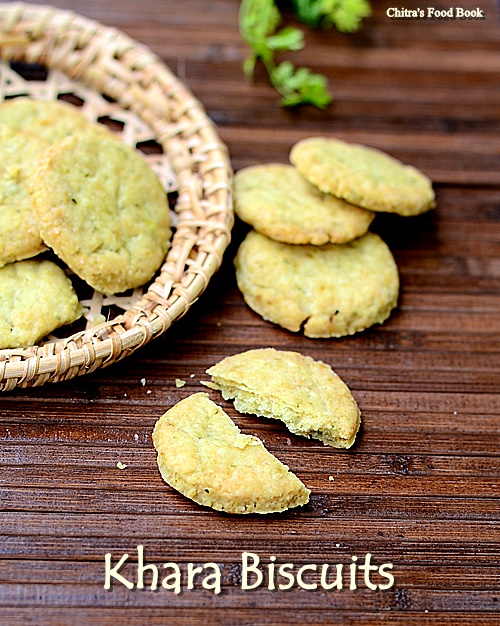
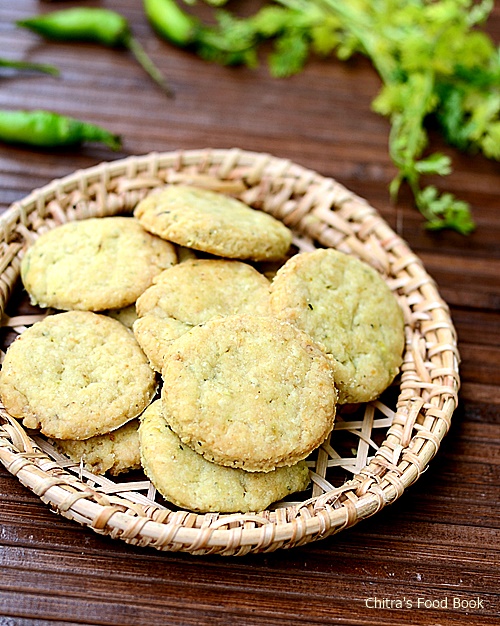
Khara Biscuit Recipe / Masala Biscuits - Savory Cookies

Khara biscuit recipe
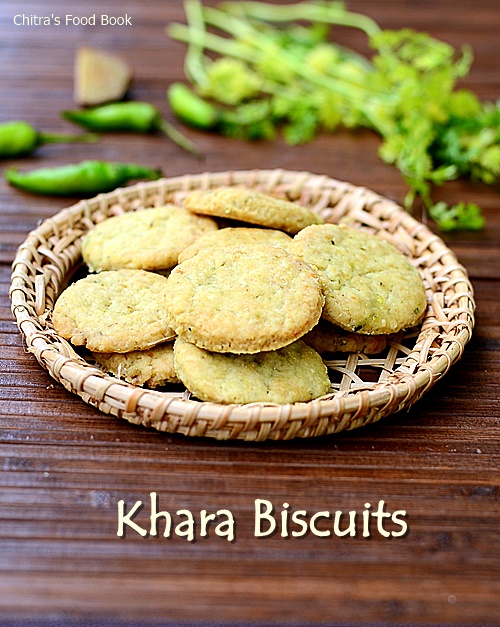
I love Bangalore Iyengar Bakery’s Khara buns & Khara biscuits more than Benne biscuits.But I usually bake benne biscuits/Nankhatai as its my family’s favorite.This morning I tried savory biscuits/Masala biscuits for the first time by referring this recipe.Actual recipe called for using butter or Vegetable shortening.In bakeries,they use vanaspati/Dalda.But I halved the recipe & used cooking oil(refined oil) to cut down the calories.I was really skeptical about the result.But good biscuits came out very well with melt in mouth texture & crispiness.I was so happy about this bake and enjoyed it with my teaLove Struck.Friends,do try this bakery style Masala biscuits/Khara biscuits and enjoy your tea time ! Color of this biscuit may vary slightly based on the time of baking and quantity of spices used.But the taste would be gr888 !
Khara biscuit recipe

Khara biscuit/Masala cookies


Khara biscuit/Masala cookies How to make bakery style Khara biscuit/Masala cookies
Cuisine: Indian
Category: Cookies
Serves: 12 nos
Prep time: 30 Minutes
Cook time: 15 Minutes
Total time: 45 Minutes
INGREDIENTS
1 cup - 200 ml , 1 tbsp – 15 gm
  • All purpose flour/Maida - 1/2 cup + 3 tbsp
  • Corn flour - 1 tbsp
  • Baking powder – 1/2 tsp
  • Cooking oil or Softened butter/ghee - 1/4 cup( I used Sundrop refined oil) 
  • Green chillies - 2 nos ( small)
  • Coriander leaves - 1 tbsp
  • Curry leaves - few
  • Ginger - 1 inch piece
  • Salt - little less than 1/2 tsp
  • Curd - 1 tsp
  • Sugar - 1/4 tsp
  • Hing/Asafetida – a pinch
METHOD
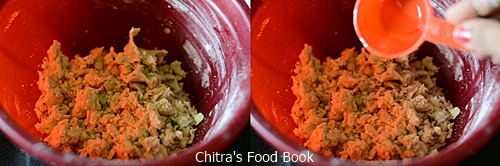
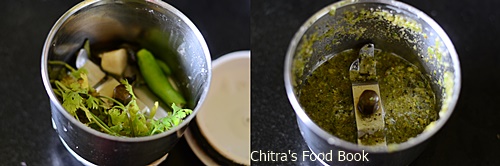
  • Grind the chillies,coriander leaves,curry leaves and ginger to a paste adding little water.No problem if the mixture is coarse.Do not add more water.(The paste should make 1tbsp approximately)
Khara biscuit recipe

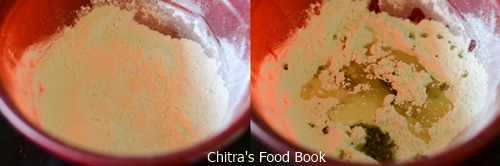
  • Take the maida,corn flour,sugar,baking powder,salt and hing in a bowl.Mix it well.
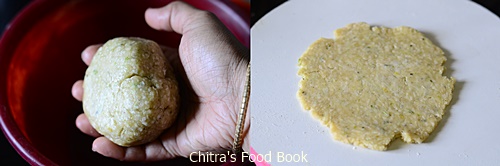
  • Add the paste, half of the oil and curd to the flour mixture.Make a crumbly mixture and add the remaining oil.Knead it and Make a non-sticky dough.Add more oil only if needed.Keep the dough closed and rest it for 30 minutes.
Khara biscuit recipe

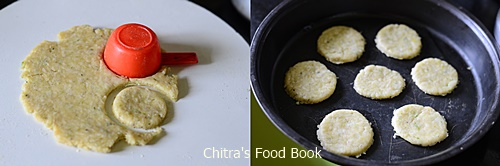
  • After 30 minutes,take a big ball sized dough and roll it using a rolling pin to 1/4” thickness.You can dust in little wheat flour if needed.Now take a round shaped cutter or lid.Make shapes and arrange the cookies in a baking tray.I used a non-stick pan.So I din’t line the tray.If you are using an aluminium tray,line it with butter paper.
Khara biscuit recipe
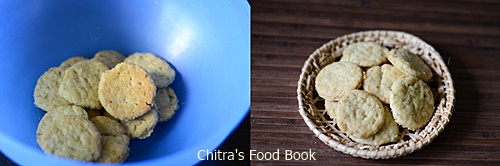
  • Pre heat the convection oven in 200c.Bake the cookies for 15-18 minutes(Mine took 15 minutes) at 200c.The bottom of biscuits turn golden brown.It is the sign of baked cookies.Remove and let it cool.The biscuits may be soft to touch when hot.But when it cools down completely,it will become crunchy.So be patient.If the biscuits are not baked properly,it would stick to the plate and it cannot be removed easily.In that case, bake for 2 minutes more.Store in an air tight box after the biscuits are completely cool.
Khara biscuit recipe

Enjoy the masala cookies with hot tea !
Note
  • For variations u can use softened butter or ghee at room temperature.
  • Adjust the quantity of spices as per your preference.

Enjoy this masala biscuits with hot tea/coffee ! Tastes yum !
Masala biscuit recipe