الأربعاء، 29 أبريل 2015

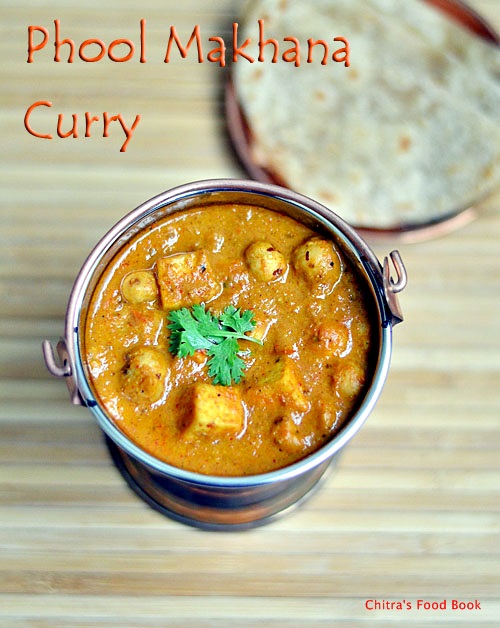
Phool Makhana Curry Recipe|Lotus Seeds Gravy With Paneer

Makhana curry recipe
I came to know about Phool Makhani(Puffed Lotus Seeds/Fox nut in English)recently through my blogger friends.As soon as i came to know about them,i looked for its health benefits and amazed at it.I have listed them below.Please have a look so that you can have it whole heartedly without any fearHappy.I used to have Lotus stem fryums( Thamarai thandu vathal in Tamil)buying from Home foods,Salem when i was pregnant as my Doctor suggested me to eat them as it is very rich in calcium.Similarly the nutrition facts of Phool makhana makes you buy them immediately.I bought it from Metro,Kanakapura road.I guess u can find them in Nilgiris too.You can prepare recipes like Roasted masala phool makhani,makhana kheer,gravy,curry,pulao and much more.Very soon i will share makhana kheer.
Coming to today’s recipe,last week i got a mail form BigBasket.com asking me to do a guest post.I generally don’t accept any promotional posts.So i was in hesitation.When i told about this offer to my friend Shalini,she suggested me to do it as she buy groceries and Vegetables from Bigbasket regularly and she gave a very good feedback about them.So i accepted to make a post.They immediately sent me this phool makhani,paneer gravy recipe.I made some changes in the original recipe and made it for Sendhil’s lunch box as a side dish for Roti/Chapathi.I too had the same for lunch.It was very nice,flavorful and kadai licking goodTongue.It tastes very similar to Paneer butter masala.Addition of phool makhana made it more healthy.Try this Yummy North Indian Gravy with lotus seeds.You will love it for sureCool
Check out my other paneer recipes HERE
Health benefits of phool Makhana
  1. Makhana helps in cardiac protection,regulates blood pressure and relieves numbness and pains in joints.
  2. It prevents premature aging,arthritis.
  3. It is rich in calcium,protein when compared with other nuts.Popped makhana contains almost 12% of protein
  4. It benefits kidney,spleen and heart.
  5. Makhana is very useful for women during and post pregnancy period.
  6. The seed also has calming properties that alleviate restlessness, palpitations, and insomnia.It is good for impotency too.
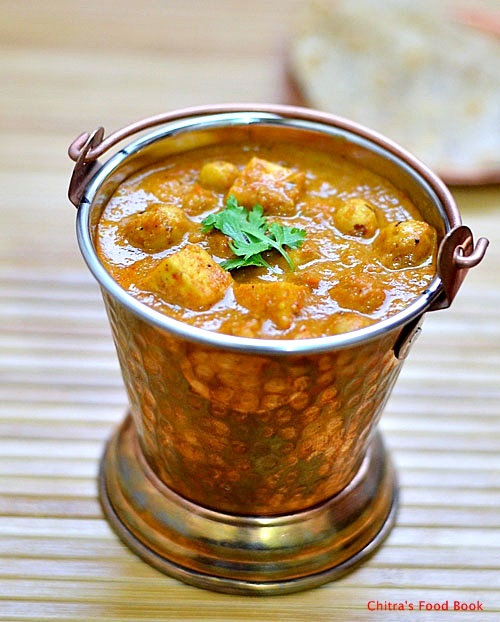
Phool makhana curry

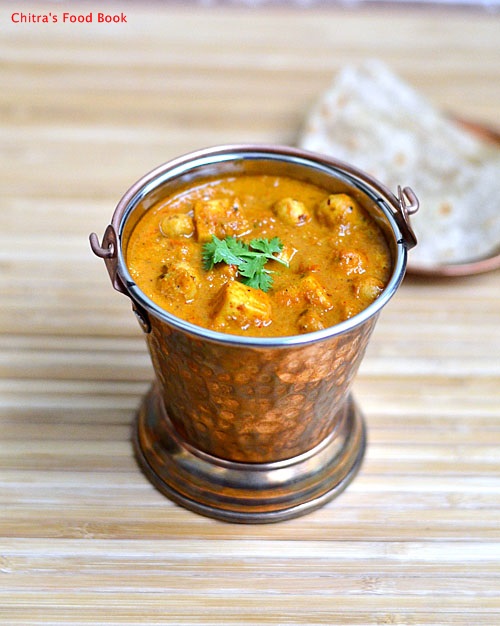
Phool Makhana,Paneer Gravy Recipe


Phool Makhana,Paneer Gravy Recipe Yummy North Indian style gravy recipe using phool makhana and paneer - An awesome side dish for roti
Cuisine: Indian
Category: Gravies
Serves: Serves 2-3
Prep time: 10 Minutes
Cook time: 15 Minutes
Total time: 25 Minutes


INGREDIENTS

To saute n grind
  • Cooking oil + ghee - 2 tbsp + 2 tsp
  • Cardamom – 1 no
  • Ripe tomato - 4 nos
  • Big onion- 2 nos
  • Green chilli - 1 no ( long)
  • Ginger garlic paste - 1/2 tsp
  • Turmeric powder - 1/8 tsp
  • Red chilli powder - 1/2 tsp( Use 1 tsp for more spice taste)
  • Dhania powder - 1 tsp
  • Garam masala powder - 1/2 tsp
  • Sugar – 1/2 tsp
  • Cashew nuts - 6 nos
  • Water – as needed
To add at the end
  • Fresh cream - 2 tbsp ( optional)
  • Kasoori methi - 1/4 tsp ( crushed)
  • Boiled milk - 1/4 cup
  • Coriander leaves - few ( to garnish)
Lemon juice – few drops (optional)
METHOD

  • Heat 1 tsp of ghee in a kadai.Roast the makhana for 3-4 minutes and set aside.Boil water in a bowl and add the chopped paneer cubes.Let it soak in hot water till use.This helps u get soft paneer pieces.Chop onions,tomatoes and slit chilli.Keep aside.
Makhana curry recipe
  • Heat  1 tbsp oil+1 tsp ghee in a kadai and add cardamom.Saute onions,ginger-garlic paste till its raw smell vanishes.Now add the green chilli and saute for a second.Add tomato pieces.Saute till mushy adding required salt.
Phool Makhana curry recipe
  • Add red chill powder,dhania powder & garam masala powder.Saute them in medium flame.Switch off the flame & add cashew nuts.Let it cool.Grind this mixture to a smooth paste adding water.
Makhana curry reecipe
  • Heat 1 tbsp of oil & splutter cumin seeds,add this paste.Saute well till oil separates.Add a cup of water and boil for few minutes.It splutters,be careful.
Makhana curry recipe
  • Lastly add the roasted makhana,paneer pieces.Add milk,sugar,mix well and switch off the flame.Add crushed kasoori methi & fresh cream at the end.Remove and garnish with coriander leaves.Adjust the consistency of gravy by adding more milk or water as it thickens after cooling down.
    Makhana curry recipe

    Serve & Enjoy with roti/chapathi !


Note
  • For variations,u can saute the tomatoes and make this gravy instead of grinding a paste.
  • Use either makhana or paneer in this gravy.

Makhana gravy recipe

Enjoy this healthy,tasty phool makhana gravy with roti.Tastes so good !
Makhana gravy recipe


الثلاثاء، 28 أبريل 2015

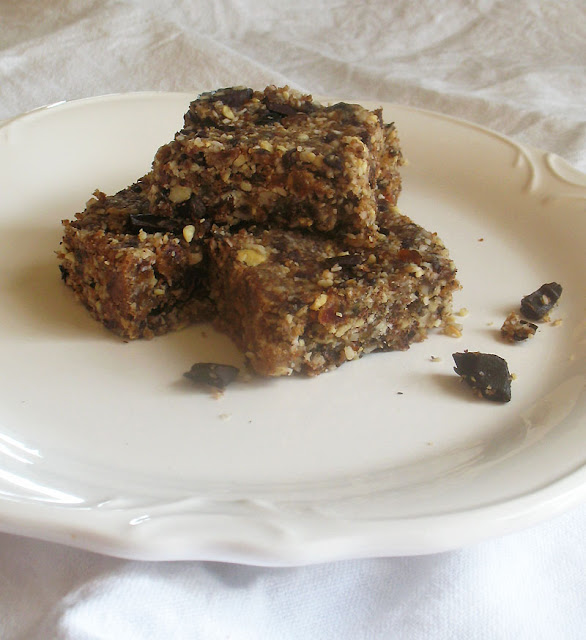
Nut Bars with Dark Chocolate Chunks

Nut Bars with Dark Chocolate Chunks

I don't eat dessert very often, but there are times when you just want a bit of sweetness in your life. The advantage of raw treats like these is you can even enjoy them for breakfast without the guilt because they are packed with the goodness of nuts, seeds and fruit. As the weather gets warmer finally it is also a great alternative to turning on the oven. All you need is a food processor to whirl everything together. When you are in a rush out the door but want a protein packed pick-me-up, these are ideal to have on hand. You only really need one small square or two to keep you going.


Nut Bars with Dark Chocolate ChunksNut Bars with Dark Chocolate Chunks
Recipe by
Published on April 28, 2015

Easy no-bake protein bars packed with nuts, dried fruit and chunks of dark chocolate

Print this recipePrint this recipe

Ingredients:
  • 2/3 cup raw almonds
  • 2/3 cup unsweetened dried grated coconut
  • 1 cup raw cashews
  • 3/4 cup pitted dates, packed
  • 1/4 cup pitted prunes (or additional dates)
  • 1/3 cup hemp seeds
  • 1 1/2 teaspoons vanilla
  • 2 teaspoons water
  • 1/4 teaspoon sea salt
  • 3 1/2 oz (100 g) dark chocolate, cut into chunks
Instructions:
  • In a food processor, pulse the almonds and coconut together for 30 seconds. Add the cashews and process for another 30 seconds until the mixture is reduced to coarse crumbs. Add the dates, prunes, hemp seeds, vanilla, water and salt and process until the mixture starts to come together.

  • Transfer to a medium bowl and stir in the chocolate chunks. Spoon the mixture into a 8-inch baking pan and press down evenly and firmly. Using a piece of waxed paper spread over the bars is helpful here. Cover the pan with foil and chill in the refrigerator for at least 5 hours. Cut into 2-inch squares.

Makes 16 2-inch squares

nut bars with dark chocolate

More raw treats to enjoy:
Raw Peanut Butter Chocolate Nut Squares
Raw Avocado Coconut Nanaimo Bars
Raw Peanut Butter Truffles
Cocoa Fruit Treats

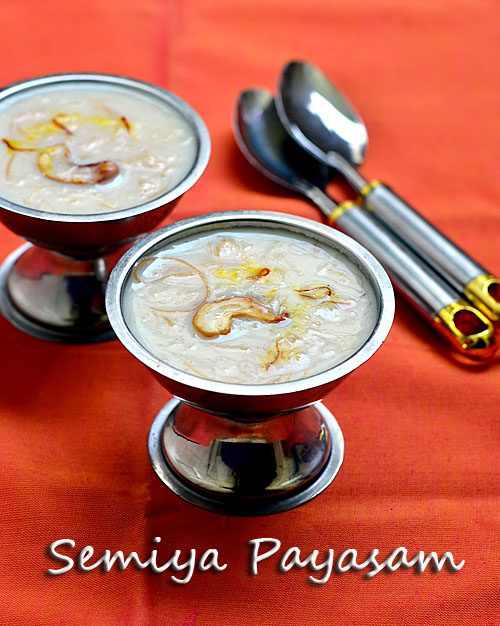
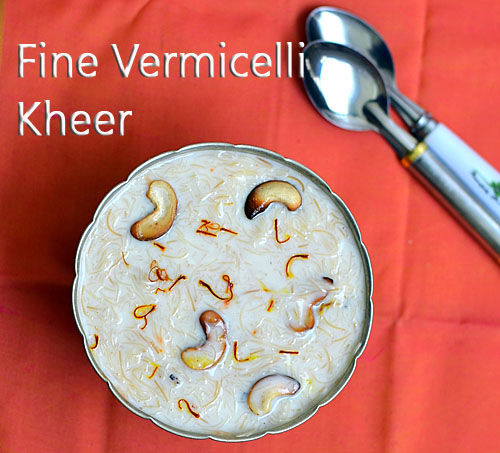
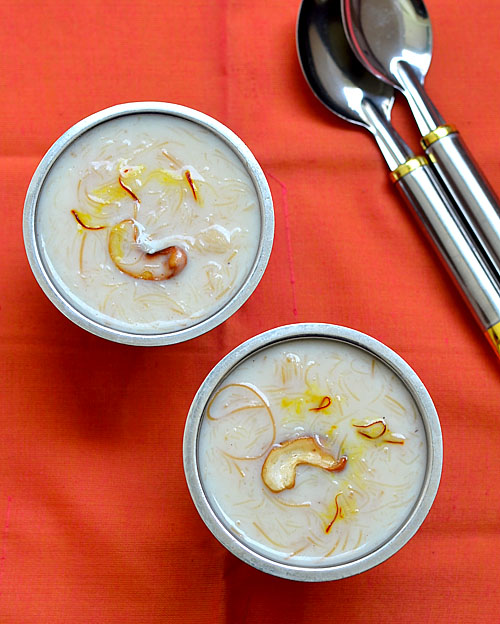
Fine Vermicelli Payasam(Semiya Kheer)Recipe

Fine vermicelli payasam recipe
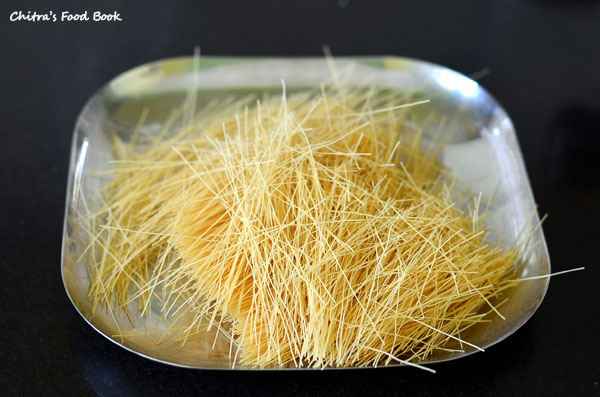
I made this payasam using fine vermicelli for the first time on our 10th anniversary last week.It was so rich and creamy with condensed milk/Milk maid.We loved it a lot and it was perfect for the celebration tooRose.Whenever I see my fellow bloggers sharing recipes like kesari and payasam with fine vermicelli(Semiya in Tamil),I get tempted & kept searching for fine vermicelli in stores.Recently i went to Jayanagar 4th block with my friend.I found this vermicelli and took it immediately to try this yummy payasam recipe.Its an easy and quick Indian dessert recipe that can be made easily by beginners too.The consistency of this kheer can be adjusted according to your preference.You can make it thick like vermicelli pudding or thin like payasam/kheer adding more milk.I have used condensed milk here but its completely optional.For variations,u can mix cooked sago/Javvarisi in this payasam.It gives more taste and volume as well.Whatever may be the combo,the end result would be great.Lets see how to make this creamy fine vermicelli payasam recipe.
Fine vermicelli

Fine vermicelli kheer/Payasam recipe


Fine vermicelli kheer/Payasam recipe Kheer/Payasam recipe with fine vermicelli/Semiya
Cuisine: Indian
Category: Sweet
Serves: Serves 4
Prep time: 5 Minutes
Cook time: 15 Minutes
Total time: 20 Minutes


INGREDIENTS

  • Fine vermicelli - 1/2 cup ( 100 gms)
  • Sugar - 1/3 cup
  • Condensed milk - 2 tbsp
  • Ghee - 1 tsp
  • Boiled milk - 1.5 cups
  • Water - 2 cups
  • Cardamom – 2 nos
  • Saffron threads-few
  • Nuts - few ( Roast in a tsp of ghee)
METHOD

  • Take the vermicelli and break into pieces.Heat ghee in a kadai and roast the vermicelli for 2 minutes till golden.
  • After roasting the vermicelli,add water to it. Cover and cook in medium flame for 5 minutes.It cooks quickly.So keep an eye so that it doesn't get burnt.
Vermicelli payasam recipe
  • Add sugar and mix well.Lastly add boiled milk,condensed milk and cardamom powder. Give a boil and switch off the flame.Add saffron threads at the end if needed.
Vermicelli payasam recipe
  • Roast the nuts in ghee and add to the payasam.
  • Serve it warm or refrigerate and serve chill.Enjoy !


Enjoy a cup of payasam with your loved ones.It tastes yum !
Vermicelli payasam recipe

الجمعة، 24 أبريل 2015

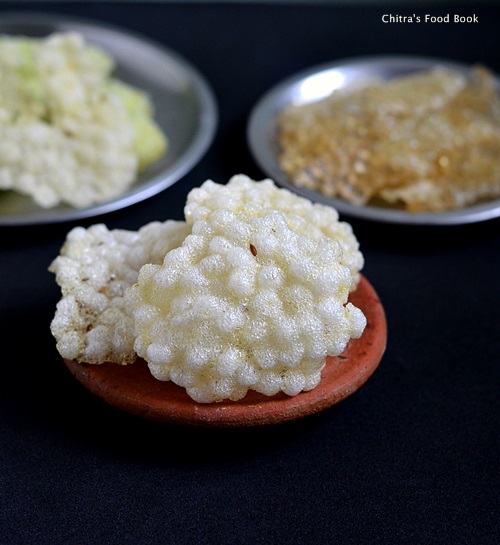
Javvarisi Vadam-Sago Vathal Recipe-Summer Recipes

Javvarisi vadam
Javvarisi vadam/Sago fryums is our family favourite vathal recipe.My MIL makes it very nicely adding different colors.Every year she makes it in bulk during summer and pass it to me & my SIL.This year too,she made a batch for us.My FIL sent me a complete video of making this vadam in detail.But i couldn’t share it now as i am totally tied up with my personal works.Very soon,i will update this post with video and step by step pictures.So,lets see how to make this crunchy Javvarisi Vathal recipe.Please refer my Arisi koozh vadam to get some basic idea of how to make vadam.
Sago vathal recipe

Javvarisi Vadam Recipe


Javvarisi Vadam Recipe Javvarisi vadam/Sago vathal recipe - Summer special side dish for rice varieties
Cuisine: Indian
Category: Snacks
Serves: -
Prep time: 12 Hours
Cook time: 30 Minutes
Total time: 12H30Min


INGREDIENTS

  • Javvarisi/Sago - 1/2 kg ( Big variety)
  • Green chillies - 5 nos
  • Cumin seeds/Jeera -2 tbsp
  • Salt - as needed( Use lesser quantity than rice vadam)
  • Water - as needed ( 1:5 ratio of sago & water)
METHOD

  • Wash and soak the Javvarisi/Sago over night.The next morning sago would have soaked well.Grind green chillies adding required water and salt.Set aside.

  • Boil water in a pressure cooker base.Use 1:5 quantity of water.If sago is 1 cup use 5 cups of water.When the water comes to a boil,add green chilli paste & Jeera.
  • Let it cook well in medium flame.Keep stirring.At one stage,the batter will become thick and shiny,transparent.Javvarisi would have cooked very well without any white trace.Squeeze 1/2 of a lemon and mix well.Addition of lemon juice helps to give white colored vadam as shown in the pics.
  • Now wash a dhoti(cotton cloth) OR thick Polythene sheet.Spread it on the floor.Pour a small ladle of batter and make vadam.Let it dry under the sun during daytime and under the fan during night for one day.
  • The next day morning,sprinkle water on the back side of the cloth and remove the vadam.If using plastic sheet,the vadam will come off easily.No need to sprinkle water.
  • Spread the vadam in the cloth or a paper and again Sun dry  in morning and put under Fan for another 2-3 days till they are completely dry.Deep fry in oil and enjoy with rice.
To check whether it is completely dry,deep fry in oil.The vadam should rise immediately as soon as u put in hot oil and it should not stick to the teeth while eating.


Note


  • For variations,u can add food color in the water during intial stage OR add color while adding lemon juice at the end for making vadam in different colors in the same batch.
Making Javvarisi vadam is easy for beginners for too.Try n enjoy with rice varieties.
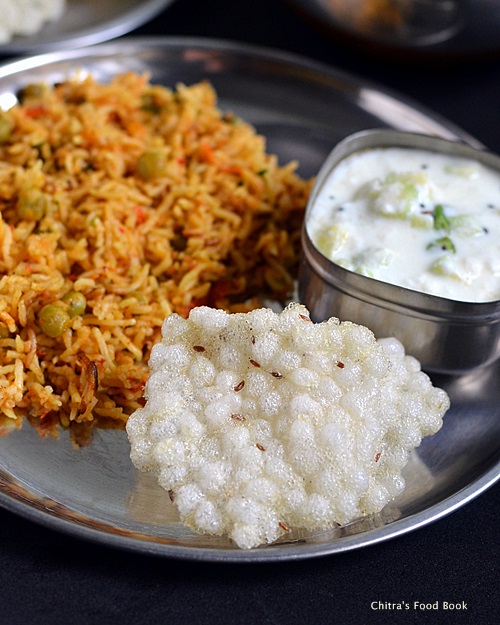
I served it with tomato riceHappy


الثلاثاء، 21 أبريل 2015

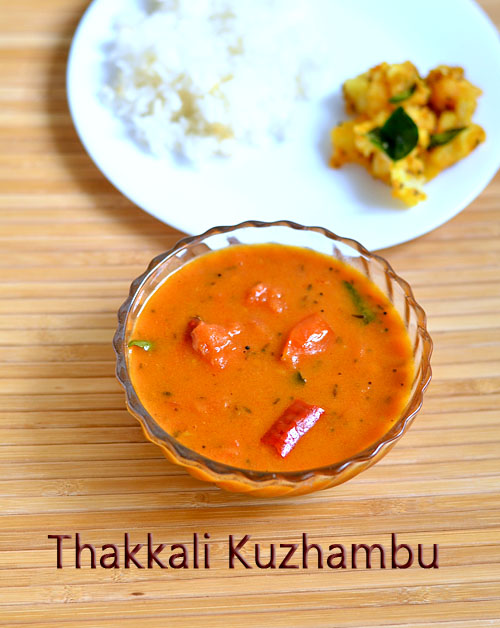
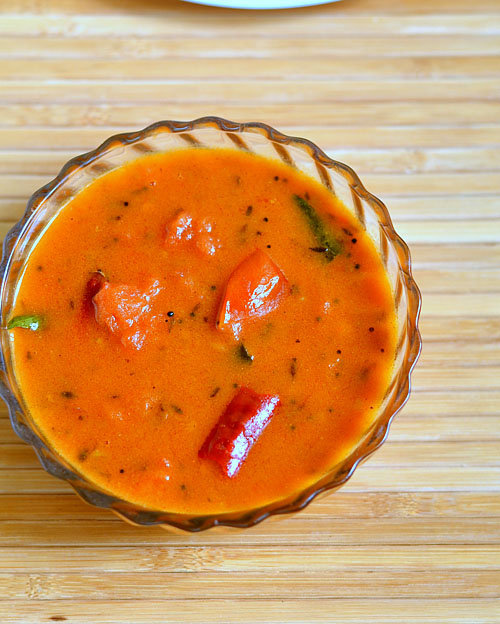
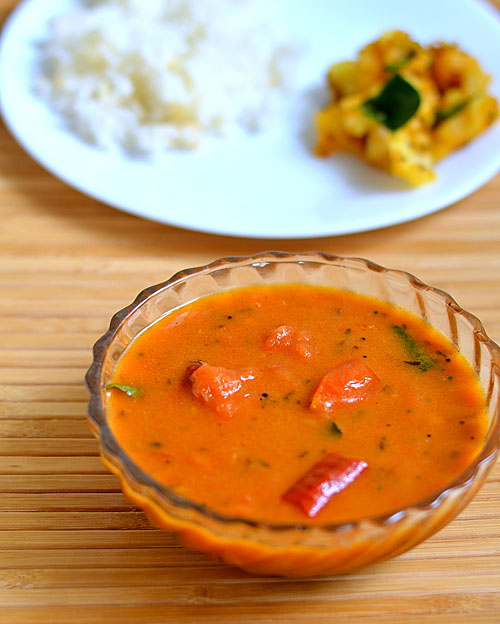
Easy Thakkali Kuzhambu/Tomato Kulambu Recipe


Thakkali kuzhambu recipe
I usually make thakkali kuzhambu for idli,dosa using my mom’s method.It is our family favourite too.But i wanted to try tomato gravy for rice for long time.I have also tried a couple of times but i made in kurma style.So it was not a good pair for rice instead it went well with Idiyappam and Roti.So i was looking for a gravy/kuzhambu recipe without coconut that suits well for rice.I got a perfect recipe from Jeyashri’s blog.I made few changes in the recipe based on my easy brahmin style vatha kuzhambu and tried it for Sendhil’s lunch box yesterday.It was very easy to make with less chopping works and zero grinding job.So Bachelors and working women can give this a shot for making a quick lunch.It was not only easy but also very tasty and finger licking good.Being a tomato lover,i loved this gravy a lot.I am happy that its a no onion no garlic recipe too.Hope this recipe would be useful for my Jain readersHappy.Lets see how to make this yummy,tangy tomato kulambu without coconut for rice.
Check out my 30 kuzhambu varieties for rice if interested !
Thakkali kulambu recipe
 

Thakkali kuzhambu recipe


Thakkali kuzhambu recipe Thakkali kuzhambu/Tomato gravy without coconut for rice
Cuisine: Indian
Category: Gravies
Serves: Serves 2
Prep time: 5 Minutes
Cook time: 10 Minutes
Total time: 15 Minutes


INGREDIENTS

  • Ripe tomato - 4 nos
  • Sambar powder – 2-3 tsp ( add 4 tsp for more spicy taste)
  • Turmeric powder - 1/8 tsp
  • Rice flour - 1 tsp
  • Salt & water - as needed
To temper
  • Gingely oil or cooking oil - 1 tbsp
  • Mustard seeds - 1/2 tsp
  • Urad dal - 1/2 tsp
  • Toor dal - 2 tsp
  • Cumin seeds/Jeera - 1/2 tsp
  • Methi seeds - 1/8 tsp
  • Red chilli – 1 no 
  • Curry leaves - few
  • Hing/asafetida - a pinch
METHOD

  • Wash and chop the tomatoes finely.Dilute rice flour in little water and set aside.

  • Heat oil in a kadai and splutter mustard seeds,methi seeds,urad dal,toor dal,Pinched red chilli and jeera.Saute for a second until dal turns golden.Now add the sambar powder and curry leaves.Saute in medium flame for a minute and immediately add the finely chopped tomatoes.Make sure sambar powder is not burnt.

  • Saute until tomato turns pulpy.Add 1 cup of water and bring to boil.Check for salt and spice.Add more if required.Lastly add the diluted rice flour and Mix well.The gravy will become thick.Add little water and bring to boil.Switch off the flame and serve hot with rice.
How to make thakkali kuzhambu

Enjoy !


Note

  • The quantity of sambar powder may vary based on the tanginess of tomato.
  • Rice flour water acts as a binding agent.Skip if u don’t want to use.Actual recipe din’t call for it.

I served this easy thakkali kuzhambu with rice & easy potato curry.It was yum !
Thakkali kuzhambu recipe

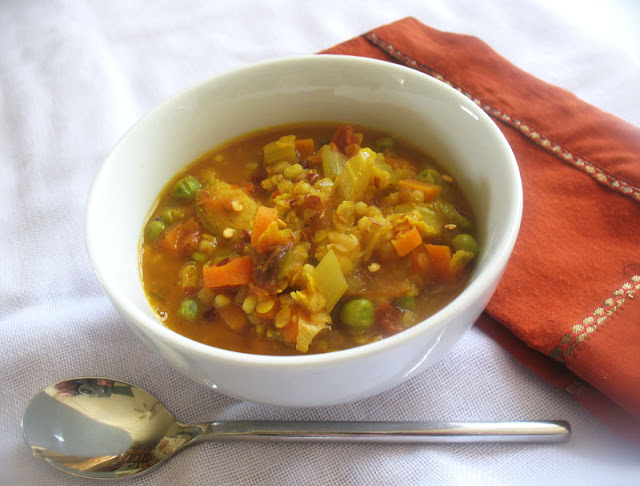
Spiced Red Lentil, Barley and Vegetable Soup

curried lentil and barley vegetable soup

There are times when you don't plan ahead for dinner and you have to make do with staples, unless you want to run out to the grocery store, but that is not always a viable or preferred option. This is one such soup that I put together one afternoon employing the use of odds and ends of produce and basics that I usually always have on hand. The addition of barley and coconut milk add a silky texture to this earthy soup packed full of plenty of root vegetables and robust tomatoes.

Feel free to use whatever vegetables on hand to include in the soup, such as bell peppers, parsnips, green beans, corn and potato, to name just a few. The soup is best with about 3 - 4 cups of vegetables.

Yes, the weather has turned cool again, but I do enjoy soup year round.

 Spiced Red Lentil, Barley and Vegetable Soup Spiced Red Lentil, Barley and Vegetable Soup
Recipe by
Cuisine: Indian
Published on April 21, 2015

Hearty and nourishing soup of lentils, barley and vegetables simmered in a lightly spiced broth of tomatoes, coconut milk and Indian seasonings

Print this recipePrint this recipe

Ingredients:
  • 4 to 6 sun-dried tomatoes
  • 2 tablespoons coconut oil or other oil
  • 1 1/2 teaspoons cumin seeds
  • 1 teaspoon brown mustard seeds
  • 1/2 teaspoon fenugreek seeds (optional)
  • 2 bay leaves or a small handful of crushed dried curry leaves
  • 1/4 teaspoon asafetida
  • 1 medium onion, diced
  • 1-inch piece fresh ginger, grated or minced
  • 1 clove garlic, crushed or minced
  • 3 to 4 green chilies, seeded and minced
  • 3 to 4 cups assorted diced vegetables (I used 2 large carrots, 2 stalks of celery, 6 small Brussels sprouts and 2/3 cup frozen peas)
  • 1 teaspoon turmeric
  • 1 teaspoon ground coriander
  • 2/3 teaspoon paprika
  • 3 medium tomatoes, finely chopped
  • 2 teaspoons tamarind paste
  • 2/3 cup red lentils, rinsed
  • 1/3 cup pearl barley, rinsed
  • 2/3 cup coconut milk
  • 5 to 6 cups water, or more as needed
  • 1 teaspoon garam masala
  • 1 to 2 teaspoons fresh or dried fenugreek (methi) leaves
  • 1 1/2 teaspoons sea salt, or to taste
  • fresh cracked black pepper
  • juice from 1 lemon (3 tablespoons)
Instructions:
  • Soak the sun-dried tomatoes in 1 1/2 cups of hot water for 30 minutes. Drain, reserving the soaking water, and chop. Set aside.

  • Heat the oil over medium heat in a large heavy-bottomed saucepan or soup pot. When hot, toss in the cumin seeds, mustard seeds, fenugreek seeds if using, and bay leaves or curry leaves. When the mustard seeds turn grey and begin to splutter and pop, quickly stir in the asafetida and then add the onion and sauté for 5 minutes. Add the ginger, garlic and chilies and stir for another minute. Now add the chopped vegetables and stir for another 5 minutes. Toss in the turmeric, coriander and paprika, and stir for another minute.

  • Now add the fresh tomatoes, sun-dried tomatoes and tamarind paste to the pan and cook for 5 to 7 minutes until thickened, stirring often. Stir in the lentils and barley and pour in the reserved sun-dried tomato soaking water, coconut milk and 5 cups of water. Bring to a boil, reduce the heat to medium-low, cover, and simmer for 20 to 25 minutes until the vegetables are tender and the lentils and barley are soft. Add up to 1 cup more water if needed.

  • Stir in the garam masala, fenugreek leaves, sea salt, black pepper and lemon juice. Simmer for another few minutes and serve hot.

Makes 6 servings

lentil, barley vegetable soup

More lentil soups to enjoy from Lisa's Vegetarian Kitchen:
Turkish-Style Lentil Soup
Creamy Brown Lentil, Barley and Mushroom Soup
Lentil Soup with Prunes and Apricots
Greek Lentil Soup (Fakes)

الأحد، 19 أبريل 2015

Anjappar Biryani Recipe In Rice Cooker-Sunday Lunch Recipes Series-14

Anjappar biryani recipe
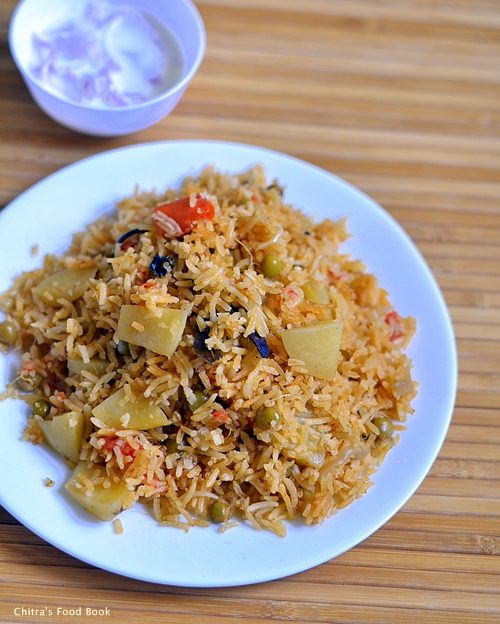
“Evalavo Pannitom Itha Panna MatomaWinking “ haha,This is how i thought when my friend Megha suggested me to try “Anjappar style biryani recipe” using vegetables.I browsed through few Anjappar style chicken biryani recipes and got it from here & here.I mixed up both the recipes and tried it using potato & peas.I usually make biryani using pressure cooker.This time i tried using rice cooker and made it little more spicy as it belongs to Chettinad.The result was yummy and we loved it.After i made this biryani successfully i became very happy & contented that i had tried and shared almost all the popular Tamil nadu biryani recipes like Ambur star biryani, Dindigul Thalappakatti biryani, Coimbatore Angannan biryani, Muslim wedding biryani, Kuska in vegetarian version which was my long time dream.In the line of those yummy biryani recipes,here is yet another interesting and the most popular Anjappar biryani recipe.Friends,do suggest me if u know any other popular biryani recipe across Tamil Nadu.I am eager to try that too.Lets see how to make this flavourful and easy to make Anjappar Biryani Recipe in detail.
Before going to the recipe,I would like to tell something.As I am bit tied up with some personal work, i will try to make a post whenever i find time.Please bear with my irregular postings just for a week.Thanks for understanding.
Check out my other popular Tamil Nadu Biryani recipes

Ambur star biryani

Dindigul Thalappakatti biryani

Coimbatore Angannan biryani

Muslim wedding biryani

Kuska

Anjappar biryani recipe

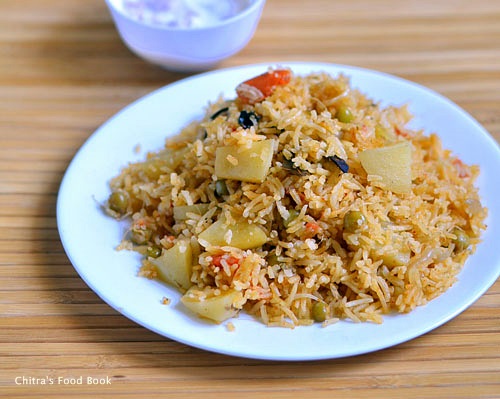
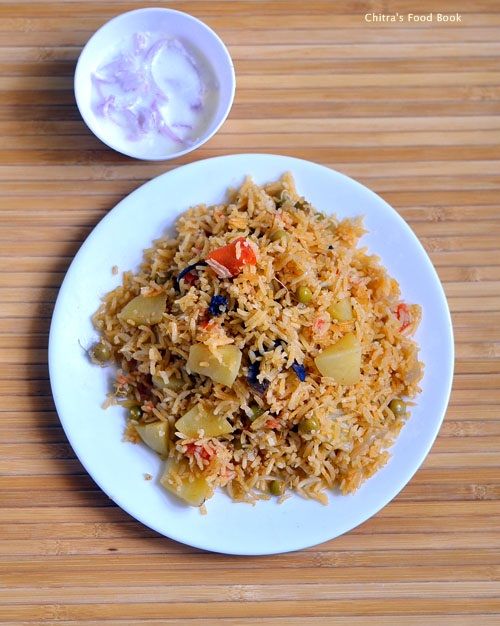
Anjappar biryani recipe using vegetables


Anjappar biryani recipe using vegetables Anjappar biryani recipe with potato & peas - Sunday special lunch menu series - 14
Cuisine: Indian
Category: Lunch
Serves: Serves 2
Prep time: 20 Minutes
Cook time: 15 Minutes
Total time: 35 Minutes


INGREDIENTS

  • Basmati rice - 1 cup ( India Gate)
  • Potato - 3 nos
  • Green peas - a fistful
  • Green chillies - 2 nos
  • Red chilli powder - 1/2 tsp
  • Salt - as needed
  • Water - 2 cups
To roast rice
  • Ghee – 2 tsp
To saute
  • Cooking oil - 2 tbsp
  • Ghee - 1 tbsp
  • Cinnamon - 1 inch piece
  • Cloves - 2 nos
  • Cardamom - 1 no
  • Biryani leaf - 1 no
  • Big onion -1 no ( sliced)
  • Tomato - 1 no
To grind (optional)
  • Big onion - 1/2 no or Small onions - 8 nos
  • Green chillies - 2 no
  • Ginger - 1 inch piece
  • Garlic - 5 cloves
  • Fennel seeds – 1/4 tsp
To Garnish
Mint + coriander leaves – 3 tbsp ( finely chopped)
METHOD

  • Wash and soak the basmati rice for 20 minutes.In the mean time,peel the potatoes and chop into cubes.Slices the onions,cut the tomatoes into small pieces.Slit the green chillies.Grind the ingredients given under”to grind” to a smooth paste adding enough water.(If u don’t want to grind them add 1.5 tsp of g&g paste along with crushed fennel seeds in oil while sauting onions and whole spices)
Anjappar biryani recipe
  • Now drain all the water in soaked rice.Heat ghee in a kadai and roast the rice for 2 minutes without breaking them.
Anjappar biryani recipe
  • Now heat the rice cooker in cooking mode and add oil + ghee in the center of serrated plate.Add cinnamon,cloves,cardamom and biryani leaf.Saute for a second.Now add the sliced onions and slitted green chillies.Saute till transparent.Now add the ground paste and saute until raw smell goes off.Add red chilli powder and mix well.The rice cooker mode may switched into warm mode.No problem,just keep sauting in the heat of plate.Now add the tomatoes and salt.Mix until tomato turns pulpy.Turn the rice cooker to cooking mode and add water.
Anjappar biryani recipe
  • Add finely chopped mint+coriander leaves in water.When the water comes to a boil,add rice.Cook it till done.
    Anjappar biryani recipe
    Enjoy with raita !


Note

  • You can make this biryani using pressure cooker too but change the quantity of water to 1.5 cups.
  • Adjust the quantity of chillies based on your need.
  • You should not add mint+coriander leaves while sauting.Add them only in the water before adding rice.
  • Roasting rice helps to give firm and long grain rice.

Try this yummy Anjappar style biryani recipe in a weekend and Enjoy with your familyHappy
anjappar style biryani