‏إظهار الرسائل ذات التسميات flash samsung. إظهار كافة الرسائل

السبت، 23 ديسمبر 2017

Guide To Flash Stock ROM Samsung GALAXY NOTE EDGE SM-N915.

Guide To Flash Stock ROM Samsung GALAXY NOTE EDGE SM-N915.

Flash Stock Firmware On Samsung GALAXY NOTE EDGE SM-N915. This device is available with different model on each country, and this is the model that available on each country : SM-N915FY (Europe), SM-N915A (AT&T), SM-N915T (T-Mobile), SM-N915K/SM-N915L/SM-N915S (Korea), SM-N915G (Singapore, Australia, Spain), SM-N915D (Japan)

See you on android guide at guidebelajar, now, I will share a little guide how to flash a stock ROM on Samsung GALAXY NOTE EDGE SM-N915 using Odin V3.10.7 software. Samsung GALAXY NOTE EDGE SM-N915 is the smartphone with 5,6 Inchi wide LCD, work on Android OS, v4.4.4 (KitKat), upgradable to v5.1 (Lollipop), with Qualcomm Snapdragon 805 Chipset, supported with Quad-core 2.7 GHz Krait 450 CPU and Adreno 420 GPU, combined with 3 GB of RAM and 16 MP of  Main camera and 3,7 MP on secondary camera. 

Flashing process in android Smartphone is like reinstall process on windows computer PC, with flash your Samsung GALAXY NOTE EDGE SM-N915 android device you can unbrick, downgrade, manually upgrade (instead of updating via OTA or Samsung Smart Switch), or restore Samsung's stock firmware instead of custom ROM. I make this guide just for you as user all Samsung GALAXY NOTE EDGE SM-N915 variant.

You need to read this guide carefully, so you can get the best result flashing on your Samsung GALAXY NOTE EDGE SM-N915. Cause you need to download necessary file, you must ensure that you have good internet connection in your computer device, this guide using a windows computer.

Initial Step To Flash Samsung GALAXY NOTE EDGE SM-N915 

Now, we have reached on beginning guide, so you must to do initial step to ensure everything run smoothly.
  1. Make sure your Samsung GALAXY NOTE EDGE SM-N915 battery is not in a low battery state, a minimum of 80%. If the battery runs out in the middle of the Root, it can lead to failure
  2. Always perform backup your important data before flashing process, Cause this process will delete or erase the data in memory.
  3. Make sure you have installed a Latest of Driver Samsung  that support with your Smartphone, If you don't have, please download here 
  4. Original USB cable driver for your Samsung GALAXY NOTE EDGE SM-N915.
  5. Download Samsung Smart Switch, Here 
  6. Download Odin V3.10.7, Here 
  7. Firmware Samsung GALAXY NOTE EDGE, you must Log In to download firmware via this link below.

Main Guide To Flash Samsung GALAXY NOTE EDGE SM-N915 

  1. You must download all necessary file.(Samsung USB driver or Smart Switch and Odin)
  2. Then you must install all driver or Samsung smart switch to your computer or PC.
  3. Extract Odin V3.10.7. file on the destination folder.
  4. To download Samsung firmware you must visit Sammobile, you can download specific firmware file for your device model number. you must Log In with your registered account on this website.
  5. On the row menu at the top of page, you can select firmware.
  6. Then you must enter in search bar with your phone model number.
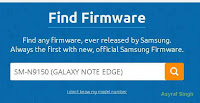
    Flash Stock Firmware On Samsung GALAXY NOTE EDGE SM-N915
    Flash Stock Firmware On Samsung GALAXY NOTE EDGE SM-N915
  7. Then select your country.
  8. Then you click on appear link.
  9. Select regular download.
  10. And Download button again. Approximately file size is 1,6 GB
  11. Wait until your file finish downloaded, after that you must extract all firmware file on specific folder on your computer.
  12. This is your file.
    Flash Stock Firmware On Samsung GALAXY NOTE EDGE SM-N915
    Flash Stock Firmware On Samsung GALAXY NOTE EDGE SM-N915
  13. Switch Off your Samsung GALAXY NOTE EDGE SM-N915 to start flashing process.
  14. Then, you must run Odin3 v3.10.7 by right click on Odin.exe and select Run as Administrator.
  15. When program is running, now you can click AP, and navigate to the *.tar or *.tar.md5 firmware file.
  16. Now your firmware file has been inserted in Odin3 
  17. Then, Enter download mode your Samsung GALAXY NOTE EDGE SM-N915 by pressing and hold Volume Down Button + Home Button + Power Button. Hold and press all button untill your phone vibrate and LCD show menu.
  18. Download mode Samsung GALAXY NOTE EDGE SM-N915
    Download mode Samsung GALAXY NOTE EDGE SM-N915
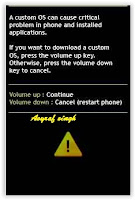
  19. And you will see picture like this on your LCD screen.
  20. Download Mode GALAXY NOTE EDGE SM-N915
    Download Mode GALAXY NOTE EDGE SM-N915
    On this mode, now you must connect your Samsung GALAXY NOTE EDGE SM-N915 to your PC / laptop using a USB cable. 
  21. After your phone connected, you will see a message appear that show your device added and there is info on the ID: COM at top left corner. Keep in mind for this COM vary depending on the PC / Laptop. Just Ignore all, in this picture you will see that your device is detected on (COM 5)
    Enter download mode samsung GALAXY NOTE EDGE SM-N915
    Port Com samsung GALAXY NOTE EDGE SM-N915
  22. Make sure re-partition is NOT ticked
  23. When everything already you can click Start Button. at the bottom left corner
  24. Just wait for the process to run about 2-5 minutes, and make sure there is no interference in this process. 
  25. When complete it will display a notification PASS and your smartphoneSamsung GALAXY NOTE EDGE SM-N915 will automatically restart.
  26. Wait your device to boot up, it will take a while.
  27. When your Samsung GALAXY NOTE EDGE SM-N915 is ready to use, you can check your firmware update version by dial *#1234# on dial pad.
    dial pad samsung GALAXY NOTE EDGE SM-N915
    dial pad samsung GALAXY NOTE EDGE SM-N915
  28. And you will see your new firmware version.
    firmware version samsung GALAXY NOTE EDGE SM-N915
    firmware version samsung GALAXY NOTE EDGE SM-N915
  29. Finish.

Warning.
Never disconnect the USB cable while flashing process is running.
Install Samsung Mobile Driver or Samsung Smart Switch if you don't see a sign in Odin.
Flash your Samsung GALAXY NOTE EDGE SM-N915 device at your own risk.
Flashing firmware's which contains more than one *.tar.md5 file will wipe all data on internal storage.  Flashing official/stock firmware won't increase the binary flash nor KNOX WARRANTY VOID counter and won't cancel the Samsung GALAXY NOTE EDGE SM-N915 device's warranty. 

الأربعاء، 20 ديسمبر 2017

Guide To Flash Stock ROM Samsung GALAXY S6 SM-G920F (Global).

Guide To Flash Stock ROM Samsung GALAXY S6 SM-G920F (Global).

Flash Stock Firmware On Samsung GALAXY S6 SM-G920F. This device is also called with Samsung Galaxy S6 SM-G920 Curved screen version. Also this device is available with different model on each country, and this is the model that dependent on each country : SM-G9200 (Hong Kong), SM-G9208 (China), SM-G9208/SS (China), SM-G9209 (China), SM-G920A (AT&T), SM-G920F (Global), SM-G920FD (Pakistan, Philippines), SM-G920I (LATAM, Singapore, India, Australia), SM-G920S (Korea), SM-G920T (T-Mobile)

See you on android guide at guidebelajar, now, I will share a little guide how to flash a stock ROM on Samsung GALAXY S6 SM-G920F using Odin V3.10.7 software. Samsung GALAXY S6 SM-G920F is the smartphone with 5,1 Inchi wide LCD, work on Android OS, v5.0.2 (Lollipop), upgradable to v5.1.1 (Lollipop),  with Exynos 7420 Chipset, supported with Quad-core 1.5 GHz Cortex-A53 & Quad-core 2.1 GHz Cortex-A57 CPU and Mali-T760MP8 GPU, combined with 3 GB of RAM and 16 MP of  Main camera and 5 MP on secondary camera. 

Flashing process in android Smartphone is like reinstall process on windows computer PC, with flash your Samsung GALAXY S6 SM-G920F android device you can unbrick, downgrade, manually upgrade (instead of updating via OTA or Samsung Smart Switch), or restore Samsung's stock firmware instead of custom ROM. I make this guide just for you as user all Samsung GALAXY S6 SM-G920F variant.

You need to read this guide carefully, so you can get the best result flashing on your Samsung GALAXY S6 SM-G920F. Cause you need to download necessary file, you must ensure that you have good internet connection in your computer device, this guide using a windows computer.

Initial Step To Flash Samsung GALAXY S6 SM-G920F 

Now, we have reached on beginning guide, so you must to do initial step to ensure everything run smoothly.
  1. Make sure your Samsung GALAXY S6 SM-G920F battery is not in a low battery state, a minimum of 80%. If the battery runs out in the middle of the Root, it can lead to failure
  2. Always perform backup your important data before flashing process, Cause this process will delete or erase the data in memory.
  3. Make sure you have installed a Latest of Driver Samsung  that support with your Smartphone, If you don't have, please download here 
  4. Original USB cable driver for your Samsung GALAXY S6 SM-G920F
  5. Download Samsung Smart Switch, Here 
  6. Download Odin V3.10.7, Here 
  7. Firmware Samsung GALAXY S6 SM-G920F, you must Log In to download firmware via this link below.

Main Guide To Flash Samsung GALAXY S6 SM-G920F 

  1. You must download all necessary file.(Samsung USB driver or Smart Switch and Odin)
  2. Then you must install all driver or Samsung smart switch to your computer or PC.
  3. Extract Odin V3.10.7. file on the destination folder.
  4. To download Samsung firmware you must visit Sammobile, you can download specific firmware file for your device model number. you must Log In with your registered account on this website.
  5. On the row menu at the top of page, you can select firmware.
  6. Then you must enter in search bar with your phone model number.
  7. Then select your country.
  8. Then you click on appear link.
  9. Select regular download.
  10. And Download button again. Approximately file size is 1,6 GB
  11. Wait until your file finish downloaded, after that you must extract all firmware file on specific folder on your computer.
  12. This is your file.
    Flash Stock Firmware On Samsung GALAXY S6  SM-G920F
    Flash Stock Firmware On Samsung GALAXY S6 SM-G920F
  13. Switch Off your Samsung GALAXY S6 SM-G920F to start flashing process.
  14. Then, you must run Odin3 v3.10.7 by right click on Odin.exe and select Run as Administrator.
  15. When program is running, now you can click AP, and navigate to the *.tar or *.tar.md5 firmware file.
  16. Now your firmware file has been inserted in Odin3 
  17. Then, Enter download mode your Samsung GALAXY S6 SM-G920F by pressing and hold Volume Down Button + Home Button + Power Button. Hold and press all button untill your phone vibrate and LCD show menu.
  18. Download Mode GALAXY S6  SM-G920F
    Download Mode GALAXY S6 SM-G920F
  19. And you will see picture like this on your LCD screen.
  20. Download Mode GALAXY S6  SM-G920F
    Download Mode GALAXY S6 SM-G920F
    On this mode, now you must connect your Samsung GALAXY S6 SM-G920F to your PC / laptop using a USB cable. 
  21. After your phone connected, you will see a message appear that show your device added and there is info on the ID: COM at top left corner. Keep in mind for this COM vary depending on the PC / Laptop. Just Ignore all, in this picture you will see that your device is detected on (COM 5)
    Enter download mode samsung GALAXY S6  SM-G920F
    Port Com samsung GALAXY S6 SM-G920F
  22. Make sure re-partition is NOT ticked
  23. When everything already you can click Start Button. at the bottom left corner
  24. Just wait for the process to run about 2-5 minutes, and make sure there is no interference in this process. 
  25. When complete it will display a notification PASS and your smartphone Samsung GALAXY S6 SM-G920F will automatically restart.
  26. Wait your device to boot up, it will take a while.
  27. When your Samsung GALAXY S6 SM-G920F is ready to use, you can check your firmware update version by dial *#1234# on dial pad.
    dial pad samsung GALAXY S6  SM-G920F
    dial pad samsung GALAXY S6 SM-G920F
  28. And you will see your new firmware version.
    firmware version samsung GALAXY S6  SM-G920F
    firmware version samsung GALAXY S6 SM-G920F
  29. Finish.

Warning.
Never disconnect the USB cable while flashing process is running.
Install Samsung Mobile Driver or Samsung Smart Switch if you don't see a sign in Odin.
Flash your Samsung GALAXY S6 SM-G920F device at your own risk.
Flashing firmware's which contains more than one *.tar.md5 file will wipe all data on internal storage.  Flashing official/stock firmware won't increase the binary flash nor KNOX WARRANTY VOID counter and won't cancel the Samsung GALAXY S6 SM-G920F device's warranty. 

Guide To Flash Stock ROM Samsung GALAXY NOTE 4 DUOS SM-N910G (Singapore, India, Australia)

Guide To Flash Stock ROM Samsung GALAXY NOTE 4 DUOS SM-N910G (Singapore, India, Australia)

Flash Stock Rom Samsung GALAXY NOTE 4 DUOS SM-N910G. This device is launched on September, 2014, and avalaible on market at October, 2014. Many version of Samsung Galaxy Note 4, depending on diferent country. This is the country that avalaible with this device, SM-N910F (Europe), SM-N910K/SM-N910L/SM-N910S (Korea), SM-N910C (Asia, Europe, South America), SM-N910FD (United Arab Emirates), SM-N910FQ (Turkey), SM-N910H (Asia-Pacific), SM-N910G (Singapore, India, Australia), SM-N910U (Hong Kong, Taiwan, Australia, New Zealand, Chile), SM-N910W8 (North America).

Today's I will share a simple guide how to flash a stock ROM on Samsung GALAXY NOTE 4 DUOS SM-N910G (Singapore, India, Australia), using Odin V3.10.6 software. Samsung GALAXY NOTE 4 DUOS SM-N910G is the smartphone with 5,7 Inchi wide LCD, work on Android OS, v4.4.4 (KitKat), upgradable to v5.0.1 (Lollipop), with Exynos 5433 Chipset, supported with Quad-core 1.3 GHz Cortex-A53 & Quad-core 1.9 GHz Cortex-A57 CPU and Mali T760 GPU, combined with 3 GB of RAM and 16 MP of  Main camera and 3,7 MP on secondary camera. 

Flashing process in android Smartphone is like reinstall process on windows computer PC, with flash your Samsung GALAXY NOTE 4 DUOS SM-N910G android device you can unbrick, downgrade, manually upgrade (instead of updating via OTA or Samsung Smart Switch), or restore Samsung's stock firmware instead of custom ROM. I make this guide just for you as user all Samsung GALAXY NOTE 4 DUOS SM-N910G variant.

You need to read this guide carefully, so you can get the best result flashing on your Samsung GALAXY NOTE 4 DUOS SM-N910G. Cause you need to download necessary file, you must ensure that you have good internet connection in your computer device, this guide using a windows computer.

Initial Step To Flash Samsung GALAXY NOTE 4 DUOS SM-N910G 

Now, we have reached on beginning guide, so you must to do initial step to ensure everything run smoothly.
  1. Make sure your Samsung GALAXY NOTE 4 DUOS SM-N910G battery is not in a low battery state, a minimum of 80%. If the battery runs out in the middle of the Root, it can lead to failure
  2. Always perform backup your important data before flashing process, Cause this process will delete or erase the data in memory.
  3. Make sure you have installed a Latest of Driver Samsung  that support with your Smartphone, If you don't have, please download here 
  4. Original USB cable driver for your Samsung GALAXY NOTE 4 DUOS SM-N910G
  5. Download Samsung Smart Switch, Here 
  6. Download Odin V3.10.7, Here 
  7. Firmware Samsung GALAXY NOTE 4 DUOS, you must Log In to download firmware via this link.
    • SM-N910G - Sri Lanka, Bangladesh, India, Australia, Singapore, Here

Main Guide To Flash Samsung GALAXY NOTE 4 DUOS SM-N910G 

  1. You must download all necessary file.(Samsung USB driver or Smart Switch and Odin)
  2. Then you must install all driver or samsung smart switch to your computer or PC.
  3. Extract Odin V3.10.7. file on the destination folder.
  4. To download Samsung firmware you must visit Sammobile, you can download specific firmware file for your device model number. you must Log In with your registered account on this website.
  5. On the row menu at the top of page, you can select firmware.
  6. Then you must enter in search bar with your phone model number.

    Flash Stock ROM Samsung GALAXY NOTE 4 DUOS SM-N910G
    Flash Stock ROM Samsung GALAXY NOTE 4 DUOS SM-N910G
  7. Then select your country
  8. Then you click on appear link.
  9. Select regular download.
  10. And Download button again. Approximately file size is 1,6 GB
  11. Wait until your file finish downloaded, after that you must extract all firmware file on specific folder on your computer.
  12. This is your file.
    Flash Stock Firmware On Samsung GALAXY NOTE 4 DUOS SM-N910G
    Flash Stock Firmware On Samsung GALAXY NOTE 4 DUOS SM-N910G
  13. Switch Off your Samsung GALAXY NOTE 4 DUOS SM-N910G to start flashing process.
  14. Then, you must run Odin3 v3.10.7 by right click on Odin.exe and select Run as Administrator.
  15. When program is running, now you can click AP, and navigate to the *.tar or *.tar.md5 firmware file.
  16. Now your firmware file has been inserted in Odin3 
  17. Then, Enter download mode your Samsung GALAXY NOTE 4 DUOS SM-N910G by pressing and hold Volume Down Button + Home Button + Power Button. Hold and press all button until your phone vibrate and LCD show menu.
  18. And you will see picture like this on your LCD screen.
  19. Download Mode GALAXY NOTE 4 DUOS SM-N910G
    Download Mode GALAXY NOTE 4 DUOS SM-N910G
  20. On this mode, now you must connect your Samsung GALAXY NOTE 4 DUOS SM-N910G to your PC / laptop using a USB cable. 
  21. After your phone connected, you will see a message appear that show your device added and there is info on the ID: COM at top left corner. Keep in mind for this COM vary depending on the PC / Laptop. Just Ignore all, in this picture you will see that your device is detected on (COM 5)
    Enter download mode samsung GALAXY NOTE 4 DUOS SM-N910G
    Port Com samsung GALAXY NOTE 4 DUOS SM-N910G
  22. Make sure re-partition is NOT ticked
  23. When everything already you can click Start Button. at the bottom left corner
  24. Just wait for the process to run about 2-5 minutes, and make sure there is no interference in this process. 
  25. When complete it will display a notification PASS and your smartphone Samsung GALAXY NOTE 4 DUOS SM-N910G will automatically restart.
  26. Wait your device to boot up, it will take a while.
  27. When your Samsung GALAXY NOTE 4 DUOS SM-N910G is ready to use, you can check your firmware update version by dial *#1234# on dial pad.
    dial pad samsung GALAXY NOTE 4 DUOS SM-N910G
    dial pad samsung GALAXY NOTE 4 DUOS SM-N910G
  28. And you will see your new firmware version.
    firmware version samsung GALAXY NOTE 4 DUOS SM-N910G
    firmware version samsung GALAXY NOTE 4 DUOS SM-N910G
  29. Finish.

Warning.
Never disconnect the USB cable while flashing process is running.
Install Samsung Mobile Driver or Samsung Smart Switch if you don't see a sign in Odin.
Flash your Samsung GALAXY NOTE 4 DUOS SM-N910G device at your own risk.
Flashing firmware which contains more than one *.tar.md5 file will wipe all data on internal storage.  Flashing official/stock firmware won't increase the binary flash nor KNOX WARRANTY VOID counter and won't cancel the Samsung GALAXY NOTE 4 DUOS SM-N910G device's warranty. 

Guide To Flash Stock ROM Samsung GALAXY NOTE 4 DUOS SM-N910C Using Odin V3.10.7.

Guide To Flash Stock ROM Samsung GALAXY NOTE 4 DUOS SM-N910C Using Odin V3.10.7.

Flash Stock Rom Samsung GALAXY NOTE 4 DUOS SM-N910C. This device is launched on September, 2014, and avalaible on market at October, 2014. Many version of Samsung Galaxy Note 4, depending on diferent country. This is the country that avalaible with this device, SM-N910F (Europe), SM-N910K/SM-N910L/SM-N910S (Korea), SM-N910C (Asia, Europe, South America), SM-N910FD (United Arab Emirates), SM-N910FQ (Turkey), SM-N910H (Asia-Pacific), SM-N910G (Singapore, India, Australia), SM-N910U (Hong Kong, Taiwan, Australia, New Zealand, Chile), SM-N910W8 (North America).

Today's I will share a little guide how to flash a stock ROM on Samsung GALAXY NOTE 4 DUOS SM-N910C (Asia, Europe, South America), using Odin V3.10.6 software. Samsung GALAXY NOTE 4 DUOS SM-N910C is the smartphone with 5,7 Inchi wide LCD, work on Android OS, v4.4.4 (KitKat), upgradable to v5.0.1 (Lollipop), with Exynos 5433 Chipset, supported with Quad-core 1.3 GHz Cortex-A53 & Quad-core 1.9 GHz Cortex-A57 CPU and Mali T760 GPU, combined with 3 GB of RAM and 16 MP of  Main camera and 3,7 MP on secondary camera. 

Flashing process in android Smartphone is like reinstall process on windows computer PC, with flash your Samsung GALAXY NOTE 4 DUOS SM-N910C android device you can unbrick, downgrade, manually upgrade (instead of updating via OTA or Samsung Smart Switch), or restore Samsung's stock firmware instead of custom ROM. I make this guide just for you as user all Samsung GALAXY NOTE 4 DUOS SM-N910C variant.

You need to read this guide carefully, so you can get the best result flashing on your Samsung GALAXY NOTE 4 DUOS SM-N910C. Cause you need to download necessary file, you must ensure that you have good internet connection in your computer device, this guide using a windows computer.

Initial Step To Flash Samsung GALAXY NOTE 4 DUOS SM-N910C 

Now, we have reached on beginning guide, so you must to do initial step to ensure everything run smoothly.
  1. Make sure your Samsung GALAXY NOTE 4 DUOS SM-N910C battery is not in a low battery state, a minimum of 80%. If the battery runs out in the middle of the Root, it can lead to failure
  2. Always perform backup your important data before flashing process, Cause this process will delete or erase the data in memory.
  3. Make sure you have installed a Latest of Driver Samsung  that support with your Smartphone, If you don't have, please download here 
  4. Original USB cable driver for your Samsung GALAXY NOTE 4 DUOS SM-N910C
  5. Download Samsung Smart Switch, Here 
  6. Download Odin V3.10.7, Here 
  7. Firmware Samsung GALAXY NOTE 4 DUOS, you must Log In to download firmware via this link.
    • SM-N910C - Chile, Thailand, Colombo, Malaysia, Vietnam, Cambodia, Iran, Pakistan, Moroco, Mauritius, Iraq, Saudi Arabia, Egypt, Kenya, Afghanistan, Paraguay, Mexico, Brazil, Colombia, Trinidad, Uruguay, Panama, Philippines, Vietnam. Here  

Main Guide To Flash Samsung GALAXY NOTE 4 DUOS SM-N910C 

  1. You must download all necessary file.(Samsung USB driver or Smart Switch and Odin)
  2. Then you must install all driver or samsung smart switch to your computer or PC.
  3. Extract Odin V3.10.7. file on the destination folder.
  4. To download Samsung firmware you must visit Sammobile, you can download specific firmware file for your device model number. you must Log In with your registered account on this website.
  5. On the row menu at the top of page, you can select firmware.
  6. Then you must enter in search bar with your phone model number.
  7. Then select your country.
  8. Then you click on appear link.
  9. Select regular download.
  10. And Download button again. Approximately file size is 1,6 GB
  11. Wait until your file finish downloaded, after that you must extract all firmware file on specific folder on your computer.
  12. This is your file.
    Flash Stock Firmware On Samsung GALAXY NOTE 4 DUOS SM-N910C
    Flash Stock Firmware On Samsung GALAXY NOTE 4 DUOS SM-N910C
  13. Switch Off your Samsung GALAXY NOTE 4 DUOS SM-N910C to start flashing process.
  14. Then, you must run Odin3 v3.10.7 by right click on Odin.exe and select Run as Administrator.
  15. When program is running, now you can click AP, and navigate to the *.tar or *.tar.md5 firmware file.
  16. Now your firmware file has been inserted in Odin3 
  17. Then, Enter download mode your Samsung GALAXY NOTE 4 DUOS SM-N910C by pressing and hold Volume Down Button + Home Button + Power Button. Hold and press all button until your phone vibrate and LCD show menu.
  18. download mode Samsung GALAXY NOTE 4 DUOS SM-N910C
    download mode Samsung GALAXY NOTE 4 DUOS SM-N910C
  19. And you will see picture like this on your LCD screen.
  20. Download Mode GALAXY NOTE 4 DUOS SM-N910C
    Download Mode GALAXY NOTE 4 DUOS SM-N910C
  21. On this mode, now you must connect your Samsung GALAXY NOTE 4 DUOS SM-N910C to your PC / laptop using a USB cable. 
  22. After your phone connected, you will see a message appear that show your device added and there is info on the ID: COM at top left corner. Keep in mind for this COM vary depending on the PC / Laptop. Just Ignore all, in this picture you will see that your device is detected on (COM 5)
    Enter download mode samsung GALAXY NOTE 4 DUOS SM-N910C
    Port Com samsung GALAXY NOTE 4 DUOS SM-N910C
  23. Make sure re-partition is NOT ticked
  24. When everything already you can click Start Button. at the bottom left corner
  25. Just wait for the process to run about 2-5 minutes, and make sure there is no interference in this process. 
  26. When complete it will display a notification PASS and your smartphoneSamsung GALAXY NOTE 4 DUOS SM-N910C will automatically restart.
  27. Wait your device to boot up, it will take a while.
  28. When your Samsung GALAXY NOTE 4 DUOS SM-N910C is ready to use, you can check your firmware update version by dial *#1234# on dial pad.
    dial pad samsung GALAXY NOTE 4 DUOS SM-N910C
    dial pad samsung GALAXY NOTE 4 DUOS SM-N910C
  29. And you will see your new firmware version.
    firmware version samsung GALAXY NOTE 4 DUOS SM-N910C
    firmware version samsung GALAXY NOTE 4 DUOS SM-N910C
  30. Finish.

Warning.
Never disconnect the USB cable while flashing process is running.
Install Samsung Mobile Driver or Samsung Smart Switch if you don't see a sign in Odin.
Flash your Samsung GALAXY NOTE 4 DUOS SM-N910C device at your own risk.
Flashing firmware which contains more than one *.tar.md5 file will wipe all data on internal storage.  Flashing official/stock firmware won't increase the binary flash nor KNOX WARRANTY VOID counter and won't cancel the Samsung GALAXY NOTE 4 DUOS SM-N910C device's warranty. 

الجمعة، 15 ديسمبر 2017

How To Flash Stock Firmware On Samsung GALAXY J5 SM-J5008 Using Odin V3.10.6.

How To Flash Stock Firmware On Samsung GALAXY J5 SM-J5008 Using Odin V3.10.6.

Flash Stock Firmware On Samsung GALAXY J5 SM-J5008. See you on android guide at guidebelajar, now, I will share a simple guide how to flash a stock ROM on Samsung GALAXY J5 SM-J5008 using Odin V3.10.6 software. Samsung GALAXY J5 SM-J5008 is the smartphone with 5 Inchi wide LCD, work on Android OS, v5.1 (Lollipop),  with Qualcomm Snapdragon 615 Exynos 7580 Chipset, supported with Quad-core 1.4 GHz Cortex-A53 & quad-core 1.0 GHz Cortex-A53 CPU and Adreno 405 GPU, combined with 1,5 GB of RAM and 13 MP of  Main camera and 5 MP on secondary camera. 

Flashing process in android Smartphone is like reinstall process on windows computer PC, with flash your Samsung GALAXY J5 SM-J5008 android device you can unbrick, downgrade, manually upgrade (instead of updating via OTA or Samsung Smart Switch), or restore Samsung's stock firmware instead of custom ROM. I make this guide just for you as user all Samsung GALAXY J5 SM-J5008 variant.

You need to read this guide carefully, so you can get the best result flashing on your Samsung GALAXY J5 SM-J5008. Cause you need to download necessary file, you must ensure that you have good internet connection in your computer device, this guide using a windows computer.

Initial Step To Flash Samsung GALAXY J5 SM-J5008 

Now, we have reached on beginning guide, so you must to do initial step to ensure everything run smoothly.
  1. Make sure your Samsung GALAXY J5 SM-J5008 battery is not in a low battery state, a minimum of 80%. If the battery runs out in the middle of the Root, it can lead to failure
  2. Always perform backup your important data before flashing process, Cause this process will delete or erase the data in memory.
  3. Make sure you have installed a Latest of Driver Samsung  that support with your Smartphone, If you don't have, please download here 
  4. Original USB cable driver for your Samsung GALAXY J5 SM-J5008.
  5. Download Samsung Smart Switch, Here 
  6. Download Odin V3.10.6, Here 
  7. Firmware Samsung GALAXY J5, you must Log In to download firmware via this link below.

Firmware Detail.

Before you perform flash to your Samsung GALAXY J5 SM-J5008, make sure your downloaded firmware is like this :
  • Model: SM-J5008
  • Model name:
  • Country: China (China Mobile)
  • Version: Android 5.1
  • Changelist: 610694
  • Build date: Thu, 11 Jun 2015 08:52:33 +0000
  • Product code: CHM
  • PDA: J5008ZMU1AOF1
  • CSC: J5008CHM1AOF1

Main Guide To Flash Samsung GALAXY J5 SM-J5008 

  1. You must download all necessary file.(Samsung USB driver or Smart Switch and Odin)
  2. Then you must install all driver or samsung smart switch to your computer or PC.
  3. Extraxt Odin V3.10.6. file on the destination folder.
  4. To download Samsung firmware you must visit Sammobile, you can download specific firmware file for your device model number. you must Log In with your registered account on this website.
  5. On the row menu at the top of page, you can select firmware.
  6. Then you must enter in search bar with your phone model number. you can type SM-J7008 as your phone models then press enter.
    download firmware Samsung GALAXY J5 SM-J5008
    download firmware Samsung GALAXY J5 SM-J5008
  7. And you will see search result like this. you can click your phone models link
    download firmware Samsung GALAXY J5 SM-J5008
    download firmware Samsung GALAXY J5 SM-J5008
  8. Then select your country.
  9. Then you click on appear link.
  10. Select regular download.
  11. And Download button again. Approximately file size is 884 MB
  12. Wait until your file finish downloaded, after that you must extract all firmware file on specific folder on your computer.
  13. This is your file.
    Flash Stock Firmware On Samsung GALAXY J5 SM-J5008
    Flash Stock Firmware On Samsung GALAXY J5 SM-J5008
  14. Switch Off your Samsung GALAXY J5 SM-J5008 to start flashing process.
  15. Then, you must run Odin3 v3.10.6 by right click on Odin.exe and select Run as Administrator.
  16. When program is running, now you can click AP, and navigate to the *.tar or *.tar.md5 firmware file.
    Flash Stock Firmware On Samsung GALAXY J5 SM-J5008
    Flash Stock Firmware On Samsung GALAXY J5 SM-J5008
  17. Now your firmware file has been inserted in Odin3 
  18. Then, Enter download mode your Samsung GALAXY J5 SM-J5008 by pressing and hold Volume Down Button + Home Button + Power Button. Hold and press all button until your phone vibrate and LCD show menu.
  19. download MODE Samsung GALAXY J5 SM-J5008
    download MODE Samsung GALAXY J5 SM-J5008
  20. And you will see picture like this on your LCD screen.
  21. Download Mode GALAXY J5 SM-J5008
    Download Mode GALAXY J5 SM-J5008
  22. On this mode, now you must connect your Samsung GALAXY J5 SM-J5008 to your PC / laptop using a USB cable.
  23. After your phone connected, you will see a message appear that show your device added and there is info on the ID: COM at top left corner. Keep in mind for this COM vary depending on the PC / Laptop. Just Ignore all, in this picture you will see that your device is detected on (COM 5)
    Enter download mode samsung GALAXY J5 SM-J5008
    Port Com samsung GALAXY J5 SM-J5008
  24. Make sure re-partition is NOT ticked
  25. When everything already you can click Start Button. at the bottom left corner
  26. Just wait for the process to run about 2-5 minutes, and make sure there is no interference in this process. 
  27. When complete it will display a notification PASS and your smartphone Samsung GALAXY J5 SM-J5008 will automatically restart.
  28. Wait your device to boot up, it will take a while.
  29. When your Samsung GALAXY J5 SM-J5008 is ready to use, you can check your firmware update version by dial *#1234# on dial pad.
    dial pad samsung GALAXY J5 SM-J5008
    dial pad samsung GALAXY J5 SM-J5008
  30. And you will see your new firmware version.
    firmware version samsung GALAXY J5 SM-J5008
    firmware version samsung GALAXY J5 SM-J5008
  31. Finish.


  32. Warning.
    Never disconnect the USB cable while flashing process is running.
    Install Samsung Mobile Driver or Samsung Smart Switch if you don't see a sign in Odin.
    Flash your Samsung GALAXY J5 SM-J5008 device at your own risk.
    Flashing firmwares which contains more than one *.tar.md5 file will wipe all data on internal storage.  Flashing official/stock firmware won't increase the binary flash nor KNOX WARRANTY VOID counter and won't cancel the Samsung GALAXY J5 SM-J5008 device's warranty. 

How To Flash Stock Firmware On Samsung GALAXY J7 SM-J7008 Using Odin V3.10.6.

How To Flash Stock Firmware On Samsung GALAXY J7 SM-J7008 Using Odin V3.10.6.

Flash Stock Firmware On Samsung GALAXY J7 SM-J7008. See you on android guide at guidebelajar, now, I will share a simple guide how to flash a stock ROM on Samsung GALAXY J7 SM-J7008 using Odin V3.10.6 software. Samsung GALAXY J7 SM-J7008 is the smartphone with 5,5 Inchi wide LCD, work on Android OS, v5.1 (Lollipop),  with Qualcomm Snapdragon 615 Exynos 7580 Chipset, supported with Quad-core 1.4 GHz Cortex-A53 & quad-core 1.0 GHz Cortex-A53 CPU and Adreno 405 GPU, combined with 1,5 GB of RAM and 13 MP of  Main camera and 5 MP on secondary camera. 

Flashing process in android Smartphone is like reinstall process on windows computer PC, with flash your Samsung GALAXY J7 SM-J7008 android device you can unbrick, downgrade, manually upgrade (instead of updating via OTA or Samsung Smart Switch), or restore Samsung's stock firmware instead of custom ROM. I make this guide just for you as user all Samsung GALAXY J7 SM-J7008 variant.

You need to read this guide carefully, so you can get the best result flashing on your Samsung GALAXY J7 SM-J7008. Cause you need to download necessary file, you must ensure that you have good internet connection in your computer device, this guide using a windows computer.

Initial Step To Flash Samsung GALAXY J7 SM-J7008 

Now, we have reached on beginning guide, so you must to do initial step to ensure everything run smoothly.
  1. Make sure your Samsung GALAXY J7 SM-J7008 battery is not in a low battery state, a minimum of 80%. If the battery runs out in the middle of the Root, it can lead to failure
  2. Always perform backup your important data before flashing process, Cause this process will delete or erase the data in memory.
  3. Make sure you have installed a Latest of Driver Samsung  that support with your Smartphone, If you don't have, please download here 
  4. Original USB cable driver for your Samsung GALAXY J7 SM-J7008.
  5. Download Samsung Smart Switch, Here 
  6. Download Odin V3.10.6, Here 
  7. Firmware Samsung GALAXY J7, you must Log In to download firmware via this link below.

Main Guide To Flash Samsung GALAXY J7 SM-J7008 

  1. You must download all necessary file.(Samsung USB driver or Smart Switch and Odin)
  2. Then you must install all driver or samsung smart switch to your computer or PC.
  3. Extract Odin V3.10.6. file on the destination folder.
  4. To download Samsung firmware you must visit Sammobile, you can download specific firmware file for your device model number. you must Log In with your registered account on this website.
  5. On the row menu at the top of page, you can select firmware.
  6. Then you must enter in search bar with your phone model number. you can type SM-J7008 as your phone models then press enter.
  7. And you will see search result, then click your phone models link
  8. Then select your country.
  9. Then you click on appear link.
  10. Select regular download.
    download firmware Samsung GALAXY J7 SM-J7008
    download firmware Samsung GALAXY J7 SM-J7008
  11. And Download button again. Approximately file size is 884 MB
  12. Wait until your file finish downloaded, after that you must extract all firmware file on specific folder on your computer.
  13. This is your file.
    Flash Stock Firmware On Samsung GALAXY J7 SM-J7008
    Flash Stock Firmware On Samsung GALAXY J7 SM-J7008
  14. Switch Off your Samsung GALAXY J7 SM-J7008 to start flashing process.
  15. Then, you must run Odin3 v3.10.6 by right click on Odin.exe and select Run as Administrator.
  16. When program is running, now you can click AP, and navigate to the *.tar or *.tar.md5 firmware file.
    Flash Stock Firmware On Samsung GALAXY J7 SM-J7008
    Flash Stock Firmware On Samsung GALAXY J7 SM-J7008
  17. Now your firmware file has been inserted in Odin3 
  18. Then, Enter download mode your Samsung GALAXY J7 SM-J7008 by pressing and hold Volume Down Button + Home Button + Power Button. Hold and press all button untill your phone vibrate and LCD show menu.
  19. download MODE Samsung GALAXY J7 SM-J7008
    download MODE Samsung GALAXY J7 SM-J7008
  20. And you will see picture like this on your LCD screen.
  21. Download Mode GALAXY J7 SM-J7008
    Download Mode GALAXY J7 SM-J7008
  22. On this mode, now you must connect your Samsung GALAXY J7 SM-J7008 to your PC / laptop using a USB cable.
  23. After your phone connected, you will see a message appear that show your device added and there is info on the ID: COM at top left corner. Keep in mind for this COM vary depending on the PC / Laptop. Just Ignore all, in this picture you will see that your device is detected on (COM 5)
    Enter download mode samsung GALAXY J7 SM-J7008
    Port Com samsung GALAXY J7 SM-J7008
  24. Make sure re-partition is NOT ticked
  25. When everything already you can click Start Button. at the bottom left corner
  26. Just wait for the process to run about 2-5 minutes, and make sure there is no interference in this process. 
  27. When complete it will display a notification PASS and your smartphoneSamsung GALAXY J7 SM-J7008 will automatically restart.
  28. Wait your device to boot up, it will take a while.
  29. When your Samsung GALAXY J7 SM-J7008 is ready to use, you can check your firmware update version by dial *#1234# on dial pad.
    dial pad samsung GALAXY J7 SM-J7008
    dial pad samsung GALAXY J7 SM-J7008
  30. And you will see your new firmware version.
    firmware version samsung GALAXY J7 SM-J7008
    firmware version samsung GALAXY J7 SM-J7008
  31. Finish.

Warning.
Never disconnect the USB cable while flashing process is running.
Install Samsung Mobile Driver or Samsung Smart Switch if you don't see a sign in Odin.
Flash your Samsung GALAXY J7 SM-J7008 device at your own risk.
Flashing firmware's which contains more than one *.tar.md5 file will wipe all data on internal storage.  Flashing official/stock firmware won't increase the binary flash nor KNOX WARRANTY VOID counter and won't cancel the Samsung GALAXY J7 SM-J7008 device's warranty. 

الأربعاء، 13 ديسمبر 2017

Guide How To Flash Stock Firmware On Samsung GALAXY E5 E500H Using Odin V3.10.6.

Guide How To Flash Stock Firmware On Samsung GALAXY E5 E500H Using Odin V3.10.6.

Flash Stock Firmware On Samsung GALAXY E5 E500H. See you on android guide at guidebelajar, now, I will share a little guide how to flash a stock ROM on Samsung GALAXY E5 E500H using Odin V3.10.6 software. Samsung GALAXY E5 E500H is the smartphone with 5 Inchi wide LCD, work on Android OS, v4.4.4 (KitKat),  with Qualcomm MSM8916 Snapdragon 410 Chipset, supported with Quad-core 1.2 GHz Cortex-A53 and Adreno 306 GPU, combined with 1,5 GB of RAM and 8 MP of  Main camera and 5 MP on secondary camera. 

Flashing process in android Smartphone is like reinstall process on windows computer PC, with flash your Samsung GALAXY E5 E500H android device you can unbrick, downgrade, manually upgrade (instead of updating via OTA or Samsung Smart Switch), or restore Samsung's stock firmware instead of custom ROM. I make this guide just for you as user all Samsung GALAXY E5 E500H variant.

You need to read this guide carefully, so you can get the best result flashing on your Samsung GALAXY E5 E500H. Cause you need to download necessary file, you must ensure that you have good internet connection in your computer device, this guide using a windows computer.

Initial Step To Flash Samsung GALAXY E5 E500H 

Now, we have reached on beginning guide, so you must to do initial step to ensure everything run smoothly.
  1. Make sure your Samsung GALAXY E5 E500H battery is not in a low battery state, a minimum of 80%. If the battery runs out in the middle of the Root, it can lead to failure
  2. Always perform backup your important data before flashing process, Cause this process will delete or erase the data in memory.
  3. Make sure you have installed a Latest of Driver Samsung  that support with your Smartphone, If you don't have, please download here 
  4. Original USB cable driver for your Samsung GALAXY E5 E500H.
  5. Download Samsung Smart Switch, Here 
  6. Download Odin V3.10.6, Here 
  7. Firmware Samsung GALAXY E5, you must Log In to download firmware via this link.
    • SM-E500F -  Sri lanka, Saudi Arabia, Afghanistan, Germany, Uzbekistan, Kazakhstan, United Arab Emirates, Israel, Morocco, Mauritius, Turkey, Kenya,  Here 
    • SM-E500H - Nepal, Bangladesh, Chile, India, Panama, Cambodia, Thailand, Indonesia, Vietnam, Philippines, Iraq, Tunisia, Saudi Arabia, Libya, Nigeria, Egypt, Kenya, Mauritius, Here 
    • SM-E500M - Trinidad, Tobago, Panama, Brazil, Peru, Mexico - Here 
    • SM-E500YZ - Taiwan - Here 

Main Guide To Flash Samsung GALAXY E5 E500H 

  1. You must download all necessary file.(Samsung USB driver or Smart Switch and Odin)
  2. Then you must install all driver or samsung smart switch to your computer or PC.
  3. Extract Odin V3.10.6. file on the destination folder.
  4. To download Samsung firmware you must visit Sammobile, you can download specific firmware file for your device model number. you must Log In with your registered account on this website.
  5. On the row menu at the top of page, you can select firmware.
  6. Then you must enter in search bar with your phone model number.
    download firmware Samsung GALAXY E5 E500H
    download firmware Samsung GALAXY E5 E500H
  7. Then select your country.
  8. Then you click on appear link.
  9. Select regular download.
  10. And Download button again. Approximately file size is 1,6 GB
  11. Wait until your file finish downloaded, after that you must extract all firmware file on specific folder on your computer.
  12. This is your file.
    Flash Stock Firmware On Samsung GALAXY E5 E500H
    Flash Stock Firmware On Samsung GALAXY E5 E500H
  13. Switch Off your Samsung GALAXY E5 E500H to start flashing process.
  14. Then, you must run Odin3 v3.10.6 by right click on Odin.exe and select Run as Administrator.
  15. When program is running, now you can click AP, and navigate to the *.tar or *.tar.md5 firmware file.
  16. Now your firmware file has been inserted in Odin3 
  17. Then, Enter download mode your Samsung GALAXY E5 E500H by pressing and hold Volume Down Button + Home Button + Power Button. Hold and press all button until your phone vibrate and LCD show menu.
  18. download MODE Samsung GALAXY E5 E500H
    download MODE Samsung GALAXY E5 E500H
  19. And you will see picture like this on your LCD screen.
  20. Download Mode GALAXY E5 E500H
    Download Mode GALAXY E5 E500H
    On this mode, now you must connect your Samsung GALAXY E5 E500H to your PC / laptop using a USB cable. 
  21. After your phone connected, you will see a message appear that show your device added and there is info on the ID: COM at top left corner. Keep in mind for this COM vary depending on the PC / Laptop. Just Ignore all, in this picture you will see that your device is detected on (COM 5)
    Enter download mode samsung GALAXY E5 E500H
    Port Com samsung GALAXY E5 E500H
  22. Make sure re-partition is NOT ticked
  23. When everything already you can click Start Button. at the bottom left corner
  24. Just wait for the process to run about 2-5 minutes, and make sure there is no interference in this process. 
  25. When complete it will display a notification PASS and your smartphone Samsung GALAXY E5 E500H will automatically restart.
  26. Wait your device to boot up, it will take a while.
  27. When your Samsung GALAXY E5 E500H is ready to use, you can check your firmware update version by dial *#1234# on dial pad.
    dial pad samsung GALAXY E5 E500H
    dial pad samsung GALAXY E5 E500H
  28. And you will see your new firmware version.
    firmware version samsung GALAXY E5 E500H
    firmware version samsung GALAXY E5 E500H
  29. Finish.

Warning.
Never disconnect the USB cable while flashing process is running.
Install Samsung Mobile Driver or Samsung Smart Switch if you don't see a sign in Odin.
Flash your Samsung GALAXY E5 E500H device at your own risk.
Flashing firmware which contains more than one *.tar.md5 file will wipe all data on internal storage.  Flashing official/stock firmware won't increase the binary flash nor KNOX WARRANTY VOID counter and won't cancel the Samsung GALAXY E5 E500H device's warranty.