الأربعاء، 9 أبريل 2014

ROSE MILK RECIPE-SUMMER DRINKS RECIPES


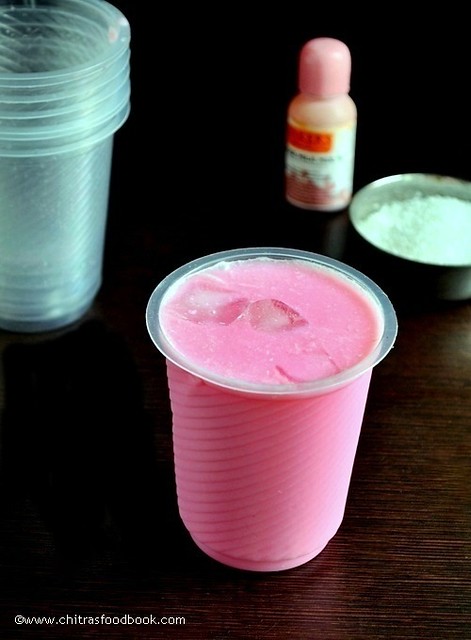
Rose milk is the easiest summer drink recipe which can be made in few minutes if u have cold milk in hand.When i was a kid, i loved rose milk kuchi ice(popsicle) more than this drink.I used to buy in Tirunelveli whenever i go for summer vacation.Soon i’ll post that version here.U can find Rose Milk in almost all the juice shops in Tamil nadu.Last week i went to Nellai and i happened to see rose milk served in a road side juice shop in a plastic cup.Immediately,i was tempted to try at home beacuse this is my family favourite.My MIL loves it a lot.She usually have this drink during summer in the evening instead of coffee/tea.Nowadays i make this for all my guests too.Sendhil usually says Rose milk tastes great only when sugar is on higher side.So i add little more.When served chilled,it tastes great.I wanted to make home made rose syrup but i din’t have proper ingredients in hand.So i went with bakers rose milk mix.Recently my friend Shalini shared rose milk shake recipe with rooh afza.I’ll try & share here soon.

Rose milk recipe


Rose milk recipe Rose milk recipe for summer – Easiest drink with a great flavour of rose! 
Cuisine: Indian
Category: Drinks
Serves: Serves 4
Prep time: 180 Minutes
Cook time: 10 Minutes
Total time: 190 Minutes


INGREDIENTS

  • Milk – 2.5 cups
  • Rose milk essence - few drops
  • Sugar – 4-6 tsp  ( add 4 tsp for mild sweet)
  • Ice cubes - optional
METHOD

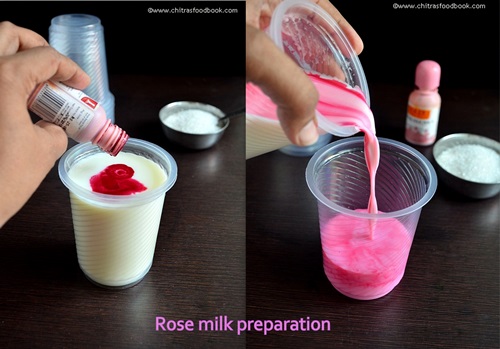
  • Boil milk,add sugar ,mix well and set aside to cool.Refrigerate or freeze it for an hour for quicker cooling.
rose milk recipe
  • After it comes to room temperature,add few drops of rose essence mix as per the flavour & color u require.Mix well.
  • Filter it to remove the skin of the milk (paal aadai) and refrigerate again for 1- 2 hours to serve chilled or add ice cubes and serve immediately.
rose milk recipe


Note

  • Adjust the quantity of rose essence & sugar as per ur taste.I usually add more sugar & more essence as i love dark color.
  • Tastes best only when serve chilled.
  • Always filter the rose milk otherwise u may get paalaadai  while drinking which many people won’t likeNyah-Nyah..
Serve chilled with or without ice cubes as u wish ! Enjoy !
rose milk recipe for summer

الاثنين، 7 أبريل 2014

CURRY LEAVES THUVAIYAL|KARUVEPPILAI THOGAYAL RECIPE

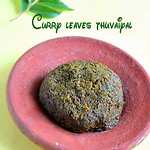
karuveppilai thogayal-recipe

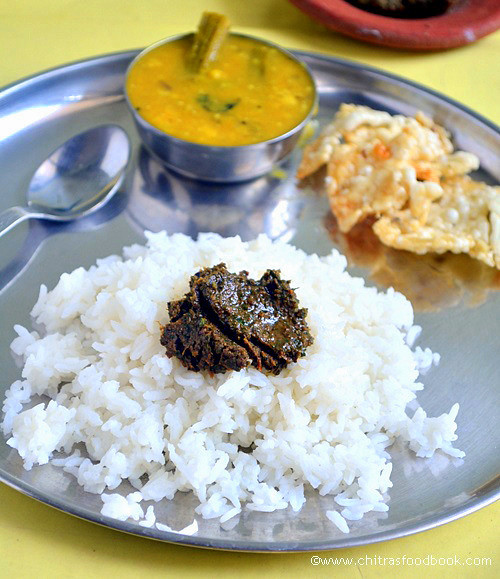
As i mention in all my thogayal posts,my MIL is an expert in making thuvaiyal recipes.She used to make thogayal with almost all the greens and vegetables.Check this link for our varieties of thogayal recipes.All are very easy to make and tastes delicious.I am very much thankful for her for teaching me these yummy varieties.We usually mix this with plain rice topped with gingely oil.It also goes well with curd rice.Sendhil loves thogayals like anything.Mostly i pack 3 varieties of thogayal rice for his lunch box along with papad & buttermilk.He can happily have it for all the seven days tooSmile with tongue out.My MIL usually says,for any thuvaiyal to be tasty,the secret lies in the quantity of red chillies & tamarind.Both should be balanced else thogayal may become either tangy or spicy.Usually urad dal is added for yield.It is completely optional.Do try this ,healthy karuveppilai thogayal recipe and let me know ur feedback.Ok,let me move on to the recipe..

Check out my curry leaves gravy and curry leaves podi with the health benefits of curry leaves if interested !

Curry leaves thuvaiyal/Karuveppilai thogayal


Curry leaves thuvaiyal/Karuveppilai thogayal Curry leaves thogayal recipe to mix with plain rice - simple n yummy dish !
 
Cuisine: Indian
Category: Thogayals
Serves: Serves 2
Prep time: 5 Minutes
Cook time: 5 Minutes
Total time: 10 Minutes


INGREDIENTS
To roast
  • Cooking oil - 2 tsp
  • Red chillies - 2-3 nos ( 2 if big)
  • Urad dal - 2 tsp
  • Curry leaves - 1 cup
  • Tamarind – Small gooseberry size
  • Jaggery – a small piece
  • Salt & water - as needed
METHOD

  • In a kadai,heat oil and roast the urad dal & red chillies.When dal turns golden brown,remove and set aside OR add curry leaves,simmer the flame completely and saute well till leaves shrink.curry leaves thogayal tile1
  • Add tamarind,give a toss and switch off the flame.Grind it to a smooth paste adding jaggery &required water.Add less water while grinding to get a thick paste.( sometimes i use mixie and sometime with ammi kal based on powercut ) The main picture is the one ground using ammikal.curry leaves thogayal tile2

Enjoy with plain rice or curd rice !!


Note

  • Roasting curry leaves is a must otherwise it gives a raw smell.
  • Adjust the quantity of chillies based on the spice level u need.
  • Consistency of thogayal varies for grinding in mixie or ammi kal.U can make a very thick paste if u use ammi kal.
 
Mix with plain rice topped with sesame oil and enjoy with vadagam Smile


Other curry leaves recipes


Raw Peanut Butter Cookies

raw peanut butter cookies

Over the past year or so I've been especially interested in creating my own energy snacks and bars at home. Not only do you have control over the ingredients you use, it's far cheaper than buying store-bought variations that are often laden with sugar and additives. In addition to nuts and dried fruits, peanut butter is often a feature of such snacks made in my kitchen because I admit that peanut butter is a weakness of mine. It is not unusual to see me eating peanut butter on one or more occasions in some form or other throughout the day.

My latest baking experiment was inspired by a cookbook I received for possible review entitled Rawsome Vegan Baking: An Un-cookbook for Raw, Gluten-Free, Vegan, Beautiful and Sinfully Sweet Cookies, Cakes, Bars & Cupcakes by Emily von Euw. I'll be having more to say about this beautiful and unique book again soon. For now, I will just say it is lavishly illustrated, featuring unique vegan and raw takes on old favorites. Pretty much all of the ingredients are staples you're likely have on hand in your kitchen, so no hunting around specialty stores or roaming the grocery aisle for additions that you may rarely have occasion to use again.

Although I was tempted by pretty much every recipe between the covers, my first choice was a raw version of peanut butter cookies. I have fond childhood memories of my mom's peanut butter cookies, and over the years I have experimented with different variations. As I move more and more away from refined sugars, this unbaked and raw version was especially appealing. Eggless and flourless, the sweetness comes from dried fruits. Soft and chewy, they are even better if you use chunky peanut butter. An additional bonus is that the cookies come together in hardly anytime at all if you have a food processor.

raw peanut butter cookies with dried fruit

These cookies are so healthy and guilt-free, you won't feel bad at all about eating cookies for breakfast.

Raw Peanut Butter CookiesRaw Peanut Butter Cookies
Recipe by
Adapted from Rawsome Vegan Baking: An Un-cookbook for Raw, Gluten-Free, Vegan, Beautiful and Sinfully Sweet Cookies, Cakes, Bars & Cupcakes
Published on April 7, 2014

Easy, moist, soft and chewy no-bake peanut butter cookies sweetened with dried fruit — a raw, delicious and wholesome treat

Print this recipePrint this recipe

Ingredients:
  • 1 cup raw almonds
  • 1/3 cup chunky natural peanut butter
  • 1/2 cup pitted dates
  • 1/2 cup prunes
  • 1 teaspoon vanilla
  • sea salt to taste
Instructions:
  • In a food processor, pulse the almonds into a flour. Add the peanut butter, dates, prunes and vanilla and process until combined into a rather crumbly dough that holds together when pressed between your fingers.

  • Form the dough into small roughly 1 1/2 inch balls. Flatten the balls slightly and transfer to a baking sheet lined with parchment paper. With a fork, make crosswise indentations. Sprinkle lightly with salt and chill in the fridge overnight.

Makes 9 to 12 cookies

raw peanut butter cookies

More healthy snacks and treats:
Cherry Nut Bars
Cocoa Fruit Energy Bites
Cocoa Fruit Treats
No Bake Peanut Butter Carob Balls

Other peanut butter cookies from Lisa's Vegetarian Kitchen:
Peanut Butter Cookie Dough Bites
Healthy Peanut Butter Cookies
Cayenne Peanut Butter Cookies

On the top of the reading stack: Food and Drink Magazine

Audio Accompaniment: untitled
الجمعة، 4 أبريل 2014

Beet, Lentil and Vegetable Soup

beet and lentil soup

There's nothing like a bowl of hot fresh cooked vegetable soup to comfort the soul and the body with a nourishing dose of vitamins and minerals. And this simple beet, potato and carrot soup does just the trick — no fancy seasonings or techniques, just the classic flavors of winter root vegetables simmered with dried thyme and a little paprika, with earthy green lentils added for a little protein boost. This is just the soup to serve on a cold day or to someone who's recovering from a winter cold or flu. Hopefully more salads will be appearing on the table soon, but for now, warming soups are still in order.

If your beets come with fresh beet tops, chop them up and add at the end of the cooking time for an extra burst of color, taste and nourishment.

Beet, Lentil and Vegetable SoupBeet, Lentil and Vegetable Soup
Recipe by
Published on April 4, 2014

Fresh beets, potatoes and carrots simmered in a simple lightly seasoned broth with hearty earthy lentils added — a perfect winter soup

Print this recipePrint this recipe

Ingredients:
  • 2 tablespoons olive oil
  • 1 onion, chopped
  • 1 to 2 cloves garlic, minced or crushed
  • 1-inch piece fresh ginger, minced or grated (1 tablespoon)
  • 2 medium beets (1 lb or 450 g), peeled and diced
  • 2 medium potatoes (1 lb or 450 g), diced
  • 2 medium carrots, sliced
  • 1 celery stalk, sliced or chopped
  • 2/3 cup dried green or brown lentils, rinsed
  • 1/2 teaspoon dried thyme
  • 5 cups vegetable stock or water
  • 1/2 teaspoon turmeric
  • 1/2 teaspoon paprika
  • 1 1/2 teaspoons sea salt, or to taste
  • fresh ground black pepper to taste
Instructions:
  • Heat the oil in a large saucepan or soup pot over medium heat. When hot, add the onion and stir for 5 minutes or until softened. Toss in the garlic and ginger, and stir for 1 minute.

  • Now add the beets, potatoes, carrots and celery. Stir for 1 minute, then add the lentils and thyme, stir once, and then pour in the vegetable stock or water. Add the turmeric, then bring to a boil, reduce the heat to medium-low, and cover. Simmer, stirring occasionally, until the lentils and vegetables are tender — about 30 minutes. Add more vegetable stock or water as desired.

  • If you have fresh beet tops, you can chop them and add them now. Stir in the paprika and simmer the soup for another 15 minutes.

  • Season with salt and black pepper to taste, and serve hot or warm.

Makes 6 to 8 servings

beet lentil vegetable soup

More winter vegetable soups you will enjoy:
Hearty Lentil Borscht
Creamy Split Pea & Vegetable Soup
Curry-Laced Pumpkin and Potato Soup
Kale and Vegetable Soup

On the top of the reading stack: Taste of Tanzania: Modern Swahili Recipes for the West by Miriam R. Kinunda

Audio Accompaniment: Echo Grid

NEERAGARAM|PAZHAYA SADAM RECIPE-SUMMER RECIPES


நீராகாரம்,பழைய சாதம்

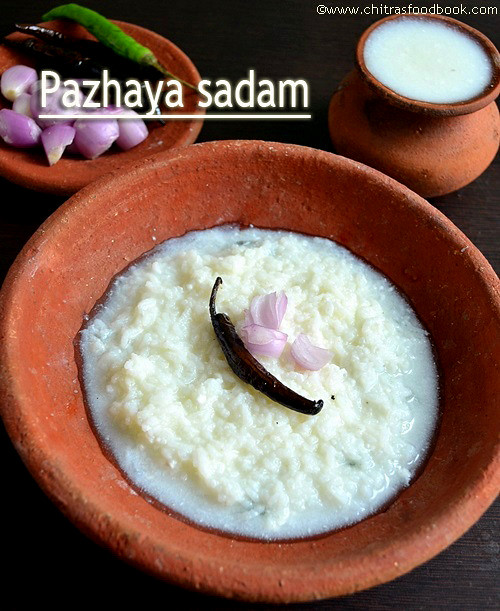
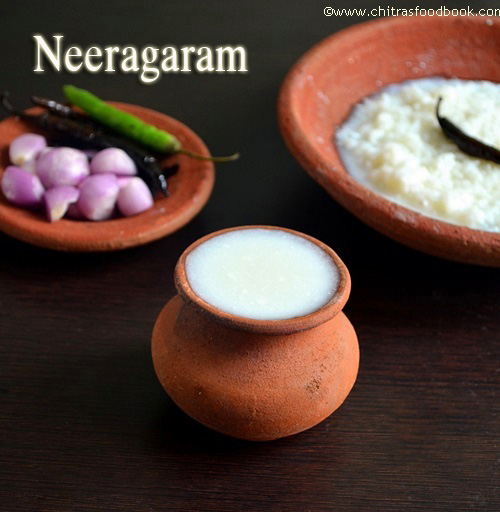
When i was thinking to post a traditional,healthy and easy coolant recipe for summer,pazhayathu aka pazhaya sadam with neeragarm recipe striked my mind.All u need is just a cup of leftover rice to make this healthy dish.I am a big fan of this recipe.My MIL makes it super tasty and flavourful adding curry leaves,small onions,more milagai,pickle and vathakuzhambu.This combination made me taste this.Before marriage,my mom had tried several times to make me eat but i never touched it and scolded my mom like anything.But after knowing its health benefits & taste,now i feel very bad about my behaviour towards my momSad smile.My mom used to tell me when she was pregnant,she used to drink a big sombu full of neeragam for breakfast and told this is the best coolant to supress body heat compared to buttermilk and tender coconut.Yes,i agree.As soon as u drink this,u feel ur tummy chilled and keeps u cool the whole day.Usually farmers and ladies who work in field used to have this for breakfast to keep them active and energetic to work under the sun.I heard neeragaram has vitamin b12 which is not found in fruits and vegetables.So lets make use of this simple and effective body coolant for this summer.Do try it friends Smile..
I tried to write the font in Tamil in the pictures.But couldn't do it.so have written in English.Sorry ;)

Neeragaram with pazhaya sadam recipe


Neeragaram with pazhaya sadam recipe Pazhaya sadam & Neeragaram recipe for summer !
Cuisine: Indian
Category: Breakfast
Serves: Serves 1
Prep time: overnight
Cook time: 10 Minutes
Total time: 8 hours


INGREDIENTS

  • Leftover rice - 1 cup
  • Water - as needed
  • Curd or thick buttermilk- 1/2 cup
  • Salt - as required
  • Small onions - few
  • Mor milagai - to taste
  • Green chillies - 1 no
  • Curry leaves - few
  • Pickle or vathakuzhambu - to taste
  • Raw mango pieces - to taste (optional)
METHOD

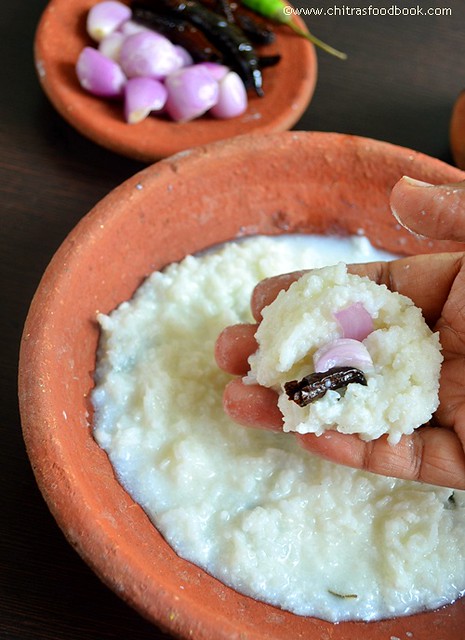
    Take the leftover rice in a bowl.I kept in the cooker itself.Add sufficient water to immerse the rice.Add few pinched curry leaves and 2 tbsp of curd.Mix well,crush the rice and keep it closed over night.
    The next morning,before breakfast,take the cooker,add the required curd or thick buttermilk,salt and mix it well..Strain the water and drink separately.
    Enjoy the rice with mor milagai or green chillies and small onions.
    My MIL mixes pickle,raw mango pieces and left over sambar or vathakuzhambu.It enhances the taste very well.

    pazhaya sadam step


Note

  • During summer season ,we add raw mango pieces while eating the rice.It gives a nice tangy taste.
  • Adding curry leaves and little curd gives a nice flavour.But add little curd.Too much curd spoils the rice.
Tastes yummy with small onions and chillies !

الأربعاء، 2 أبريل 2014

Spicy Chickpeas in a Tomato Coconut Sauce

chickpeas and spinach

I'm back from a two-week retreat of sorts and feeling tired but rather refreshed. I managed to get in some kitchen time during my retreat, and after my last extremely cheesy offering I am sharing a cleansing chickpea curry with spinach.

I adore all things legume, but if I could only eat one legume I would have to go with chickpeas. These plump peas are a perfect vehicle for Indian spices, although they shine in any number of dishes, whole or ground up. Whenever I cook up a pot of chickpeas for a dish, I always soak more than I need because I know I will be nibbling on handfuls of the peas before they even make it into the dish.

Chickpeas feature here, simmered in a spicy tomato-based coconut sauce and adorned with handfuls of nourishing and earthy spinach. There is minimal preparation time, and once your beans are cooked it is just a matter of throwing it all together on the stove top. Although it is a refreshing and vibrant dish anytime, it is certainly suited to a busy weeknight meal precisely because it is so easy to put together. You may want to serve it with rice or your favorite Indian flat bread. I choose to cook up a pot of quinoa that I tossed with fresh lemon juice once it was cooked. Tangy, earthy and spicy, this simple curry is now a new favorite and one that I will especially keep in mind when I am pressed for time or don't feel like fussing too long in the kitchen but still want something to tantalize and satisfy the taste buds.

spicy chickpeas and spinach

Spicy Chickpeas in a Tomato Coconut SauceSpicy Chickpeas in a Tomato Coconut Sauce
Recipe by
Cuisine: Indian
Published on April 2, 2014

Simple, vibrant and delicious chickpea and spinach curry simmered in a flavorful spiced tomato and coconut milk sauce

Print this recipePrint this recipe

Ingredients:
  • 1 1/4 cup dried chickpeas (3 1/2 cups cooked or 2 14 oz cans)
  • 1 tablespoon olive oil
  • 1 teaspoon cumin seeds
  • 2 cloves garlic, minced
  • 1 1/2 inch piece fresh ginger, minced or grated
  • 2 to 3 fresh green chilies, seeded and finely chopped
  • 1 tablespoon curry powder
  • 1 teaspoon ground coriander
  • 1/2 teaspoon ground cumin
  • 1/4 teaspoon cayenne
  • 2 large tomatoes, finely chopped
  • 1/3 cup coconut milk, or more as needed
  • 6 oz (175 g) fresh spinach, washed, trimmed and roughly chopped or torn
  • 1 teaspoon garam masala
  • 1 teaspoon sea salt, or to taste
  • fresh ground black pepper
Instructions:
  • Rinse the chickpeas and soak in enough water to cover for 8 hours or overnight. Drain and rinse, then transfer to a medium saucepan and cover with fresh water. Bring to a boil, reduce the heat to low, cover, and simmer until the peas are tender — 1 to 1 1/2 hours. Drain and set aside.

  • Heat the oil in a large saucepan over medium heat. When hot, add the cumin seeds and stir until the seeds darken a few shades — about 1 minute. Toss in the garlic, ginger and chilies, and continue to stir for another few minutes. Now add the curry powder, ground coriander, ground cumin and cayenne, and stir for 1 minute until fragrant. Add the tomatoes and simmer for 5 to 10 minutes until thickened.

  • Now add the cooked chickpeas and simmer for another 5 minutes. Whisk in the coconut milk and gently simmer for another 5 minutes. Add more coconut milk as desired.

  • Add the spinach, a few handfuls at a time, until wilted. Once all of the spinach is added, simmer on low heat for another 5 minutes.

  • Stir in the garam masala and salt and black pepper to taste. Let sit for 5 minutes and serve hot alongside hot fresh cooked rice or Indian flat breads.

  • Notes: I used my own homemade curry powder and garam masala for this dish. I would never go back after making my own blends. Their use really moves this dish up a few levels on the taste chain.

  • If you wish, you can use heavy cream instead of the coconut milk for a creamier sauce. You may need to add more coconut milk or cream depending on your desired consistency.

Makes 4 to 5 servings

spicy chickpeas with spinach served up for dinner

Other chickpeas dishes from Lisa's Kitchen you are sure to enjoy:
Chana Chaat (Tangy and Tart Chickpea Salad)
Chana Masala
Tamarind Chickpeas
Spicy Chickpeas in a Spicy Tomato Glaze

On the top of the reading stack: Rosehips on the Kitchen Table

Audio Accompaniment: Minilogue

الثلاثاء، 1 أبريل 2014

WATERMELON JUICE RECIPE|SUMMER DRINKS


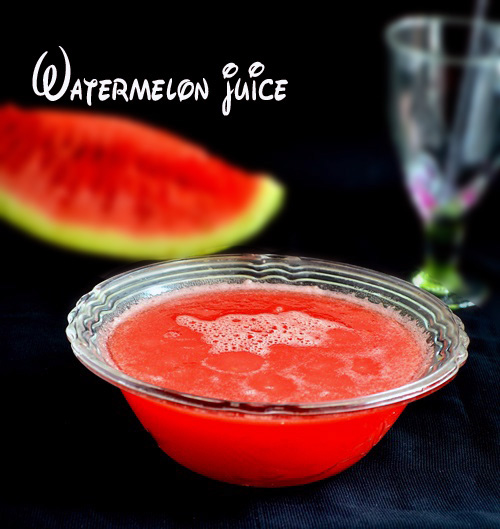
Watermelon juice is an effective thirst quencher and coolant to beat the summer heat with amazing health benefits.Though i know this very well,I have never bought this fruit as i had an aversion from my childhood.But now,being a food blogger,i love to try and taste recipes with all vegetables or fruits.So this year i bought watermelon for the first time and prepared this juice.Its basically a low calorie drink but its filling and keeps us energetic & active for hours.Its always good to eat a fruit as it is instead of making juice adding sugar and other sweeteners.We too like that way.But for blogging purpose,i made this simple juice recipe Winking smile.Soon i’ll post an easy salad for summer with watermelon.
watermelon fruit


Watermelon juice recipe


Watermelon juice recipe Watermelon juice recipe to beat the summer heat !
Cuisine: Indian
Category: Juices
Serves: 2-3 cups
Prep time: 10 Minutes
Cook time: 10 Minutes
Total time: 20 Minutes


INGREDIENTS

  • Watermelon - 1/2 no (medium size)
  • Ice cubes – as needed
  • Sugar or honey - as needed (optional)
  • Pepper powder or chat masala pwd – a pinch
METHOD

  • Cut the watermelon into slices and remove the seeds.Cut into small cubes and grind it along with sugar or honey if desired.I din’t use sugar as my watermelon itself was very sweet.Add a pinch of chat masala or pepper powder if u wish.Strain the juice and enjoy adding ice cubes!!
watermelon juice step

Enjoy !


Note

  • Its always better to have this fruit as it is.Some kids don’t like to eat.So u can make this juice and try..
  • Consume the juice immediately after u grind.
  • Addition of chat masala or pepper powder is completely optional.
  • I have seen some recipes adding mint leaves,lemon juice and ginger along with watermelon.Do try for variation if u like that flavor.

Serve chilled and fresh ! Enjoy !!