‏إظهار الرسائل ذات التسميات LEFTOVER RECIPES. إظهار كافة الرسائل

الاثنين، 18 أبريل 2016

Thayir Vadai Recipe – South Indian Curd Vada

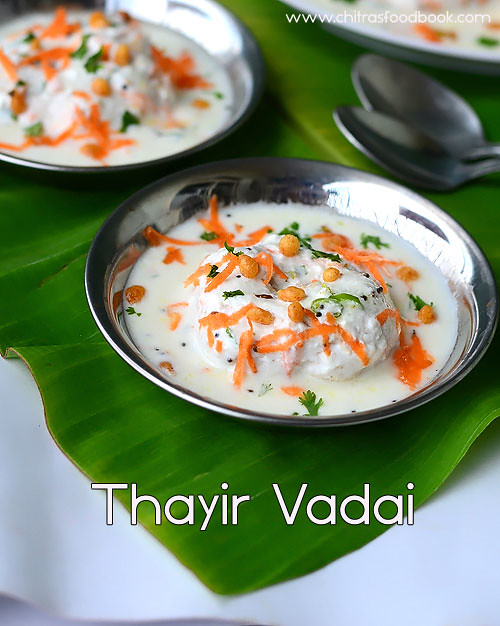
Thayir vadai recipe 
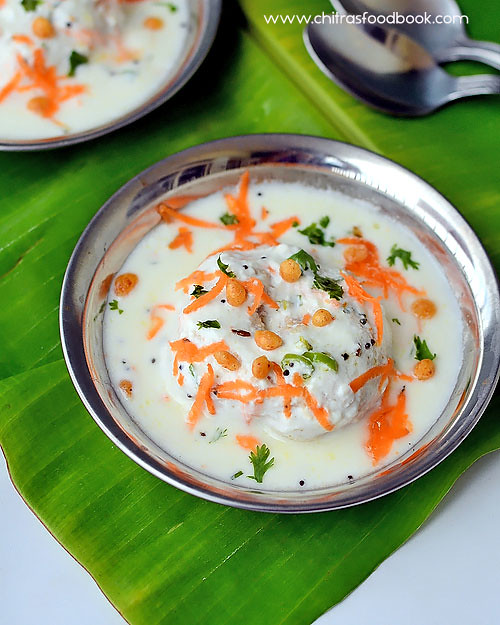
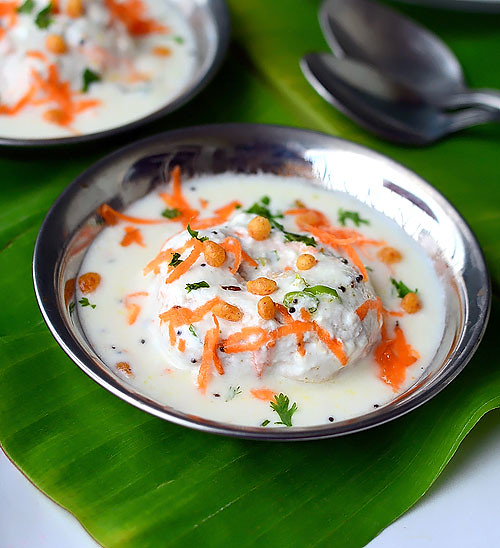
I am a big big fan of Tamil nadu style thayir vadai. I love it more than sambar vadai & rasa vadai. My FIL used to buy thayir vadai/Curd vada ( Perugu vada in Telugu) from hotel Saravana bhavan and Guptha sweets whenever we visit Salem. On Tamil new year day, I made no onion urad dal Vada/Ulundhu vadai for Pooja.Then I prepared this Thairu vadai using the leftover vada. It came out very well. I served it by garnishing with grated carrot & kara boondhi just like the way served in restaurants. We loved it very muchLove Struck. Long back I have shared my daughter’s favorite North Indian Dahi vada recipe. And now I am happy to share my most favorite South Indian Thayir vadai recipe with you all. Try it during this Summer Vacation and enjoy with your family. Lets see how to make South Indian Thayir vadai/Curd Vada Recipe.
Thayir vadai

Thayir Vadai Recipe - Curd Vada


Thayir Vadai Recipe - Curd Vada Thayir Vadai - South Indian Curd Vada Recipe
Cuisine: South Indian
Category: Snacks
Serves: Serves 5
Prep time: 30 Minutes
Cook time: 20 Minutes
Total time: 50 Minutes


INGREDIENTS
For making vada
  • White round Urad dal - 1/2 cup
  • Green chillies - 2nos
  • Ginger - 1 inch piece
  • Curry leaves - few
  • Asafetida/Hing - 2 pinches
  • Salt & water - as needed
For Curd Vada
  • Fresh thick curd - 1 cup
  • Water - 2 tbsp
  • Salt - as needed
To temper
  • Cooking oil - 2 tsp
  • Mustard seeds - 1/2 tsp
  • Urad dal - 1/2 tsp
  • Cumin seeds/Jeera – 1/4 tsp
  • Curry leaves - few
  • Cashew nuts - few
  • Hing - a pinch
To garnish
  • Grated carrot - 2-3 tbsp
  • Finely chopped coriander leaves - 2 tbsp
  • Kara boondhi - as needed
METHOD

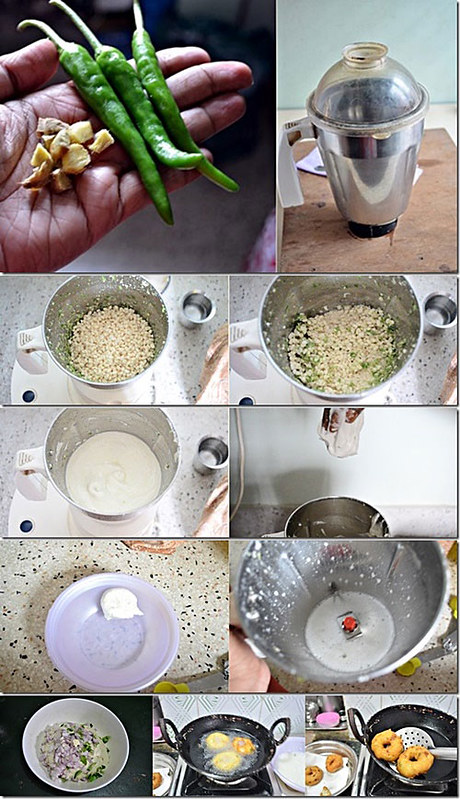
  • Wash and soak the urad dal for an hour or two. Drain the excess water completely. In a big mixie jar, grind green chillies, ginger and hing without adding water. Add the drained urad dal and grind it without water. It would grind coarsely.Wipe the sides of mixie jar. Now add 2 tbsp of water.Grind again. Add water in only a tsp or tbsp at regular intervals and grind a smooth & soft batter. Batter should not be watery or too thick. It should be airy & weightless. So add less water and grind the batter patiently. You can use ice cold water too. Do not add salt while grinding the batter. Remove the batter and check its consistency. For this,drop a pinch of batter in a bowl of water. If it floats on top, batter is just right. Remove the creamy batter in a bowl. Beat it well using your hands or an egg beater to make the batter airy( Updated tip from Sujata).Add finely chopped curry leaves, Pepper powder if you wish and required salt if you are going to make vada immediately. Else keep the batter in the refrigerator till use without adding salt.
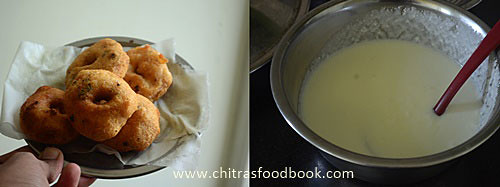
  • Heat oil to deep fry and check its temperature by dropping a pinch of batter. If it rises immediately, oil temperature is right. Simmer the flame and drop the vada into the oil.Fry in batches,3-4 at a time in medium flame. Remove in a tissue once it turns golden on both the sides. Make 5 vada and keep it ready.
Check out my Medhu vada recipe using MIXIE for more details !
Thayir vadai recipe
  • Take 1 cup of thick curd in a wide bowl. Add 2 tbsp of water or little more and whisk it. Add salt and check for taste.Make sure curd is not too thick or too watery.
Thayir vadai
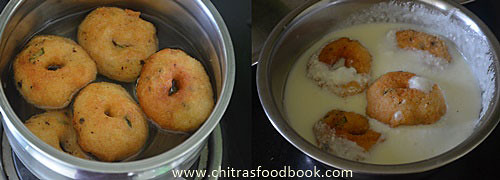
  • Now boil water in a wide bowl till it starts to bubble. Drop the vada in the water. Let it be inside hot water for just a minute. Then remove the vada and put it in the curd mixture.
Thayir vadai
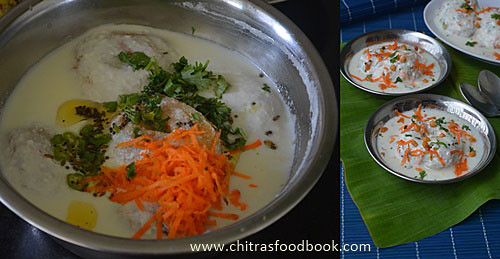
  • Let the vada soak in curd mixture for 30 minutes to 4 hours. Make sure vada is well immersed in curd mixture.Temper mustard seeds, urad dal, hing, curry leaves, cashews and add to the curd. You can also add a finely chopped green chilli and add while tempering.
  • Just before serving, add finely chopped coriander leaves, grated carrot and Kara boondhi. Serve immediately and enjoy !!
Thayir vadai
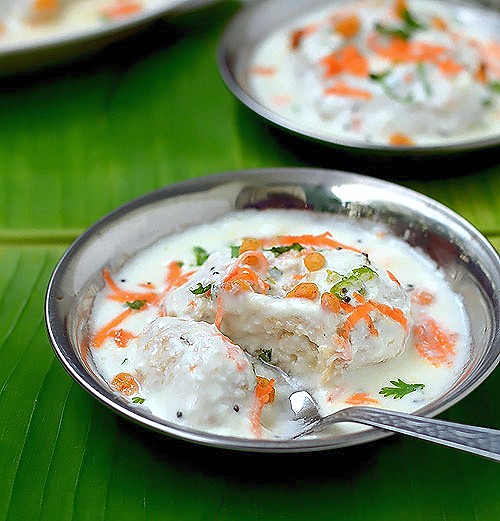
  • Yummy Tamil nadu style thayir vadai is ready !! Enjoy !

Note
  • Grinding vada batter properly is more important. If the vada turns out hard, it won’t absorb the curd mixture properly.In that case, you can dip the vada in hot water for 30 minutes before putting in curd mixture.
  • For variations, you can grind green chillies+ginger to a paste and mix with curd instead of grinding with urad dal. But add less green chillies ( 1 or 2) because curd mixture will become too spicy.
  • Dipping in hot water helps the vada to become soft and absorb the curd mixture.
  • If the curd is too thick, vada won't absorb it.So add little water & whisk it & dilute before you drop the vada.
  • Don’t worry even if the vada is too cold or at room temperature. Dipping in hot water makes it warm and helps to absorb the curd.So you can make thayir vadai with leftover vadai easily as I did.
  • Do not forget to garnish with coriander leaves, grated carrot and kara boondhi.
Curd vada recipe
Enjoy this yummy, creamy, spongy, juicy thayir vadai !! Tastes absolutely yum !!
South Indian curd vada

الجمعة، 31 يوليو 2015

Idli Manchurian Recipe-Leftover Idli Recipes

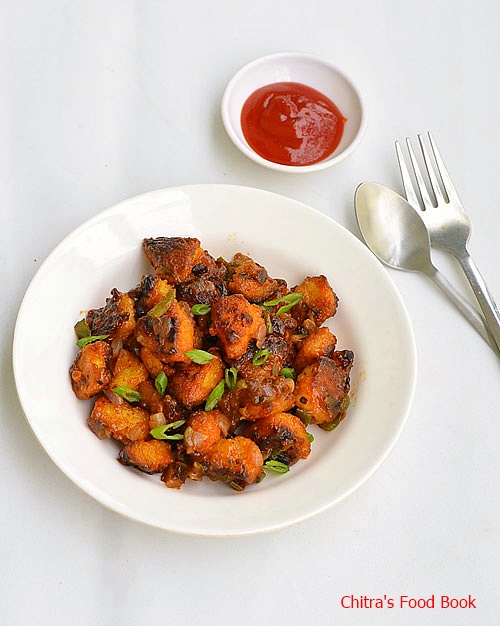
Idli manchurian recipe
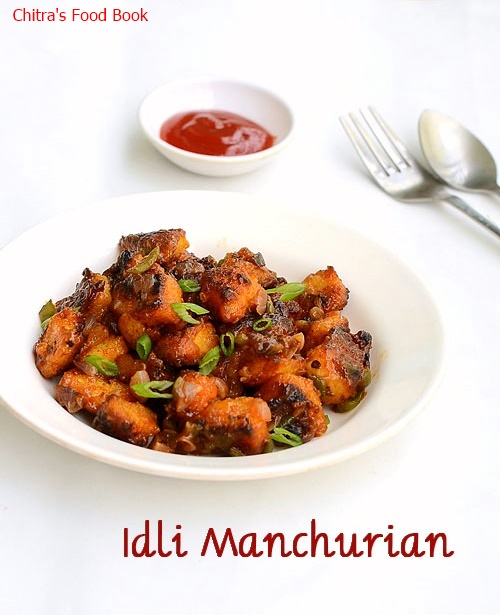
I have tried Chilli idli, Idli fry, Kaima idli even idli upma using left over idli.But Idli Manchurian is the one I wanted to make for long time.Yesterday I cooked some extra idlis just to make this manchurian.I made it for my daughter in the evening after she came back from the school.She loved it to the core and showed a big thumbs upDancing.Generally kids love any deep fried snacks.I don’t have to say about the taste of fried idlis.So this recipe would be a sure hit among the kids and adults as well.This recipe is a combo of Indian & Chinese Manchurian recipes.While I was clicking the pictures,I couldn’t resist my temptation to grab some from the plate.DroolingIt was so flavorful! Do try this idli manchurian recipe for your kids as evening snack.I am sure you won’t even get a single piece to tasteTongue.Ok,Lets see how to make fried Idli Manchurian recipe with stepwise pictures.
How to make idli manchurian recipe

Idli Manchurian recipe


Idli Manchurian recipe How to make Idli manchurian.
Cuisine: Indian
Category: Snacks
Serves: Serves 1
Prep time: 10 Minutes
Cook time: 15 Minutes
Total time: 25 Minutes


INGREDIENTS
To deep fry or shallow fry
  • Idli - 4 nos
  • Maida/All purpose flour - 2.5 tbsp
  • Corn flour – 2.5 tbsp
  • G&G paste - 1/2 tsp
  • Red chilli powder - 1/2 tsp
  • Salt- as needed
  • Cooking oil - 3 tbsp ( to shallow fry)
For sauce mix
  • Cooking oil - 2 tbsp
  • Finely chopped big onion - 1 no
  • Finely chopped capsicum - 2 tbsp
  • Finely chopped spring onion - 2 tbsp
  • Finely chopped garlic,ginger - 1 tsp
  • Tomato sauce - 1 tbsp
  • Green chilli sauce - 1/2 tsp
  • Soya sauce - 1/4 tsp
  • Red chilli powder - 1/4 tsp
  • Corn flour – 1 tsp (dilute in water)
  • Salt & pepper powder - as needed
METHOD
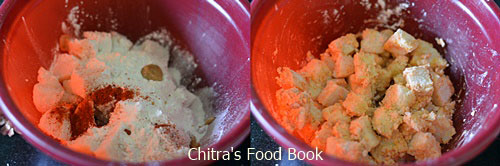
  • Cut the left over idlis into big cubes.To this mix maida,corn flour,salt,g&g paste,red chilli powder and mix well.Sprinkle some water to coat the idlis with batter.Mix it carefully,do not break the idlis.Let it marinate for sometime. OR follow this alternate method.ie Make a thick batter using maida,corn flour and spice powders and dip the idli pieces,deep fry in oil immediately.
Idli manchurian recipe

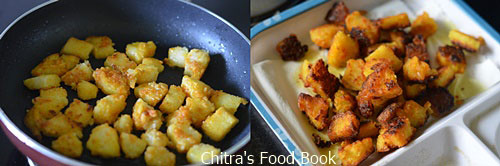
  • Heat oil in a pan and arrange the idli pieces to shallow fry. Roast it well in medium flame for 3-4 minutes.Flip the idli pieces and roast the other side as well.Do not cook in very high flame.Idli pieces may burn.Remove the pieces to a tissue paper.Drain the excess oil.
Idli manchurian recipe

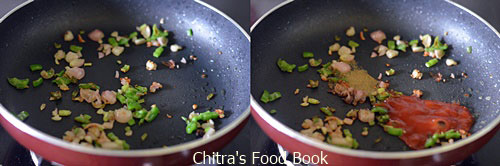
  • In the same pan,add little more oil.Saute the finely chopped onion,garlic,ginger,spring onions and capsicum.Mix well.Add some salt,tomato sauce,soya sauce and green chilli sauce.Mix well and add red chilli powder,pepper powder.Mix well.
Idli manchurian recipe
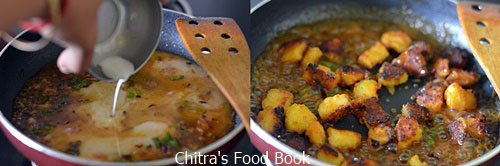
  • Dilute corn flour in water and add this to the mixture.Let it boil for sometime and thicken.
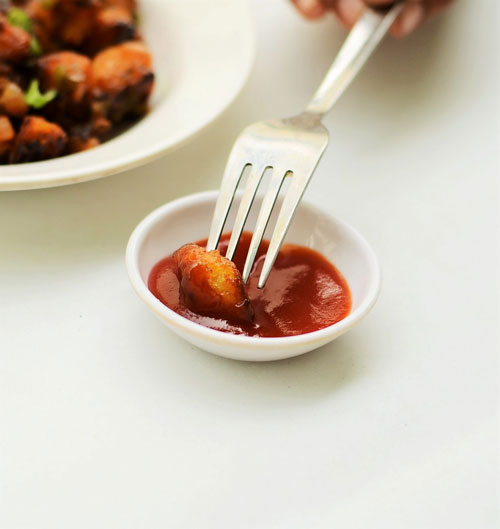
  • Add the idli pieces at the end.Toss it well and switch off the flame.Garnish with chopped spring onions.Serve hot with ketchup! Enjoy !
Idli manchurian recipe
Note
  • You can deep fry the idli pieces instead of shallow frying.I felt shallow frying patiently gives great results than deep frying.Deep fried idlis absorb more oil.Calorie conscious people can go for baking option.
  • You can also add the idli pieces as such instead of frying them.
  • Adjust the quantity of chilli powder,pepper powder and green chilli sauce as per your taste buds.
Enjoy hot idli manchurian with tomato sauce.Tastes yum !
Idli manchurian recipe


الجمعة، 4 أبريل 2014

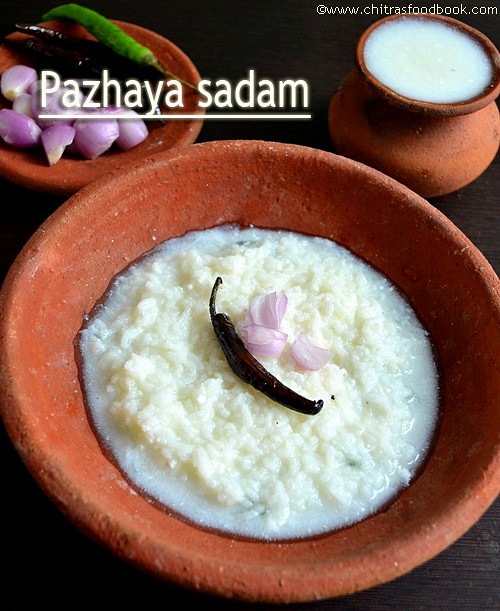
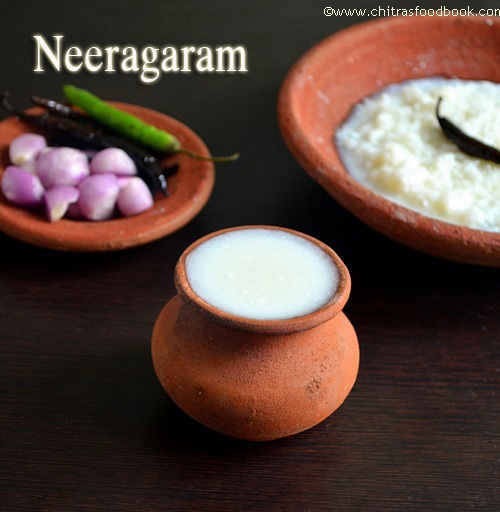
NEERAGARAM|PAZHAYA SADAM RECIPE-SUMMER RECIPES


நீராகாரம்,பழைய சாதம்

When i was thinking to post a traditional,healthy and easy coolant recipe for summer,pazhayathu aka pazhaya sadam with neeragarm recipe striked my mind.All u need is just a cup of leftover rice to make this healthy dish.I am a big fan of this recipe.My MIL makes it super tasty and flavourful adding curry leaves,small onions,more milagai,pickle and vathakuzhambu.This combination made me taste this.Before marriage,my mom had tried several times to make me eat but i never touched it and scolded my mom like anything.But after knowing its health benefits & taste,now i feel very bad about my behaviour towards my momSad smile.My mom used to tell me when she was pregnant,she used to drink a big sombu full of neeragam for breakfast and told this is the best coolant to supress body heat compared to buttermilk and tender coconut.Yes,i agree.As soon as u drink this,u feel ur tummy chilled and keeps u cool the whole day.Usually farmers and ladies who work in field used to have this for breakfast to keep them active and energetic to work under the sun.I heard neeragaram has vitamin b12 which is not found in fruits and vegetables.So lets make use of this simple and effective body coolant for this summer.Do try it friends Smile..
I tried to write the font in Tamil in the pictures.But couldn't do it.so have written in English.Sorry ;)

Neeragaram with pazhaya sadam recipe


Neeragaram with pazhaya sadam recipe Pazhaya sadam & Neeragaram recipe for summer !
Cuisine: Indian
Category: Breakfast
Serves: Serves 1
Prep time: overnight
Cook time: 10 Minutes
Total time: 8 hours


INGREDIENTS

  • Leftover rice - 1 cup
  • Water - as needed
  • Curd or thick buttermilk- 1/2 cup
  • Salt - as required
  • Small onions - few
  • Mor milagai - to taste
  • Green chillies - 1 no
  • Curry leaves - few
  • Pickle or vathakuzhambu - to taste
  • Raw mango pieces - to taste (optional)
METHOD

    Take the leftover rice in a bowl.I kept in the cooker itself.Add sufficient water to immerse the rice.Add few pinched curry leaves and 2 tbsp of curd.Mix well,crush the rice and keep it closed over night.
    The next morning,before breakfast,take the cooker,add the required curd or thick buttermilk,salt and mix it well..Strain the water and drink separately.
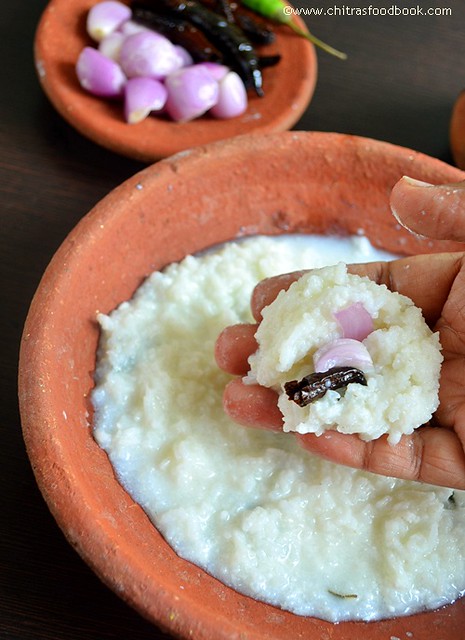
    Enjoy the rice with mor milagai or green chillies and small onions.
    My MIL mixes pickle,raw mango pieces and left over sambar or vathakuzhambu.It enhances the taste very well.

    pazhaya sadam step


Note

  • During summer season ,we add raw mango pieces while eating the rice.It gives a nice tangy taste.
  • Adding curry leaves and little curd gives a nice flavour.But add little curd.Too much curd spoils the rice.
Tastes yummy with small onions and chillies !

الأحد، 3 نوفمبر 2013

SUZHIYAN & DIWALI BREAKFAST RECIPES

DIWALI BREAKFAST RECIPES-001


Hi friends , here is a picture of our Diwali breakfast recipes..Hope u all celebrated Diwali very well..I had a great Diwali celebration in my in-laws place. I got a new saree from my in-laws and two churidhars from my husband..:) I was so  happy and busy in burning crackers , eating sweets and snacks(my mil's preparation), wishing friends and relatives and in taking pictures..We usually make Medhu vadai with pepper , Suzhiyan and adhirasam along with idli, sambar for neivedyam on Diwali morning.Diwali breakfast is like a feast for us. We have all the sweets and snacks made for Diwali along with the above said recipes. We keep munching the savories and sweets the whole day..We don’t even make lunch.Our only job is to watch special programmes in TV ,eat and sleep ;)..

I wanted to post Suzhiyan in my food book for long time because this is Sendhil’s most favorite among all the Diwali recipes Smile.This is my mom’s favorite too. Its very easy to make. We usually make suzhiyan specially on Diwali Day and after ganesh chaturthi with left over channa dal pooranam . I learnt this recipe from my MIL. My mom & sis makes the same with coconut pooranam.In our house , we call this as suyyan/susiyam/sugin Smile . Stuffing is our choice. Here comes the recipe for outer layer and our easy method of making stuffing/pooranam ..

suzhiyan-picture

Suzhiyan Recipe


Suzhiyan Recipe Suzhiyan is a delicious, deep fried snack stuffed with chana dal pooran. We make this for neivedyam on Diwali and Ganesh chaturthi.
Cuisine: South Indian Category: Sweet / Snack Yields: 30
Prep Time: 30 Minutes Cook Time: 10 Minutes Total Time: 40 Minutes
Cooking Method: Deep Fry


INGREDIENTS
1 cup - 200ml
For pooranam
  • Channa dal – 1/2 cup
  • Grated jaggery – 1/2 – 3/4 cup ( add 3/4 cup for more sweetness)
  • Grated coconut – 1/2 cup
  • Cardamom powder – 1/2 tsp
  • Water – as needed
For outer layer
  • All purpose flour /Maida – 1 cup
  • Besan flour – 1 tbsp (optional)
  • Rice flour – 1 tbsp
  • Salt – a pinch
  • Cooking soda – A pinch
Oil – to deep fry
METHOD

  • Prepare the stuffing first. For this, pressure cook channa dal adding required water and a tsp of oil.Cook for 2-3 whistles in low flame. After the steam is released , mash the dal well with a whisk or ladle.Set aside.
suzhiyan tile1
  • To this mashed dal , add grated coconut and jaggery.Mix till the mixture thickens and leave the sides of the pan & becomes non-sticky.Add cardamom powder. Switch off the flame and allow it to cool. Make small lemon sized balls after the stuffing becomes warm..
suzhiyan tile2
  • In a wide bowl, take the all purpose flour , besan and rice flour. Add a pinch of salt and cooking soda. Add water to make a batter of bajji batter consistency. Batter should flow like a ribbon. It should coat the stuffing well.Put the stuffing balls in the batter.
suzhiyan tile3
  • Heat oil in a kadai and when it gets heated , put the balls and deep fry for few minutes .Keep turning both the sides for even cooking.Remove and store after it cools down..
suzhiyan tile4
suzhiyan tile5
Enjoy !
Note
  • While cooking dal , if u add more water , drain the excess water and grind to a smooth paste. Also while adding jaggery and coconut , u don’t have to add water.Coconut and jaggery itself leaves water when it melts.
  • If u want to remove the impurities of jaggery , first heat & melt the jaggery adding little water and allow it to become frothy..When it is frothy, add grated coconut and mashed dal. Mix till mixture thickens and leaves the sides.
  • U can make the batter only using maida.Adding rice flour makes it slightly crispy..
  • Besan flour is completely optional. Make the batter in bajji batter consistency..Do not make it too thin or too thick..The stuffing should be coated well..
  • Suzhiyan stays soft and good for 3-4 days..


suzhiyan picture-001

الجمعة، 17 مايو 2013

IDLI UPMA RECIPE | LEFTOVER IDLI RECIPES

idli upma bowl
Idli upma is my most favourite South Indian tiffin recipes.If u ask me, i would say it is the tastiest breakfast/dinner recipe in this world Winking smile . I can have it all through the day.I can live with it. My mom makes it specially for me (by reserving some idlies)in the evenings or the next day morning with left over idlis. I like to have it with less oil , more onions & dals and mildly spiced.I love my mom’s upma very muchSmile..Some people make it yellow in color adding turmeric powder but we make it white.. I should say about my MIL here. She knows i am crazy about this upma.So she used to prepare it for me every alternate days when i was pregnant. She adds coconut oil as her own touch.I am really blessed to have such a caring & loving MIL like my mom(Touchwood Winking smile ).Now after tasting this upma from my mom& mil’s hands, i feel bad to try on my own Eye rolling smile.. But i wanted to post my favourite recipe in my blog. So i prepared it yesterday for breakfast and enjoyed every mouth to the core Open-mouthed smile.Please refer “Note’ for variations..Adding more onions gives a nice taste :)

idli upma1

INGREDIENTS
  • Left over idli – 5 nos
  • Big onion – 2 nos OR small onion – 20 nos.
  • Green chilli – 1 no (slit)
  • Ginger – 1/2 inch piece
  • Curry leaves – few
  • Salt – as needed
To temper
  • Cooking oil or coconut oil – 1 tbsp
  • Mustard seeds – 1 tsp
  • Urad dal – 2 tsp
  • Chana dal – 1 tbsp
  • Red chilli – 1 no (pinched into 2)
METHOD
  • Crumble the idlies well and set aside.
  • Usually left over Idlies are slightly dry.. For crumbling easily, just dip the idli in water for just 3 seconds and then try. U can easily crumble and it will be soft too..
  • U can also freeze the leftover idlies in an air tight box for easy crumbling.But after crumbling sprinkle some water & add salt to make it soft..
  • One more way is just crumble the idli well ( without freezing) and sprinkle some water over it . It helps to keep it soft... Add salt to it, mix well and set aside. My mom follows this method..
  • In an iron wok, add mustard seeds .Let it splutter completely. Then add the urad & channa dal and saute till golden brown..Now add the pinched red chilli ,finely chopped onions , ginger , slit green chilli and curry leaves.Saute till onion turns transparent.
idli upma tile1
  • Lastly add the crumbled idli and mix well. Keep it in low flame for 10 minutes till it forms a burnt layer in the bottom. ( We call it as adai/ porukku).. It tastes very nice and crispy ..But adai/ porukku forms only if u use iron or aluminium kadai not in the non-stick pan..
  • Check for salt and switch off the flame. Garnish with coriander leaves if desired!
idli upma tile2
Serve hot !!

NOTE
  • For variations u can add turmeric powder while sautéing onions.U’ll get a nice yellow colored upma.
  • One of my friends suggested me to sprinkle idli podi for an extra spicy punch.
  • To make it more healthy , add finely chopped or grated carrots , peas , potato etc..
Technorati Tags: ,,,,,,,

الاثنين، 13 ديسمبر 2010

Kara Pori Recipe - Spicy Puffed Rice - Murmura Recipe - Easy Snacks Recipes

Kara-pori

Kara pori / Spicy puffed rice/ spicy Murmura is our family favourite snack recipe which i learnt from my MIL.I usually make this with leftover/soggy puffed rice we buy for Sarawathi pooja.Its a very simple,easy to make,low calorie and tasty snacks recipe which can be eaten all through the day without guilty. Lets see how to make this spicy puffed rice recipe with garlic.Soon i will share a no garlic masala kara pori recipe.
Do check out my Beach style kara pori recipe here Smile.

Kara pori

Kara pori/Spicy puffed rice recipe


Kara pori/Spicy puffed rice recipe Kara pori recipe - Spicy puffed rice recipe with garlic flavor
Cuisine: Indian
Category: snacks
Serves: Serves 2
Prep time: 5 Minutes
Cook time: 5 Minutes
Total time: 10 Minutes
INGREDIENTS
1 cup - 250ml
  • Puffed rice/Murmura/Pori - 2 cups
  • Ghee - 1 tbsp
  • Roasted peanuts and fried gram dal - a fistful ( optional)
  • Curry leaves - few
  • Sambar powder - 1 tsp  
  • Salt - a pinch
  • Turmeric powder - 1/8 tsp
  • Garlic cloves - 7 nos (crushed slightly with skin)
  • Roasted peanuts & fried gram dal - a handful ( optional)
METHOD

  • Take a wide mouthed kadai and add a tbsp of ghee.Spread it all over the pan.When it becomes hot,add the peanut and dal ( If adding ), Curry leaves, sambar powder,  salt, turmeric powder and slightly crushed garlic flakes ( no need to peel the skin)..Fry everything for a moment in low to medium flame.Do not burn them.Nice aroma arises. Now add the puffed rice, toss it till its coated uniformly and switch off the flame. Mix it well with the fire off and allow the puffed rice to remain in the kadai for sometime to become crispy.( Note: If u try to eat it hot, puffed rice will be soggy & soft.It will become crispy only after it cools down).
  • For variations, you can use 3/4 tsp red chilli powder + 1/8 tsp turmeric powder. You can also use leftover soggy puffed rice. No need to use crispy puffed rice/ murmura.
  • U can store this pori in an air tight box after its cool down completely and enjoy for few days with coffee/Tea.
Note
  • You can skip garlic and make it as a no garlic version. But i feel garlic adds more flavor to this recipe.My husband likes to eat garlic with skin.But I remove the skin while eating.Finally its ur choice!
  • Use ghee for tempering. Do not avoid it. 

Crispy , yummy , delicious kara pori is ready to Enjoy with tea / coffee :)

Kara-pori-recipe