‏إظهار الرسائل ذات التسميات TIFFIN RECIPES. إظهار كافة الرسائل

الخميس، 19 يناير 2017

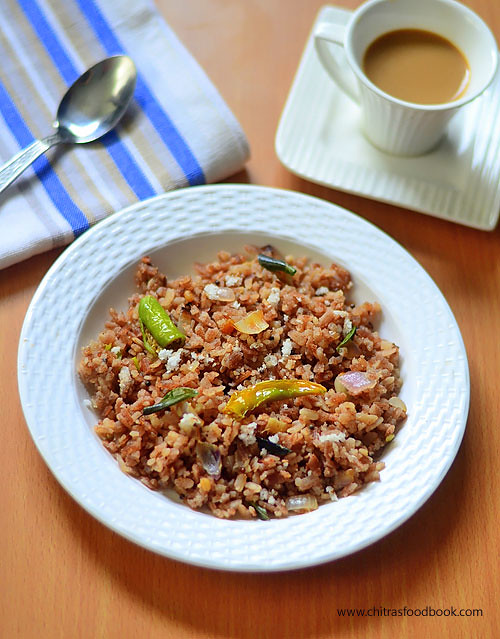
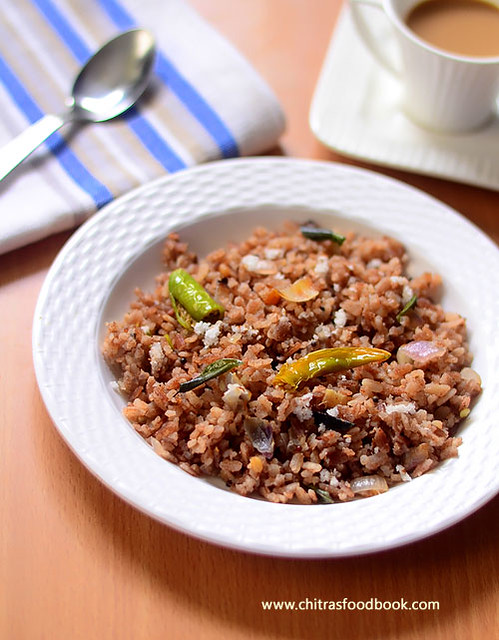
Red Poha Upma – Sigappu Aval Upma – Red Aval Recipes

Red Poha Upma
Poha( Flattened Rice/Rice flakes in English, Aval In Tamil, Avalakki In Kannada, Poha in Hindi) is used to make quick and easy, Instant breakfast recipes like Poha upma, Poha idli , Poha pongal etc. Mostly I make Poha recipes using white poha but red poha is considered to be high in nutrition with lots of health benefits.It is prepared from red rice.It is good for diabetes and is rich in fiber, vitamin B and minerals like calcium, zinc, iron, manganese, magnesium. Recently one of my readers suggested me to share some red aval recipes. So last time when I went to Salem, I bought a pack of Red Aval ( Sivappu aval in Tamil), Kambu aval and Ragi aval from Barathi supermarket. I followed my usual aval upma recipe and made this instant sigappu aval upma recipe quickly for our breakfast. It was very nice,flavorful and tasty. Above all, we got a satisfaction of having a healthy food. Ok, Lets see how to make red aval upma with step by step photos !

Check out my Instant, ready to eat Poha Mix Recipe !


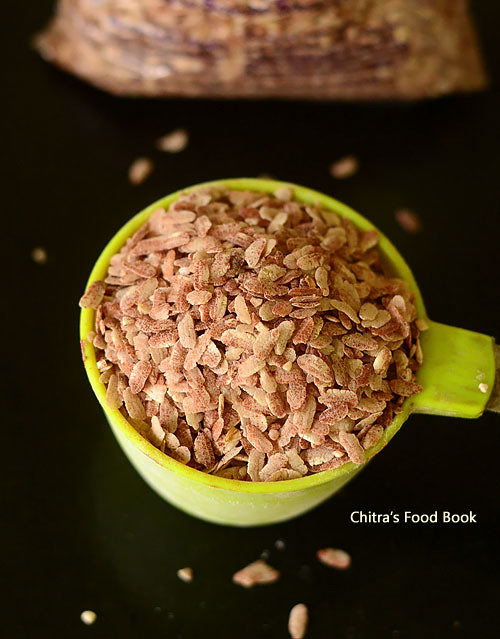
Red Poha - Sigappu aval

Red Poha Upma Recipe


Red Poha Upma Recipe Red Poha Upma - Sigappu Aval Upma recipe for easy, instant breakfast !
Cuisine: Indian
Category: Breakfast recipes
Serves: Serves 2
Prep time: 10 Minutes
Cook time: 15 Minutes
Total time: 25 Minutes


INGREDIENTS
1 cup - 250ml
  • Red Poha/ Sigappu aval - 1 cup
  • Big onion - 1 no ( Finely chopped)
  • Green chillies - 2 nos ( slitted)
  • Ginger - 1 tsp ( finely chopped)
  • Curry leaves - few
  • Grated coconut - 1/4 cup
  • Coriander leaves - to garnish
  • Lemon juice - few drops
To temper
  • Cooking oil or coconut oil - 2 tbsp
  • Mustard seeds - 1 tsp
  • Cumin seeds – 1/2 tsp
  • Urad dal - 1 tsp
  • Chana dal - 1.5 tsp
  • Hing/Asafetida - few pinches
METHOD

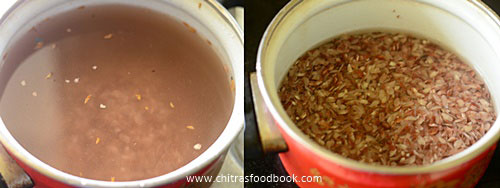
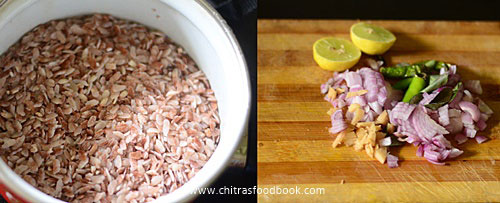
  • Wash the red poha twice to remove the debris & HUSK.( If the red poha is thin, it will become soft after washing. So no need to soak it. If the poha is thick and hard, it will not become soft even after washing. In that case, you should soak it) I used red thick poha, so I washed and soaked it for 10 minutes till all the water is absorbed by the red poha. Keep it covered. Water should be just 1 inch above the poha while soaking.
  • Chop the onion, green chilli and ginger. Keep it aside.
    Sigappu aval upma - Red poha upma
    Sigappu aval upma - Red poha upma
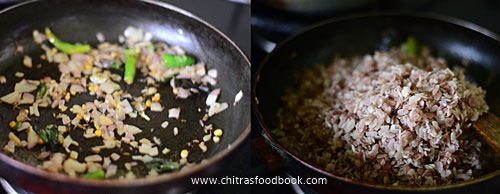
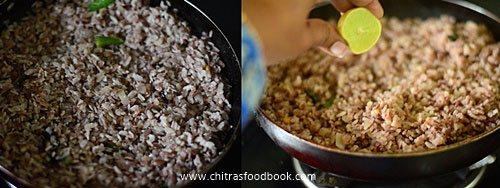
  • In a kadai, heat oil and splutter mustard seeds, urad dal, chana dal and cumin seeds.Saute finely chopped onion, slit green chillies, ginger pieces and torn curry leaves.Saute till onion turns transparent.
    Sigappu aval upma - Red poha upma
  • Add the soaked poha, required salt and mix well gently. Make sure poha doesn’t turn mushy while mixing. Keep the flame completely low and cover the upma with a lid. Cook it for 8-10 minutes. Open it once or twice in the middle and stir it. Check if the poha is cooked soft else add little water and mix well.Cook till done.Sometimes thick poha needs little more water to cook.Lastly add the lemon juice, coriander leaves and grated coconut. Mix well and switch off the flame.Serve hot !!
    Red aval upma
Enjoy !
Note
  • Add finely chopped chillies instead of slit chillies for spicy taste.I used slit chillies for mildly spicy.
  • Adding lemon juice helps to absorb the iron content in poha.So do not skip it.
  • If you want to make no onion version, just use boiled potato pieces and sprinkle 2 tbsp of roasted, coarsely powdered peanuts at the end.


Enjoy this healthy Red Poha Upma For your breakfast or dinner !
Red Poha Upma

الثلاثاء، 13 ديسمبر 2016

Tomato Poori Recipe – Thakkali Poori – Tamatar Ki Puri Recipe

Tomato poori
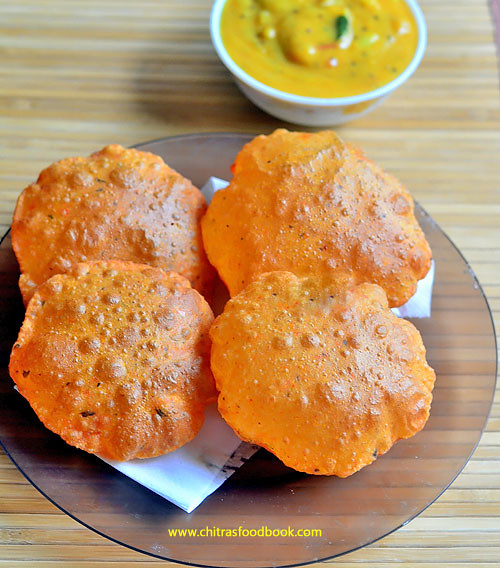
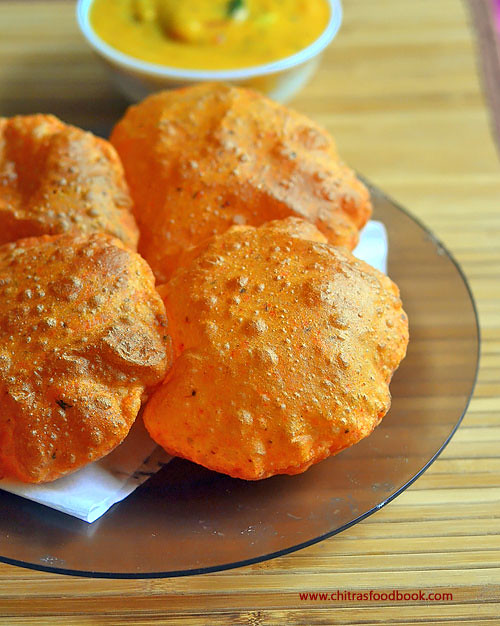
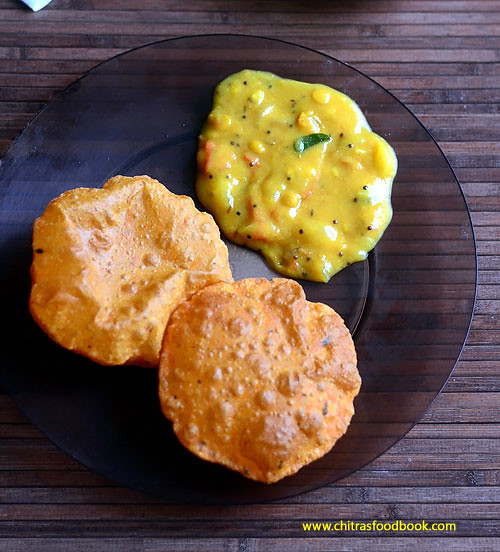
Recent days I have been trying varieties of Poori recipes for our weekend breakfast. I have tried and posted palak poori, masala poori, beetroot poori, chola poori . This week I made tomato poori ( Tamatar ki puri in Hindi and Thakkali poori in Tamil) for the first time. I just combined the recipes of my regular poori & masala poori and tried this tomato poori by adding tomato puree.It came out really well with nice red color. I prepared Bombay chutney as the side dish for this poori. It was a nice combo and we loved it a lot. This poori can be packed for kids lunch box or for snack as it tastes good and soft even if its not hot. Do try this colorful poori variety for your family and let me know the feedback. Tomorrow I will share the recipe of Bombay chutney. Today lets check out how to make this yummy tamatar puri recipe with step by step photos !
Thakkali poori

Tomato poori recipe / Thakkali Poori / Tamatar ki puri


Tomato poori recipe / Thakkali Poori / Tamatar ki puri How to make tomato poori recipe - Weekend special breakfast recipe
Cuisine: Indian
Category: Breakfast
Serves: 12 nos
Prep time: 10 Minutes
Cook time: 2 Minutes
Total time: 12 Minutes


INGREDIENTS
1 cup - 200ml
  • Wheat flour - 1.5 cups ( I used Aashirvaad brand)
  • Fully ripe tomato - 2 nos
  • Rava / Sooji – 1.5 tsp ( I used Bombay rava)
  • Ghee – 1/2 tsp
  • Red chilli powder - 1.5 tsp
  • Ajwain/omam - 1 tsp
  • Garam masala powder - 1/2 tsp
  • Salt & water - as needed
  • Kasoori methi - 1 tsp ( crushed)
  • Cooking oil - to deep fry ( I used refined oil)
METHOD

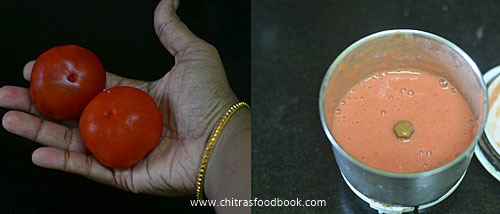
  • Wash and grind 2 tomato in a mixie jar without adding water. Grind it to make a smooth puree.
    Tomato poori recipe
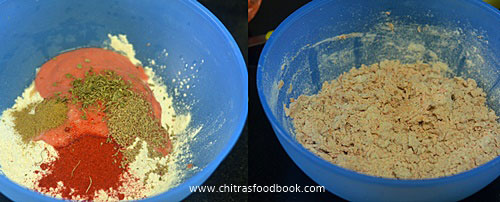
  • In a wide bowl or plate, take the wheat flour, tomato puree, rava, red chilli powder, garam masala powder, crushed kasoori methi, salt and ghee. Mix till crumbly.Remove the unground tomato pieces if any.
    Tomato poori recipe
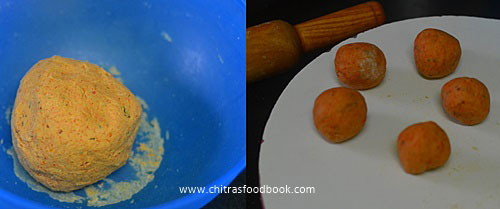
  • Add water little by little and make a thick, smooth dough. Dough should be non-sticky.Knead the dough with your palm for 2-3 minutes and keep aside for 10 minutes. If you wish, you can make poori immediately.
    Tomato poori recipe
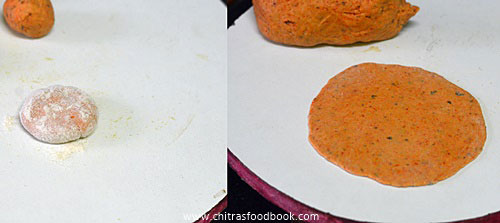
  • Make lemon sized balls out of the dough.Take one ball, dust with wheat flour and roll into thick, small poori as shown below. Thickness of poori should be more than chapathi. Only thick poori would puff up well.
    Tomato poori recipe
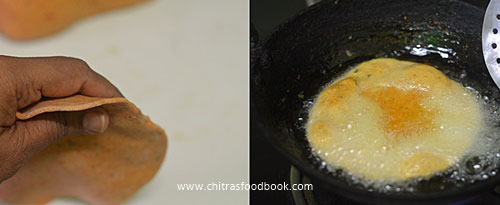
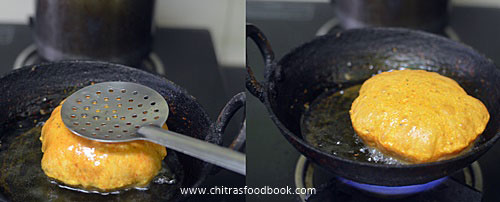
  • Heat oil in a kadai to deep fry the poori. Check its temperature by dropping a pinch of dough. If it rises to top immediately, oil temperature is just right.Make sure oil is not smoking hot. Keep the flame medium . Take a rolled poori, pat it with your hands to dust off the excess wheat flour and drop one poori in hot oil.
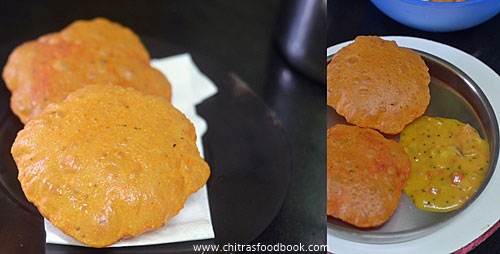
  • When it starts to come up, just press it gently with the ladle. Poori will puff up well. Now flip the other side and cook for a minute. Remove in a tissue paper, drain the excess oil and serve hot with your favorite side dish.
    Tomato poori recipe
    Tomato poori recipe
Enjoy !


Note
  • Adjust the quantity of masala powders as per your taste.
  • Do not make the dough sticky. Poori will absorb more oil.
  • Adding rava helps to maintain the poori puffy for long time.
  • Addition of ghee helps to keep the poori soft for hours.
  • Roll the poori thicker than chapathi else it won’t puff up.
  • Heat of the oil should be perfect to get well puffed poori. If the heat of oil is less, poori will sink in oil and drinks more oil. If the heat is more, the color of poori will become dark and may turn like a papad.
We enjoyed this yummy tomato masala poori with Bombay chutney !
Tomato poori recipe

الجمعة، 7 أكتوبر 2016

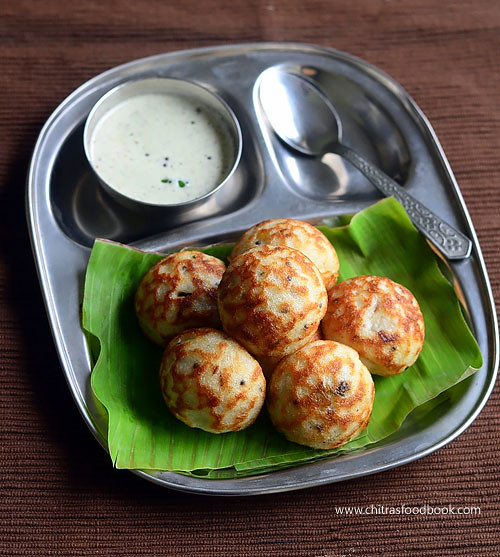
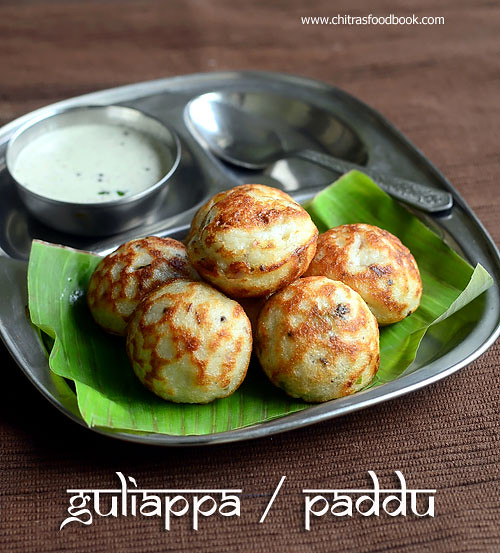
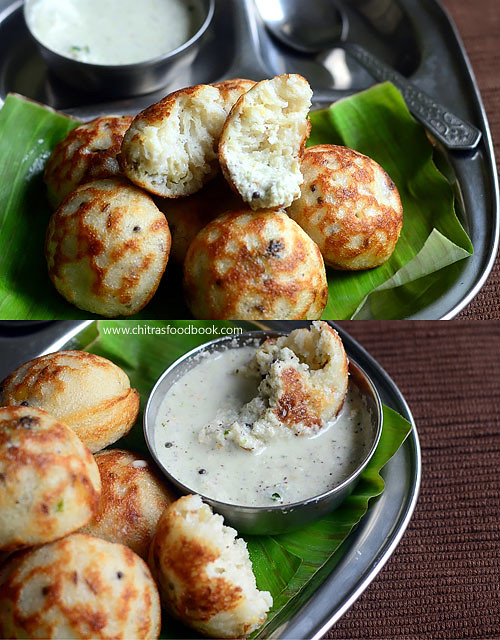
Guliyappa Recipe – Paddu Recipe – Karnataka Recipes-Paniyaram Varieties

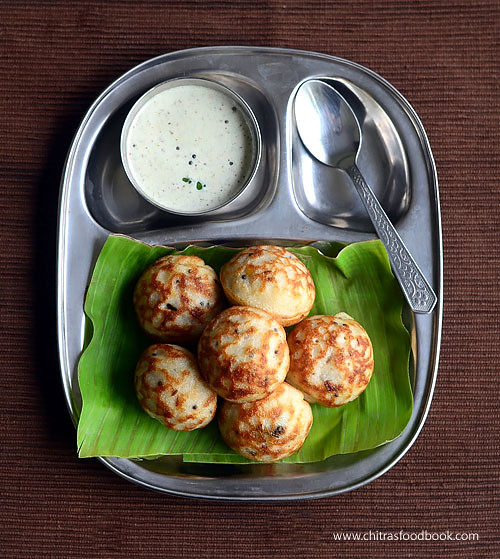
Guliyappa recipe
Paddu was the first street food I tasted in Bangalore – Karnataka after my marriage. Sendhil took me to NR colony Davangere Benne Dosa stall and there we tasted a plate of benne dosa and this paddu. It was very soft, spongy and super round in shape with a golden tint. After that, I have tasted it in V V puram food street too.I thought its made with the leftover dosa batter instantly just like my mom's Tamilnadu style Kuzhi paniyaram. This dish is prepared in all the states with slight changes in the recipe and its named in different languages as Guliyappa or paddu in Kannada, Guntu Punugulu in Andhra. When I asked about its recipe to my School mom’s group friends, they told it can be made with leftover dosa batter or with a special Paddu batter. I got tempted when they told about it and immediately got the recipe from my friend Lakshmi (Anu and Lakshmi are the newly added gems in our School moms group Cool). I tried her recipe and it came out very well. Sendhil loved it a lotParty. I made my watery Pottukadalai ( Hurigadale chutney) chutney with slight changes as a side dish for this paddu.It was a nice combo and we relished it a lot. Thank you so much my dear Lakshmi. I have learnt Karnataka’s one of the traditional breakfast recipes just because of youLove Struck. Friends, do try this recipe in a weekend and enjoy it.Ok,  Lets check out how to make Karnataka style Guliyappa/ Paddu at home with step by step photos !
Guliyappa recipe

Guliyappa recipe - Karnataka style Paddu recipe


Guliyappa recipe - Karnataka style Paddu recipe One of the most popular Karnataka delicacy - Guliyappa/ Paddu recipe with homemade special paddu batter
Cuisine: Karnataka
Category: Breakfast
Serves: 20 nos.
Prep time: 15 Hours
Cook time: 5 Minutes
Total time: 15H 5Mins


INGREDIENTS
1 cup - 250ml
  • Dosa rice / Normal rice – 1 cup ( Raw rice)
  • Round white Urad dal – 1/4 cup  ( To make softer paddu, use 1/3 cup)
  • Thick Poha/ /Beaten rice/ Avalakki – 1/4 cup ( Thin poha can also be used)
  • Methi seeds/ Menthya – 1/2 tsp
  • Chana dal / Kadala bele – 1 tbsp
For tempering
  • Cooking oil – 1.5 tbsp
  • Mustard seeds – 1 tsp
  • Cumin seeds/Jeera – 1/2 tsp
  • Big onion – 1 no
  • Green chillies – 1 no ( finely chopped)
  • Curry leaves – few
  • Coriander leaves – Little
  • Asafetida / Hing – a pinch
Side dish for Paddu / Paddu chutney :
Hurigadale chutney/Fried gram dal chutney – I added few curry leaves and a sprig of coriander leaves while grinding and served for paddu.
METHOD

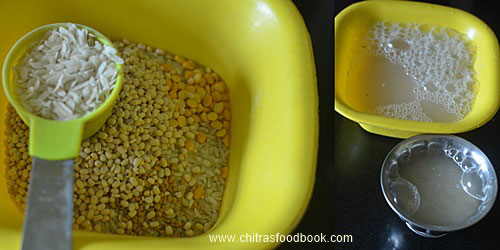
  • Wash and soak the rice, urad dal, methi seeds and chana dal together in required water for 3-4 hours.Wash and soak the avalakki/Beaten rice separately in enough water for 30 minutes to 1 hour. ( I am not sure on why to soak avalakki seperately. I just followed what my friend told) You can try soaking everything together if you wish. Thin avalakki can also be used.
    Paddu recipe
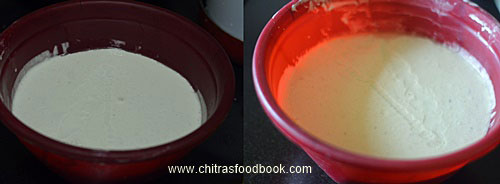
  • Grind Rice and dal mixture first. While it is half done, add the soaked Avalakki/Poha and grind it further to a smooth paste. Add the required salt while grinding. Make sure batter is smooth and not too watery.Remove the batter in a big bowl and let it ferment over night or for 8 hours.

  • The next day morning, batter would have raised slightly and not doubled. Mix it well with a ladle and check its consistency. It should be like dosa batter and not like thick idli batter.So add some water if needed.
    Paddu recipe
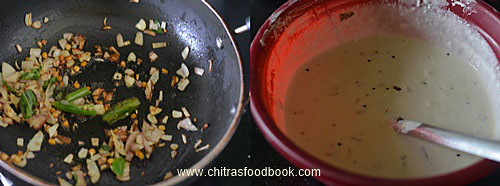
  • Heat oil in a kadai.Splutter mustard seeds, cumin seeds, Urad dal and chana dal.Saute until golden.Add  finely chopped big onions, sliced or finely chopped green chillies, curry leaves and saute well.Add this to the batter and mix well.Add coriander leaves if you wish. Mix well and set aside.
    Guliyappa recipe
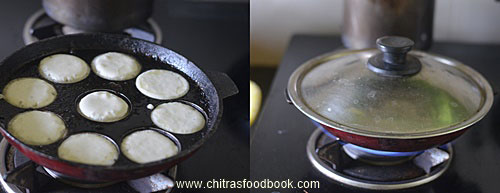
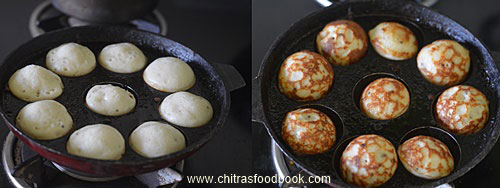
  • Pour 2 tsp of oil in each hole of paddu mould/Appe pan. Pour a small ladleful of batter. Cover and cook in medium flame. Open the lid and flip the other side with a spoon or steel stick. Cook the other side and remove in a plate.Serve hot with hurigadale chutney/Roasted gram dal chutney. Tastes great !
    Karnataka paddu recipe
    How to make paddu at home

Enjoy !

الجمعة، 23 سبتمبر 2016

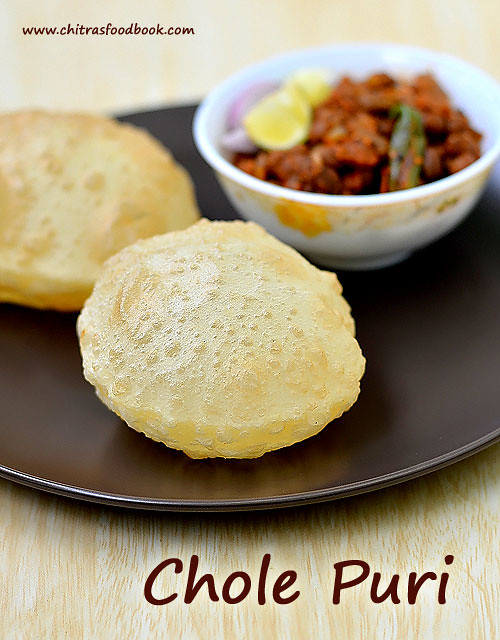
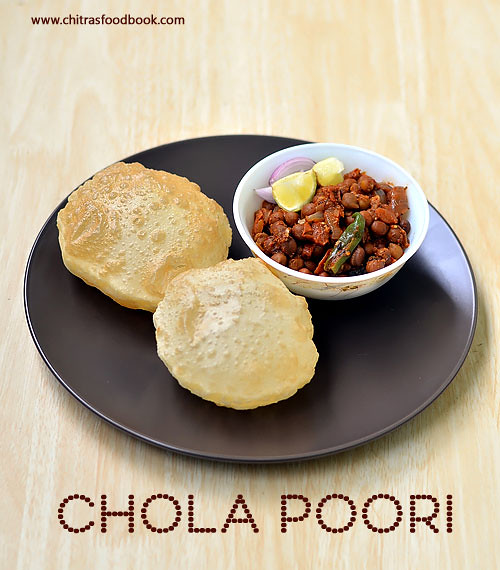
Chola Poori Recipe – How To Make Chola Puri

Chola poori recipe
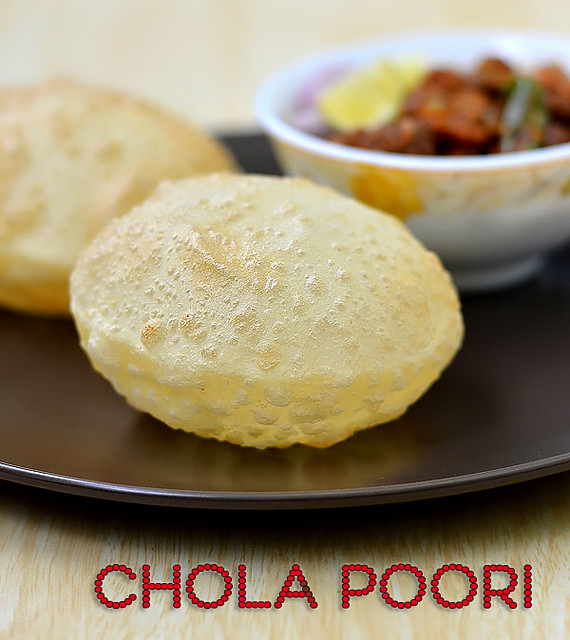
Recently I tasted a big sized, puffy Chola poori with chana masala in Hotel Saravana bhavan,SalemWinking.Actually speaking, Punjabi special chole bhatura was in my try list for years. But I haven’t tasted it so far.Soon I must taste it in North Indian restaurants to know its actual taste and then experiment at homeWaiting. I think Chola poori must be an adaptive version of chole bhatura in South. So I tried this Tamil nadu style chola poori at home. I was thinking chola poori is called as chole bhatura in Hindi. But there are variations in the ingredients for dough and preparation for making bhatura and chola poori. For making bhatura yeast, baking powder or soda water is used whereas chola puri is made without yeast or any raising agent. Only curd/yogurt is used. Bhatura dough needs a resting time of 3-4 hours whereas this one needs just 30 minutes. The method of preparation of chola poori is quite similar to our plain wheat flour poori. All the tips and tricks we follow for wheat flour poori is applicable to this as well.I got this awesome recipe from this blog.I have tried it thrice during weekends.It comes out very well with a puffy looking, soft texture. We all know the best, popular side dish for chola poori is chana masala or chole masala.So I prepared Punjabi chole following this recipe from my Punjabi thali post and served with chola poori. It was a yummy combo.We loved it to the core. Friends, do try this easy chola poori recipe. Don’t mind about calories, just enjoy with chana masalaLove Struck. Serve it for weekend breakfast or dinner. Ok, Lets see how to make Chola poori recipe with stepwise pictures. I will try to make a detailed video post soon.
Check out my beetroot poori and Palak poori recipes if interested !
Chola poori

Chola poori recipe


Chola poori recipe How to make Chola poori recipe - Delicious breakfast recipe for weekends
Cuisine: Indian
Category: Breakfast/Dinner recipe
Serves: Yields 12-14
Prep time: 30 Minutes
Cook time: 2 Minutes
Total time: 32 Minutes


INGREDIENTS
1 cup - 200ml
  • Maida/All purpose flour - 2 cups
  • Sooji/Rava – 1/4 cup ( Upma rava)
  • Wheat flour/Atta – 1/4 cup
  • Cooking oil - 1 tbsp
  • Fresh Curd/yogurt – 2 tbsp
  • Salt - as needed
  • Water - as needed
  • Cooking oil - to deep fry
METHOD

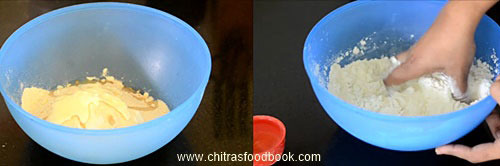
  • In a wide bowl, sift the maida and wheat flour.To this, add sooji, Oil, salt and curd. Mix well with your fingers. Oil and curd should spread well with flour and the mixture looks crumbly. ( Sooji helps to maintain puffiness for long time. Wheat flour helps to make perfect round shape. Oil  & curd is to give softness to the poori)
    How to make chola poori
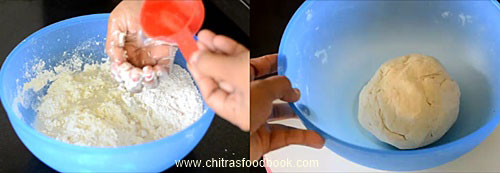
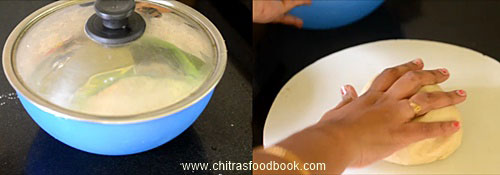
  • Add the required water little by little and make a stiff dough.Dough should be non-sticky, thick and stiff like our usual wheat flour poori.Cover it with a damp cloth. Let the dough rest for 30 minutes.
    How to make chola poori
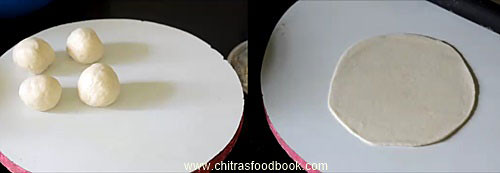
  • After 30 minutes, knead the dough for 2-3 minutes and make it smooth. Make small or big sized balls from the dough as per your wish. In hotels, they serve big sized poori. Roll it slightly thicker than the usual poori. Use wheat flour to dust the balls. Arrange them in a paper or a plate.
    How to make chola poori
    How to make chola poori
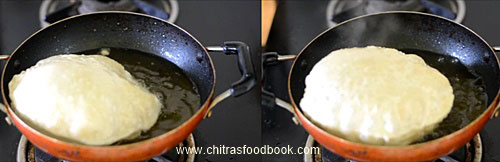
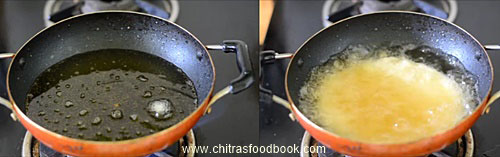
  • Heat oil in a kadai and when it gets heated, drop a pinch of dough to check the oil temperature.The dough should rise immediately to the top. Keep the flame medium high and drop one poori at a time. Poori will puff up immediately. If not, press the poori gently with a slotted ladle. It will puff up. Flip it and cook the other side till bubbles cease.It will look slightly golden in color.The color of poori will change based on the oil temperature. You can find the difference in color or pooris in the main picture. To maintain white colored pooris, switch off the heat after making 2-3 pooris, let the oil cool down slightly. Then heat it and check with a pinch of dough. Proceed as mentioned above and deep fry the poori.Remove the puri in a tissue paper. Drain and enjoy with chole masala or chana masala. Adjust the heat before frying each poori. Make sure oil is not smoking hot. Please check my POORI RECIPE for more details.
    How to make chola poori
    How to make chola poori
Enjoy !
Check out my beetroot poori and Palak poori recipes if interested !

Note
  • Make sure the dough is thick and hard but smooth.It should not be too soft like soft chapathi dough.So add water accordingly.
  • Resting time of 30 minutes is needed.
  • Poori will puff up only when its rolled thick.Thin poori will become like papad. So roll it thick.
  • The temperature of oil is very important to get puffy poori. If the oil temperature is too low,  poori will absorb more oil and does not puff up. If oil temperature is too high and smoky, poori will turn golden brown very soon and cook unevenly.
Enjoy this white, puffy chola poori at home with chana/chole masala Love Struck
How to make chola poori at home

الثلاثاء، 16 أغسطس 2016

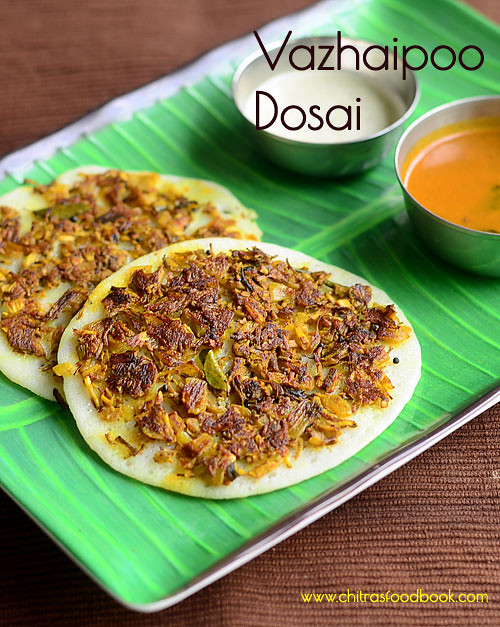
Vazhaipoo Dosai Recipe – Banana Flower Dosa

Vazhaipoo dosai
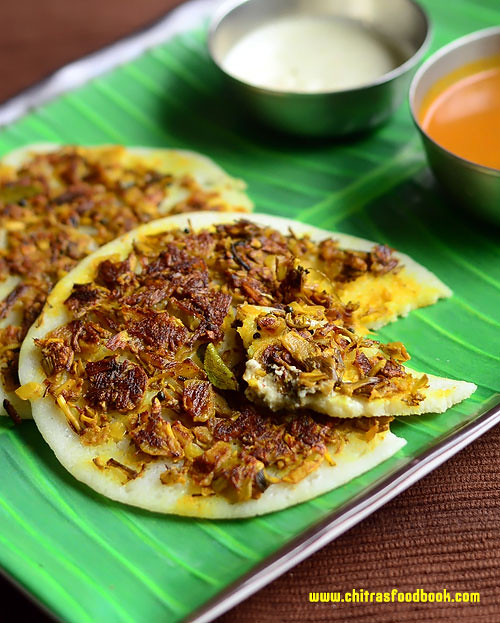
Recently I tasted vazhaipoo uthappam in Salem Saravana bhavan – Aasai Dosai restaurant. It was very tasty and I din’t have the feel of eating vazhaipoo. As its a healthy dosa, I wanted to try at home. I was able to guess the ingredients of the masala(topping) and recreated the same. It came out very closeDancing. Sendhil loved it a lot. Most of us make Vazhaipoo usili, vazhaipoo vada  and even vazhaipoo adai at home. This vazhaipoo dosa is sure a welcome change from them. The consumption of banana flower would be more in this dosa. Make this dosa for your husband and ask him to guess the ingredientsWinking. He would love its taste for sure and definitely becomes surprised to know it is a vazhaipoo recipe. This dosa tastes the best with coconut chutney . Make sure you use fresh banana flower and its not bitter to taste.Ok, let see how to make restaurant style, healthy vazhaipoo uthappam recipe for your breakfast/dinner with step by step photos.
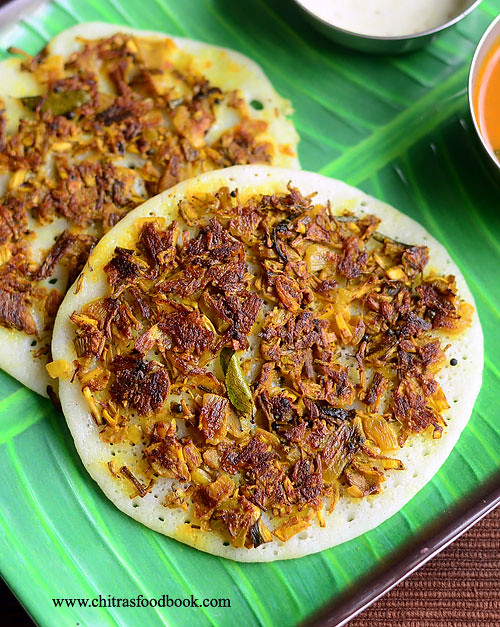
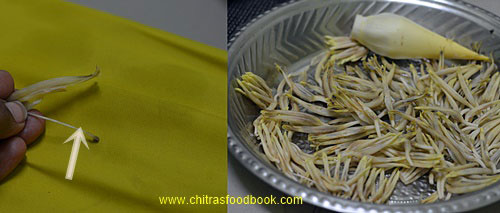
Don’t forget to check out my how to clean vazhaipooVazhaipoo kuzhambu, Vazhaipoo vadai, vazhaipoo poriyal, Vazhaipoo usili and vegetable uthappam recipes.


Banana flower dosa

Vazhaipoo dosa/ Banana flower dosa recipe


Vazhaipoo dosa/ Banana flower dosa recipe Vazhaipoo/Banana flower dosa recipe – Healthy dosa variety for breakfast/dinner
Cuisine: South Indian
Category: Main - Breakfast
Serves: 7 nos
Prep time: 10 Minutes
Cook time: 15 Minutes
Total time: 25 Minutes


INGREDIENTS
1 cup - 250ml
For the masala
  • Vazhaipoo/Banana flower - 1 no
  • Big onion - 2 nos
  • Green chillies - 2 nos ( thinly sliced)
  • Curry leaves - few
  • Chilli powder or sambar powder - 1/2 tsp
  • Turmeric powder - 1/4 tsp
  • Salt & water - as needed
  • Lemon juice – few drops (optional)
To temper
  • Cooking oil - 2 tbsp
  • Mustard seeds - 1/2 tsp
  • Urad dal - 1 tsp
  • Cumin seeds - 1 tsp
  • Hing/Asafetida - a big pinch
METHOD

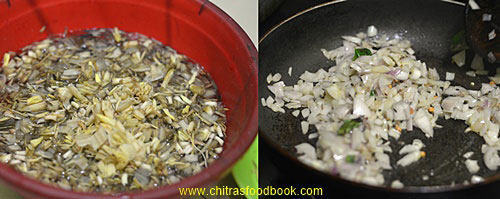
  • Wash and clean the vazhaipoo ( Refer this post on how to clean vazhaipoo). Chop it finely and keep them immersed in water till use. Finely chop the onion and green chillies.
Vazhaipoo dosai
  • In a kadai, heat oil and splutter mustard seeds, urad dal, cumin seeds.Add finely chopped green chillies and saute till its color changes. Add onions,curry leaves and saute till transparent.
  • Vazhaipoo dosai
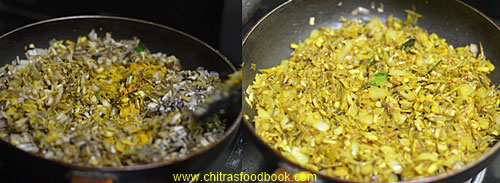
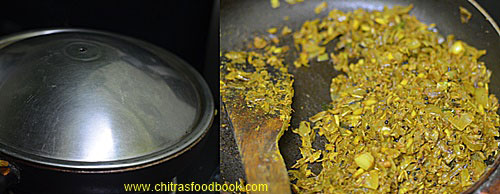
  • Now add the turmeric powder, chopped vazhaipoo, red chilli powder or sambar powder, required salt. Mix well. Mix well until vazhaipoo shrinks and cooks well. Cover the kadai with a lid and simmer the flame. Let the vazhaipoo cook soft. Stir it once in the middle.Switch off the flame and add few drops of lemon juice if needed. Check for taste.
Vazhaipoo dosai
Vazhaipoo dosai
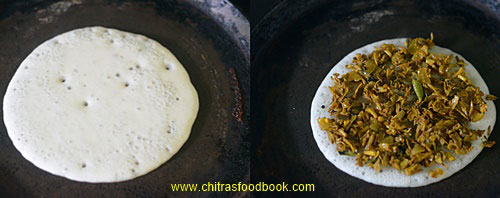
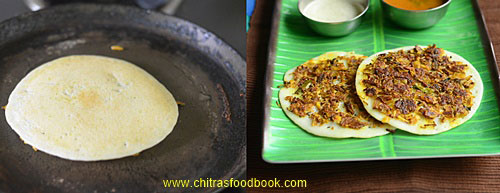
  • Heat a dosa pan and pour 1 ladleful of batter. Spread it slightly for making uthappam. After you see the bubbles over the dosa, spread the vazhaipoo masala over the dosa and drizzle a tsp of gingely oil over the dosa. Flip the dosa carefully and cook for a minute.

Vazhaipoo dosai
  • Remove the dosa and serve hot with chutney or sambar ! Enjoy !
Vazhaipoo dosai
Note :  Add more green chillies or chilli powder as per your wish.

Yummy, healthy vazhaipoo dosa is ready to serve with coconut chutney and sambar !
 Vazhaipoo dosa