السبت، 14 فبراير 2015

Coconut Milk Veg Biryani Recipe/Thengai Paal Biryani-Sunday Lunch Recipes-6

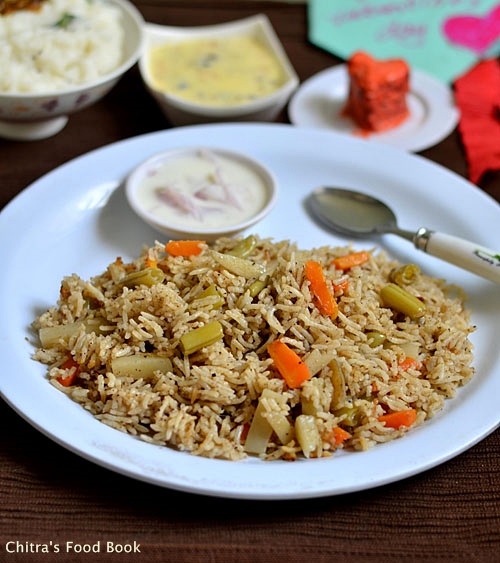
Coconut milk veg biryani recipe

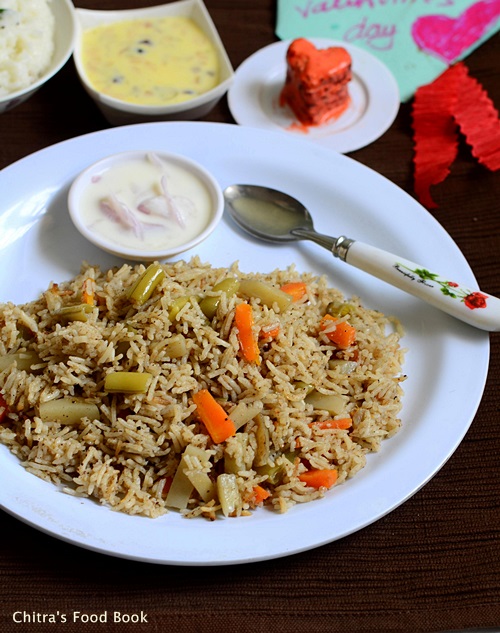
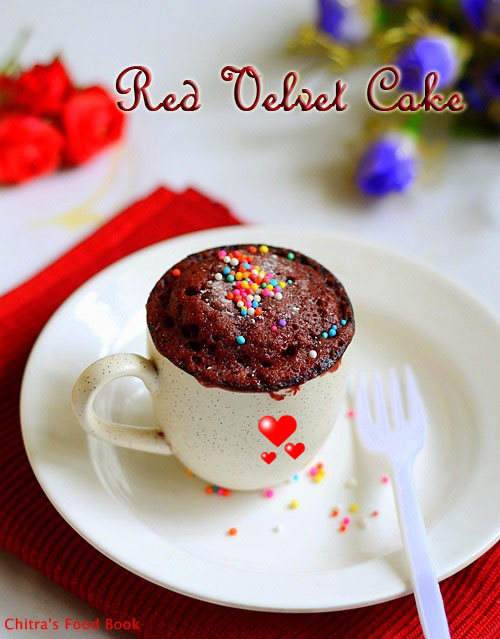
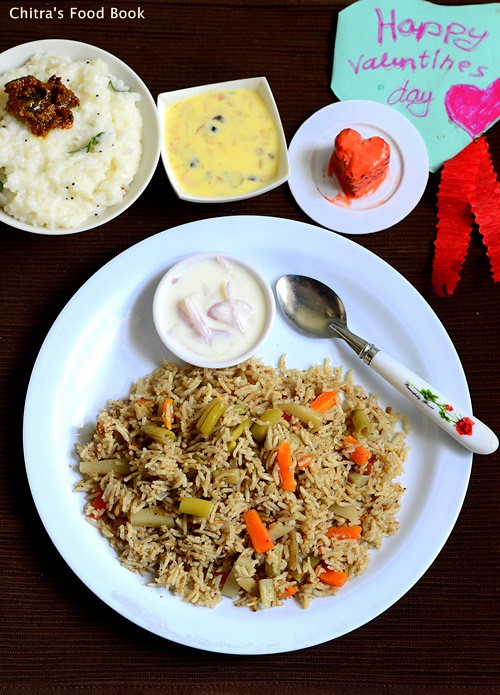
Today being Valentine’s day,I made this special coconut milk vegetable biryani for our lunch.Of course my husband is in Norway but still i made this biryani along with basundi for my daughter & in-laws.I will show this platter to Sendhil online in skype callWinking.Today my daughter Raksha gifted us her own made Valentine’s day card along with heart shaped,iced Red Velvet CakeLove Struck .Can u find them in the above pic ?? ;)We were really surprised and moved to see her love & affectionHappy.
Ok,coming to this recipe,Generally i don’t add coconut milk in my biryani but its been my long time wish to try biryani adding coconut milk/Thengai paal.I am happy that i tried on this special occasion.I was so happy with the outcome & the addition of coconut milk made my biryani so rich & took it to the next level.Actually i thought to make white colored biryani  and din’t add spice powders but i couldn’t bring that color.Mine looked half whiteSad .You can make any variations to this recipe.It comes out well in all the ways.Try it & let me know how it turned out for you!

Coconut milk Veg biryani

Coconut milk veg biryani recipe


Coconut milk veg biryani recipe Coconut milk veg biryani recipe- Sunday special lunch recipe
Cuisine: Indian
Category: Lunch
Serves: Serves 3
Prep time: 30 Minutes
Cook time: 15 Minutes
Total time: 45 Minutes


INGREDIENTS

  • Basmati rice - 1 cup
  • Thick Coconut milk + water - 1 + 0.75 cups ( I used 2 cups equal measure)
  • Cooking oil + Ghee - 1 tbsp + 2 tbsp
  • Bay leaf - 1 no
  • Jhapatri - 1 no (optional)
  • Big onion - 1 no
  • Mixed vegetables - 1/2 cup ( Carrot-1,Beans-5 nos,Potato-1 no.Peas-handful)
  • Mint & coriander leaves - 2 tbsp ( finely chopped)
  • Lemon juice - 1/2 tsp
To grind
  • Cashew nuts – 5 nos
  • Green chillies - 4 nos
  • Cinnamon - 1 inch piece
  • Cloves - 3 nos
  • Cardamom - 2 nos
  • Star anise - 1 no
  • Fennel seeds - 1/2 tsp
  • Ginger - 1 inch piece
  • Garlic cloves - 5 nos
  • Kalpasi/Black stone flower - 1 no
  • Water - as needed
METHOD

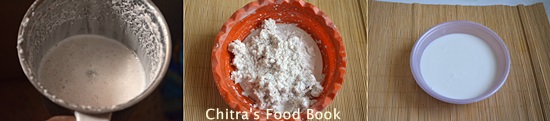
  • Wash and soak the basmati rice adding 1.5 cups of water for 1 hour.Grind 1 cup of grated coconut adding 1 cup of warm water and take thick milk.Keep it aside.
  • Wash and chop the vegetables & set aside.
Coconut milk veg biryani
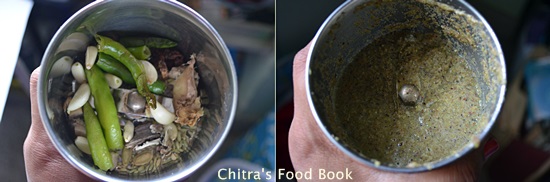
  • Take all the ingredients given under “ To grind” and grind them coarsely without adding water.Then add little water & make a smooth paste.Set aside.
Coconut milk veg biryani
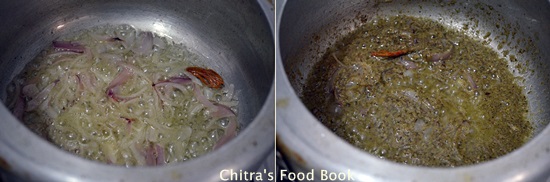
  • Heat oil+ghee in a pressure cooker. Saute bayleaf & Jhapatri.Then add the ground paste & finely chopped mint,coriander leaves.Saute well till raw smell vanishes off.
Coconut milk veg biryani
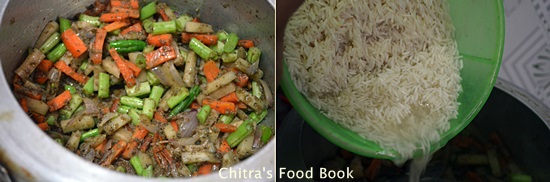
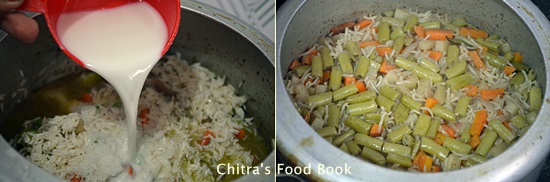
  • Now add the chopped vegetables,mix well.Add the required salt,soaked rice along with water and coconut milk.Lastly add lemon juice in water & check for taste.Add salt if needed.Add slitted green chillies if u feel,spice is less.
Coconut milk veg biryani
  • Cook in low flame for one whistle.It takes 10 minutes.After the steam is released,fluff the rice with fork & serve it hot with raita.
Coconut milk veg biryani
Enjoy !


Note
  • For variations,u can add 1/2 tsp of red chilli powder & biryani masala powder.In that case,reduce the green chillies to 3nos.
  • Soak basmati rice for minimum 30 minutes to get soft,elongated rice.
  • You can also fry the soaked rice in ghee before adding in biryani.

Coconut milk biryani,Curd rice,Basundi and a piece of Red Velvet cake for lunch.Come n join me friendsHappy
Coconut milk veg biryani recipe

الجمعة، 13 فبراير 2015

Eggless Red Velvet Cake In A Mug(1 min microwave cake)-Valentine’s Day Recipes

Eggless red velvet cake recipe

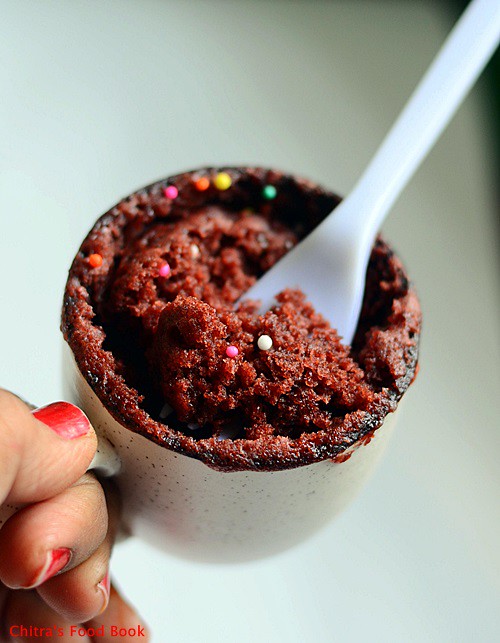
Valentine’s day is around the corner.I am sure u all would be scratching your head about what to make something special for your loved onesLove Struck.Here u go, a super easy,soft n spongy,eggless one minute red velvet cake in a mug using microwave under one minute.Last year i have shared some easy,instant microwave cake recipes( refer side bar) and i am really happy that i am getting rave reviews about those recipes from my readers.This has been a real boost which inspires me to try more microwave recipes especially one minute mug cakes.When i was looking for Valentine’s day recipes ideas,i found home made Chocolates & Red Velvet Cake are the most wanted recipes on lover’s day.As I have already posted an easy, no cook,3 ingredient home made chocolate recipe here,i wanted to share this easy red velvet cake recipe without using eggs & buttermilk for you all to try out on this Valentine’s day.Here i have used red food color as i din’t want to take chance with beetroot in my first attempt.Soon i will try n share this recipe replacing artificial color.You can make this cake in the next few minutes just after reading this recipe & surprise your sweet heart/HusbandParty.
Yesterday,my Husband Sendhil had left to Norway for a short official trip.So we celebrated our Valentine’s day in advance with this yummy,super soft,Romantic Red velvet cake recipeRose.We both enjoyed this cake with one spoon in one mugLaughing,hope u can understand what i mean hereWinking.
Friends,Do try this easy cake for your loved ones.I am sure it will be a great choice for this celebration ! And don’t forget to share your feedback about this cake with meWinking.Lets see how to make this easy red velvet cake recipe for two on this special Valentine's day !

Easy red velvet cake recipe

Easy Red Velvet Cake in a mug using microwave


Easy Red Velvet Cake in a mug using microwave Microwave red velvet cake under 1 minute - Eggless,butterless recipe.
Cuisine: Indian
Category: Cakes
Serves: Serves 2
Prep time: 5 Minutes
Cook time: 1 Minutes
Total time: 6 Minutes


INGREDIENTS

  • All purpose flour - 4 tbsp
  • Sugar – 2.5 tbsp
  • Baking powder - 1/4 tsp
  • Salt - a pinch
  • Cocoa powder- 1 tsp
  • Red food color - 2 pinches or 2 drops
  • Vanilla essence - 1/4 tsp
  • Vinegar/Lemon juice - 1/2 tsp
  • Milk - 3 tbsp (Use  boiled milk at room temp)
  • Vegetable oil/cooking oil - 1.5 tbsp ( use odourless oil)
METHOD

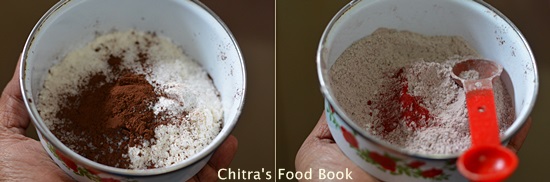
  • Take all the dry ingredients ( maida,sugar,cocoa powder,baking powder and salt) in a big mug or bowl.Mix it well adding food color.
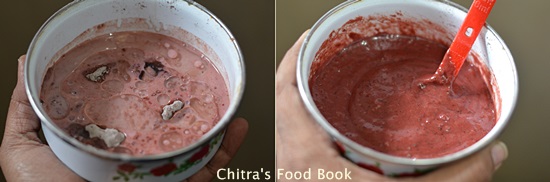
  • Then add the milk,oil and vanilla essence.Mix well without any lumps and make sure sugar is dissolved well.
Red velvet cake
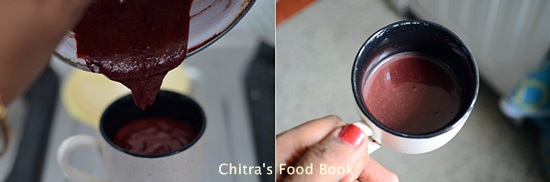
  • The consistency of batter will be semi solid & it should fall like a thick ribbon.Make sure the batter is filled till half of the mug because this cake will double while cooking.
  • Now microwave the mug in high power for 1 minute.Cake will raise & its size would be doubled.( mine is 800w.Please adjust the timing as per the power of your microwave) Check with a toothpick or back of a spoon.If it comes out clean,cake is done.Else keep it again for 10 secs.
  • For simple decoration,u can put sprinklers on top as i did OR dust it with powdered sugar.If u apply frosting,it would be even more rich. Make your choice & variations !
Easy red velvet cake recipe
  • Serve with any frosting or just sprinkle powdered sugar & enjoy !
Happy Valentine’s day !!

Note
  • Do not mix everything together.First mix the dry ingredients & then go for mixing wet ones.
  • Adjust the time based on the power of your microwave.
  • It tastes mildly sweet.So add more sugar based on ur tastebuds.But make sure sugar is dissolved before u microwave.
Red velvet cake recipe

Try this easy red velvet cake on Valentine’s day & have a fun filled day with your loved ones !
Wish u all a very happy Valentine’s dayLove Struck
Easy red velvet cake recipe

الأربعاء، 11 فبراير 2015

Easy Brinjal Gothsu/Kathirikai Gothsu Recipe For Idli,Pongal

Brinjal gothsu recipe

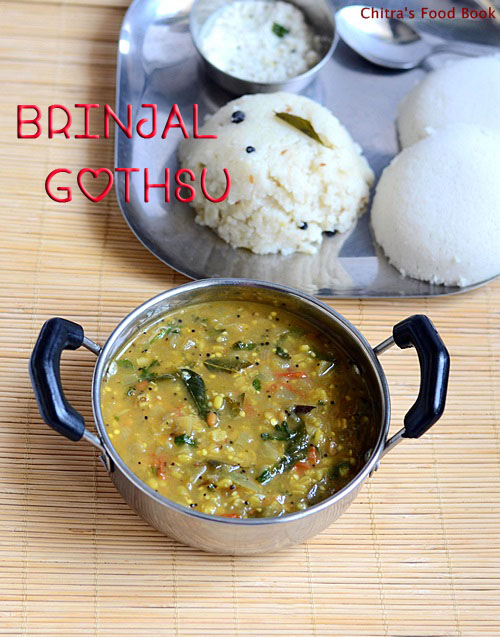
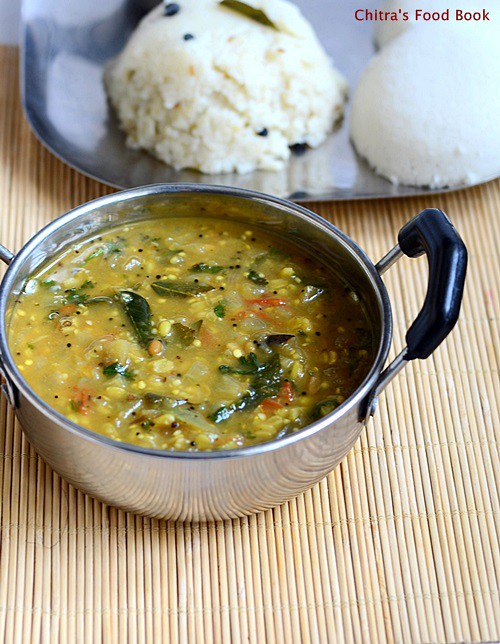
I am a big big fan of brinjal recipes.But Sendhil & Raksha are just opposite to me.So i make brinjal dishes only when my in-laws visit my place.This morning,i made this easy gothsu recipe learning from my MIL.Its a very easy,one pot brinjal gosthu recipe.In this method,u don’t need to roast & powder the spices as we do for Chidamabaram kathirikai gosthu.The procedure of this brinjal gravy is very similar to my MIL’s Thanjavur style tomato gosthu.We usually make this as a side dish for Idli.But recently i had tasted this with pongal too.It was yummy.Its a great recipe for bachelors & working women who look for easy side dish recipes.All u have to do is just chopping,sauting & pressure cooking,Tada! This gravy would be ready under 15 minutes.Just try once,u will come to knowHappy.My MIL makes it watery as we like it that way.Here i have made it slightly thick to suit pongal.Finally,the consistency is ur choice.Lets see how to make this yummy kathirikai/Brinjal gosthu recipe for idli and pongal.

Brinjal gothsu

Easy brinjal gosthu/Kathirikai gotsu recipe


Easy brinjal gosthu/Kathirikai gotsu recipe Easy brinjal gosthu recipe-Side dish for idli and pongal
 
Cuisine: Indian
Category: Side dish
Serves: Serves 2
Prep time: 5 Minutes
Cook time: 10 Minutes
Total time: 15 Minutes


INGREDIENTS

  • Brinjal - 3 nos ( medium)
  • Small onions or big onion - 20 nos/1 no
  • Green chillies - 4 nos
  • Tomato - 1 no
  • Tamarind - small berry size ( Sundakkai alavu)
  • Moong dal - 1.5 tbsp
  • Turmeric powder – 1/8 tsp
  • Salt & water - as needed
To temper
  • Cooking oil - 2 tbsp
  • Mustard seeds - 1 tsp
  • Urad dal - 1 tsp
  • Chana dal - 1 tsp
  • Curry leaves - few
  • Hing/asafetida - a big pinch
  • Idli/Dosa batter OR Rice flour - 1/2 tbsp/1.5 tsp 

Coriander leaves – to garnish

METHOD

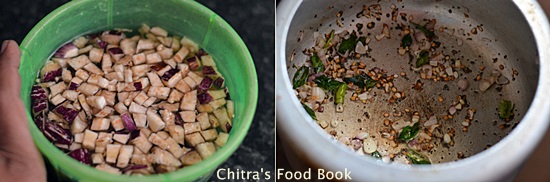
  • Wash and chop the brinjal into small squares.Soak in water till use to prevent discoloration.Similarly chop the onions,green chillies finely.

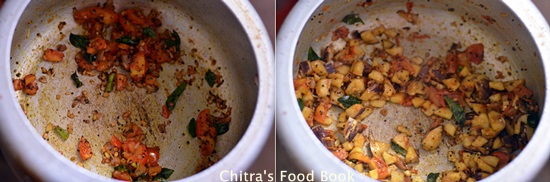
  • Heat oil in a cooker base.Splutter mustard seeds,urad dal & chana dal.Then add the finely chopped onions,green chillies,curry leaves & hing.Saute till onion turns transparent.

Brinjal gothsu recipe

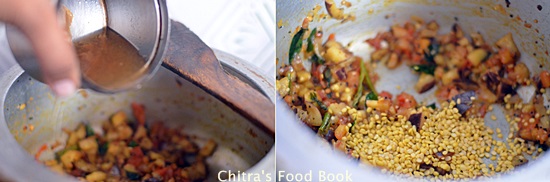
  • Now add the finely chopped tomato pieces & brinjal. Add some salt and saute till tomato turns mushy.Lastly add the tamarind extract and moong dal.Mix well.Add little turmeric powder,required salt and water.
Brinjal Gothsu

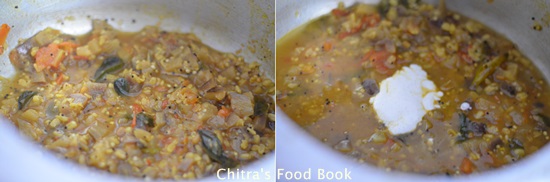
Kathirikai gothsu

  • Pressure cook in low flame for one whistle.After the steam is released,mash everything well.No problem if some dals are visible.Its enough if its just cooked & blossomed.Then add the idli/dosa batter or rice flour diluted in 1/4 cup of water.Mix well & allow the gravy to boil till it thickens lightly.Make it slightly thin if using for idli & thick for pongal.Garnish with lots of coriander leaves.Serve hot with idli or pongal.

Brinjal gothsu recipe

Enjoy !


Note

  • If u are serving for idli,add sesame oil/gingely oil while eating.It tastes great.
  • Add more chillies based on ur taste.
  • Tamarind should be very less.Its used just to remove the mild bitterness of brinjals ( we call it as “Kaaral” taste in Tamil)
  • This recipe is completely different from chidambaram gosthu.So it tastes mildy spicy and tangy.
  • Adding idli/dosa batter helps to thicken the gravy.U can also replace it with rice flour.
  • Garnishing with coriander leaves gives a nice smell.


Enjoy this yummy,easy brinjal gosthu with idli or pongal !

Kathirikai gothsu recipe


الثلاثاء، 10 فبراير 2015

Eggplant in a Tahini Mustard Sauce

eggplant in a tahini mustard sauce

Eggplant has recently become an treasured component of my meals, especially when they feature in a curry. Though eggplant doesn't have a lot of flavor on its own, it is a remarkable vegetable that not only adds texture but soaks up all of the goodness of the seasonings present in the dish it stars in.

I also happen to be a mustard fan, and I was immediately enchanted when I came across this idea for an eggplant side from Soma. As usual, I have adapted things to my own preferences, but the nod goes to Soma nonetheless.

The tahini here tempers the mustard somewhat, but the mustard is the trending taste here, with succulent slices of cooked eggplant.

Eggplant in a Tahini Mustard Sauce

Eggplant in a Tahini Mustard SauceEggplant in a Tahini Mustard Sauce
Recipe by
Adapted from eCurry
Cuisine: Indian
Published on February 10, 2015

Tender pieces of fried eggplant simmered in a unique creamy and spicy mustard sauce

Print this recipePrint this recipe

Ingredients:
  • 1/2 oz (14 g) dried wild mushrooms
  • 1 1/2 tablespoons black mustard seeds
  • 1 tablespoon yellow mustard seeds
  • 1 teaspoon turmeric
  • 1 tablespoon Kashmiri chili powder
  • 1/4 teaspoon cayenne
  • 1 teaspoon coconut or brown sugar
  • 3 tablespoons tahini
  • 1 large eggplant
  • 4 tablespoons sesame or mustard oil
  • 1 teaspoon cumin seeds
  • 1/2 teaspoon nigella (black onion or kalonji) seeds
  • 3 to 4 green or red chilies, seeded and chopped
  • sea salt to taste
Instructions:
  • Soak the mushrooms in 2/3 cup hot water for 30 minutes. Drain, reserving the soaking water, and roughly chop the mushrooms. Set aside.

  • Prepare the mustard paste. Grind the mustard seeds in a spice grinder or blender. Transfer to a bowl and whisk in 1/4 cup water. Let sit for about 20 minutes and then whisk in the turmeric, chili powder, cayenne, sugar and tahini.

  • Wash the eggplant and pat dry with kitchen towel. Slice of the ends and then cut the eggplant into strips about 2 inches long and 3/4 inches wide. Alternately, cut into large cubes. Sprinkle the cut eggplant with salt and a bit of turmeric and toss well to coat. Let sit for 15 minutes, stirring often.

  • Heat 2 tablespoons of the oil in a large frying pan or wok over medium heat. When hot, add the cumin seeds, nigella seeds and chilies. Stir and fry until the seeds sputter and the chili softens. Add the eggplant and increase the heat slightly.

  • Cook the eggplant, stirring often, until it begins to soften and brown — about 10 minutes. Now add the remaining 2 tablespoons of oil along with the mustard paste and mushrooms, stirring well to coat the eggplant pieces.

  • Reduce the heat to medium-low and gently stir and cook for another 5 minutes. Add the reserved mushroom soaking water and more water as needed to thin the sauce to your desired consistency. Simmer for another 5 to 10 minutes until the eggplant is cooked. Season with salt and serve hot or warm.

Makes 4 servings

eggplant with tahini and mustard

Other eggplant creations from Lisa's Vegetarian Kitchen:
Eggplant Quinoa Bites with Pesto
Baked Eggplant Stuffed with Curried Vegetables
Stuffed Eggplant Poriyal
Drumstick Sambar with Seared Eggplant

On the top of the reading stack: the newspaper

Audio Accompaniment: Marsen Jules
الاثنين، 9 فبراير 2015

Rava Dosa Recipe(Instant Version)-South Indian Breakfast Recipes

Instant Rava dosa recipe
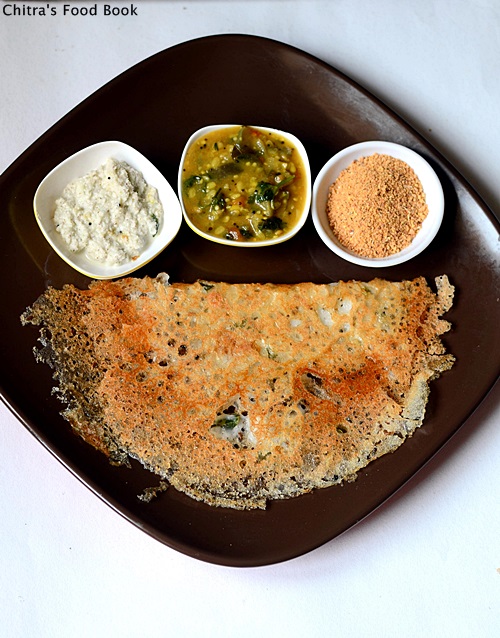
Rava Dosa is one of the most popular South Indian breakfast recipes.Crispy Rava dosa is Sendhil’s most favourite dosa variety in hotels.Whenever we go to restaurants,i order plain uttapam for myself & his choice would be mostly rava dosa.As it is my man’s favourite,i have tried making this dosa many times in my kitchen to impress himLove Struck.But most of my attempts were flop showsNot talking.It may be due to the wrong proportions of rava,rice flour & maida or the consistency of batter might not be right.When i told this to my friend Shalini,she suggested her fail proof rava dosa recipe which she has been successfully making it for years.I tried it yesterday for our Sunday breakfast.It came out unbelievably great!Sendhil loved it a lot & had more dosas.I became very happy,excited & i immediately called my dear Shalu to thank her.I must also thank Vahchef for some additional tips i learnt by watching his video.Friends,try this recipe.I am sure you won’t be disappointed with the results.Also don’t forget to follow the tips i have shared in this post which helps you to make perfect lacy rava dosa.Ok,Over to the recipe with a pictureHappy.
Check out my other Rava Recipes : Rava Kesari,Rava idli,Rava Kichadi,Rava Upma,Masala rava kichadi,Rava Payasam,Rava Ladoo,Rava roti,Microwave rava kesari,Milk kesari recipes.


Crispy Rava Dosa Recipe

Rava dosa recipe-Instant Version


Rava dosa recipe Crispy restaurant style rava dosa recipe for breakfast
Cuisine: Indian
Category: Breakfast
Serves: 12 nos
Prep time: 15 Minutes
Cook time: 3 Minutes
Total time: 18 Minutes


INGREDIENTS
 1 cup = 200 ml

  • Rice flour – 1 cup
  • Unroasted Rava – 1/2 cup
  • Maida – 1/4 cup
  • Water – 3 cups + 1/4 cup( add 2 tbsp more in the middle)
  • Curd – 1/4 cup ( semi solid)
  • Salt – as needed
  • Cumin seeds/Jeera – 1/2 tsp
  • Pepper – 1 tsp (crushed)
  • Green chilli – 1no ( finely chopped)
  • Coriander leaves  & curry leaves – Few ( finely chopped)
  • Asafetida/Hing – as needed
  • Ghee or cooking oil - as needed to drizzle dosas
METHOD

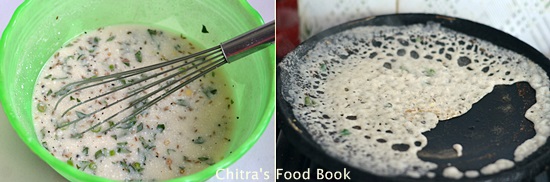
  • In a wide bowl,take the curd and rava.To this add rice flour,maida & salt.Add 3 cups of water & mix well with a whisk.Now add the cumin seeds,crushed pepper,Finely chopped green chillies,coriander leaves,hing & curry leaves.Mix well without lumps.Check for batter consistency.Leave it for 10 to 15 minutes.
  • In the mean time,u can grind coconut chutney for side dish.After 10 minutes,check the batter,it would be thick slightly.So add 1/4 cup of water.Mix well & check whether the batter is right.I have given the water quantity i used for this recipe.Take it as a reference & adjust the quantity.The consistency of batter may not be correct in the first attempt.You will come to know the right consistency only after making the first dosa.( The first dosa may not come out perfectly crispy.Based on the texture of dosa,add little more water & make the second dosa.So it comes by trial & error only.You should get the perfect one at least for 3 rd dosa if u are a beginner.)
  • Heat a dosa pan.I used iron pan here.Non-stick also works fine.Dosa pan should be well heated but not smoky.Grease the pan with oil.Hold the ladle 15cms away from the pan & pour a ladleful of batter around the corner of dosa pan.Make a circle.Again take some little batter & fill the inner portions.I.e. u should pour the batter in a circular motion from outer to inner portion of pan.Do not fill the holes.Instead drizzle some ghee in the holes.
Instant Rava Dosa Recipe
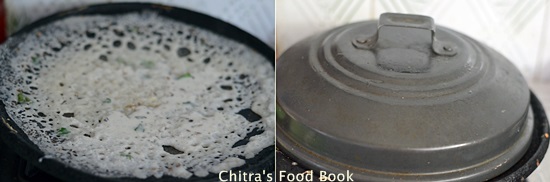
  • Keep the flame medium to medium high.Drizzle a tsp of ghee all over the dosa.Cover the pan with a lid & cook for sometime till u see the dosa turning crispy & golden brown.I( I covered the pan with my idli pot lid)
Instant Rava Dosa Recipe
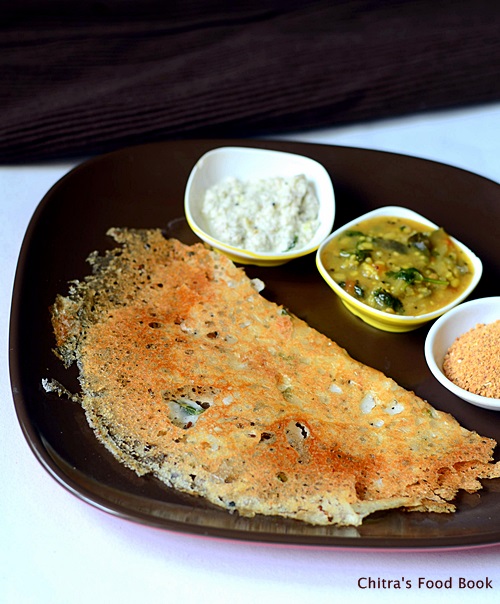
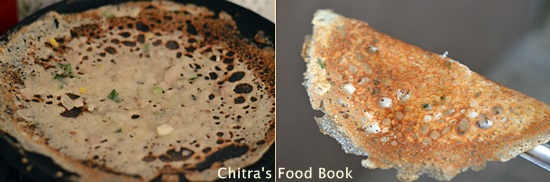
  • Do not flip the dosa.Just fold it & serve immediately with coconut chutney & sambar.Before making the next dosa,mix the batter very well because Rava may settle down in the bottom of bowl.If u feel the batter is thickened,add 2 tbsp of water.Mix well & make dosa.Keep the flame high till u pour the batter & as soon as u pour the batter,reduce the flame to medium & cover cook as mentioned above.Repeat the same procedure for all dosas.
Instant rava dosa
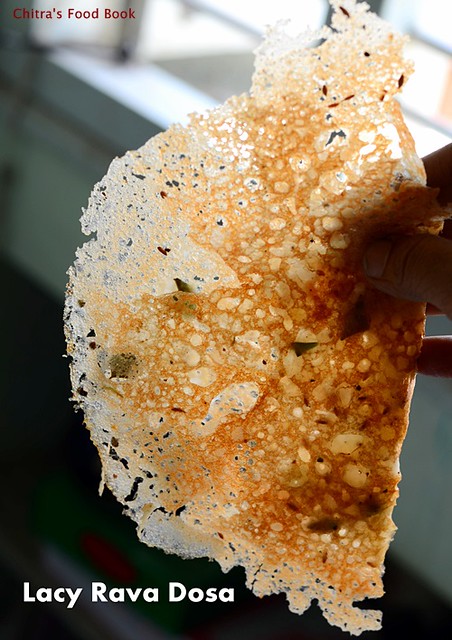
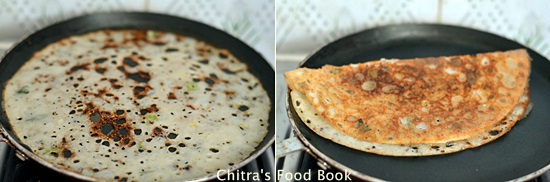
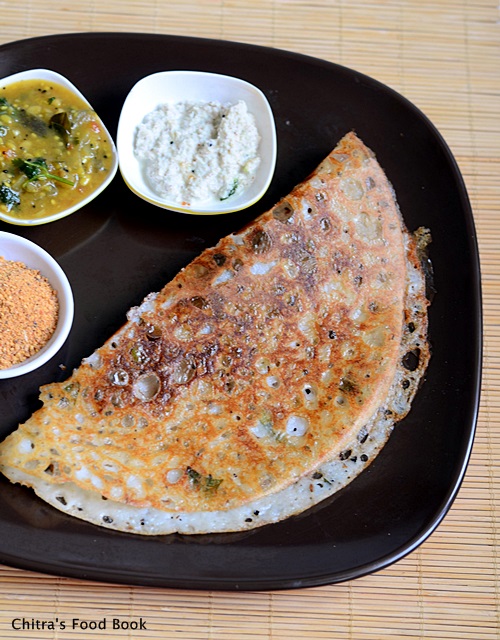
  • Here is a rava dosa picture i made using non-stick dosa pan.

Enjoy !


Note
  • For variations & for health reasons,u can follow the same recipe without maida.It comes out well.
  • The consistency of rava dosa batter is very important to make crispy,lacy dosas.So add water as needed.
  • Cooking in medium flame for more time gives u crispy dosa.Cooking in high flame makes the dosa brown & uncooked in the middle.
  • Covering the pan while cooking helps to cook the dosa quick & gives u nice uniform golden color.
  • you should mix the batter really well every time before making dosa.The batter may thicken after u make 3-4 dosas.So add 2 tbsp water & thin down the batter.
  • Adding ghee while making dosas gives nice flavor & restaurant touch.So use it as per your wish.
  • For making onion rava dosa,sprinkle finely chopped onions in greased tawa.Then pour the batter.Onions will be cooked well.
  • To make fruit n nut rava dosa,sprinkle finely chopped cashews,badam & tutti frutti over the pan and pour the batter.Cook in medium flame.

Check out my other Rava Recipes : Rava Kesari,Rava idli,Rava Kichadi,Rava Upma,Masala rava kichadi,Rava Payasam,Rava Ladoo,Rava roti,Microwave rava kesari,Milk kesari recipes.

Rava Dosa Using Non-stick Pan.
Instant Rava Dosa recipe

Enjoy this crispy,lacy rava dosa with your favourite chutney & sambar!!
Rava Dosa Recipe