الثلاثاء، 13 سبتمبر 2011

PARUPPU THOGAYAL RECIPE


Paruppu-thogayal

This is my husband's favorite thogayal. It tastes the best when paired with vatral kuzhambu . Its is a delectable combination.

INGREDIENTS
1 cup - 200ml
  • Moong dal - 1/8 cup ( 2 tbsp)
  • Toor dal - 1/8 cup (2 tbsp)
  • Red chilly - 1 no
  • Grated coconut - 1 tbsp 
  • Pepper corns - 1/2-1 tsp ( adjust)
  • Garlic cloves - 6 nos
  • Salt - As reqd
METHOD
  • Take a kadai and add a tbsp of oil. Fry the dals along with red chillies.
  • Once its cool, grind adding salt , grated coconut and little water to make a paste.
  • Crush the pepper corns and garlic cloves using a mortar n pestle,add to this thogayal & run the mixie.
  • Add little water if required to bring the desired consistency.
Mix with plain rice adding sesame oil ..Enjoy !!


الأحد، 11 سبتمبر 2011

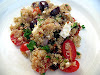
Quinoa, Tomato and Feta Salad

Quinoa, Tomato and Feta Salad

This is another ideal salad for late summer hot weather and fulfilling enough for a chilly fall meal. Quinoa is as versatile as rice, light and fluffy with a delightful nutty flavour. Quinoa cooks up in 15 minutes and can be eaten just as is with a bit of tamari sauce, or incorporated into a number of dishes like the following salad that takes hardly any time at all to whip up. Served with a legume dish, this satisfying salad proved to be a perfect side. Add some savory biscuits alongside the meal and you are in for a feast that won't leave your belt bursting.


Quinoa, Tomato and Feta Salad Quinoa, Tomato and Feta Salad
Recipe by
Published on September 11, 2011

A simple and savory quinoa salad dressed with tomatoes, olives, feta cheese and a little spice — ideal for late summer or early fall

Print this recipePrint this recipe

Ingredients:
  • 1 cup dried quinoa
  • 6 sun-dried tomatoes
  • 20 cherry tomatoes, halved
  • 1/2 cup olive oil
  • a few dashes of balsamic vinegar
  • 1/2 teaspoon dried red pepper flakes
  • 2 to 3 fresh chilies, seeded and finely chopped
  • 1 large shallot, finely chopped
  • fresh cracked pepper to taste
  • sea salt to taste
  • generous 1/2 cup pitted and chopped Kalamata olives
  • 1/2 to 2/3 cups Feta cheese
  • handful of fresh parsley, chopped
Instructions:
  • Rinse the quinoa and soak overnight in 2 cups of water. Bring to a boil, reduce the heat to low, cover, and simmer for 15 - 20 minutes or until the liquid is absorbed. Let sit for a few minutes and then fluff with a fork. Set aside to cool at room temperature or in the refrigerator if desired.

  • Meanwhile, soak the sun-dried tomatoes in hot water for 20 minutes, then drain and chop.

  • Fluff the quinoa again and place in a large mixing bowl. Add the rest of the ingredients and toss gently until well combined.

Makes 4 servings

More grain salads from Lisa's Vegetarian Kitchen you will be sure to enjoy:
Mexican-Style Kamut Berry, Black Bean and Roasted Corn Salad
Quinoa Spinach Salad with Feta, Pomegranate and Toasted Almonds
Mexican-Style Black Bean and Millet Salad

On the top of the reading stack: Plenty: Vibrant Vegetable Recipes From London's Ottolenghi by Yotam Ottolenghi

Audio Accompaniment: Deadbeat EB Radio Podcast

الجمعة، 9 سبتمبر 2011

Home-Style Chila

I was recently treated to a lovely cookbook entitled Sukham Ayu by Jigyasa Giri and Pratibha Jain. What a treasure and an abundance of recipes for vegans too. Oil can be used instead of the cow's ghee that is often called for in many of the dishes. Though I am an ovo-lacto vegetarian, I do enjoy the cleansing feeling of a vegan meal from time to time. This cookbook is full of information about vegetarian Ayurvedic recipes, principles and guidelines and is adorned with gorgeous photographs that tantalize your taste buds and illustrate ideal presentations. Ultimately, it is the blend of flavors and seamless offerings that makes this a must for Indian cuisine enthusiasts.

chila pancakes

An excellent resource for those who want to maintain optimal health to suit their body types and conditions and perfectly suited for home cooks. Moderation is the key to health and here you will find healthy sweets, dal soups, vegetable dishes, delicious breads, rice side dishes, nourishing snacks and chutneys, salads and beverages to go along with your meals. The recipes are innovative and creative and easy to prepare. Along with extensive information about an vegetarian Ayurvedic diet, most of the recipes are accompanied by helpful hints and advice, along with suggestions for substitutions and additions. I will have much more to say about this cookbook as I explore it in the next little while. I am looking forward to learning more about Ayurvedic philosophy and this is just the book for curious minds such as mine who care about proper eating and balance.

The first recipe that caught my attention were these Basic Home-Style Chila, which are very similar to dosa popular in South India. Often served for breakfast, but also as a snack and a very good accompaniment to dinner along with some homemade chutney and a salad and a bed of rice. We are also told these pancakes help those recuperating from an illness.

"We gather mere stones and call them gems, whereas the real gems of life are water, food and words of wisdom" — Rig Veda

Thanks so much for the authors for sending me a complimentary copy of this award winning book.

Basic Home -Style ChilaBasic Home -Style Chila
Recipe by
Adapted from Sukham Ayu: Cooking at Home With Ayurvedic Insights
Cuisine: Indian
Published on September 9, 2011

Savory and spicy little mung bean and rice pancakes great for snacking or as a dinner side served with chutney

Print this recipePrint this recipe

Ingredients:
  • 1 cup dried split mung beans
  • 2 tablespoons basmati rice
  • 1-inch piece fresh ginger, chopped
  • 1/2 teaspoon asafoetida
  • 1/4 cup fresh coriander or parsley
  • sea salt to taste
  • small handful of dried fenugreek leaves
  • 2 fresh red chilies, seeded and finely chopped
  • dash of cayenne
  • ghee, butter or oil for frying
Instructions:
  • Wash the split mung beans and rice in a strainer. Place in a bowl, cover with several inches of fresh water, and let stand for at least 4 hours at room temperature. Drain and add to a food processor blender along with the ginger, asafoetida, coriander or parsley, salt, fenugreek leaves, chilies and cayenne. Process to a smooth batter, adding a little water or necessary, until the batter is thick but of a pouring consistency.

  • Heat a non-stick pan over medium heat and brush with some ghee, butter or oil. When hot, ladle some of the batter on to the pan, taking care to spread it out as thin as possible with the bottom of the ladle so that it forms a pancake about 6 - 7 inches in diameter.

  • Reduce the heat slightly, drizzle some ghee or oil around the edge of the chila and cook for 2 minutes until it begins to brown. Flip the pancake, cook for another minute or two, and flip again and cook for another minute.

  • Fold and keep warm in a 150° oven while you cook the remaining chila.

Makes 6 pancakes

More Indian pancakes you are sure to enjoy from Lisa's Vegetarian Kitchen:
Savoury Rice and Urad Dal Pancakes
Rice Flour Pancakes
Chickpea Flour Pancakes with Crushed Peas and Cilantro

On the top of the reading stack: cookbooks

Audio Accompaniment: Underworld - Luetin

الأربعاء، 7 سبتمبر 2011

Blueberry Cottage Cheese Biscuits

blueberry cottage cheese biscuits

I have been called "The Biscuit Queen" because I often make biscuits and though I am a modest gal, my biscuits and scones usually turn out perfectly. Easy to make, if you follow a few basic principles. When it comes to making biscuits, such sweet and savory pleasers are a good choice for those just learning how to bake. As a rule, always use cold ingredients and take care not to overwork the dough. Depending on the type of biscuit or scone that you are making, the dough is sometimes rolled out, shaped or dropped onto the sheet with a spoon or small scoop. Another tip is to line your baking sheet with parchment paper so that the bottoms of your biscuits don't get too brown.

My latest favorite biscuit is really a cross between a biscuit and a scone. Biscuits and rolls and muffins tend to rise more than scones. The texture of these cheese scones (or biscuits if you prefer) were perfect; not too dry, not overly moist with a slight crunch from the outside of the scone. I will certainly be making these again soon. Probably I could eat the whole batch during the course of the day if I didn't care about my waistline.

Blueberry Cottage Cheese BiscuitsBlueberry Cottage Cheese Biscuits
Recipe by
Published on September 7, 2011

Simple, light and fluffy blueberry biscuits with just a little sweetness — a great snack or addition to lunch or dinner

Print this recipePrint this recipe

Ingredients:
  • 1/3 cup cold unsalted butter, cut into pieces
  • 2 cups unbleached white flour
  • 1/3 cup sugar
  • 2 teaspoons baking powder
  • 1/4 teaspoon sea salt
  • 1/3 cup whole milk
  • 5 oz (140 g) pressed cottage cheese
  • 1 large egg, beaten
  • 1/2 to 1 cup fresh or frozen and thawed blueberries, coated with flour
Instructions:
  • Line a baking sheet with parchment paper.

  • In a large bowl, combine the butter, flour, baking powder, sugar and salt. Cut the butter into the dry ingredients until the mixture resembles coarse crumbs.

  • Stir the milk into the cottage cheese and then stir in the egg. Transfer to the dry ingredients and stir until the dough comes together to form a soft dough. Gently fold in the blueberries. Shape the dough into roughly 2-inch balls and transfer to the prepared baking sheet.

  • Bake in a preheated 400° oven for 18 to 20 minutes, or until golden brown on the top.

Makes 8 to 10 biscuits
blueberry cottage cheese scones

Some scone recipes from Lisa's Kitchen you are sure to enjoy:
Jalapeno Cheddar Scones
Santa Fe Scones
Pumpkin Scones
Apple Cheddar Scones

On the top of the reading stack: The Cat's Table by Michael Ondaatje

Audio Accompaniment: Pan American - "Right of Return"

الأحد، 4 سبتمبر 2011

Summer Chickpea Salad

Summer Chickpea Salad

Late summer is the season of opportunity to enjoy the fruits — or vegetables and herbs — of our gardening labours with fresh and colourful salads. I make my summer chickpea salad quite often at this time of year for the chance to throw in plenty of fresh peppers and herbs from my garden. Zesty and delicious, it's always a popular choice with my husband and friends on the patio table no matter how often I put it together.


Summer Chickpea SaladSummer Chickpea Salad
Recipe by
Published on September 4, 2011

A zesty and refreshing Mediterranean-style chickpea salad dressed with fresh herbs — a great summer lunch or light dinner

Print this recipePrint this recipe

Salad:
  • 1/2 cup dried chickpeas (1 1/2 cups cooked or 1 14 oz can)
  • 1/2 pint grape tomatoes, halved
  • 1/2 yellow or orange bell pepper, seeded and chopped
  • 1 or 2 jalapeños, seeded and chopped
  • large handful fresh basil leaves, shredded
  • small handful fresh mint leaves, finely chopped
  • 4 oz (115 g) Feta cheese, crumbled
  • 1/2 cup Kalamata olives, pitted and sliced
Dressing:
  • juice of 1 lemon (3 tablespoons)
  • 3 tablespoons olive oil
  • 1/2 teaspoon sea salt, or to taste
  • fresh ground black pepper to taste
Instructions:
  • Rinse the chickpeas and soak overnight covered in several inches of cold water with a little yogurt whey or lemon juice added. Drain and add to a medium saucepan. Cover with fresh cold water or vegetable stock and bring to a boil. Immediately reduce the heat to low, cover, and let simmer for 1 to 1 1/2 hours or until the beans are soft. Drain and set aside to cool for 20 or 30 minutes.

  • Place the chickpeas, tomatoes, peppers, herbs, Feta cheese and olives in a large salad bowl. Whisk together the dressing, pour over the salad, and gently toss.

  • Serve cooled or at room temperature.

Makes 4 servings
Summer Chickpea Salad

Other summer salad ideas you may enjoy:
Warm Baby Potato and Pea Salad
Chickpea Salad with Tamarind Dressing
Creamy Potato and Green Bean Salad
Chickpea and Tomato Salad with Chat Masala

الخميس، 1 سبتمبر 2011

No Croutons Required - The Winner for August and the theme for September


The challenge for August was to make a soup or salad with lentils. We received lots of lovely and tempting entries and this month we have two winners.

Denny of Oh Taste n See made this pretty and healthy Lentil Coconut Soup.


The next popular entry is from Valerie of City Life Eats. Her entry is Curried Quinoa Salad with Lentils. I certainly love the combination of curry, my favorite grain and lentils.


Congratulations to both ladies. I don't know which dish to try first.

I will be hosting the September edition of No Croutons Required. The challenge this month is to make a vegetarian soup or salad with ingredients grown in your garden. For a recap of the guidelines, check here.

الأحد، 28 أغسطس 2011

Poricha Kuzhambu Recipe - Raw Mango, Drumstick Gravy

I learnt this from my MIL. Usually we make this gravy only with drumstick. But during mango season , we make this combination. It tastes great with the excellent flavor of mango. If u don't get sour raw mango ,no problem , u can try this with drumstick alone by adding little tamarind extract to get the tangy taste. We mix this gravy in plain rice with little ghee.Here i've used Vengaya vadagam for seasoning.I think most of u may not have/aware of this. So i've given the ingredients below to replace vadagam.
Try this simple & delicious poricha kuzhambu. Iam sure u'll love it and start to make it often.

MANGO PORICHA KULAMBU

 INGREDIENTS
  • Raw mango - 1 no ( Medium sized) (cut into cubes as shown in the above picture)
  • Drumstick - 2 nos
  • Moong dal - 3 tbsp
  • Sambar powder - 2 tsp
  • Salt & water- As needed
To grind:
  • Grated coconut - 3 tbsp
  • Water - As needed.
To temper:( to replace vadagam)
  • Mustard seeds - 1/4 tsp
  • Urad dal - 1/4 tsp
  • Jeera - 1/4 tsp
  • Small onion - 10 nos ( cut into small pieces)
  • Curry leaves - a few (finely chopped)
  • Cooking oil - 1 tbsp
METHOD
  • Pressure cook moong dal by adding a pinch of turmeric powder and a drop of oil. Mash it and set aside.
  • Now in a bowl , take the drumstick pieces.Add the required water & cover cook. When it is half cooked, add the cubed mango pieces and add more water if necessary. Once it starts to boil , add the sambhar powder, salt  & cooked moong dal. Cover cook till mangoes & drumstick pieces get cooked.{Make sure the mango pieces should not be mushy and dissolved in the gravy}.
  • Now grind the grated coconut adding little water to make a smooth paste.
  • Mix this paste to the gravy and allow it to boil for sometime. If u feel the gravy is too thick, add water to bring the consistency. (In this step , check the salt & spice, add if needed)
  • Suppose if the gravy is too watery after adding the coconut paste , u can add a little amount of rice flour to make the gravy thick.But this step is purely optional.
  • At last , season the gravy with vengaaya vadagam or the above mentioned items. If u use the above said items for tempering, saute till everything turns golden brown. This gives a spl flavor to the gravy.
ENJOY MIXNG WITH HOT PLAIN RICE & A DROP OF GHEE OR SERVE AS A  SIDE DISH FOR VATRAL KUZHAMBU / SAMBAR RICE.