الأربعاء، 30 سبتمبر 2015

My Legume Love Affair #88 - October 2015

My Legume Love Affair #88

I'm pleased once again to be hosting My Legume Love Affair, a long running event celebrating all of the goodness of legumes. We are at edition #88 and I hope fellow bloggers will submit a recipe this month. This event was started by my dear and loving friend Susan of The Well Seasoned Cook and eventually passed along to me to administer. A special thank you to those who have hosted and contributed their creativity and talent over the years.

Legumes are an important source of protein, especially for those following vegetarian or vegan diets. In my kitchen, it is rare a day goes by without legumes playing an important role.

To share in the legume love affair, all you need to do is:

Prepare a legume-centric dish. Link back to this announcement, my blog and also Susan's blog, as she is the original founder of the event. Share your creation using the linky tool at the end of this post by the end of the month. Use of the lovely logo, designed by Susan, is optional, but appreciated.

I own and operate a vegetarian blog, so only vegetarian recipes will be accepted. That includes recipes free of meat, fowl and seafood. Please only one submission per month, per blogger. Recipes from your archives will be accepted if reposted and updated.

For your dish to be included in the roundup, it must contain more than just a few tablespoons of legumes. The slight exception to this are legumes such as fenugreek or tamarind that typically are used in smaller quantities. Fresh or dried beans, lentils, pulses, and the sometimes edible pods that contain these seeds, and derivative products such as tofu or besan, along with fenugreek, carob, and peanuts are all acceptable. The possibilities are endless. Please just ensure that your shining ingredient is in fact a member of the legume family. All types of cuisines and courses are welcome, meaning appetizers, sides, mains and desserts are all acceptable so long as the mighty legume is the key ingredient.

Thanks in advance for your participation and inspiration. I am looking for guest hosts for 2016. Send me an email at legume.lisa AT gmail DOT com or leave a comment on this post if you would like to host.


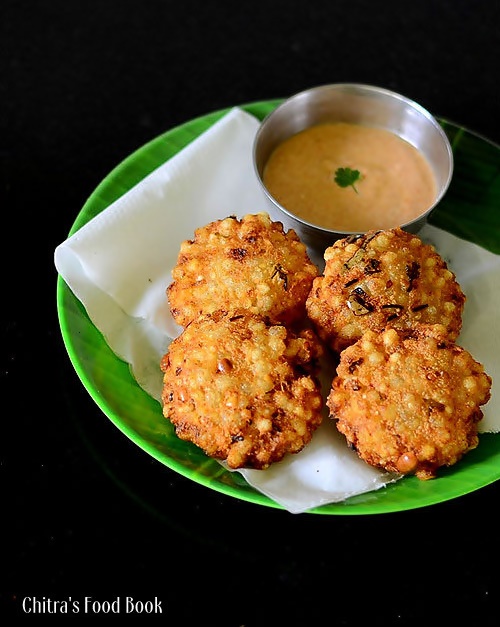
Sabudana Vada With Chutney Recipe/Javvarisi Vadai-Navratri Recipes

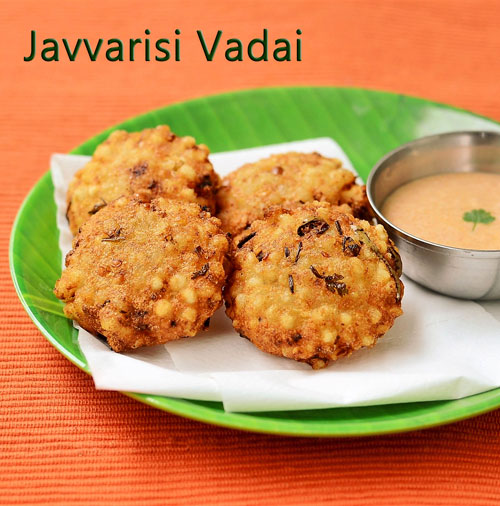
Javvarisi vadai
 Navratri is around the corner.I am sure most of you would look for no onion no garlic fasting recipes.Sago/Tapioca pearls(Sabudana in Hindi,Javvarisi in Tamil) is considered to be one of the most important ingredient used for cooking vrat recipes.People usually make Sabudana khichdi,Kheer in North India and Javvarisi Upma,Payasam in South during fasting days either for breakfast or for dinner.I always wonder why sabudana is consumed on Vrat days even though it is high in carbohydrates & Calories.I browsed few websites and found some health benefits like Sabudana gives quick energy.It is very easy to digest & gives a cooling effect on the system.It is quite low in fat,protein and does not have any minerals or iron.So  milk, peanut & potatoes are added with sago to increase its nutrtious value.Basically I love sabudana kheer /Javvarisi Payasam prepared with sugar or jaggery more than other sabudana dishes.But this year during this Navratri festival,I wanted to explore varieties of sabudana recipes.So I started with Maharashtrian style Sabudana vada/Sago fritters and made a quick video along with step by step pictures.Even though I tried it for the first time,its result made me felt as if I am making it regularly at homeLaughing.Yes,it came out super crispy and tasted great with this easy peanut curd chutney.This chutney is one of the best side dishes for sabudana vada as mentioned HERE.I too loved this combo very much.I have tasted sabudana vada only once in GOLI VADA PAV outlet.But its taste and appearance was completely different than this one.I will try to experiment that vada and post it here.Now lets see how to prepare Sabudana Vada recipe for Vrat snacks.You can try shallow frying or Air fry it for diet version.Serve & eat it hot to enjoy its best taste !
Check out my Javvarisi vathal/Vadam & Mango Sago Pudding

Sabudana vada recipe


Sago vada / Sabudana Vada- Javvarisi Vadai

Sago vada / Sabudana Vada- Javvarisi Vadai How to make Sago vada/Sabudana vada with video
Cuisine: North Indian
Category: Sweet
Serves: Serves 4
Prep time: 10 Minutes
Cook time: 15 Minutes
Total time: 25 Minutes

INGREDIENTS

  • Sago/Sabudana/Javvarisi - 1/2 cup ( Big variety,NO nylon)
  • Medium sized potato - 1 no
  • Roasted peanuts - 2 tbsp
  • Arrowroot powder or rice flour or corn flour - 1/2 tbsp ( I used corn flour)
  • Green chillies - 1 no ( Finely chopped)
  • Ginger - 1/2 inch piece ( -do-)
  • Coriander leaves - 2 tbsp (-do-)
  • Cumin seeds/Jeera - 1/2 tsp
  • Sugar-1/4 tsp
  • Lemon juice – 1/2 tsp
  • Salt - as needed
  • Oil - to deep fry
For Peanut chutney
  • Fresh curd – 1/4 cup
  • Peanut powder – 2 tbsp
  • Red chilli powder – 1/2 – 1 tsp
  • Turmeric powder – 1/8 tsp
  • Cumin powder – 1/4 tsp
  • Sugar – a pinch
  • Salt – as needed
METHOD
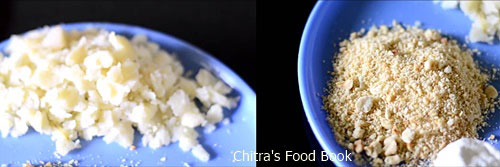
  • Wash & soak the sabudana overnight Or 4-5 hours adding enough water to cover it.Soak till it becomes soft.Drain all the excess water & squeeze the sabudana.Take in a bowl.
  • Pressure cook potato,peel the skin and mash it well.Powder the roasted peanuts coarsely. Chop the green chilli,ginger & coriander leaves.
  • Take the squeezed sabudana,mix the mashed potato,peanut powder,Corn flour or arrowroot powder,chopped green chilli,ginger,coriander leaves,sugar & salt( Use arrow root powder during fasting days).Mix it well & make a dough.DO NOT ADD WATER.Soaked sabudana & mashed potato along with rice flour makes a non-sticky dough.(TIP: If sago has more water content,vada will absorb more oil.If sago is too dry,vada may crumble or dissolve in oil.So take care and bind the mixture well)
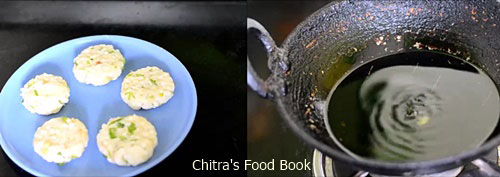
  • Take a small ball sized batter and make a round.Pat it to bring vada shape.Arrange in a plate.
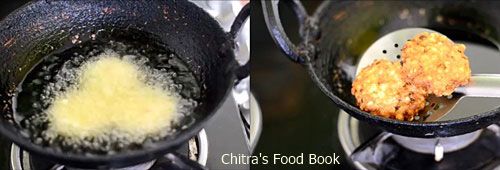
  • Heat oil in a kadai and put a pinch of batter.If it rises to the top,Oil is right.Keep the flame medium.Now drop the vada and cook in batches.Flip the vada and cook both sides till golden brown.This vada takes more time to turn golden brown.So keep flipping it until u get the color(TIP: Deep fry the vada patiently in medium flame else it may turn brown faster leaving the inner portion uncooked.Slow frying helps to bring crispy exterior.Make sure the temperature of oil is correct,else vada will absorb more oil)
Keep the unused batter in refrigerator because vada may absorb more oil if kept outside for long time.
PEANUT CHUTNEY
Powder the roasted peanuts.Take the curd,powdered peanuts,red chilli powder,turmeric powder,salt,sugar.Mix well and check for taste.Serve hot vada with peanut chutney !
Note
  • For variations replace green chilli with a tsp of red chilli powder.
  • You can skip rice flour/corn flour with arrow root powder during fasting days.
  • Add more green chillies for spicy vada.
  • You can also add garam masala powder for more spicy flavor.But its not the authentic recipe.

Enjoy crispy sabudana vada with peanut curd chutney ! Tastes yum !!
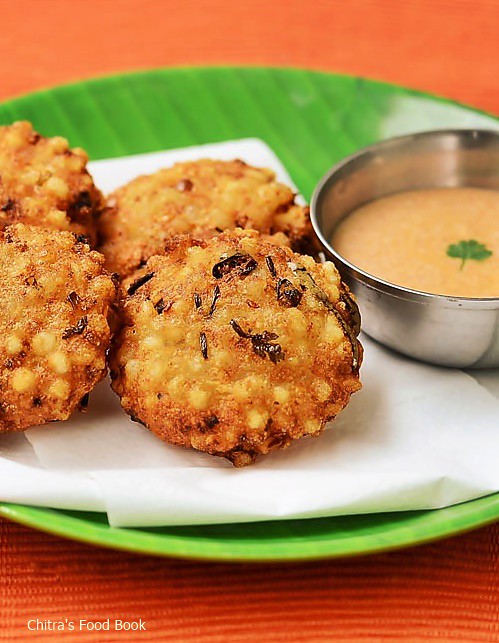
Sabudana vada with chutney


الاثنين، 28 سبتمبر 2015

Urad Dal Tomato Soup

Urad Dal Tomato Soup

A longtime favorite soup of mine that I often make when I don't want to fuss and want something warming and easy to digest, this attractive and gently spiced ural dal and tomato soup is always worth another share. And another taste too. Creamy mild urad dal combines so well with tangy tomatoes, hot peppers, ginger and cumin. I took advantage of a surplus of cherry tomatoes from our garden for an extra boost of flavor and goodness as well as a red bell pepper too for some extra flair. Sometimes simplicity is exactly what the body needs. This easy-to-make recipe just might become a staple in your kitchen too.

Serve with a rice dish, such as yellow lemon rice with fried cashews or cracked black pepper rice for a simple but complete and satisfying meal.

Note: Ural dal can be found at Indian and Asian grocers. Though urad dal has a unique creamy flavor, red lentils can be used instead.

Urad Dal Tomato SoupUrad Dal Tomato Soup
Recipe by
Cuisine: Indian
Published on September 28, 2015

Simple and beautiful creamy urad dal and tomato soup with spices — colorful, nourishing and easy to digest

Print this recipePrint this recipe

Soup:
  • 6 cups water
  • 1/2 teaspoon turmeric
  • 1/4 teaspoon cayenne
  • 3/4 cup split skinless urad dal, rinsed
  • 3 medium tomatoes, roughly chopped
  • 1 to 2 red or green chilies, seeded and finely chopped
  • 1/2 red bell pepper, seeded and chopped
  • 1 teaspoon sea salt, or to taste
Tempering:
  • 2 tablespoons sesame oil or ghee
  • 2 teaspoons cumin seeds
  • 2 to 3 dried whole red chilies, broken into bits
  • 1-inch piece fresh ginger, grated or minced
  • 1/2 teaspoon asafetida
  • 2 tablespoons chopped fresh parsley, for garnish (optional)
Instructions:
  • Bring the water, turmeric and cayenne to a boil in a large saucepan. Stir in the urad dal and again bring to a boil. Reduce the heat to moderately low, cover, and simmer for 30 minutes.

  • Stir in the tomatoes and chilies. Cover again and continue to simmer for another 40 minutes. Stir in the red pepper and simmer for another 10 minutes until the dal is soft and fully cooked. Remove from heat and stir in the salt.

  • Heat the oil or ghee in a small saucepan or frying pan over medium heat. When hot, add the cumin seeds, dried chilies and ginger. Stir and fry for a few minutes. Toss in the asafetida, quickly stir, and immediately pour into the soup. Cover and let sit for 5 minutes or longer to allow the seasonings to soak into the dal.

  • Serve hot, garnished with fresh chopped parsley if desired.

Makes 6 to 8 servings

urad dal and tomato soup

This is my contribution to No Croutons Required, a monthly event showcasing vegetarian soups and salads, alternately hosted by Jacqueline of Tinned Tomatoes and myself. I am hosting this month.

Other soups to enjoy from Lisa's Vegetarian Kitchen:
Fennel-Flavored Urad Dal Soup (Sada Urad Dal)
Black-Eyed Peas in an Indian Curried Soup
Cranberry Wild Rice Soup
Curried Indian Vegetable Soup

Gobi Biryani / Cauliflower Rice Recipe
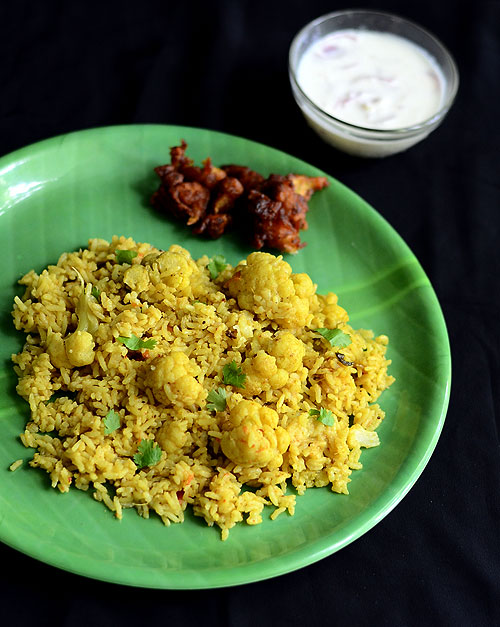
Cauliflower Biryani Recipe
Cauliflower is one of the favorite vegetables for kids & adults.In my family,my daughter loves my Gobi 65.So I always opt for gobi manchurian or gobi 65 more than other cauliflower recipes.This Friday I came to Salem to my in-laws house.My FIL bought a big sized cauliflower as it is Raksha's favorite vegetable. I made crispy Gobi fry with half of the cauliflower and made this biryani for Sunday Lunch yesterday.It came out really well.I referred my MIL’s hand written cook book for the recipe.I tweaked it slightly to suit our family’s taste.Everyone gave thumbs up after tasting the biryani.This cauliflower rice can be made as lunch box recipe for your kids.I am sure they will love to have it with raita.Ok,Lets see how to make this week’s Sunday Lunch Recipes Series 31-Gobi Biryani aka Cauliflower Rice .

Do check my Biryani Series collection HERE.
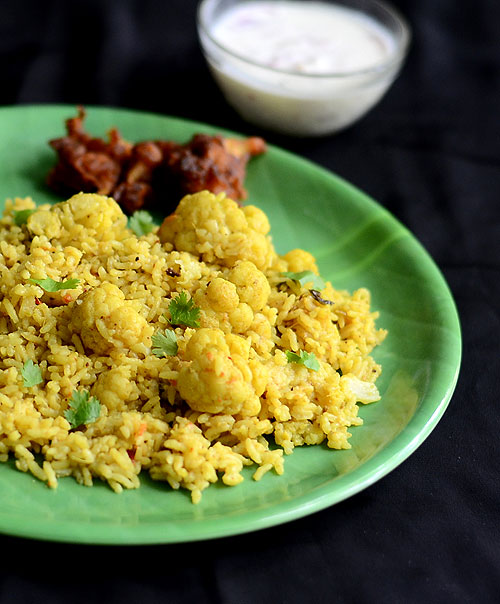
Cauliflower Biryani Recipe

Gobi/Cauliflower biryani recipe


Gobi/Cauliflower biryani recipe Cauliflower rice / Gobi biryani recipe - Kids favorite Rice
Cuisine: Indian
Category: Lunch ideas
Serves: Serves 3
Prep time: 30 Minutes
Cook time: 20 Minutes
Total time: 50 Minutes


INGREDIENTS

  • Basmati rice - 1 cup
  • Water - 1.75 cups
  • Big onion - 1 no
  • Tomato - 1 no
  • Red chilli powder - 1/2 tsp
  • Garam masala powder - 3/4 tsp
  • Salt - as needed
  • Mint+coriander leaves - few
  • Curd - 1 tbsp
  • Lemon juice - few drops
To grind
  • Green chillies - 2 nos
  • Cashewnuts - 5 nos
  • Cinnamon - 1 inch
  • Cloves - 2 nos
  • Cardamom - 1 no
  • Fennel seeds - 1/2 tsp
  • Ginger -1 inch piece
  • Garlic - 5 cloves
METHOD
  • Wash and soak the basmati rice for 30 minutes.In the mean time,take the big sized cauliflower florets and wash in turmeric+salt mixed hot water to remove germs.( Tip : Do not use small sized cauliflower florets because it will become mushy while cooking in cooker.So use bigger florets) Slice the onion and tomato.I used steamed rice here.So i used 1:2.5 cups of water after soaking the rice for 30 mins.
  • Grind all the ingredients given under “to grind” to a smooth paste adding enough water. Set aside.
Cauliflower Biryani Recipe
  • Heat a pressure cooker with oil+ghee. Saute a bay leaf,black stone flower.Saute onion slices till transparent.Add the ground masala and tomato pieces.Saute till tomato turns mushy and raw smell of masala goes off completely.
Cauliflower Biryani Recipe
  • Add turmeric powder,red chilli powder,garam masala powder and salt.Now add the cauliflower pieces and mix well to coat the masala.
Cauliflower Biryani Recipe
  • Now add the washed & soaked basmati rice,water and pressure cook for 1 whistle in low flame. Open the cooker after the steam is released.Fluff the rice with fork and serve hot with raita!! Enjoy !
  • Cauliflower Biryani Recipe
Note

  • you can replace cauliflower with baby corn ,potato or meal maker/Soya chunks and make this rice.
  • For variations u can skip the grinding part and saute all the spices given under “To grind” in oil+ghee.

Enjoy Cauliflower biryani with raita.I made some Gobi 65 specially for my daughter on demand Happy
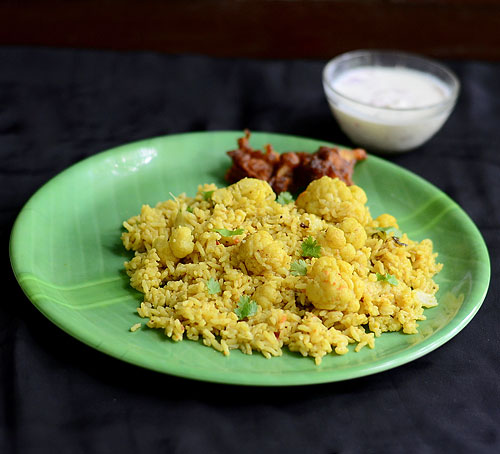
Gobi biryani

الجمعة، 25 سبتمبر 2015

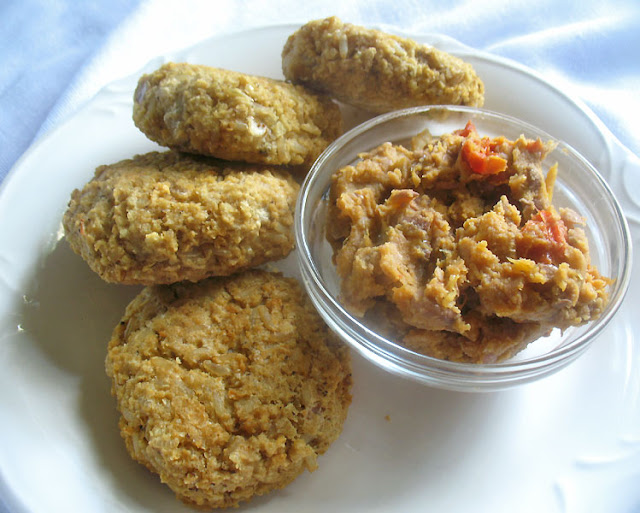
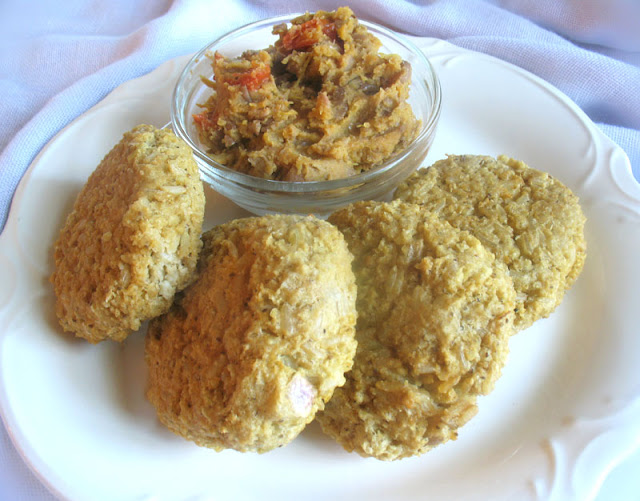
Millet and Brown Rice Patties with Tahini and Tamari

Millet and Brown Rice Patties with Tahini and Tamari

Sometimes the easiest dishes are the most satisfying, especially when you are pressed for time but don't wish to sacrifice flavor or nutrients. Take these deliciously nutty baked millet and brown rice patties with creamy tahini and salty tamari sauce. With hardly any ingredients at all, they need little adornment to satisfy the palate and appetite. I've always maintained that millet is an under-appreciated grain, and there is no reason for that. It's always a staple in my pantry, along with the more popular grains such as rice, quinoa and oats.

Millet and Brown Rice Patties

Notes: I would not recommend using soy sauce in place of the tamari in this recipe. Tamari usually contains little or no grains and is much less salty than soy sauce. Usually made as a byproduct of miso paste, it's thicker and richer than most soy sauce with less of a harsh bite. Depending on the brand of soy sauce you may have in your kitchen, it might not even be fermented and sometimes contains corn syrup and preservatives. Once you have tried tamari sauce, there is no going back after experiencing its more subtle essence.

These do not have to be baked, as they make a delightful and nourishing grain side just as is. If you have the time though, baking them adds a nice outer crunchy layer and brings out the natural nuttiness of the grains. I served them with refried beans and they would also go nicely with a side salad. Because of the protein in the grains and tahini, they would also make a pleasant and balanced light meal along with some thick tomato sauce or salsa.

Millet and Brown Rice Patties with Tahini and TamariMillet and Brown Rice Patties with Tahini and Tamari
Recipe by
Published on September 25, 2015

Easy, hearty and nourishing baked grain patties seasoned with tahini and tamari

Print this recipePrint this recipe

Ingredients:
  • 1 cup uncooked millet
  • 1/2 cup uncooked brown rice
  • 3 cups water
  • 1 1/2 teaspoons celery seed
  • 2 shallots or 1 onion, finely chopped
  • 3 tablespoons tamari sauce
  • 1/2 cup tahini
Instructions:
  • Thoroughly rinse the millet and rice. Soak for 8 hours or overnight in a medium saucepan in 3 cups of water.

  • Add the celery seed and bring to a boil. Reduce heat to low, cover, and simmer until all of the water is absorbed — about 35 to 40 minutes. Quickly stir in the shallot or onion during the last 10 minutes of cooking time. Remove from heat and let sit for about 10 minutes.

  • Fluff with a fork and stir in the tamari and tahini. Taste for seasoning and add more tamari if desired. At this point, you can serve as is, or you can shape the mixture into patties, like I did here.

  • To bake, line a baking sheet with parchment paper and preheat an oven to 425°. Shape the mixture into 1 1/2 inch patties, transferring to the baking sheet as you go. If the mixture is too dry, add a bit of olive oil. If it is too moist, sprinkle in a bit of chickpea flour.

  • Bake for 15 minutes, gently flip, and bake for another 10 to 15 minutes until golden brown.

Makes 10 to 12 patties

Baked Millet Brown Rice Patties

Other millet recipes to enjoy from Lisa's Kitchen:
Indian-Style Millet with Browned Onions and Green Beans
Northeast African Millet Patties
Millet and Chickpea Flour Crêpes with Spinach
Red Lentil, Chickpea and Millet Patties

On the top of the reading stack: Vegetarian Comfort Foods: The Happy Healthy Gut Guide to Delicious Plant-Based Cooking

Audio Accompaniment: Steve Roach

Anjaneyar Kovil Milagu Vadai/Hanuman Temple Vada Recipe
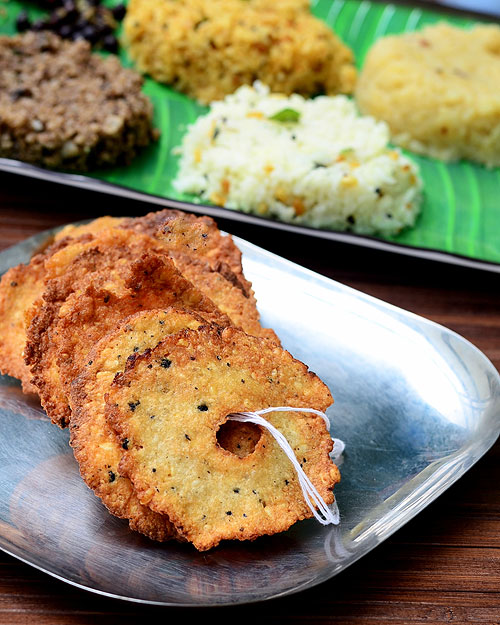
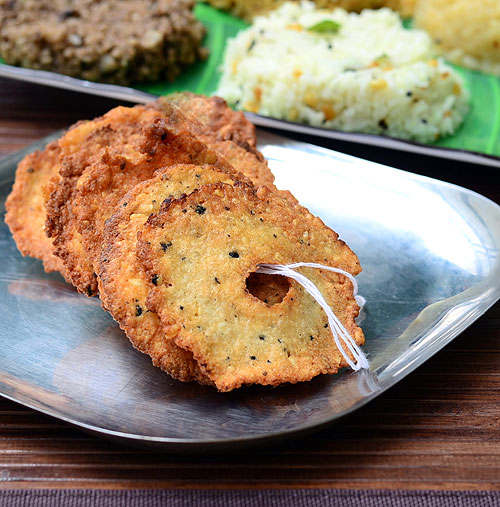
Anjaneyar kovil vadai
Anjaneyar kovil vadai/Hanuman temple vada is something very special than our usual urad dal vada with pepperHappy.Its crunchy taste and its awesome pepper flavor makes anyone fall for it.More than all,it’s a special prasad prepared in temple kitchen/madapalli and offered in the form of Vadai malai for Anjaneyar.Prasadam given in temples always tastes great and unique with its own flavor.To mention specifically,Chennai Nanganallur Anjaneyar temple vadai malai is most famous in Tamil nadu.Generally South Indian temples are famous for its puliodharai,sakkarai pongal and vadai.Most of us try to recreate Kovil puliodharai and kovil vadai at home.And if we get the taste close to temple version,we feel very happy and excited.I too got the same feel when I made this Anjaneyar temple vada successfully and that too in my very first attempt.I used to try temple puliogare very often in my kitchen but I couldn’t match the taste which was very disappointing for me.But when I prepared this vadai malai for Purattasi sani thaligai last week.I was completely satisfied with the output.Anyone even a beginner can make this crispy vada if you follow the steps carefully.So lets check out how to make this Hanuman temple style pepper vada with step by step photos.
Anjaneyar kovil milagu vadai malai

Anjaneyar Kovil Vadai Recipe


Anjaneyar Kovil Vadai Recipe Anjaneyar kovil milagu vadai with urad dal-Hanuman temple pepper vada
Cuisine: Indian
Category: Snack
Serves: 11-12 nos
Prep time: 20-60 Minutes
Cook time: 5 Minutes
Total time: 25-65 Minutes


INGREDIENTS

  • Round white urad dal - 1 cup
  • Rice flour - 1.5 tsp
  • Hot oil - 1 tsp
  • Milagu/Pepper corns - 1 tsp
  • Salt - as needed
  • Hing/Asafetida - 1/4 tsp
  • Water - add only if needed ( 1 -2 tsp)
METHOD
  • Wash and soak the urad dal for 30 minutes to one hour.You can also soak it for 20 minutes and proceed if you have less soaking time.
  • After soaking drain all the water completely using a colander/Strainer.Make sure there is no water left in urad dal.Let it sit in colander for 5 to 10 minutes.
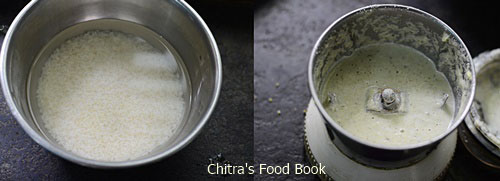
  • Now take the mixie jar,put the pepper corns,hing and then top with urad dal. If you put urad dal first and then pepper corns,pepper may not grind properly.So put the pepper and then add the urad dal.Grind it twice for short interval and grind the batter coarsely.Take care batter should not become too smooth.Add 1-2 tsp of water only if needed.Do not add salt.

    How to make anjaneyar vadai recipe

  • Remove the paste into a bowl and add rice flour,salt and hot oil.Mix well.Take two thick polythene sheets or banana leaf or zip lock covers.Grease with oil generously.Take a big gooseberry sized ball and keep in it one greased sheet.Place the other sheet on top of it.Take a small bowl with flat surface and press the ball with it.
How to make anjaneyar vadai recipe
  • It will flatten to a thin roundel.Make a hole in the center using your finger. Pat it in uniform thickness else vada may turn crispy in thinner side and soggy in thick portions.
  • Grease the sheet every time u pat the vada else vada may break while you remove.If vada breaks while you remove it, grind it little more n proceed.
How to make anjaneyar vadai recipe
  • Heat oil in a kadai to deep fry the vada.Put a drop of batter to check the oil temperature.If it rises immediately,oil temperature is just right.Now simmer the flame completely and carefully remove the vada from the sheet.Drop in oil and fry in medium flame till it turns golden brown and crispy.Flip the vada and cook the other side too.When the bubbles cease,remove the vada into a tissue and drain the excess oil. If the batter is properly ground without adding water,vada will not absorb oil.( Deep fry the vada patiently in medium flame because the color of vada turns black very soon and it remains uncooked when done in high flame)
How to make anjaneyar vadai malai recipe
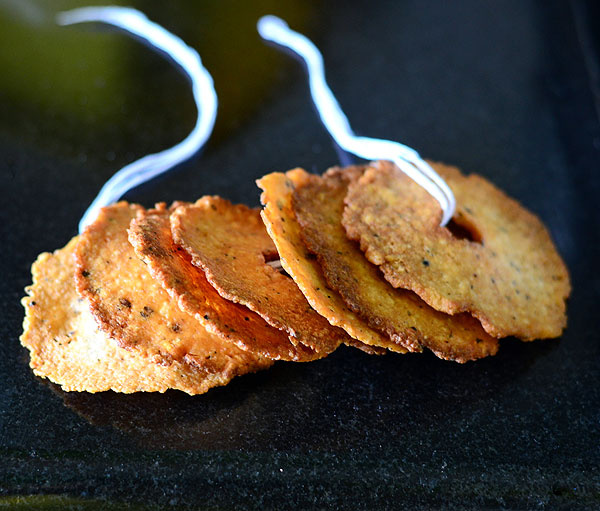
  • I deep fried the vada one by one by keeping less oil.So its your choice of frying one by one or in a batch.Make 11 or 21 numbers and tie them in a thread.Make vada malai and offer to Lord Anjaneyar.Get his blessings !
How to make anjaneyar vadai malai recipe
Note

  • Soaking time of urad dal can be varied.I soaked for more than 2-3 hours but still my vada came out very crispy.You can achieve the same result even if you soak the dal for less than 30 minutes,
  • Crispness of vada completely depends on proper grinding of batter and frying the vada patiently in low to medium flame.
  • Never skip the rice flour & hot oil.It helps to make the vada crispy.
  • Add more pepper for spicy vada.
Offer this crunchy pepper vada to GOD and Enjoy !
Hanuman temple vada recipe

الثلاثاء، 22 سبتمبر 2015

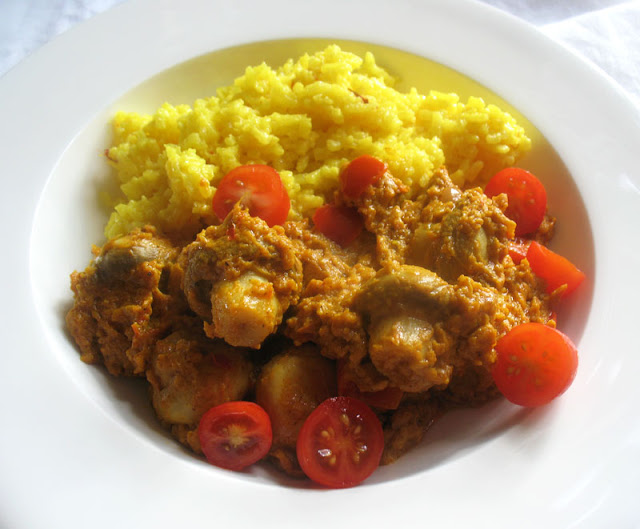
Mushroom Tikka Masala

Mushroom Tikka Masala

One of my favorite ingredients, I scarcely like to go a week without eating mushrooms and will often incorporate them into rice or dishes that don't ordinarily call for them. But sometimes I like to make a dish in which the mushrooms shine as the starring ingredient. That and my usual preference for Indian food means plenty of mushroom curries being served at my table.

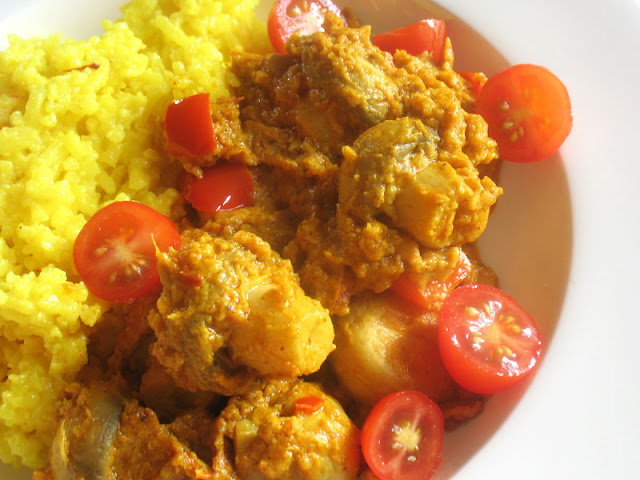
This time I marinated whole tender button mushrooms in a thick and zesty Indian yogurt and spice "tikka" or marinade. As if these wouldn't be good enough by themselves, I simmered them gently in an incredible smooth Indian-spiced tomato and cashew gravy. Using the mushrooms whole and only gently simmering them in the gravy keeps them plump and meaty for enjoying them as a whole wonderful mushroom bite with each forkful. Served with some simple saffron rice, this mushroom curry made an extraordinarily colorful and delicious meal.

Don't let the rather long list of ingredients intimidate you. It's not a complicated dish to make.

mushroom tikka masala with rice

Mushroom Tikka MasalaMushroom Tikka Masala
Recipe by
Cuisine: Indian
Published on September 22, 2015

Plump, tender whole mushrooms marinated in a thick Indian yogurt tikka and simmered in a vibrant and zesty tomato and cashew sauce

Print this recipePrint this recipe

Mushroom tikka:
  • 4 tablespoons thick yogurt or coconut milk
  • 2 teaspoons fresh lemon juice
  • 1 tablespoon chickpea flour (besan)
  • 1/2 teaspoon turmeric
  • 1/2 teaspoon garam masala
  • 1/2 teaspoon chat masala
  • 1/2 teaspoon Kashmiri chili powder
  • 1/2 teaspoon cumin seeds
  • 1 clove garlic, minced or crushed
  • 1/2-inch piece ginger, minced or grated
  • 1/2 teaspoon sea salt or rock salt, or to taste
  • 1 lb (450 g) small button mushrooms, cleaned
  • 3 tablespoons oil
Masala (spice blend):
  • 1 teaspoon cumin seeds
  • 1 teaspoon coriander seeds
  • 1/2 teaspoon brown mustard seeds
  • 1/2 teaspoon fenugreek seeds
  • 1/2 teaspoon black peppercorns
  • 1/2 teaspoon turmeric
  • 1/2 teaspoon Kashmiri chili powder
  • 1/2 teaspoon paprika
  • 1/2 teaspoon garam masala
  • 1/8 teaspoon ground nutmeg
Gravy:
  • 2 tablespoons oil
  • 1 small red onion, finely chopped
  • 1 clove garlic, minced or crushed
  • 1-inch piece ginger, minced or grated
  • 1 to 2 red or green chilies, seeded and finely chopped
  • 1/4 cup raw cashews, soaked in hot water for 30 to 60 minutes and drained
  • 3 large tomatoes, chopped
  • 1 medium red bell pepper, seeded and chopped
  • 1 1/2 teaspoons coconut or brown sugar
  • 2 teaspoons dried fenugreek leaves (methi)
  • 1 teaspoon sea salt, or to taste
  • 2 tablespoons fresh chopped cilantro for garnish (optional)
Instructions:
  • Prepare the tikka by whisking together the yogurt or coconut milk, lemon juice and chickpea flour in a large bowl. Add the spices, garlic, ginger and salt, and whisk until blended. Stir in the mushrooms until well coated.

  • Heat the oil in a large non-stick skillet over medium-high heat. When hot, add the mushroom mixture to the pan and cook for about 8 minutes, stirring often, until the mushrooms begin to brown and release their juices. Transfer the mixture back to the bowl, stir to coat the mushrooms again, and let cool to room temperature. Cover and let marinate for another 2 hours, or overnight in the refrigerator.

  • To make the spice blend, dry roast the cumin seeds, coriander seeds, mustard seeds, fenugreek seeds and black peppercorns in small unoiled saucepan or frying pan over medium-low heat, tossing or stirring frequently, until they darken a few shades. Transfer to a small blender or spice grinder and grind into a powder. Stir in the turmeric, chili powder, paprika, garam masala and nutmeg. Set aside.

  • To make the gravy, heat the oil in a large non-stick skillet over medium heat. When hot, add the onion to the pan and sauté, stirring often, for 5 minutes or until softened. Stir in the garlic, ginger and chilies, and cook for another few minutes. Remove from heat and let cool for a few minutes. Transfer to a blender and add the cashews, tomatoes and spice blend. Process until smooth.

  • Return the mixture to the pan, adding a few teaspoons of oil if the pan is too dry. Simmer over medium heat until the mixture has thickened, stirring often — about 10 minutes. Stir in the red pepper, sugar and fenugreek leaves. Cook for another few minutes and then stir in the marinated mushrooms and salt. Cook for another 5 minutes.

  • Serve hot garnished with fresh chopped cilantro if desired alongside savory Indian flat breads or fresh cooked rice.

Makes 4 servings

mushroom tikka curry

I'm sharing this with Jacqueline's weekly Meat Free Mondays event.

Other mushroom dishes from Lisa's Kitchen you are sure to enjoy:
Mushroom Curry Simmered in a Fenugreek Cream Sauce with Green Peas
Paneer Mushroom Masala
Mushroom Egg Masala
Kashmiri Chickpeas with Mushrooms

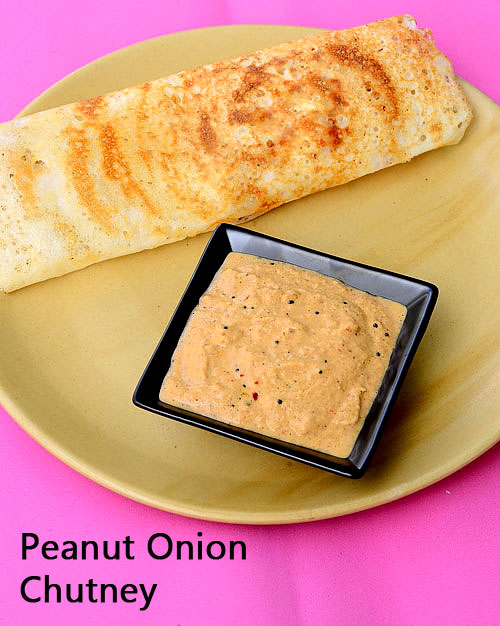
Peanut Onion Chutney Recipe For Idli Dosa

Peanut onion chutney recipe
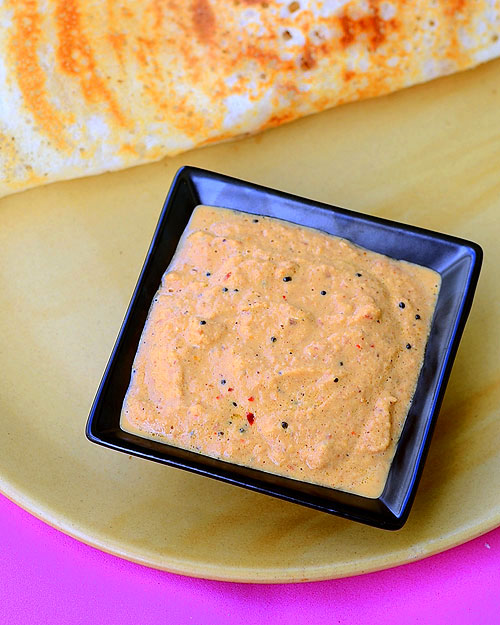
 Basically I love to make different varieties of chutney for idli,dosa.So I keep hunting some interesting chutney recipes even after posting 40+ chutney recipes in my blog. I wanted to make variations in peanut chutney as Sendhil loves peanuts.I have tried Andhra style peanut chutney with coconut & peanut tomato chutney.But Peanut onion chutney without coconut was pending in my list.So I tried it last week for dosa.It was awesome.We all loved it.I am happy to include this yummy recipe in my chutney collection.I have not removed the skin of peanuts in this chutney after reading some health benefits of peanut skin HERE.So this chutney is quick and easy to make.Try this tasty side dish for idli,dosa.You will love it like us.Lets see how to make peanut onion chutney below.
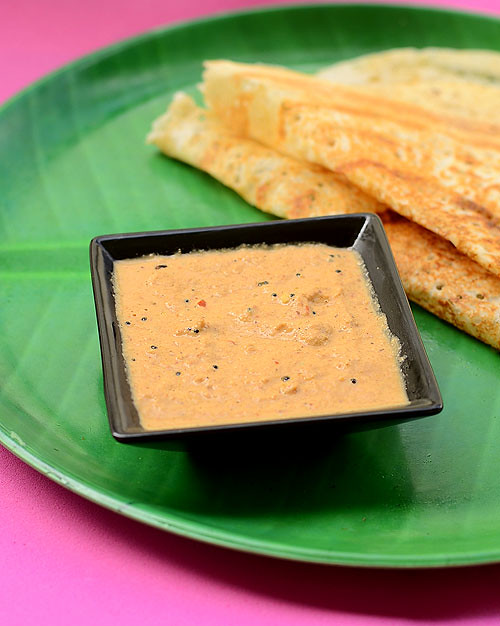
Peanut onion chutney recipe
Peanut onion chutney recipe


Peanut onion chutney recipe Peanut onion chutney recipe - Side dish for idli,dosa
Cuisine: Andhra
Category: Side dish for dosa
Serves: Serves 2
Prep time: 5 Minutes
Cook time: 5 Minutes
Total time: 10 Minutes
INGREDIENTS

  • Peanuts - 1/4 cup
  • Big onion - 1 no
  • Red chillies - 4 nos ( add more for spicy taste)
  • Garlic cloves - 5 nos
  • Tamarind - a small pinch
  • Salt & water - as needed
To temper
  • Cooking oil - 1 tsp
  • Mustard seeds - 1/4 tsp
  • Urad dal - 1/2tsp
  • Curry leaves - few
METHOD
  • Heat 1 tbsp of oil in a kadai and roast the peanuts.After 2 minutes,add the chopped big onion,red chillies,garlic cloves and a pinch of tamarind along with required salt.Saute everything well.Let it cool.Grind it to a smooth paste and temper the mustard seeds,urad dal & curry leaves.
Onion peanut chutney

Serve with idli,dosa drizzled with gingely oil.
Note
  • Adjust the quantity of red chillies as per your taste
  • You can skip garlic.
  • Tempering gives a nice flavor to this chutney.so don’t skip it.

Drizzle a tsp of gingely oil & enjoy this chutney with idli,dosa Happy
Peanut onion chutney recipe