‏إظهار الرسائل ذات التسميات ANDHRA RECIPES. إظهار كافة الرسائل

الاثنين، 21 نوفمبر 2016

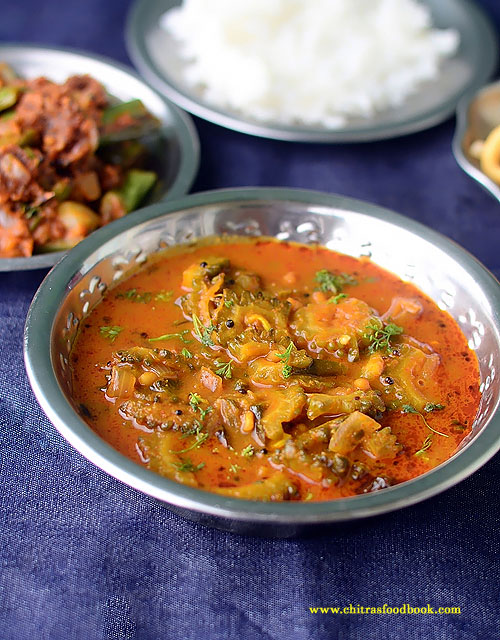
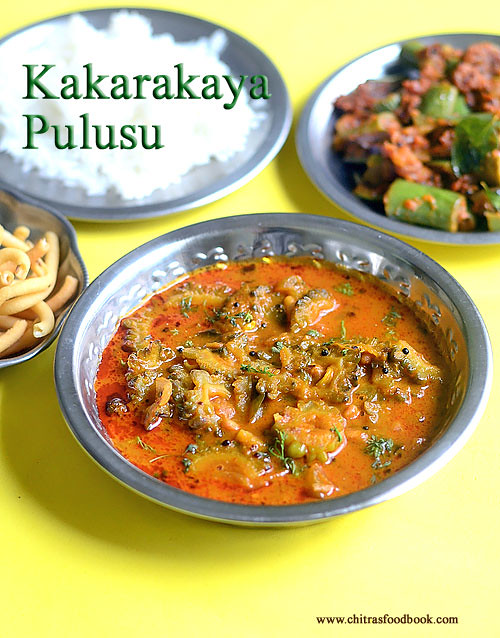
Kakarakaya Pulusu Recipe – Andhra Style Bitter Gourd Gravy

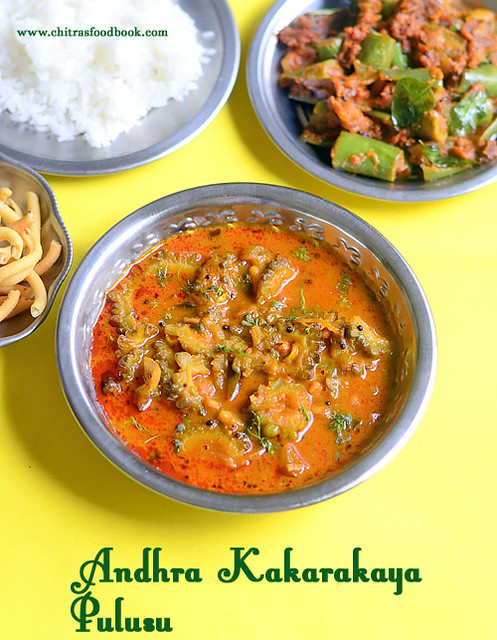
Andhra Kakarakaya pulusu recipe
Kakarakaya ( Bitter Gourd in English, Pavakkai in Tamil, Karela in Hindi) is a very healthy and diabetic friendly vegetable. I make bitter gourd recipes at least once in a week.Usually I prepare bitter gourd curry, Chettinad puli kuzhambu or Pavakkai pitlai. Kakarakaya Pulusu is made by frying bitter gourd pieces in oil and its added to a spicy gravy.But I came across an easy, one pot, Andhra style Kakarakaya Pulusu ( Pulusu means Kuzhambu/Gravy) in a You tube video. I tried it for lunch along with brinjal masala poriyal. This gravy tasted very well without much bitterness. Bitter gourd lovers like me must try this recipe. Addition of jaggery(Bellam), tamarind and thinly sliced bitter gourd sauted in oil helps to reduce the bitterness I feel. So friends, do try this Andhra special Kakarakaya Pulusu recipe for rice. I am sure you will enjoy it Happy Now lets see how to make it with step by step photos !
Check out my other ANDHRA RECIPES as well.


Kakarakaya pulusu recipe

Kakarakaya Pulusu Recipe - Andhra Bitter Gourd Gravy


Kakarakaya Pulusu Recipe - Andhra Bitter Gourd Gravy How to make Andhra style Bitter Gourd Gravy for rice - Kakarakaya pulusu recipe
Cuisine: Andhra Recipes
Category: Side dish for rice
Serves: Serves 2-3
Prep time: 10 Minutes
Cook time: 20 Minutes
Total time: 30 Minutes


INGREDIENTS
1 cup - 250ml
  • Bitter gourd - 1 no ( Medium sized)
  • Tamarind - Big gooseberry size
  • Big onion - 1 no ( chopped)
  • Green chillies -2 nos
  • Ginger & Garlic paste - 1/2 tsp ( or use 1/2 tsp Ginger paste)
  • Red chilli powder - 1.5 tsp 
  • Dhania powder - 1 tbsp
  • Salt & water - as needed
  • Grated jaggery - 2 tsp
To temper
  • Cooking oil - 3 tbsp
  • Mustard seeds - 1/2 tsp
  • Urad dal - 1 tsp
  • Curry leaves - few
  • Hing - a pinch
  • Coriander leaves - to garnish
METHOD

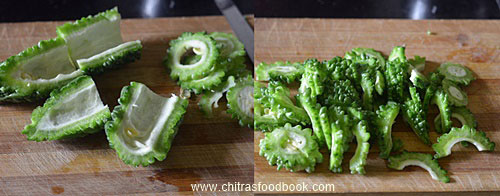
  • Wash and cut the bitter gourd vertically. Remove the middle portion along with the seeds. Slice it thinly as shown in the picture below. These steps will help you to remove the bitterness to a certain extent.So slice it thinly.
    Kakarakaya pulusu
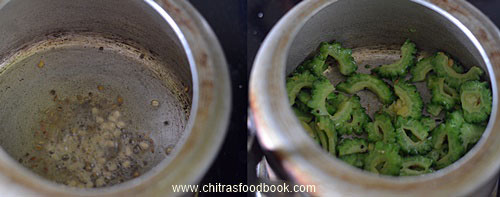
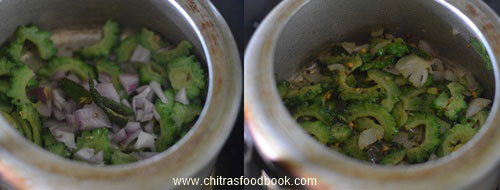
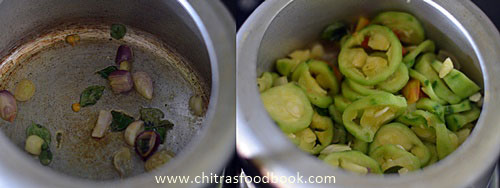
  • In a pressure cooker base, heat oil and splutter mustard seeds, urad dal, cumin seeds, curry leaves. Add bitter gourd slices till it becomes soft. Add onion, g&g paste and saute till its raw smell goes off. Add slit green chillies and saute for few seconds.
    Kakarakaya pulusu
    Kakarakaya pulusu
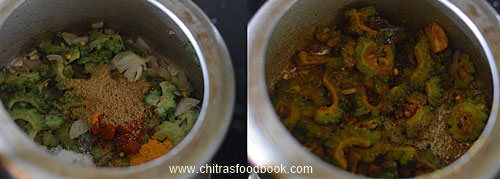
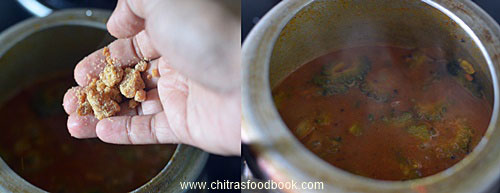
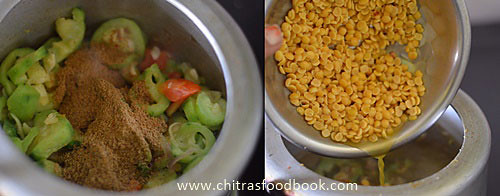
  • Now add the red chilli powder, turmeric powder, dhania powder and salt. Dhania powder helps to give thickness to the gravy. Mix well in low flame without burning them. Now add 1 cup of tamarind extract, raw pinched curry leaves. Let it boil for a minute. Add the grated jaggery, check for salt and spice. Add more chilli powder and salt if needed. Mix well and pressure cook in very low flame for 2 whistles.  Bitter gourd cooks soft.
    Kakarakaya pulusu
    Kakarakaya pulusu
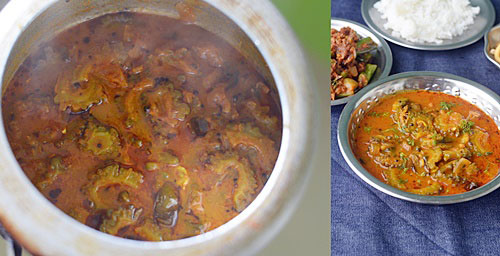
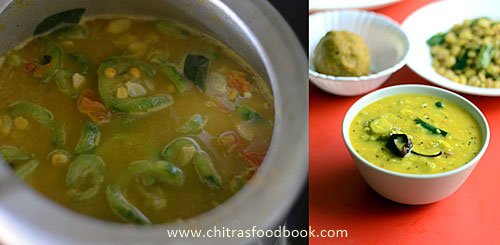
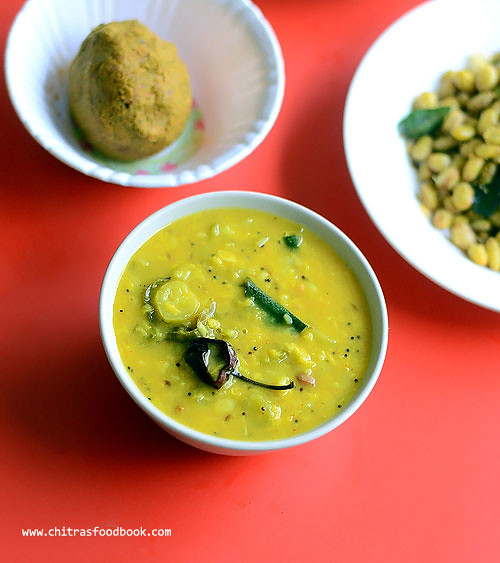
  • Open the cooker and see a layer of oil floating on top. Check if the gravy is too watery. If  its too watery, boil for sometime till slightly thick. Mix well & serve hot with rice & papad ! ( Oil floats on top only if you cook this gravy in pressure cooker.  If you make in kadai, you should boil the gravy till oil oozes out)
    Kakarakaya pulusu
Enjoy!
Note
  • Adjust the quantity of green chillies and red chilli powder as per your taste buds
  • Add the mentioned quantity of oil to get the oil floating on top.
Try this Andhra delicacy at home and enjoy your lunch !!
Kakarakaya pulusu recipe

الجمعة، 12 أغسطس 2016

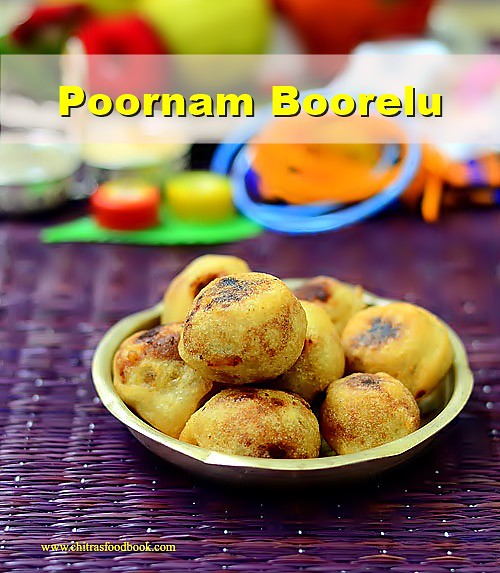
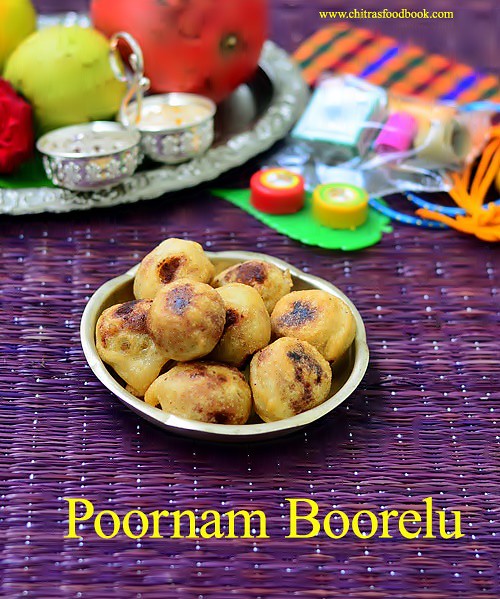
Poornam Boorelu Recipe – How To Make Poornalu – Andhra Burelu

Poornam boorelu
Poornam Boorelu/Poornalu/ Burelu (In Telugu) is one of the most important Neivedyam /Prasadam recipes for Varalakshmi Vratham in Andhra. Most of the people make this during Diwali and Ganesh chaturthi too. Boorelu is very similar to Tamil nadu style Suzhiyam/Suzhiyan recipe but the ingredients used for the outer covering is different. In suzhiyan, maida and rice flour is used for the outer covering whereas boorelu needs rice + urad dal batter (Just like dosa batter) for the covering. Otherwise, the procedure for making Pooranam is one and the same. Pooranam ( Stuffing) can be made with Senaga pappu ( Chana Dal ), Pesarapappu ( Moong dal ) or Kobbari ( Coconut). This morning I tried it for pooja and of course to post this special recipe on this Varamahalakshmi festival day. Even though its my first attempt, it came out very well and I am happy with the result. For this recipe, I asked my neighbor Sowjanya who is from Andhra. She told, on Varamahalakshmi, they make a count of 9 boorelu/poornalu and offer to God. It should be consumed only by the family members after the pooja. So its a must and should sweet recipe to be made for them during this festival.She shared her recipe along with some useful tips too. Thank you Sowjanya for the perfect recipe. We all loved it. Do try this Andhra special sweet recipe for festivals and have a great celebration. Ok, Lets see how to make Pooranam Boorelu ( Poornalu) with step by step pictures.
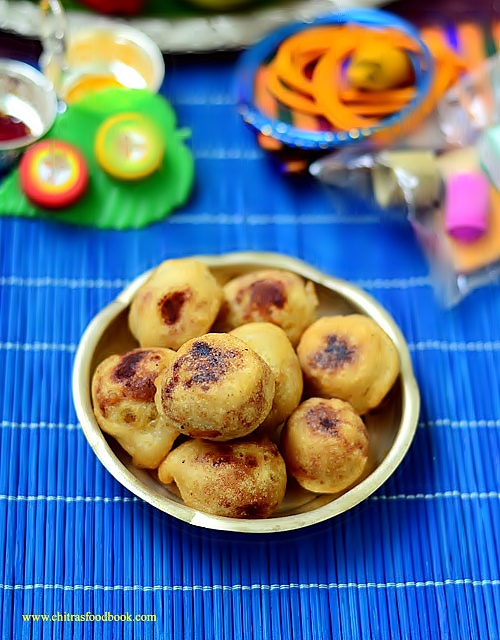
Andhra boorelu

Pooranam Boorelu Recipe


Pooranam Boorelu Recipe Pooranam Boorelu - Andhra style senagapappu boorelu recipe
Cuisine: Indian
Category: Sweet
Serves: 9 nos
Prep time: 5 Hours
Cook time: 3 Minutes
Total time: 5H03Minutes


INGREDIENTS
For the stuffing/Pooranam
  • Chana dal - 1/2 cup
  • Grated jaggery - 3/4 cup
  • Water - 1/3 cup
  • Cardamom - 2 nos
  • Grated coconut - 1//4 cup
For the outer covering
  • Raw rice - 1/2 cup
  • Round white urad dal - 1/4 cup
  • Water - as needed
  • Salt - A pinch
  • Sugar - 1/2 tsp
  • Cooking oil - to deep fry
METHOD

  • Wash and soak the rice and dal together for minimum 4 hours. Over night soaking is also fine. Grind it to a slightly coarse paste in dosa batter consistency adding required water. Make sure batter is not too thin. Set the batter aside for one to 5 hours. But I used it immediately without resting time.
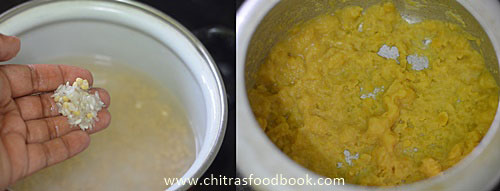
  • Wash and pressure cook chana dal adding enough water. Chana dal should be blossomed and retain its shape ( i.e when you press the dal, it should become mushy) Do not over cook the dal. Grind it to a coarse paste without adding water or mash it with a ladle.
Poornalu - Poornam boorelu
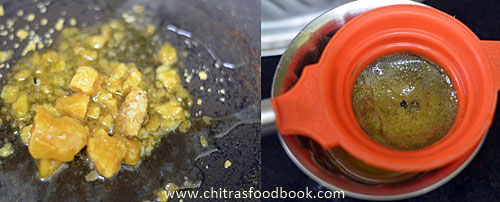
  • In a pan, melt jaggery adding water. Strain it to remove the impurities using a metal strainer. Boil the syrup till it becomes frothy or reaches one string consistency. Add the ground chana dal paste, cardamom powder and grated coconut. Mix well till it becomes a whole mass and leaves the sides of pan. Switch off the stove and let it become warm. Make balls of golf balls size and arrange in a plate.
 Poornam boorelu
 Poornam boorelu
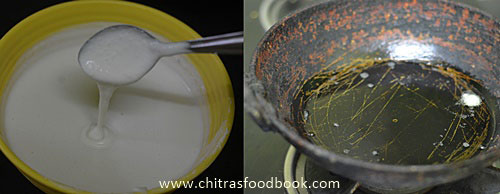
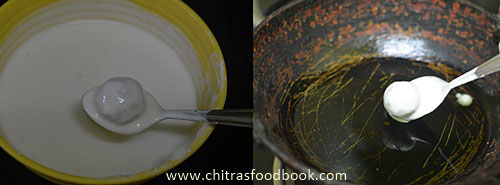
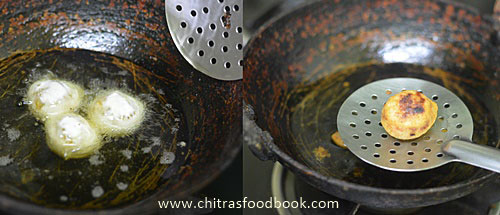
  • Heat oil to deep fry. Test the oil temperature by dropping a pinch of batter. If it rises to the top, oil heat is just right. Simmer the flame completely.Take the ground batter, add sugar, mix well. Dip a stuffing ball into the batter using a spoon. Wipe the excess batter in the sides of vessel and deep fry the balls in medium flame till it turns slightly golden with brown spots.Do not fry for long time. Remove in a tissue. Offer to GOD and get the blessings. Enjoy  eating!
 Poornam boorelu
 Poornam boorelu
 Poornam boorelu
NOTE : You should make 9 or 5 balls and offer to GOD. It should be eaten only by the family members.Do not give this as prasad to others.

Tip 1 : Adding sugar in the batter gives a mild sweet taste to the outer covering too. So it won't taste bland.
Tip 2 : Poornam should be thick and there should not be any moisture content in it else it will disperse in oil when you deep fry the balls.So add besan flour if needed to make the stuffing thick.
Tip 3 : If the batter is thin, you can add some rice flour to bring the right consistency.


Note
  • You can use the remaining batter to make dosa or punugulu.
  • While cooking dal , if u add more water , drain the excess water and grind to a smooth paste. 
  • If there is more moisture in the cooked dal, you can add some besan flour to thicken the stuffing quickly.
  • It stays soft and good for 1-2 days.
Enjoy this delicious traditional Andhra sweet at home !
Pooranam boorelu

الثلاثاء، 9 أغسطس 2016

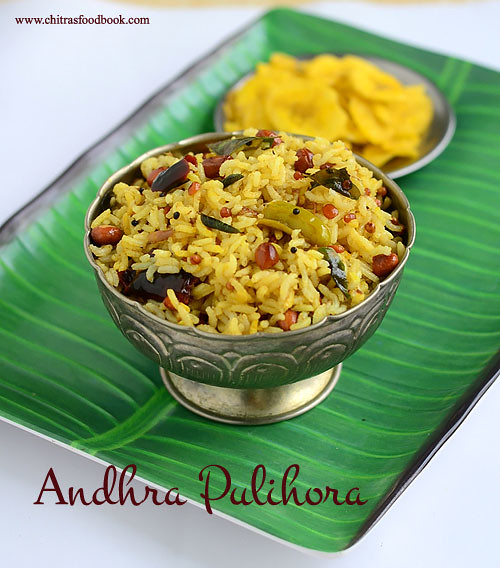
Andhra Pulihora Recipe – How To Make Chintapandu Pulihora Pulusu

Chintapandu pulihora
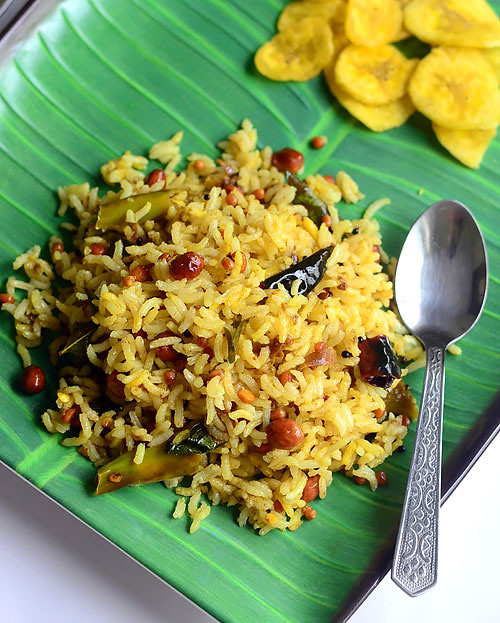
Andhra Pulihora known as Chintapandu Pulihora in Telugu is a must try recipe during festival time. As Varalakshmi Vratham is fast approaching, I thought of sharing some Andhra style neivedyam recipes for this festival. This morning, I was asking my friend Megha about Varalakshmi Vratham special recipes as her MIL belongs to Andhra. She suggested recipes like Boorelu, appalu, Garelu and Pulihora. As our family is a big fan of tamarind rice, I started with this recipe Winking.The ingredients and preparation of Andhra Pulihora is completely different from our Tamil nadu style Puliodharai. Its a very simple recipe without any grinding job.In the traditional temple style pulihora recipe, they add sesame seeds powder or mustard powder. But I made the basic version as told by Megha and watched Attammaa TV YouTube video recipe too for more reference. This Puliogare paste i.e Pulihora Pulusu can be quickly made in minutes if you have readymade tamarind paste in hand. Its an ideal choice for quick lunch box recipe.Raksha loved it a lot and asked me for second serving as well Happy. But this pulihora needs a standing time of minimum 2 hours for all its flavors to blend well.Friends, do prepare this rice at least two hours before serving to relish its actual taste and flavor. I will update the video recipe tomorrow. Now lets see the step by step recipe of how to prepare Andhra Pulihora/Chintapandu pulihora in detail.
Check out my Tamil nadu style Puli Sadam and Pepper Puliogare recipes too.
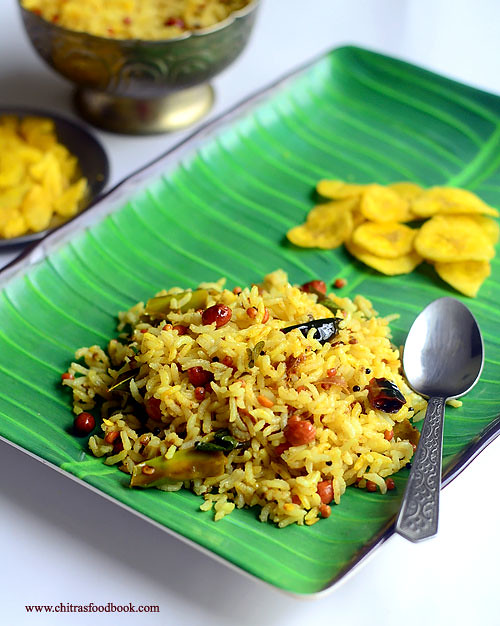
Andhra Pulihora recipe

Andhra Pulihora recipe


Andhra Pulihora recipe Chintapandu pulihora - Andhra style pulihora recipe
Cuisine: Indian
Category: Main-Lunch recipes
Serves: Serves 2-3
Prep time: 10 Minutes
Cook time: 20 Minutes
Total time: 30 Minutes


INGREDIENTS
1 cup = 200ml
  • Raw rice - 1/2 cup
  • Water - 1.25 cups
  • Cooking oil - few drops
  • Turmeric powder - 1/4 tsp
For paste
  • Tamarind - Big lemon size
  • Cooking oil - 3 tbsp
  • Mustard seeds - 1 tsp
  • Urad dal - 1/2 tbsp
  • Chana dal - 1/2 tbsp
  • Peanuts - a fistful, say 1-2 tbsp
  • Red chillies - 3 nos
  • Green chillies - 3 nos
  • Curry leaves - few
  • Chopped ginger - 1/2 tsp
  • Asafetida/Hing - 2 generous pinches
  • Turmeric powder – 1/4 tsp
  • Salt & water - as needed
To dry roast & powder ( Optional step)
  • White sesame seeds powder – 1/2 tbsp OR Mustard seeds powder – 1 tsp ( To sprinkle over the rice while mixing)
METHOD

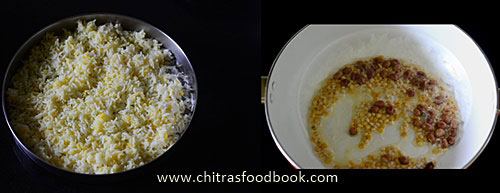
  • Soak tamarind in 1 cup of hot water for 10 minutes. Wash and pressure cook the raw rice adding water and few drops of cooking oil. Cook the rice for 2 whistles in low flame and open the cooker after steam is released. Spread the rice in a plate and add 1/4 tsp of turmeric powder, 1 tsp of cooking oil. Mix well and let the rice cool down.
Andhra Pulihora recipe
  • Take the extract from soaked tamarind using 1.5 cups of water and keep it aside. Soak chana dal in water for about 1/2 hr. and then added to the oil to fry. , Tip shared by Sujata :))
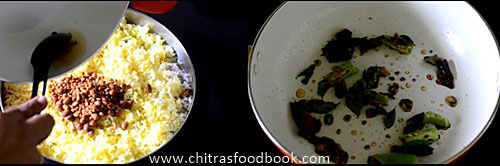
  • Heat 1 tbsp of oil in a pan and roast the peanuts. When the skin of peanuts starts to crackle, add the chana dal and urad dal. Roast till golden brown.Remove and add them to the rice. Do not mix with rice. This helps to retain the dals and peanuts crunchy while eating.
Andhra Pulihora recipe
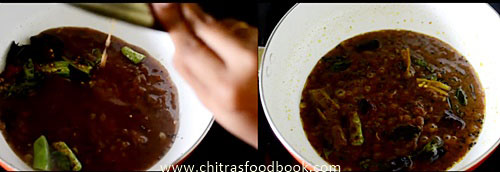
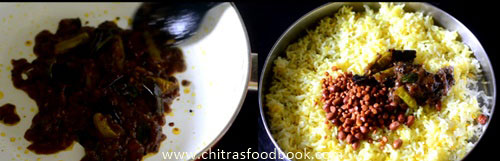
  • Again heat 2 tbsp of oil in the same kadai and splutter mustard seeds, red chillies, green chillies, ginger, curry leaves, hing and saute well. Add the tamarind extract, salt and turmeric powder. Mix well and let the mixture boil till it leaves oil and becomes a thick paste. ( No need to add jaggery)
Andhra Pulihora recipe
  • Remove from the flame and add the required paste to the rice. (Soak 2 pinches of  hing in one teaspoon of water for 15 mts  After 15 minutes, mix well with fingertip, then add the water to the rice & mix well. Try this tip.Its suggested by Sujata in the comments section :))
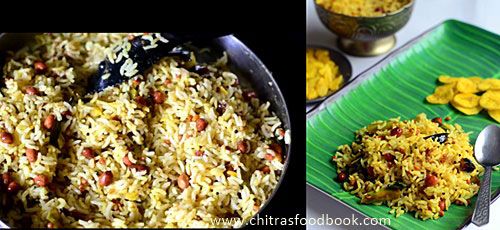
  • Mix well, check for salt and give a standing time of  2 hours. It is also very important to keep the pulihora covered. This tip is also shared by SujataServe with chips or papad. Enjoy !
Andhra Pulihora recipe

Andhra Pulihora recipe
Note : You can add 1.5 tsp of dry roasted and powdered white sesame seeds or 1/2 tsp mustard seeds powder over the rice while mixing to get temple style flavor.It gives an extra punch for this dish. Standing time is necessary to enjoy its actual taste.Add more chillies and more oil as per your taste buds.

Yummy Andhra pulihora is ready. I served it with Kerala Nendran chips. Combo eppudii ?? Winking
السبت، 4 يونيو 2016

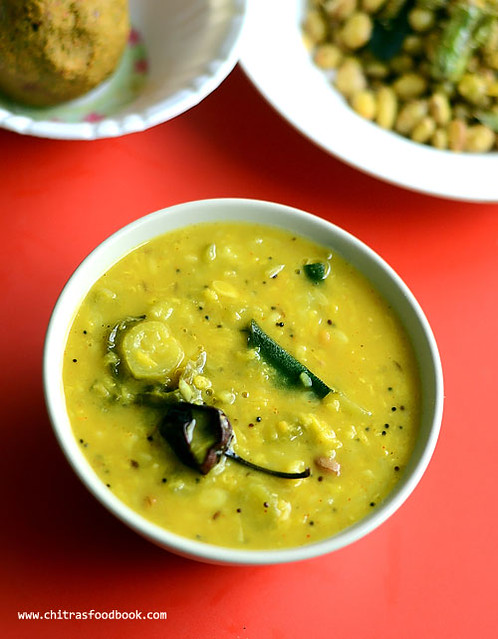
Ridge Gourd Dal – Andhra Beerakaya Pappu Recipe

Andhra beerakaya pappu
Ridge gourd (Turai/Luffa/Torai in Hindi, Peerkangai in Tamil, Beerakaya in Telugu, Hirekai in Kannada, Peechinga in Malayalam) has lot of health benefits.It is low in cholesterol and saturated fats but high in vitamin C, dietary fiber, riboflavin, thiamin, zinc, iron, manganese and magnesium. Usually I make Ridge gourd thogayal or Peerkangai Chutney/kuzhambu for rice. But recently I tried Ridge gourd peel/skin chutney and Andhra Beerakaya pappu for the first time. I followed this dal recipe from Prathiba’s blog. It came out well. Its a quick and easy, one pot dal recipe for rice. Apt for working women and Bachelors. Soon I must try Ridge gourd curry/poriyal and gravy for chapathi too. Lets see how to make this easy Andhra style ridge gourd dal/Beerakaya Pappu.


Beerakaya Pappu recipe

Ridge gourd dal / Beerakaya Pappu Recipe


Ridge gourd dal / Beerakaya Pappu Recipe Ridge gourd dal / Beerakaya Pappu recipe - Andhra style, easy dal recipe for rice
Cuisine: Andhra recipes
Category: Lunch recipes
Serves: Serves 3
Prep time: 10 Minutes
Cook time: 15 Minutes
Total time: 25 Minutes


INGREDIENTS
To pressure cook
  • Ridge gourd - 1 no ( medium)
  • Toor dal - 1/4 cup ( 50 gms)
  • Big onion - 1 no ( Sliced)
  • Green chillies - 2 nos ( add 4 nos for more spicy taste)
  • Tomato - 1 no ( chopped finely)
  • Turmeric powder - 1/2 tsp
  • Red chilli powder – 1/2 tsp
  • Dhania powder/Coriander powder - 1 tsp
  • Cumin powder - 1/2 tsp
  • Water - 1.25 cups
  • Salt - as needed
To temper
  • Ghee - 2 tsp
  • Mustard seeds - 1/2 tsp
  • Urad dal - 1 tsp
  • Red chilli - 1 no
  • Crushed garlic cloves – 5 nos
  • Curry leaves - few
  • Asafetida / hing - 1/4 tsp
METHOD

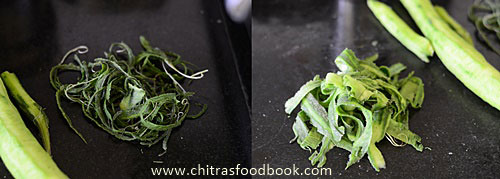
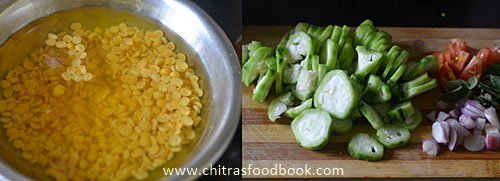
  • Wash and soak the toor dal till you chop the veggies.Wash and remove the ridges and then peel the skin of ridge gourd completely. Use it for making chutney/thogayal if you wish or discard it. Chop the ridge gourd into slices.
Ridge gourd dal

Beerakaya Pappu recipe
  • In a pressure cooker, heat oil. Saute the onions, slitted green chillies, curry leaves. Saute tomato pieces and add the ridge gourd slices too.Saute for a minute.Add turmeric powder, red chilli powder, dhania powder and salt. Mix well and add the soaked dal, required water. Mix well. Pressure cook in low flame for one or two whistles.
Beerakaya Pappu recipe
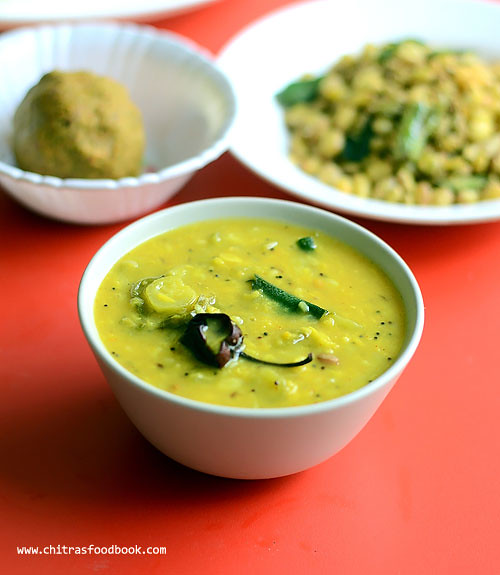
  • Remove the lid after the steam is released. Mash the dal and vegetables well. Check for taste and add more salt or red chilli powder if needed. Let it boil for sometime if the gravy is watery. Bring it to desired thickness.
  • Heat oil/ghee in a kadai and when it gets heated , splutter the mustard seeds, urad dal, hing, crushed garlic, red chilli and curry leaves.Add this to the boiling dal. Switch off the flame and serve hot with rice. Don’t forget to add a tsp of ghee while serving.Enjoy !
Beerakaya Pappu recipe


Note
  • Use moong dal instead of toor dal.
  • You can temper with cooking oil instead of ghee.
  • Adding red chilli powder is optional. Its not mentioned in the original recipe. But I added red chilli powder and used less green chillies. If you wish, u can skip red chilli powder and add more green chillies.
  • For masala taste, u can add 1/2 to 1 tsp of ginger-garlic paste in the dal.
Try this easy, yummy Ridge gourd dal and enjoy with plain rice and tsp of ghee !!
Ridge gourd Dal recipe

الثلاثاء، 22 سبتمبر 2015

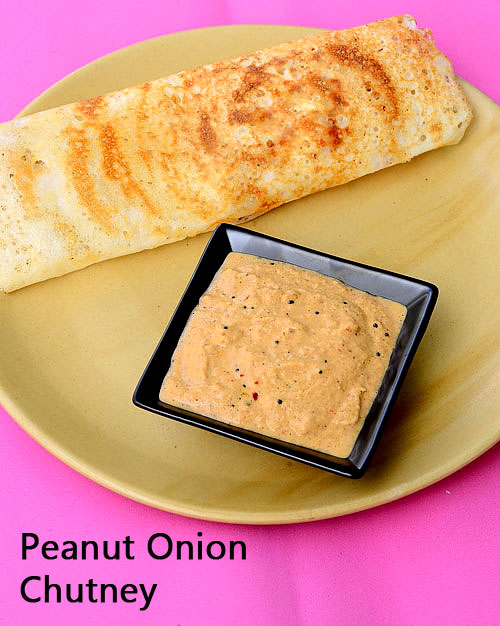
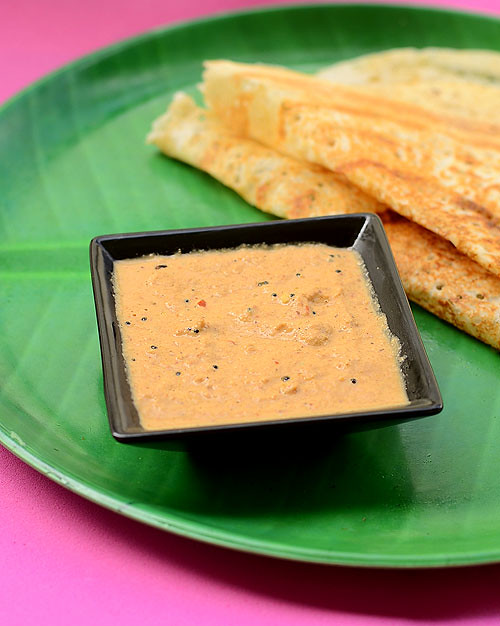
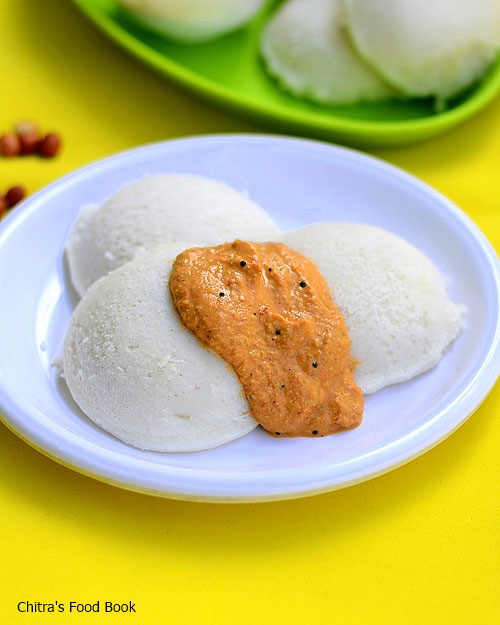
Peanut Onion Chutney Recipe For Idli Dosa

Peanut onion chutney recipe
 Basically I love to make different varieties of chutney for idli,dosa.So I keep hunting some interesting chutney recipes even after posting 40+ chutney recipes in my blog. I wanted to make variations in peanut chutney as Sendhil loves peanuts.I have tried Andhra style peanut chutney with coconut & peanut tomato chutney.But Peanut onion chutney without coconut was pending in my list.So I tried it last week for dosa.It was awesome.We all loved it.I am happy to include this yummy recipe in my chutney collection.I have not removed the skin of peanuts in this chutney after reading some health benefits of peanut skin HERE.So this chutney is quick and easy to make.Try this tasty side dish for idli,dosa.You will love it like us.Lets see how to make peanut onion chutney below.

Peanut onion chutney recipe

Peanut onion chutney recipe


Peanut onion chutney recipe Peanut onion chutney recipe - Side dish for idli,dosa
Cuisine: Andhra
Category: Side dish for dosa
Serves: Serves 2
Prep time: 5 Minutes
Cook time: 5 Minutes
Total time: 10 Minutes
INGREDIENTS

  • Peanuts - 1/4 cup
  • Big onion - 1 no
  • Red chillies - 4 nos ( add more for spicy taste)
  • Garlic cloves - 5 nos
  • Tamarind - a small pinch
  • Salt & water - as needed
To temper
  • Cooking oil - 1 tsp
  • Mustard seeds - 1/4 tsp
  • Urad dal - 1/2tsp
  • Curry leaves - few
METHOD
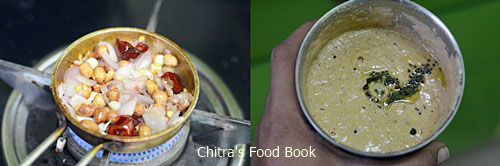
  • Heat 1 tbsp of oil in a kadai and roast the peanuts.After 2 minutes,add the chopped big onion,red chillies,garlic cloves and a pinch of tamarind along with required salt.Saute everything well.Let it cool.Grind it to a smooth paste and temper the mustard seeds,urad dal & curry leaves.
Onion peanut chutney

Serve with idli,dosa drizzled with gingely oil.
Note
  • Adjust the quantity of red chillies as per your taste
  • You can skip garlic.
  • Tempering gives a nice flavor to this chutney.so don’t skip it.

Drizzle a tsp of gingely oil & enjoy this chutney with idli,dosa Happy
Peanut onion chutney recipe


الاثنين، 17 أغسطس 2015

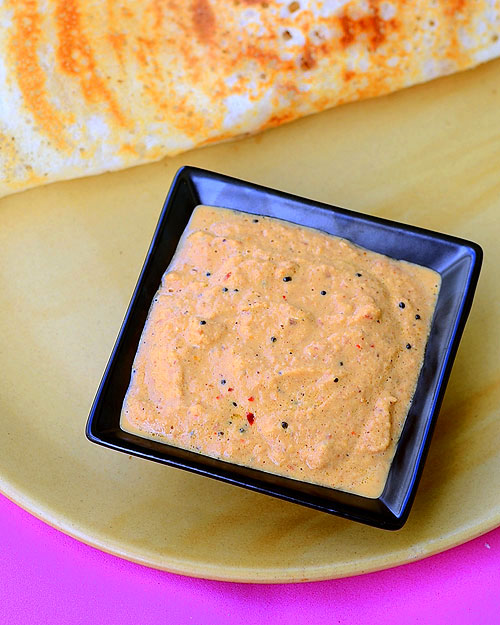
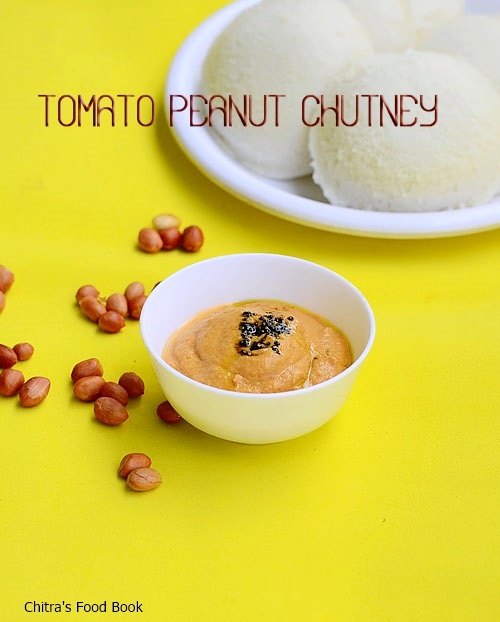
Tomato Peanut Chutney Recipe-Andhra Palli Chutney Recipe

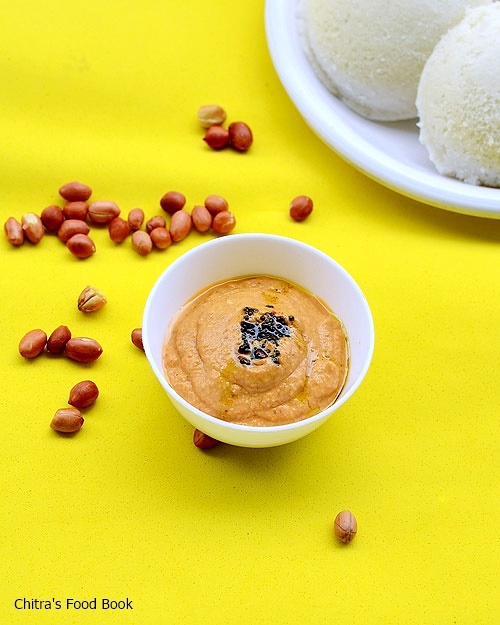
Sendhil loves chutneys made using groundnut.I usually make Peanut/Groundnut chutney in this way.I was looking for a Peanut/Kadlekai chutney with the combination of tomato & red chillies but without onion.I came across this recipe in Sailu’s kitchen.In Andhra,this chutney is known as Palli Pachadi.I tried it by adjusting the quantity of chillies as per my family’s taste.It came out very well.Sendhil loved it a lot with hot idli.It tasted great for dosa as well.Friends,do try this chutney recipe if you are a peanut lover.You will make it very often.Color of this chutney may vary if you use more chillies & tomato.Lets see how to make this yummy Andhra style side dish for idli dosa - tomato palli chutney.I forgot to tell you – It’s a no onion no garlic recipe .I am happy to add this chutney to my 35 chutney recipes collectionHappy.

Andhra Tomato Peanut chutney Recipe


Andhra Tomato Peanut chutney Recipe Peanut chutney adding tomato--Palli Pachadi in Andhra style !
Cuisine: Andhra
Category: Side dish
Serves: Serves 2
Prep time: 10 Minutes
Cook time: 10 Minutes
Total time: 20 Minutes


INGREDIENTS

  • Groundnut/Peanuts - 1/4 cup
  • Tomato - 2 nos ( small) OR 1 big
  • Red chillies - 2 nos 
  • Green chilli - 1 no
  • Tamarind - a pinch (optional)
  • Salt &water – as needed
To temper
  • Cooking oil - 1 tbsp
  • Mustard seeds - 1/2 tsp
  • Curry leaves - few
  • Hing/Asafetida -a pinch
METHOD
  • Roast the peanuts in medium flame for 5 minutes till it turns crispy. I roasted in microwave high power for 3 minutes.Rub the skin and take the groundnuts in a plate.
  • In a kadai,heat oil and saute the red chillies,green chillies,tomatoes until tomato turns mushy. Lastly add the roasted peanuts,tamarind and salt.Switch off the flame and let it cool.Grind it to a smooth paste adding water.
  • Temper mustard seeds,hing & curry leaves. Add to the chutney !Serve with idli,dosa.

Enjoy !
Note
  • Add more chillies if u like spicy chutney.
  • I sauteed the green chillies too.But the original recipe called for using raw chilli.

 Enjoy this yummy chutney with idli,dosa !