الأربعاء، 7 أكتوبر 2015

Butter Badusha Recipe / Balushahi - Diwali Sweets Recipes

Badusha recipe
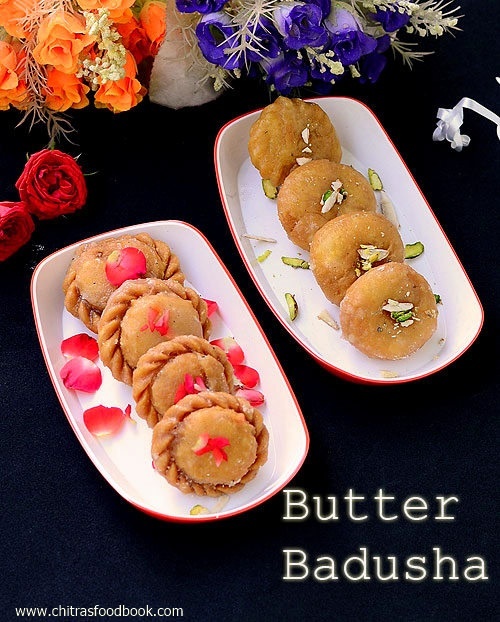
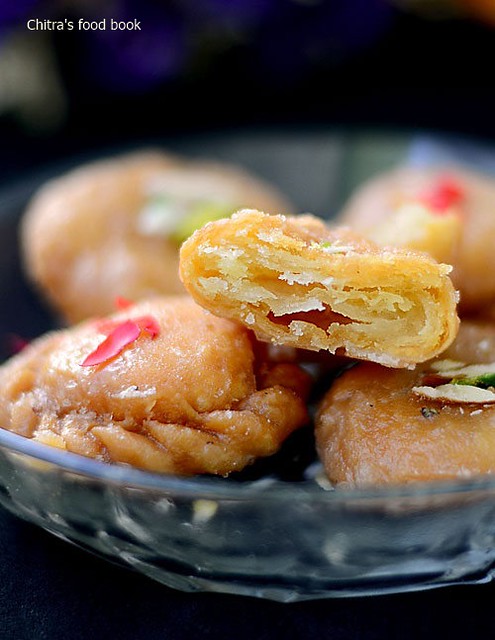
Badusha/Balushahi recipe is one of the must try sweets recipes during Diwali or any occasions.Most of the people in India make badusha for Diwali.So I thought of starting my diwali recipes with this most popular sweet recipe.Basically I am not a big fan of sweets.But there are very few sweets for which I don’t say NO.Badusha is one among them.I love it for its flaky,layered texture with mild sweetness.Every year during Diwali,my MIL makes Maida burfi and Badusha without fail.She is my inspiration to try sweets on my own.She usually adds Dalda/Vanaspati or butter to make badusha.Based on my MIL’s recipe and after few trial & errors,I am making badusha successfully for the past two years.I have shared some tips,do’s & don’ts below for beginners.I took a complete video for badusha preparation and shared the same below.I love the traditional donut shaped badusha more than the swirled ones.But still swirled badusha looks more attractive like suryakala.So in this post,I have just shared a small video of how to make badusha swirls for beginners to learn.Hope it is easily understandableThinking.Lets see how to make the most popular Indian sweet balushahi aka badhusha in detail.
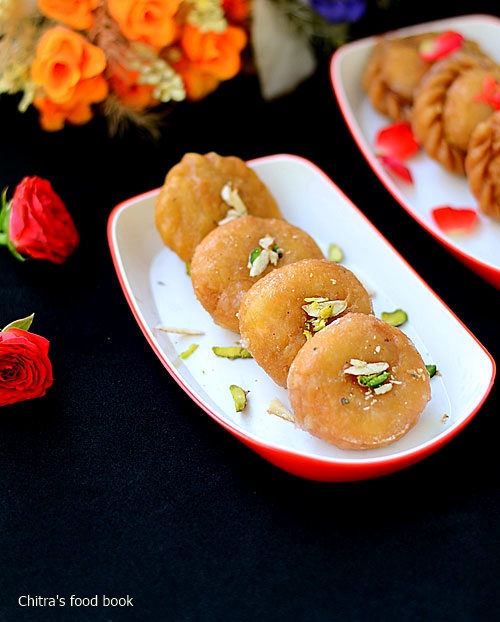
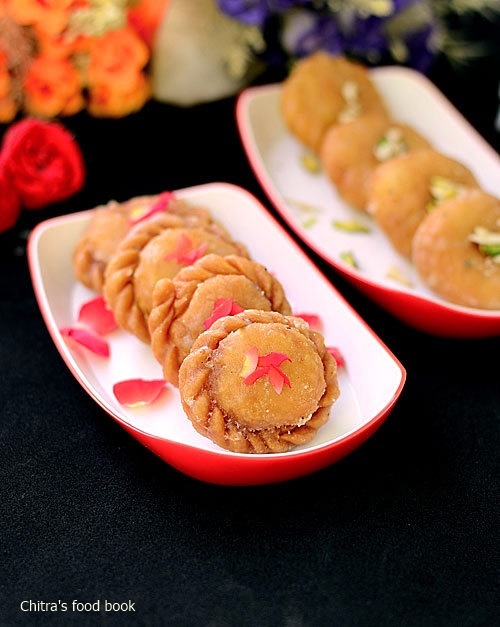
Badusha - Full recipe video

How to shape badusha

Badusha recipe
POINTS TO REMEMBER
  • Generally beginners complaint about badusha disperses/dissolves in oil.It is due to the addition of more cooking soda or fat content( ghee or butter).If the oil temperature is too low,badusha may dissolve in oil.
  • Sometimes you may get more cracks in badusha after frying.It may become shapeless too.It is also due to the quantity of cooking soda.So please be very careful while adding soda.
  • The secret of getting flaky,layered badusha lies in slow deep frying in low flame.Adding curd doesn’t make the difference.My MIL never add curd.Still it comes out flaky.
  • You can replace butter with melted ghee.But use melted ghee or butter only at room temperature.It should not be hot.
  • No need to knead the dough very hard or beat as you do for chapathi dough.Its enough to make a soft,crack free dough to get good badusha.
  • The recipe I have shared here gives badusha which may be slightly hard as soon as you prepare.But it will become soft the next day and tastes much better.
butter badusha

Butter badusha recipe


Butter badusha recipe How to make butter badusha-Diwali sweets recipes
Cuisine: Indian
Category: Sweets
Serves: 9 nos
Prep time: 30 Minutes
Cook time: 20 Minutes
Total time: 50 Minutes


INGREDIENTS
1 cup = 200 ml
  • All purpose flour/Maida - 1 cup (tightly packed & levelled)
  • Melted butter - 1/4 cup ( at room temp,butter should not be hot)
  • Curd - 1 tbsp
  • Cooking soda - 1/8 tsp(slightly heaped,must be less than 1/4 tsp)
  • Water - as needed ( I used 2-3 tbsp)
  • Salt - a small pinch
For sugar syrup
  • Sugar - 1/2 cup
  • Water - 1/4 cup
  • Cardamom powder - 1/2 tsp
  • Lemon juice - 1/2 tsp
  • Saffron threads & dessicated dry coconut,nuts - for decoration
METHOD
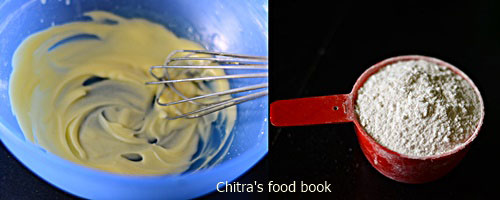
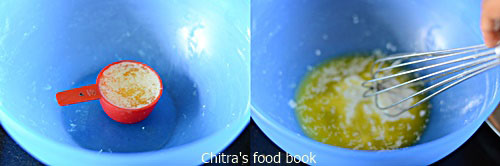
  • Take a wide bowl and add the melted butter,cooking soda & curd.Mix well with a whisk till it becomes a creamy paste.It will take 1-2 minutes.Take sugar in a bowl and add water.Mix well & set aside.Let it dissolve for making syrup.
badusha recipe
badusha recipe
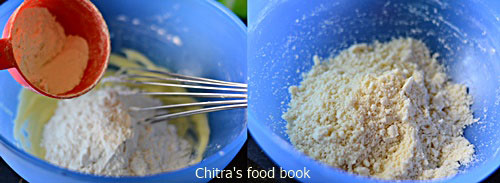
  • To this paste,add maida and a pinch of salt.Mix well and make a crumbly mixture.Butter & curd mixture should spread well with the flour.The mixture should resemble bread crumbs.Sprinkle some water and make a soft,non-sticky dough( I used around 2-3 tbsp of water.It may vary based on the water content in curd)
butter badusha recipe

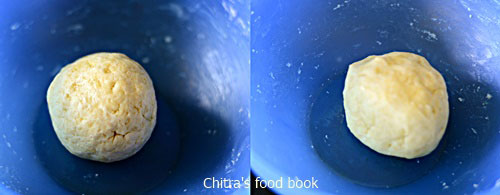
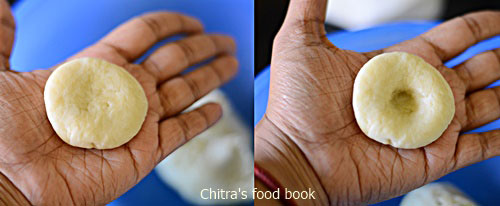
  • Rest the dough for 30 minutes.After the resting time,the dough would be very soft.Smoothen it using your hands to remove cracks by just pressing it gently.Do not knead it.Take small ball sized dough and make a crack free smooth ball.Flatten it using your palm and make a dent in the center using your pointer finger.Make a deep impression.
butter badusha recipe
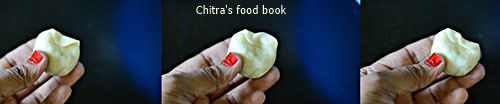
  • For making swirl shaped badusha,take a ball from the dough and pinch in a corner.Fold it and again pinch the swirled end.Repeat this to make a circle.Refer video for more reference.
butter badusha recipe

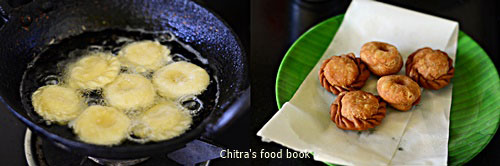
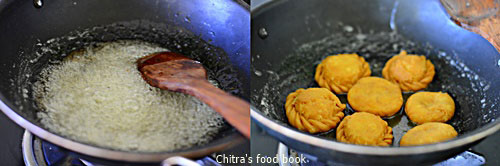
  • Heat oil in a kadai and when it gets heated , drop a pinch of batter.As soon as the batter rises to the top,drop 3-4 badusha and switch off the flame.Let the badusha cook in off fire till it floats on top of oil.After it starts to float,flip the badusha and switch on the flame.Keep the flame medium and cook the badusha till it turns golden in color.One batch takes nearly 8-10 minutes.
butter badusha recipe
  • The swirled badusha takes more time to cook and looks dark in color compared to the donut shaped ones.Don’t panic.It also tastes little more crispy compared to the round ones.Deep frying patiently is more important to get layers in badusha.So please follow this carefully.
  • While frying badusha,u can make sugar syrup.Boil the syrup till one string consistencyi.e when u take a drop of syrup between your fingers & release,it will form a single string..Add cardamom powder & lemon juice and switch off the flame.Lemon juice prevent crystallization of sugar syrup.Refer this post for detailed sugar syrup consistencies.
  • Remove the badusha in a tissue.Drop them into the warm syrup.Let it soak for 5-10 minutes.Flip them in the syrup for even coating.In the mean time,deep fry the next batch of badusha.Remove the badusha from the syrup and arrange in a plate.Once it cools down,sugar syrup with crystallize and make a nice coating.Store it once badusha is cooled down completely. Enjoy ! It stays good for 3-4 days if properly done.
If the sugar syrup crystallizes while u soak the badusha,add few drops of water,heat it.Bring the string consistency & then drop the badusha.
Try this yummy sweet for Diwali and have a great celebration Happy
Butter badusha recipe


الثلاثاء، 6 أكتوبر 2015

Black Bean and Sweet Potato Enchiladas with Avocado Cream Sauce

Black Bean and Sweet Potato Enchiladas

Much like popular Italian baked pasta dishes such as cannelloni or lasagna, this vegan Mexican baked tortilla dish is wonderfully rich despite the total absence of meat and dairy. There is only one drawback to this meal — it's so absurdly delicious and wholesome that it presents a challenge to the cook to come up with something that has as much flair and finesse for the next dinner. Thankfully there were leftovers.

Black Bean and Sweet Potato Enchiladas with Avocado Cream Sauce

Honestly, these must be the best enchiladas I have ever made and enjoyed. If you fancy meat or cheesy dishes, you won't miss either here even though these are completely vegan. And quite filling too. A spiced filling of black beans, sweet potato, brown rice, spinach and black olives are wrapped in corn tortillas and baked in a thick, rich and zesty homemade tomato sauce. Topped with a colorful creamy avocado and cilantro cream sauce with fresh lime juice that is drizzled on just before serving, this is a complete meal. Everything you need to nourish is included and these enchiladas are an ideal choice if you happen to be entertaining guests.

Vegan Black Bean and Sweet Potato Enchiladas with Avocado Cream Sauce

The enchilada sauce can be made the day before and the sweet potato roasted ahead of time as well so that everything comes together with ease when it's time to prepare dinner.

Black Bean and Sweet Potato Enchiladas with Avocado Cream SauceBlack Bean and Sweet Potato Enchiladas with Avocado Cream Sauce
Recipe by
Adapted from The Oh She Glows Cookbook: Vegan Recipes To Glow From The Inside Out
Cuisine: Mexican
Published on October 6, 2015

Black beans, sweet potato, brown rice, spinach and black olives wrapped in corn tortillas and baked in a thick, rich and zesty homemade tomato sauce

Print this recipePrint this recipe

Enchilada sauce:
  • 2 tablespoons olive oil
  • 1 shallot, finely chopped
  • 1 clove garlic, finely chopped
  • 1 red chili, seeded and finely chopped (or a pinch of cayenne)
  • 2 tablespoons chickpea flour (besan) or unbleached white flour
  • 3 to 4 teaspoons chili powder
  • 1 teaspoon ground cumin
  • 1/2 teaspoon paprika
  • 1/3 cup nutritional yeast
  • 2 medium tomatoes, finely chopped
  • 2/3 cup tomato paste
  • 1 1/2 cups vegetable stock
  • 1/2 to 1 teaspoon sea salt, or to taste
Enchiladas:
  • 1 large sweet potato (about 2 1/2 cups), scrubbed
  • 1 tablespoon olive oil
  • 1 small red onion, chopped
  • 2 cloves garlic, minced
  • 1 jalapeño, seeded and finely chopped
  • 1 teaspoon chili powder
  • 1 teaspoon ground cumin
  • 1/2 red bell pepper, seeded and chopped
  • 2 cups cooked black beans (2/3 cup dried or 1 19 oz can)
  • 1/2 cup cooked brown rice
  • 2 large handfuls of spinach, roughly chopped
  • 1/3 cup black olives, pitted and roughly chopped
  • juice from 1 lime (2 tablespoons)
  • 1 teaspoon sea salt, or to taste
  • 6 6-inch corn or flour tortillas
Avocado cream sauce:
  • 1/2 cup fresh cilantro, trimmed
  • 1 medium avocado
  • 3 tablespoons water, or as needed
  • juice from 1 lime (2 tablespoons)
  • 1/2 teaspoon sea salt
Instructions:
  • To make the enchilada sauce, heat the oil in a medium saucepan over medium heat. When hot, toss in the shallot, garlic and chili if using and sauté for a few minutes. Stir in the flour until the vegetables are coated. Now stir in the chili powder, cumin, paprika and cayenne if using. Stir for another minute.

  • Add the nutritional yeast and fresh tomato, whisk the mixture, and simmer a few minutes. Stir in the tomato paste, stock and salt. Simmer for another 5 minutes or until thickened. Add a bit more stock if the sauce is too thick. It should be creamy and thick, but not watery. Set aside until it's time to assemble the enchiladas.

  • To boil the sweet potato, peel and cut into small pieces and boil in enough water to cover until fork tender — about 5 to 7 minutes. Or to roast the sweet potato, preheat an oven to 400°, pierce the potato a few times with a fork, and bake until fork tender — about 30 minutes. Let cool, remove the skin, and chop into small pieces.

  • To make the enchilada filling, heat the oil in a large skillet over medium heat. When hot, add the onion and sauté for 5 minutes. Add the garlic and jalapeño and continue to saute for another few minutes. Stir in the chili powder and cumin.

  • Now add the red pepper, sweet potato, black beans and rice and stir well to combine. Add the spinach, a small handful at a time, and cook over medium-high heat until the spinach is wilted.

  • Remove the mixture from the heat and stir in the olives, 1/2 cup of the enchilada sauce, lime juice and salt.

  • Preheat an oven to 350°. To assemble the enchiladas, grease a large 9 x 13 baking dish with olive oil. Spread about 1 cup of the enchilada sauce over the bottom of the dish. Scoop about 3/4 cup of the filling onto each tortilla, wrap, and place seam-side down into the dish. Top with any remaining filling and the rest of the sauce.

  • Bake for 20 to 25 minutes until the sauce has thickened and is a deep red colour.

  • While the enchiladas are baking, prepare the avocado cream sauce. In a small food processor or blender, mince the cilantro. Add the avocado, water, lime juice and salt. Process until well combined and creamy, adding more water as necessary.

  • To serve, individually plate the enchiladas and drizzle each with avocado cream sauce.

Makes 6 servings

Black Bean and Sweet Potato Enchiladas

This is my contribution to My Legume Love Affair, a monthly event started by Susan of The Well Seasoned Cook and now administered by me. I am also hosting this month. I'm also sharing this with Jacqueline's weekly Meat Free Mondays event.

Other Mexican-style dishes to enjoy from Lisa's Vegetarian Kitchen:
Cornmeal-Crusted Kidney Bean and Black Bean Chili
Refried Beans with Pumpkin
Mexican-Style Mung Bean Tostadas
Pinto Bean and Avocado Burritos

الاثنين، 5 أكتوبر 2015

Mug Biryani Recipe - Dum Biryani

Mug biryani recipe
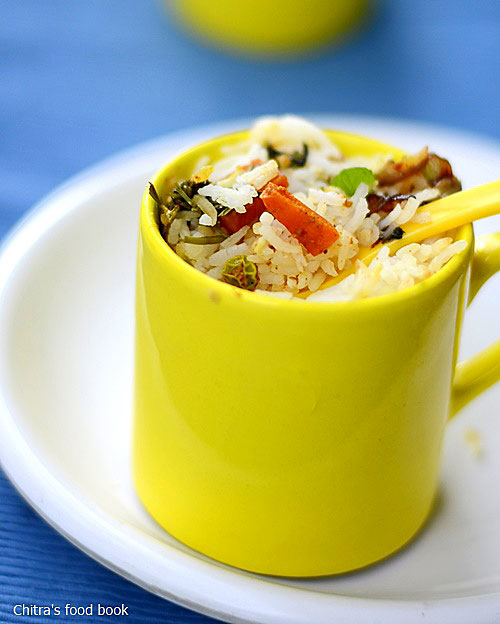
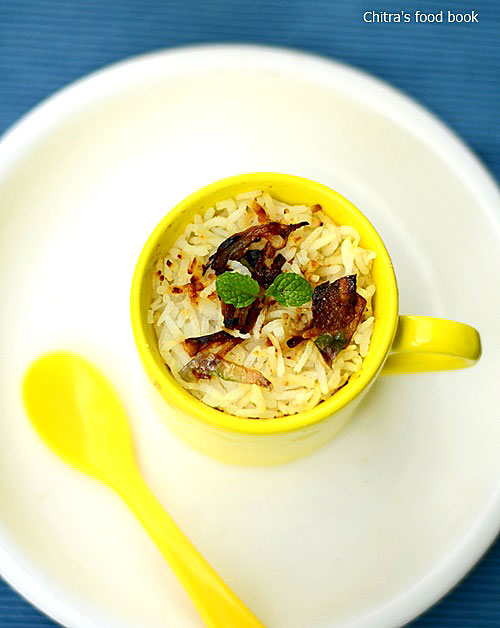
Recently I came across biryani recipe in a coffee mug.I loved the idea and tried it for our Sunday lunch yesterday.Mug biryani is nothing but the usual layer biryani assembled and baked in a microwave safe mug.I followed my vegetable layer DUM biryani for gravy recipe and adapted the outer covering recipe from HERE.Raksha was so happy and fascinated to see the biryani in a bowlTongue.She was eagerly waiting with me in the kitchen to see the output.As I wished,the result was awesome.We all loved it.I reserved a bowl of biryani for myself & had it for dinner tooWinking.Friends,Try this biryani for a change & attract your family members.Lets check out this week’s Sunday Lunch Recipes Series no 32– Flavorful Mug biryani adding mixed vegetables!!

Check out my other SUNDAY SPECIAL BIRYANI RECIPES


Mug biryani recipe

Mug biryani recipe-Dum biryani


Mug biryani recipe-Dum biryani Vegetable biryani in a coffee mug-Sunday lunch recipes series 32
Cuisine: Indian
Category: Lunch ideas
Serves: Serves 3-4
Prep time: 30 Minutes
Cook time: 30 Minutes
Total time: 60 Minutes


INGREDIENTS
1 cup = 200 ml
  • Basmati rice - 1 cup
  • Water - 5 cups
  • Whole spices ( 1 cinnamon,2 cloves,1 black stone flower,1 bayleaf,1cardamom)
  • Salt - as needed
  • Cooking oil or ghee - 1 tsp
For gravy
  • Cooking oil + ghee - 1 tbsp+1 tbsp
  • Whole spices -1 each
  • Big onion - 1 no
  • Green chilli - 1no
  • G&G paste - 1/2 tsp
  • Mixed vegetables ( 1 carrot,a handful of green peas,1 potato) - 1/2 cup
  • Curd - 1/2 cup
  • Turmeric powder - 1/8 tsp
  • Red chilli powder - 1 tsp
  • Biryani masala powder - 1 tsp
  • Salt & water - as needed
For dough
  • Maida/All purpose flour - 1/2 cup
  • Salt – a pinch
  • Baking powder – 1/4 tsp
  • Baking soda – a pinch
  • Warm milk – 1 tbsp
  • Water -as needed to knead the dough
For layering
  • Mint+coriander leaves - 2 tbsp
  • Browned onions - a handful
  • Saffron soaked milk - 1/4 cup
  • Cooking oil or ghee - to grease the mug
METHOD
  • Wash and soak the basmati rice for 30 minutes.In a wide kadai or vessel,boil 6 cups of water adding cinnamon,cloves,cardamom and black stone flower.Add some salt.When the water comes to a roll boil,add lemon juice.Drain the water from the soaked basmati rice and add to the boiling water.
  • Cook the rice in open pan for nearly 8 minutes.Stir it once or twice in the middle.Make sure u don’t over cook the rice.Rice should be firm and soft.It should be 3/4 th cooked.
  • Remove the kadai and pass it through a colander/sieve.Run the tap water over the rice to stop cooking process.Drain all the excess water and keep the rice in the colander.Spread it in a wide plate and let it cool completely.
Mug biryani recipe

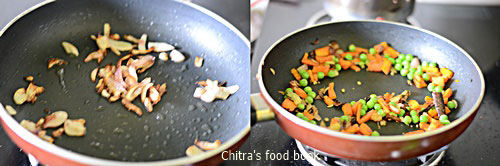
  • Heat 2 tbsp of oil and caramalize the onions by sauting in high flame for a minute.Remove in a plate.
  • Now prepare the gravy.Heat oil+ghee in a wide kadai and saute the cinnamon,cloves,cardamom and bayleaf.Add the ginger-garlic paste and saute for a minute till raw smell goes off.Now add sliced onions and saute till transparent.
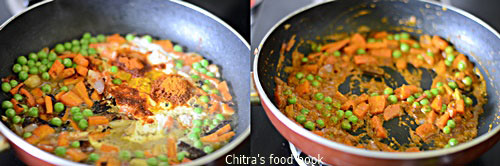
  • Add the mixed vegetables and saute well.Add salt.
Mug biryani recipe

  • Now add the curd and mix well in low flame.Add the red chilli powder,turmeric powder, biryani masala powder and salt.Mix well.Lastly add some water and cook the mixture very well till veggies are completely cooked and oil floats on top.It will become a semi solid gravy.
Mug biryani recipe
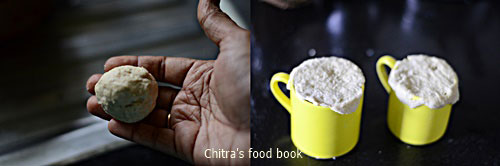
  • Remove the kadai and keep the gravy aside.Take a bowl and make the chapathi dough adding the ingredients given under “ For dough” OR make a plain chapathi dough using wheat flour & salt to seal the mug.
  • Take the microwave safe mugs and grease with a tsp of oil.
Mug biryani recipe
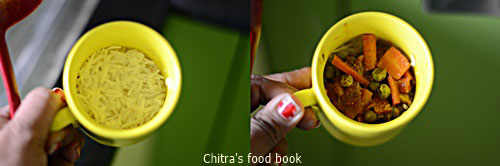
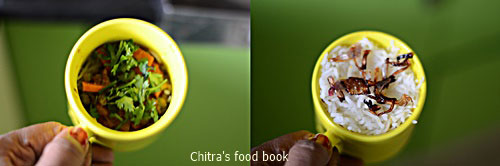
  • Spread a small ladle of cooked rice as first layer.Now layer the gravy over the rice and sprinkle some chopped mint+coriander leaves.
Mug biryani recipe
  • Layer with rice now.Repeat the same till the brim of mug.Lastly sprinkle some saffron soaked milk and caramelized onions.Seal the mug with a small round disc made of dough.Preheat the oven in 180c and bake the biryani for 15 minutes.Remove & serve hot !
Mug biryani recipe
Mug biryani recipe

Enjoy with raita !


Note

  • Adding green chillies is optional.U can add more red chilli powder for spicy biryani.
  • You can replace  biryani masala powder with garama masala powder too.
  • Addition of mint+coriander leaves is very important.
  • Replace curd with lemon juice for variations but add lemon juice only before putting in DUM.In that case,add 2 tomatoes along with onions and saute until mushy.

Enjoy this yummy Mug biryani with your family !
Mug biryani recipe


السبت، 3 أكتوبر 2015

Spiced Teff Cakes with Sun-Dried Tomatoes

spiced teff patties

With my recent forays into Ethiopian cooking, I've become interested again in revisiting teff for the first time in many years.

Teff
Teff has been the staple grain of Ethiopian cooking for thousands of years but is relatively unknown to the rest of the world except through the sourdoughed teff flour flat bread called "injera" that is served in every Ethiopian restaurant. But it is available in larger grocers and in health food stores from brands such as Bob's Red Mill. And its obscurity certainly doesn't hide its unique qualities. So very tiny that its name actually translates as "lost", it has a rich brown color and a much more robust earthy and nutty flavor than any other grain. And it's a nutritional gluten-free powerhouse of protein, calcium, iron and fiber.

Teff has a thick, chewy and gritty polenta-like consistency when cooked up and makes for a distinctive — and healthy — breakfast porridge. But on the dinner table, its robust flavor makes it less a platform for seasonings and vegetables than other grains and more of the starring flavor. So teff is a perfect vehicle for making savory cakes like the kind I like so much. Combined with Ethiopian spices, chilies, sun-dried tomatoes and a raw cashew paste, this thick cooked grain molds into burger-size patties that can be baked or fried for a bold tasting side dish that might just turn out instead to hog the spotlight on your dinner table.

teff patties with okra

Spiced Teff Cakes with Sun-Dried TomatoesSpiced Teff Cakes with Sun-Dried Tomatoes
Recipe by
Cuisine: Ethiopian
Published on October 3, 2015

Hearty spiced savory cakes made with Ethiopian teff and berbere spice — serve baked or fried for a unique, nourishing and robust flavored dinner side

Print this recipePrint this recipe

Cakes:
  • 3 1/4 cup water or vegetable stock
  • 2/3 cup nutritional yeast, divided
  • 1/2 teaspoon turmeric
  • 1 to 2 cloves garlic, minced and divided
  • 1 cup whole grain teff
  • 1/2 to 2/3 cup red onion, diced
  • 1 to 2 jalapeños, seeded and finely chopped
  • 6 sun-dried tomatoes, soaked in hot water for 30 minutes, drained and chopped
Cashew paste:
  • 3 tablespoons flax seed
  • 1/3 cup raw cashews, soaked in hot water for 1 hour and drained
  • 1/4 cup almond or hemp milk, or more as needed
  • 2 tablespoons coconut oil
  • 1 tablespoon berbere spice
  • 2 teaspoons ground cumin
  • 1/2 to 1 tablespoon paprika, to taste
  • 1 1/2 teaspoons sea salt
Instructions:
  • In a large heavy-bottomed saucepan, bring the water or stock, 1/3 cup of the nutritional yeast, turmeric and half of the garlic to a boil. Slowly pour the teff into the water, whisking. Reduce the heat to low and cook uncovered, stirring frequently and scrapping the bottom of the pan to ensure the teff doesn't stick, for about 25 minutes until the liquid is absorbed. Remove from the heat and set aside for 5 minutes.

  • While the teff is cooking, make up the paste. In a small blender or food processor, grind the flax seed. Then add the the cashews, almond or hemp milk, coconut oil, berbere, cumin, paprika and salt. Process until a thick paste is formed. Add a little more almond or hemp milk if it is too thick to blend.

  • Transfer the cooked teff to a large bowl. Stir in the remaining nutritional yeast, garlic, red onion, jalapeños, sun-dried tomatoes and cashew paste. Mix until well combined. Let cool to room temperature, then cover and refrigerate for at least 5 hours or preferably overnight.

  • Shape the mixture into 2-inch patties. If the mixture seems to moist, stir in a few tablespoons of chickpea flour.

  • To fry the cakes, heat a few tablespoons of oil in a large skillet over medium-high heat. When hot, add a few of the cakes to the pan, taking care not to overcrowd the pan. Fry for about 5 minutes until golden brown then flip and fry for another 4 minutes. Drain on paper towels and repeat until all the cakes are cooked.

  • To bake the cakes, line a baking sheet with parchment paper and preheat an oven to 375°. Place the cakes on the prepared sheet and bake for about 20 minutes until the cakes begin to brown. Carefully flip and bake for another 15 to 20 minutes until golden brown on both sides. Remove from the oven and let sit for another 10 minutes before serving.

Makes 10 2-inch cakes

spiced teff cakes

Other patties and burgers to enjoy from Lisa's Vegetarian Kitchen:
Potato Patties Stuffed with Spiced Green Peas (Aloo Matar Tikki)
Sweet Potato and Chickpea Patties with Avocado and Tomato Salsa
Chickpea Patties Smothered in Vegetable Gravy
Nigerian Black-Eyed Pea Patties with Pilipili Sauce

On the top of the reading stack: The Chickpea Flour Cookbook: Healthy Gluten-Free and Grain-Free Recipes to Power Every Meal of the Day

الجمعة، 2 أكتوبر 2015

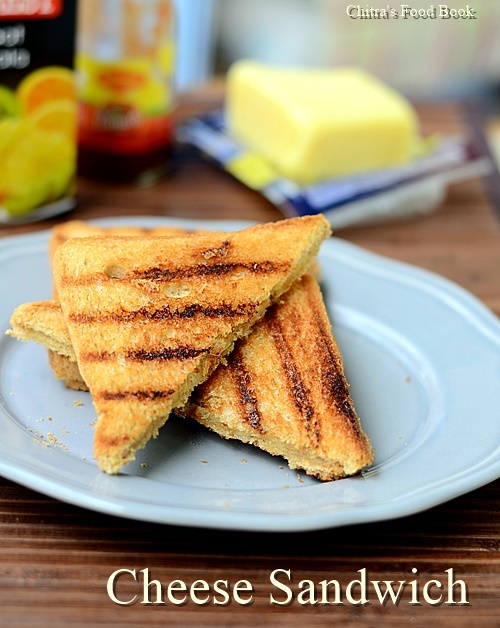
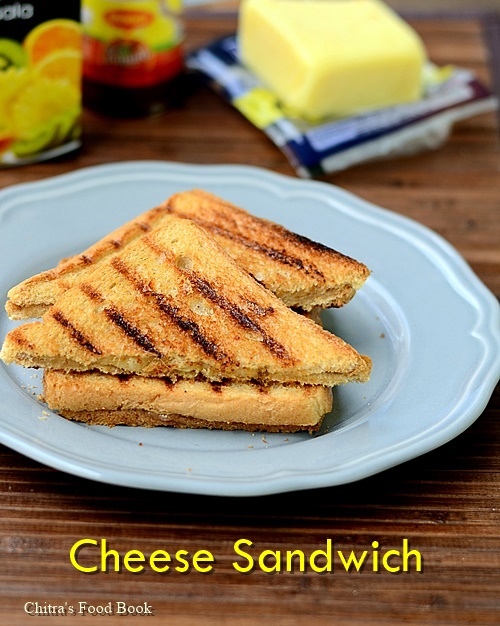
Grilled Cheese Sandwich Recipe-Sandwich Recipes For Kids

Grilled cheese sandwich
Grilled Cheese Sandwich is one of the sandwich recipes I make often for my daughter’s breakfast,mostly on Sunday mornings.She loves it a lot.For my daughter I use milk bread and mozzarella cheese whereas I make the same for myself and Sendhil by using cheddar cheese & whole wheat bread.My family likes this this sandwich in Indian style adding chopped green chillies,coriander leaves and chat masala powder.Sometimes I add tomato ketchup and mayonaise too.This sandwich can be prepared with many variations as per our family’s preference.Whatever be the stuffing,it’s finally the cheese that make the kids love this sandwich.
Before going to the recipe,I would like to mention a few lines about online grocery shopping.Recent days I have been purchasing groceries Online Via Bigbasket.com.Mostly I buy the ingredients which are not found near my house.Recently I bought cheddar cheese , blueberries,Flax seeds,millets , millet flour and some organic foods.I am very much happy with their customer service and the quality of the items.With the booming trends of online shopping, there is not even a single area that has been left untouched. Right from a pin to a plane, you can get almost everything with the help of websites and mobile applications. Keeping this in mind, many startups have chosen the line of supplying the grocery and the stuffs available in the supermarkets online. To simply state the things, the concept of the online supermarket Chennai is getting highly prevalent these days. Same goes with the fact when they order online grocery Chennai. Right from the imported food items to the gourmet and the branded foods, you can get almost everything online that is not available or even heard of at the traditional supermarkets. 
To ease down the satisfaction levels of the customers, it has been seen that these apps and websites provide the options of easy return and replacement as well. If you are not satisfied with the quality of vegetables that is delivered to you, you simply have to request a return of your money and the problem would be solved. Also on days when there are strikes or the prices are reaching new heights every day, keeping yourself limited to the online style of grocery, shopping can help you save a lot of People can easily look for offers and discounts to buy online these days through some websites that offer such coupons. Moreover when you sign up for the newsletters of these websites, they constantly keep on sending you the details related to the offers that they have launched. Taking benefit of such situations, it will be easy to place orders, get things delivered and stay assured about the quality of the branded and imported food items that you are investing in.
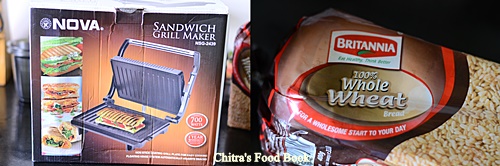
Lets see how to make this yummy Indian style perfectly grilled Cheese Sandwich recipe.If you don’t own a grill sandwich maker,you can try the same in oven or tawa.
Grilled cheese sandwich

Grilled Cheese Sandwich Recipe


Grilled Cheese Sandwich Recipe How to make grilled sandwich recipe using sandwich maker
Cuisine: Indian
Category: Breakfast
Serves: Serves 3
Prep time: 10 Minutes
Cook time: 5 Minutes
Total time: 15 Minutes

INGREDIENTS

  • Wheat bread or milk bread- 16 nos (Makes 8 pairs)
  • Grated Cheddar cheese or mozarella cheese-2 cups (200gms)
  • Finely chopped Green chillies - 2 nos
  • Chat masala powder - 2 tsp (Adjust as per the taste)
  • Coriander leaves - 2 tbsp
  • Tomato sauce & Mayonnaise - as needed(optional topping)
  • Salt - as needed
  • Butter - to brush the bread
METHOD
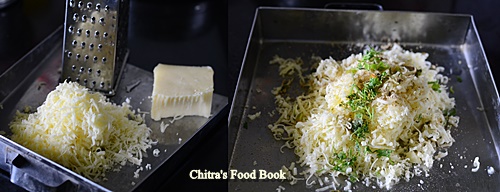
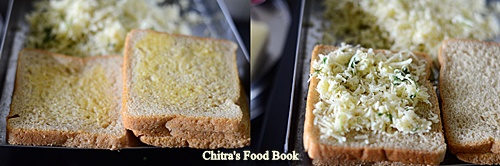
  • Grate the cheese and mix the chopped chillies,coriander leaves,salt and chat masala powder.Replace green chillies by pepper powder or red chilli powder as per your taste.Add as per your taste.
Grilled cheese sandwich
  • Take 2 bread slices and brush one side of the bread with butter at room temperature.Spread the cheese mixture on the other side of one bread slice.Cover it with another slice.Make sure the buttered side is facing up.
Grilled cheese sandwich
Grilled cheese sandwich  
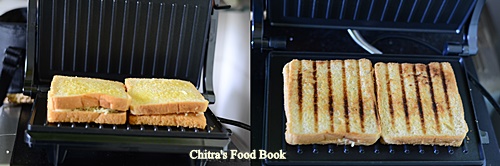
  • Take the grill sandwich maker and place the sandwich with buttered side touching the hot plate.
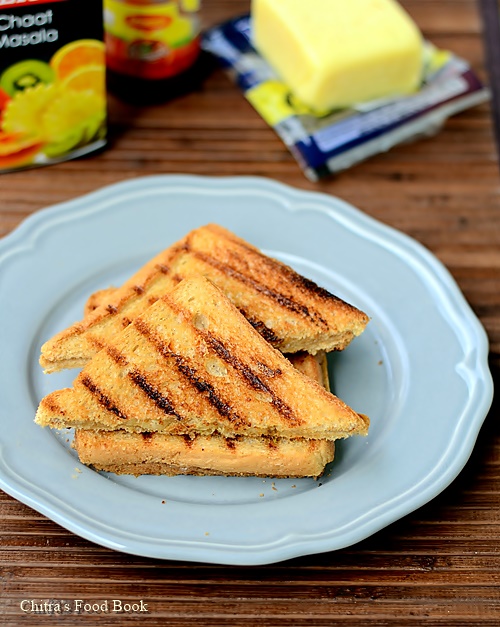
Toast the slices till its done.Serve hot !
Grilled cheese sandwich
Note
  • You can add an additional topping of tomato sauce or mayonnaise.
  • You can skip chillies or pepper powder and use chat masala alone if making for kids. 

Enjoy this yummy,cheesy grilled sandwich for your breakfast !
Grilled cheese sandwich

No Croutons Required - Early Autumn Edition

Welcome to the September 2015 edition of No Croutons Required, a monthly event featuring vegetarian soups and salads, alternately hosted by my good friend Jacqueline of Tinned Tomatoes and myself. This month we have 9 recipes to share. Perhaps because September was warmer than usual, we have a good selection of salads this time around. As always, a special thanks to all who took the time to submit a recipe. Without further ado, settle in and have a look at these creative dishes.

pickle and green bean potato salad
Recipe: Pickle and Green Bean Potato Salad

Chef: Janet
Blog: The Taste Space
Location: Ontario, Canada

First up is Janet with this delightful salad that surely would make for lovely picnic fare or a main salad dish anytime of year. Potatoes and green beans are dressed up with olive oil, diced pickles and some pickle juice, Dijon mustard, garlic, shallots, seasoning and filled out further with white flageolet beans to make a main course salad. Yes please. When asparagus is in season, consider using that instead of the green beans.

creamy potato salad
Recipe: Creamy Potato Salad

Chef: Cate
Blog: A Travelling Cook
Location: Germany

Up next is another potato salad and it also happens to include pickles. This intriguing creamy salad features potatoes, pickled cucumbers, green onion and baby peas. Another mayo free dish, these mouthwatering vegetables are dressed with avocado, pickle juice, chipotle chilli flakes, lemon juice, fresh dill and mint. Another salad that would be delicious anytime of year, for any occasion.

Recipe: Quinoa, Cashew and Honeyed Carrot Salad

Chef: Johanna
Blog: Green Gourmet Giraffe
Location: Australia

What a way to honour your father. A long time contributor to NCR, Johanna shares this substantial salad featuring mighty quinoa, roasted carrots with honey and cumin and toasted cashews. Dressed all up with olive oil, more cumin, paprika, honey, lemon juice, fresh mint and garnished with lemon rind and crumbled feta, you'll be dreaming about this salad even before you try it.

Chickpeas, carrot and watercress salad
Recipe: Chickpeas, Carrot and Watercress Salad

Chef: Haniyah
Blog: No Fussy Eaters
Location: UK

Chickpeas please. In a salad, they certainly shine. Here they come together with grated carrots, watercress, spring onion and parsley. This beautiful bowl is lovingly smothered with mayonnaise and Greek yogurt and seasoning. You never can go wrong with chickpeas. Even the most avowed bean snubber will admit to enjoying chickpeas.

Green (Runner Beans, Peas) and Yellow (Courgette and Sweetcorn) Minestrone
Recipe: Green (Runner Beans, Peas) and Yellow (Courgette and Sweetcorn) Minestrone

Chef: Shaheen
Blog: Allotment 2 Kitchen
Location: UK

A wonderful way to incorporate homegrown golden yellow courgette and runner beans, this warming dish is certainly appealing to me. Along with those treats, we have onion, garlic, fennel, mint, basil, arborio rice, peas and sweet corn. Fresh and tasty indeed.

Recipe: Chopped Egg, Avocado & Tenderstem Broccoli Salad

Chef: Jacqueline
Blog: Tinned Tomatoes
Location: UK

I don't eat eggs very often but if I did this salad would be served up right way. Offered up by dear Jac, salad leaves, tenderstem broccoli, avocado, cucumber and hard boiled eggs are dressed with a salad cream. If you like, dress it all up with avocado dressing instead or anything you like.

urad dal tomato soup
Recipe: Urad Dal Tomato Soup

Chef: Lisa
Blog: Lisa's Kitchen
Location: Canada

My contribution this month is a nourishing and easy creamy urad dal soup with fresh tomatoes from my garden. A long time favourite of mine, red pepper is added, along with chilies and this lovely soup is tempered with cumin seeds, dried red chilies, ginger, asafetida and garnished with fresh parsley. Just what I want when the deep freeze sets in.

Recipe: Tender Ridge Gourd Salad with Nuts

Chef: Lata
Blog: Flavours and Tastes
Location: Lomé, Togo

Tender ridge gourds are featured in this salad, along with cherry tomatoes, sour grapes, mixed toasted nuts and some chilli flakes for a bit of heat. Feel free to add any vegetables you like drizzled with some fresh lime juice. Easy to prepare and surely delicious.

Recipe: Butternut Squash, Chilli and Ginger Soup
Chef: Amy
Blog: Lush Eats
Location: UK

We don't have a picture of this dish, but that doesn't matter because this autumn soup is sure to get your tastebuds going with just a recipe. Butternut squash is surely a fall staple, and here it is combined with onion, garlic, fresh ginger and chilies. A bit of coconut milk would be nice here and surely a sprinkling of pumpkin seeds.

And that concludes the September 2015 edition of No Croutons Required. Jacqueline will be hosting for October. Check her site for details.