الاثنين، 22 يوليو 2013

No Croutons Required - Bean Salads

The challenge for July was to come up with a vegetarian salad featuring legumes. It's plenty hot this month and salads are an easy way to provide nourishment without too much fuss or heat in the kitchen. A special thanks to all the cooks who submitted an entry. I kindly ask that you vote for your favorite in the comment section or via email. Please note that neither my submission nor Jacqueline's is eligible for the vote. Without further ado, let's serve it up.


Our first entry is this healthy Sprouted Black Chickpea Mixed Salad from Anshu of My Mom's Recipes. Intended as an entree salad, this one is a feast for the eyes and the body. Here sprouted black chickpeas are tossed with cherry tomatoes, sweet pepper, red onion, carrots, cucumber, beets, jalapeno, seasoning and olive oil and served over fresh greens and drizzled with some Italian dressing and garnished with Parmesan. That is one fancy salad that sounds perfect for hot summer days.

couscous salad

Next up is Elizabeth of Elizabeth's Kitchen Diary with this colorful Three Bean Couscous Salad that is a complete meal in itself though it was made as a side dish. Either way, this combination of red onion, couscous, red pepper, cannellini, flageolet and adzuki beans, sultanas, seasoning and parsley makes for an impressive patio dish that will surely impress your dinner guests.

chickpea salad

Janet from the Taste Space enters this month with a most flavorful Morrocan Carrot and Chickpea Salad that makes good use of pantry ingredients. Carrots, chickpeas, dates and cilantro are dressed with a mixture of cumin seeds, olive oil, lemon juice, sweetener and some seasoning. Sweet, earthy, tart and obviously nourishing, served alongside a bed of brown rice, you are in for one delicious supper.

kosambari

Kavitha of Techie Cookie Freaky shares an innovative Kosambari (With Strawberry) that I am certain I could not resist. Mung beans star here, along with grated carrots, lime juice, strawberries, olives, seasoning and red onion if you please. Certainly a lovely balance of flavors in this dish and yet another ideal summer meal.

black-eyed pea salad

My contribution this month is a Black-Eyed Pea Salad with Indian Spices that is sure to impress your dinner guests, especially if served in some radicchio leaves. I've combined earthy black-eyed peas, simmered with some salt and turmeric, and then tossed with tomatoes, green onions, ginger, fresh mint, chillies, chat masala and lime juice and then tempered with cumin seeds, chili powder, ground cumin, paprika and some rock salt. Simple, but most nourishing and light for a perfect summer meal on the patio along with some goat cheese toasts with fresh dill.

Potato and Bean Salad with Zingy Herb Dressing

My lovely friend and co-host of NCR, Jacqueline of Tinned Tomatoes, has prepared a substantial Potato and Bean Salad with Zingy Herb Dressing that cannot fail to please. This celebration of beans is comprised of wholegrain rice, jersey royal potatoes, black-eyed peas, kidney beans, ripe tomatoes, red pepper and dressed with fresh coriander, olive oil, lemon juice and freshly cracked black pepper. Comforting and delicious indeed.

halloumi salad

Our final entry is from Rachel Cotterill. This gorgeous Warm Halloumi Salad with Lime Dressing surely would make for a lovely lunch or light dinner to be enjoyed outdoors with some chilled wine. Halloumi is marinated in lime juice and olive oil and then seared, and combined with lightly steamed green beans, asparagus and edamame beans. The vegetables are arranged over salad greens and coriander and topped with the cheese. Elegant and an ideal summer time meal that may be filled out with some crusty bread.

Jacqueline will be hosting the August 2013 edition of No Croutons Required. Check back at the beginning of the month for the theme.

السبت، 20 يوليو 2013

Cracked Black Pepper Rice

cracked black pepper rice

This dish has been a staple rice dish in my kitchen as it is easy to prepare and appeals to a wide variety of tastes. It is best served chilled or at room temperature, so if you are making a more complex meal, you can make it up ahead of time. The process is rather unique, as you use a large quantity of water for a relatively small quantity of rice and cook the rice at a full boil instead of reducing the temperature to a simmer. The result is a nice sticky, zesty rice. It's such a treasured rice dish, so I am sharing this again, with updated photos.


Cracked Black Pepper RiceCracked Black Pepper Rice
Recipe by
Adapted from Lord Krishna's Cuisine: The Art of Indian Vegetarian Cooking
Cuisine: Indian
Originally published on April 5, 2007

Buttery basmati rice seasoned with fresh cracked black pepper

Print this recipePrint this recipe

Ingredients:
  • 1 1/4 cups white basmati rice
  • 8 cups water
  • juice from 1 lemon
  • 3 tablespoons butter
  • 2 bay leaves or a handful of dried curry leaves
  • 1 teaspoon sea salt
  • 3 teaspoons fresh cracked black pepper
Instructions:
  • Thoroughly rinse the rice under cold running water and soak in 8 cups of water for 20 to 30 minutes. Drain, reserving the soaking water, and let the rice sit in the strainer for 20 to 30 minutes to dry.

  • Pour the reserved water in a large saucepan and add the lemon juice, a dab of the butter, and the bay leaves or curry leaves. Bring to a boil over high heat. Stirring constantly, pour in the rice in a slow steady stream. Cook uncovered in briskly boiling water for 12 to 15 minutes or until rice is just tender and fluffy.

  • Drain the rice and let cool in the strainer for about 2 minutes. Discard the bay leaves if using, and spoon the rice into a large serving bowl. Stir in the remaining butter, salt and pepper. Toss gently to mix.

  • Chill or let cool to room temperature before serving.

Makes 5 to 6 servings
pepper rice

الجمعة، 19 يوليو 2013

Sweet Pongal Recipe / Sakkarai Pongal In Pressure Cooker - Pongal Festival Recipes

9320609906_31d98c943e_z
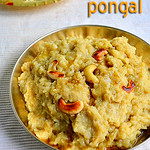
Usually i make aval payasam or moong dal payasam for friday pooja.Today being Aadi velli , i made this sweet pongal ( Chakkara pongal/sakkarai pongal in Tamil).I usually make sakkarai pongal for aadi velli , aadi perukku & thai pongal. For the other occasions we make rice payasam mostly.I have already posted an authentic, traditional sakkarai/ sweet pongal in my blog where i have shown how to make pongal in venkala paanai (pot). In this post , i have mentioned our usual method of making sweet pongal using pressure cooker. To make perfect sweet pongal, always use good quality raw rice & dark colored jaggery to get the best results in color & taste.Its very flavourful , tastes similar to Kovil pongal/temple pongal and u’ll love it for sure. Try this & let me know dearies Smile. Check out the video too !

Sweet pongal/Sakkarai pongal - Video !


9317822729_8fb5a9a214_z


Sweet Pongal Recipe


Sweet Pongal Recipe Sweet Pongal recipe-Sakkarai pongal -How to make Temple style sweet pongal recipe at home.
Cuisine: South Indian
Category: Sweet
Serves: Serves 3
Prep time: 10 Minutes
Cook time: 20 Minutes
Total time: 30 Minutes


INGREDIENTS
1 cup - 200ml
To pressure cook
  • Raw rice – 1/2 cup
  • Yellow Moong dal – 1.5 tbsp ( add 2.5 tbsp for more dal flavor)
  • Water – 2.5- 3 cups(varies as per the quality of rice)
  • Salt – a pinch
For syrup
  • Jaggery – 3/4 cup ( use 1 cup for more sweetness)
  • Water – 1/2 cup
For Flavor
  • Ghee – 3 tbsp
  • Cardamom – 2 nos
  • Edible camphor – A pinch
  • Jaathikaai – A pinch
  • Cloves – 2 nos
  • Cashewnuts – 5-7 nos
  • Raisins – 5 nos (optional , i dint use)
METHOD
  • In a kadai , heat 2 tsp of ghee and roast the cashews , raisins, cloves & jaathikai. Powder the jathikkai and set aside.
sakkarai pongal tile1

  • In the same ghee , roast the moong dal till golden brown with a nice aroma.
  • In a pressure cooker base , take the washed rice & 3 cups of water. Add the roasted moong dal along with a pinch of salt. Pressure cook for 4-5 whistles till rice & dal turns mushy.Open the cooker & mash the rice , dal very well with a ladle..
sakkarai pongal tile2

  • In the meanwhile , prepare jaggery syrup. In a wide bowl , take the jaggery with 1/2 cup of water and allow the jaggery to melt completely. Strain the impurities and again boil the syrup till it becomes frothy. Remove & add this syrup to the cooker.
 sakkarai pongal tile3

  • Mix well and add 2 tsp of ghee to avoid the pongal sticking to the bottom.Stir very well for 4-5 minutes till all the syrup gets mixed.
sakkarai pongal tile4
  • Pongal will start to thicken and leave the sides of the cooker . At this stage add the remaining 2 tbsp of ghee and the roasted cloves , cardamom powder,edible camphor powder & roasted jaathikai powder..Mix well & switch off the stove. Initially it will look semi solid in consistency. But it will thicken as time proceeds.Before serving u can reheat it adding little milk or water.
  • sakkarai pongal tile5

    If your pongal looks dry when warm , add little ghee & milk ,reheat it n serve ! It tastes divine !!Enjoy !

Note

  • Always add more ghee at the end for a nice flavour . It also makes the pongal soft & non sticky.
  • Use good quality ghee & rice for better flavour n taste.Adding jathikkai  & cloves gives a superb smell.Don't skip it
  • Milk can be added if pongal looks dry or hard. But addition of milk reduces the shelf life , color will slightly change and also the sweetness gets reduced.. For the above recipe u can add 1/5 cup of milk to the max..
  • Use dark colored paagu vellam to get a nice color.

الأربعاء، 17 يوليو 2013

Black-Eyed Pea Salad with Indian Spices

black eyed pea Indian salad

With sweltering weather hitting much of the Western hemisphere, more salads are served up on kitchen and patio tables. Spice it up is my motto, and so I was inspired to make an earthy Indian-style black-eyed pea salad with a hot, tart and tangy seasoning that required very little prep and cooking time. While the peas are boiling, chop up the ingredients needed and measure out the spices. It all comes together in no time at all once the black-eyes have cooled a bit.

I served the salad up in some radicchio leaves along with some lightly toasted crusty bread topped with some goat cheese and fresh dill and then quickly broiled for a few minutes. An Indian flatbread would be a nice addition to the meal, or a simple rice dish such as cracked black pepper rice.

black-eyed pea salad

This is my contribution to No Croutons Required, hosted this month by me. The theme is legume salads. I am also sharing with Jac's Bookmarked Recipes.


Black-Eyed Pea Salad with Indian SpicesBlack-Eyed Pea Salad with Indian Spices
Recipe by
Adapted from 1,000 Indian Recipes
Cuisine: Indian
Published on July 17, 2013

Simple summer salad of earthy and nutty flavored black-eyed peas tossed with a hot, tart and tangy blend of Indian spices

Print this recipePrint this recipe

Black-eyed peas:
  • 1 cup dried black-eyed peas
  • 1/2 teaspoon turmeric
  • 1 teaspoon sea salt
Salad:
  • 1 large tomato, partially seeded and diced
  • 4 green onions, trimmed and chopped
  • 1-inch piece fresh ginger, grated or minced
  • 1 tablespoon fresh mint leaves, finely chopped
  • 1 green or red chili, seeded and finely chopped
  • 1/2 teaspoon chat masala
  • juice from 1 lime (2 tablespoons)
Seasoning:
  • 1 tablespoon oil
  • 1 teaspoon cumin seeds
  • 1/2 teaspoon chili powder
  • 1/2 teaspoon ground cumin
  • 1/2 teaspoon paprika
  • 1/2 teaspoon rock salt (optional)
To serve:
  • radicchio leaves or mixed greens
Instructions:
  • Rinse the black-eyed peas and soak in enough water to cover for 6 hours or overnight. Drain and rinse, then transfer to a medium saucepan. Pour in 1 3/4 cups of water and add the turmeric and sea salt. Bring to a boil, then reduce the heat to medium-low, cover, and simmer until the peas are tender but not falling apart — about 45 minutes. Add more water as necessary. The water should evaporate, but if not, drain and let the peas cool.

  • Transfer the cooked peas to a large bowl and add the tomato, green onions, ginger, mint, chili, chat masala and the lime juice. Stir well to combine.

  • Heat the oil in a small saucepan over medium heat. When hot, toss in the cumin seeds and stir for 1 minute. Add the chili powder, ground cumin, paprika and rock salt if using, and stir for another 30 seconds. Stir the spices into the salad.

  • Taste for seasoning and serve at room temperature or chilled in radicchio leaves or over mixed greens, sprinkled with a little chat masala if desired, along with some rice or some crusty bread.

Makes 4 servings
black eyed pea salad with Indian spicing

More black-eyed pea dishes from Lisa's Vegetarian Kitchen:
Black-Eyed Pea Patties with Chili Sauce
Indian Black-Eyed Peas
Black-Eyed Peas with Potatoes and Tamarind
Curried Black-Eyed Peas

On the top of the reading stack: Affliction by Russell Banks

Audio Accompaniment: the ceiling fan

MEDHU VADAI RECIPE (WITH VIDEO) | ULUNDU VADAI


Medhu -- vadai

I have already posted urad dal vada with pepper. In that post i have mentioned the different methods used to shape vadas.By seeing that post many of my friends mailed & asked me to post a video on how to grind the vada batter using mixie & how to shape vada using a sheet and some easy tips to identify the consistency of batter..I was hesitant in the beginning whether i could do this and i wanted somebody to help me taking the video. Recently my in-laws visited my place and with the help of my MIL i took this video by keeping beginners in mind.The batter yield will not be good when we grind in mixie as compared to grinder.But i am sure u’ll get the taste & crispness equal to grinder batter…Please bear the mistakes in this video as this is my first attempt. I hope i can do it better in future & update here.I am also a beginner and i am still in the learning and experimenting phase.Most of us miss the batter consistency adding more water. So i have tried to give the exact water quantity i used .The quantity of water slightly differs as per the quality of urad dal.So keep this video as reference and adjust the water quantity.I have also given some tips in the “Note” section to adjust the consistency of batter if it is watery.Experts,please excuse and do share ur tips in the comments section Smile..
Recently i had vada for breakfast in AAB. I found jeera , pepper corns , onions and curry leaves . So i too started making in that way as my husband loves pepper more than onions. Here i have mentioned pepper & jeera in the ingredients list. For poojas & festivals we add only pepper.. Add onions alone or both onion & pepper as per ur wish.But remember to add onions just before frying vada else onions will leave water and make the batter watery. Always keep the batter refrigerated till use.No problem if one or two tsp of water goes extra. Batter will thicken if u refrigerate it. If u find the batter too watery , add few tsp of rice flour to make it thick & to make a proper shaped vada . But u should serve it hot . Otherwise vadas won’t be crispy in room temperature.Also if u add less water to grind the batter , vada will be hard. If u add the correct water & grind the batter , vada will stay crispy even after it cools down . Vada won’t drink much of oil if the batter is right. My MIL used to add a tsp of toor dal while soaking urad dal to avoid oil absorption. Beginners can follow this method.Some people soak little raw rice along with urad dal or add a tsp of rice flour to the batter. All these are not necessary if u grind the batter in right consistency..
Ok friends , let me know ur comments if u try this method. Good luck Smile with tongue out
Don't forget to check out my latest post with video about medhu vadai recipe using grinder

Do check out my mixed vegetable vada if interested ..

Medhu vadai closeup

INGREDIENTS
1 cup = 200 ml

  • White round urad dal – 1 cup
  • Green chillies – 3 nos
  • Ginger – 1 inch piece (chopped)
  • Water – 1/3 cup + 1 tsp (adjust as per the quality of urad dal , start with 1/4 cup of water & increase gradually)
  • Rice flour - 1 tsp 
To mix in the batter
  • Small onion/ Big onion – 15 nos / 2 nos
  • Curry leaves – Few
  • Pepper corns – 1 tsp
  • Jeera – 1/4 tsp
  • Asafetida / hing – 2-3 generous pinches
  • Salt - as needed

METHOD

  • Wash and soak urad dal for 1 hour and keep it inside the fridge( refrigerator).After soaking, drain all the water completely and keep in a bowl. Use this water for grinding the batter.Choose a bigger sized mixie jar to hold the urad dal batter.( jar should be double the size of batter).
vada tile1
  • First grind the green chillies , ginger piece without salt (updated). Grind it coarsely without adding water.
  • Then add the urad dal without water and grind for few seconds till it becomes a coarse paste.
vada tile3
  • Now add 1/3 cup of water and grind for a minute till smooth. Open the jar , wipe the sides & check the batter. .
vada tile4
  • If it is slightly coarse , add 1 more tsp of water.( Always add in tsp further).. Again grind & check the consistency. Batter should be thick, fluffy n smooth. When u drop the batter , it will slide slowly & it will form a stiff peak. One more tip is,drop a small quantity of batter in a bowl of water.It will float on top.Remove the batter & add some water to the jar, run the mixie once. Use this water for dipping ur hands while u deep fry vadas.
vada tile5
vada tile6
  • Refrigerate the batter.Remove,add salt & a tsp of rice flour and beat the batter well. Just before frying vadas , add the finely chopped onions , curry leaves and whole pepper corns & 1/4 tsp of jeera. Mix well. Dip ur fingers in the urad dal water , shape the vadas .Deep fry on both the sides till onion turns golden brown , remove , drain in a tissue paper & enjoy eating hot as evening snack with coffee !
vada tile7
Please watch the below videos for better understanding .. Hope it is useful Smile

Don't forget to check out my latest post with video about medhu vadai recipe using grinder


VIDEO FOR GRINDING THE BATTER

How to grind the vada batter for onion vada using mixie

VIDEO FOR SHAPING THE VADA USING A SHEET
How to shape the vada using a sheet

NOTE

  • 1/4 cup is the minimum quantity of water needed to grind the batter. It differs based on the urad dal. But after adding 1/3 cup , add water in tsp and check the batter every now & then. Please don’t add too much of water.
  • If u add more water,vada will drink more oil.To avoid oil absorption,u can add 1/2 tsp of toor dal along with urad dal while soaking.
  • The quantity of batter may not be more as u get in grinder. In grinder, we get batter for 25 medium sized vadas .In mixie , u can make 12-15 vadas.
  • Vada will absorb more oil if u deep fry in low heat oil.Heat of the oil should be right. It should not be smoky. If u deep fry when the oil is too hot , vada will brown quickly but the inside portion will not be cooked .
  • For proper cooking , always check the heat of oil by dropping a bit of batter. If it rises immediately , oil is in the correct temperature.
  • Adjust the flame to high and medium high while deep frying.
  • Deep fry in medium low flame for long time to get crispier vadas.For onion vada , u should remove the vada when the onions turn golden brown.For pepper vada , remove it when the sound ceases & turns golden brown.
  • Shaping of vada comes only by practice. Start using a sheet for shaping. Then u can make it directly using ur hands.
Don't forget to check out my latest post with video about medhu vadai recipe using grinder

Enjoy eating hot with coffee or tea !!
VADA WITH COFFEE

Don't forget to check out my latest post with video about medhu vadai recipe using grinder

الاثنين، 15 يوليو 2013

Paneer and Pea Curry Smothered in a Cashew Tomato Gravy

paneer curry

Since I started cooking Indian food some 20 years ago, shortly after becoming a vegetarian, paneer curries were one of my most delightful discoveries. Whenever I acquire a new cookbook or when I browse through talented bloggers offerings, paneer dishes usually end up bookmarked for future reference. One reason that I am not a vegan might very well be luscious chunks of paneer cheese transformed into a spicy curry. I just can't see myself giving that up, nor other treasured cheeses for that matter. Eggs I could do without, but not paneer, though it only appears on the menu every month or so.

My latest experiment, that was met with much praise from my diners, was this paneer and green pea curry simmered in a fresh and lightly spiced cashew and tomato gravy. Rich, yes, especially if you fry your paneer in ghee or butter, but easy to digest and truly fit for royalty, although it is really easy to prepare. As I often say, simplicity often results in the most gourmet and satisfying dishes that will grace your table. I dare say it is as good as my classic mattar paneer — maybe even better.

paneer coconut curry

Paneer and Pea Curry Smothered in a Cashew Tomato GravyPaneer and Pea Curry Smothered in a Cashew Tomato Gravy
Recipe by
Adapted from Monsoon Spice
Cuisine: Indian
Published on July 15, 2013

Lightly fried pieces of tender paneer cheese and plump sweet peas simmered in a thick, rich and spicy cashew and tomato gravy — a colorful and delicious centerpiece for any north Indian meal

Print this recipePrint this recipe

Paste:
  • 1/3 cup raw cashews
  • 1/2 cup grated coconut, fresh, dried or frozen
  • 1 1/2 -inch piece cinnamon stick, broken into pieces
  • 4 green cardamon pods
  • 4 whole cloves
  • 1 1/2 teaspoons cumin seeds
  • 2 to 3 red or green chilies, seeded and chopped
  • 2 to 3 tablespoons water
Curry:
  • 2 cups paneer cheese
  • 3 to 4 tablespoons ghee, butter, or oil
  • 1 small onion, finely chopped
  • 1-inch piece fresh ginger, finely chopped
  • 1 clove garlic, crushed or finely minced
  • generous 1/2 teaspoon turmeric
  • 1/2 teaspoon chili powder
  • 1/2 teaspoon amchoor powder (optional)
  • pinch of asafetida (optional)
  • 1 plum tomato, finely chopped
  • handful of dried curry leaves, crumbled
  • 1 1/2 cups coconut milk
  • a few handfuls of fresh cilantro, chopped
  • 1 1/4 cups green peas, fresh or frozen
  • 1/2 to 1 cup water, as needed
  • 1 1/2 teaspoons sea salt, or to taste
  • 1/2 teaspoon garam masala (optional)
Instructions:
  • Begin by making the paste. Soak the cashews in hot water for 20 minutes, then drain and combine with coconut, cinnamon stick, cardamom pods, cloves, cumin seeds and chilies in a food processor. Process until smooth, adding water as needed to make a smooth but fairly thick paste.

  • Cut the paneer cheese into 1-inch strips, squares or triangles about 1/4-inch thick, or chop into bite-size cubes.

  • Heat a few tablespoons of ghee, butter or oil in a non-stick skillet over medium heat. When hot, add the paneer pieces to the pan and fry, flipping or turning every few minutes, until lightly golden brown on both sides. Drain on paper towels and set aside.

  • In a large saucepan, heat another tablespoon of the ghee, butter or oil over medium heat. When hot, add the onion and stir for a 2 to 3 minutes until softened. Add the garlic and ginger and continue to stir for another 2 to 3 minutes. Now toss in the turmeric and chili powder as well as the amchoor powder and asafetida if using, stir for 1 minute, and then add the paste, tomato and curry leaves. Simmer for another few minutes, stirring often.

  • Stir in the coconut milk and cilantro and bring to a gentle boil. Reduce the heat to medium-low and simmer for 8 to 10 minutes, until thickened, stirring often.

  • Add the prepared paneer and peas to the pan. Pour in 1/2 cup to 1 cup water to achieve your desired consistency. Simmer for another 10 minutes, stirring often. Add the salt near the end of the cooking time, along with the garam masala if using. Taste for seasoning and serve hot with rotis and/or a bed of hot buttered basamati rice.

Makes 6 servings
paneer cheese pea curry

More paneer goodness from Lisa's Vegetarian Kitchen:
Mung Beans with Paneer Cheese
Paneer Cubes with Sun-Dried Tomatoes
Butter Paneer Masala

On the top of the reading stack: 1,000 Indian Recipes (Small Print) by Neelam Batra

Audio Accompaniment: the washing machine

CHETTINAD BRINJAL KOSUMALLI | SIDE DISH FOR IDIYAPPAM , IDLI


kosamalli copy
I tried this recipe from kumudham supplementary book.It is a good side dish for idiyappam , idli & dosa.It is one of the traditional chettinad recipes..We relished with idli rava idlis. It was very tasty. My husband is not fond of brinjal recipes but he loved this kosamalli a lot.  Smile
INGREDIENTS
  • Brinjal – 4 nos
  • Potato – 1 no
  • Tomato – 2 nos
  • Small onion – 20 nos
  • Tamarind – Berry size
  • Green chillies – 4 - 6 nos
To temper
  • Mustard seeds – 1/2 tsp
  • Urad dal – 1 tsp
  • Curry leaves – few
  • Red chillies – 2 nos
To garnish
  • Coriander leaves - few

METHOD
  • Slit brinjal into 4 pieces & cut the potato into two pieces. Pressure cook brinjal & potato for 2 whistles.Drain the excess water . Remove the skin of brinjal & potato and mash them well.Soak tamarind in warm water & take the extract. Set aside.
kosamalli tile3
  • In a kadai , temper mustard seeds , urad dal , red chillies & curry leaves.Then saute onions , green chillies & tomato pieces. Saute for few minutes. Add the drained water from the vegetables & allow it to boil..
kosamalli tile1
kosamalli tile2
  • Now add the mashed vegetables & tamarind extract.Allow it to boil for few minutes.This gravy should be slightly watery.Garnish with plenty of coriander leaves.
kosamalli tile4


kosamalli ladle