الثلاثاء، 19 مارس 2013

Black Bean and Quinoa Mexican-Style Chipotle Vegetarian Chili

black bean quinoa chili

For someone as enamored of Mexican food as myself, it's rather surprising I suppose that I've seriously acquainted myself with chipotle peppers only this past year. Sure, I've used canned chipotles in adobo sauce on an occasion or two, but the adobo sauce quite overwhelmed any appreciation I might have gained for the pepper on its own. After receiving some chipotle spice blend and also finding the dried whole chipotles in the market, I am quite taken with the smoky heat and depth that these smoke-dried jalapeños bring to food. I expect that chipotles will find their way into many of my Mexican-style recipes from hereon…

…such as in this thick, smoky and spicy chili. Loaded with black beans, quinoa and plenty of vegetables, this simple and full-flavored chili is a complete, nourishing and filling meal in one pot. And it makes enough to feed a family or, in my case, to send a husband off to work with lunch for a few days. A slice of two of homemade cornbread on the side makes this chili a terrific meal.

black bean quinoa chipotle chili

If you don't have chipotle powder or dried whole chipotles, substitute extra chili powder or paprika and a dried whole red chili or two. For the smoky flavor, add a drop or two of liquid smoke or a pinch or two of smoked paprika.


Black Bean and Quinoa Mexican-Style Chipotle Vegetarian ChiliBlack Bean and Quinoa Mexican-Style Chipotle Vegetarian Chili
Recipe by
Cuisine: Mexican
Published on March 19, 2013

Thick, smoky, spicy and zesty chili loaded with black beans, quinoa and plenty of vegetables for a complete, nourishing and filling meal in one pot

Print this recipePrint this recipe

Ingredients:
  • 1 cup dried black beans (3 cups cooked or 2 14 oz cans)
  • 1 cup uncooked quinoa
 
  • 2 dried whole chipotle peppers
  • 1/2 cup sun-dried tomatoes
  • 1/2 oz (14 g) dried mushrooms
 
  • 1 tablespoon olive oil
  • 1 large onion, chopped
  • 1 large carrot, diced
  • 2 stalks celery, sliced
  • 1 small cauliflower, cut into 1-inch florets
  • 2 cloves garlic, minced
  • 2 to 3 jalapeños, seeded and finely chopped
 
  • 2 to 3 tablespoons chili powder
  • 1 tablespoon ground cumin
  • 1 teaspoon paprika
  • 1 teaspoon dried oregano
  • 1/2 teaspoon chipotle powder
  • 1/2 teaspoon ground coriander
  • 1/2 teaspoon cayenne
 
  • 5 to 8 button mushrooms, sliced
  • 1 large tomato, chopped
  • 1 to 2 cups of vegetable stock or water
  • 2 ears fresh corn or 1 1/2 cups frozen
 
  • zest from 1 lime
  • juice from 2 limes
  • sea salt and fresh cracked black pepper to taste
Garnish:
  • greek yogurt or cream (optional)
  • fresh grated Cheddar or jack cheese (optional)
  • fresh parsley or cilantro, chopped (optional)
Instructions:
  • Rinse the beans and soak for 8 hours or overnight in several inches of water. Separately, rinse the quinoa and soak for 8 hours or overnight in 2 cups of water.

  • Drain and rinse the beans, then transfer to a medium saucepan and cover with several inches of fresh water. Bring to a boil, reduce the heat to low, cover, and simmer for 1 hour or until the beans are tender. Drain, transfer to a medium bowl, and mash about 1/3 of the beans with a fork or potato masher. Set aside.

  • Meanwhile, soak the dried chipotles, dried mushrooms and sun-dried tomatoes in hot water for 20 to 30 minutes, then drain and chop. Set aside.

  • Heat the olive oil over medium heat in a large heavy-bottomed saucepan. When hot, add the onions, carrots, celery and cauliflower, and stir for 6 to 8 minutes or until the onion is softened and the cauliflower just begins to brown. Now add the garlic and jalapeños and continue to stir for another minute or two. Toss in the spices and stir for another minute.

  • Now add the fresh mushrooms to the pan, turn up the heat to medium-high, and stir for 4 minutes or until the mushrooms begin to soften. Stir in the chipotles, sun-dried tomatoes, dried mushrooms, fresh tomato, black beans, and quinoa along with the quinoa's soaking water. Add about 1 cup of the vegetable stock or water. If you are using fresh corn, add it now. Bring to boil, reduce the heat to medium-low, cover, and simmer for about 30 minutes, stirring often and adding more stock or water as needed. If you are using frozen corn, add it during the last 10 minutes of the cooking time.

  • Remove from heat and stir in the lemon zest and juice, salt, and black pepper to taste. Serve hot garnished with a swirl of yogurt or cream, grated Cheddar or jack cheese and chopped fresh parsley or cilantro if desired.

Makes 8 servings
black bean chili

More one-pot meals from Lisa's Vegetarian Kitchen:
Azuki Bean Casserole
Black Bean Chili with Toasted Spices
Mesopotamian Barley, Chickpea, Lentil and Tahini Soup
Simple Chana Dal, Dill and Tomato Khichri

On the top of the reading stack: Mollie Katzens Sunlight Cafe

Audio Accompaniment: silence

الاثنين، 18 مارس 2013

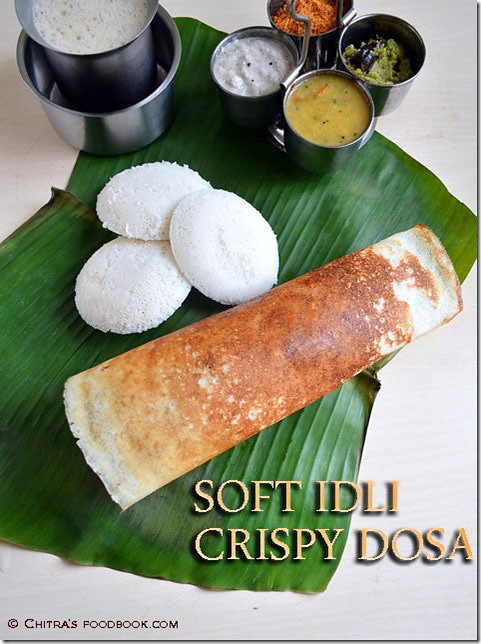
Idli Dosa Batter Using Mixie | Breakfast Recipes

Idli dosa batter using mixie
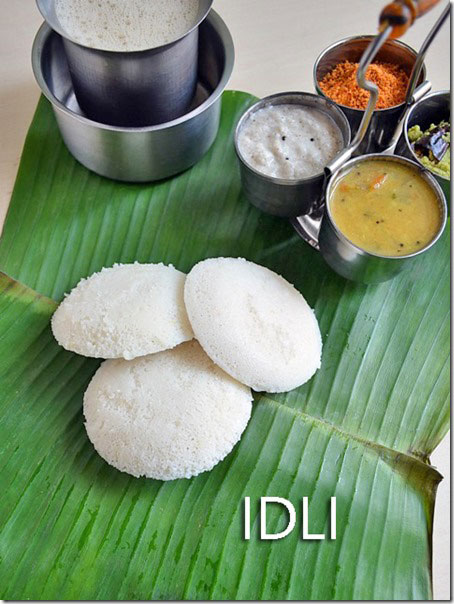
After 3 successful attempts , i am posting this recipe for idli batter using mixie. Most of us use grinder for making soft idli , crispy dosa batter.It yields more quantity,good texture and softness. But there are situations we may need to use mixie. Whenever i want to grind the idli batter in small quantity ( for two days use ) i use our Indian mixer. The problem in using mixie is we need to add more dal to get soft idli .But for grinder we use 6:1 ratio, sometimes 8:1 too.I wanted to make soft idlies with less dal .So i used aval /poha to replace dal and tried it.It does the magic here.One more issue with mixie is , the jar gets heated up very soon.So I used ice cold water for grinding the batter. This post may be boring to the experts,but for beginners and for people in abroad who don’t own a grinder, this post would be useful  Winking smile. Experts , do leave ur suggestions and tips Smile .If u have good quality urad dal , use the same proportion of ingredients mentioned below, otherwise make it 4:1 ratio of rice and dal and try for the first time.Based on the result , change the quantity. Please go through the “Notes” section for variations & tips for fermentation.For people who live in cold countries i have made a separate post for fermentation of idli batter with stepwise pictures.Please check this link. Lets see how to make soft idli & crispy dosa batter at home using mixie !
Idli dosa batter using mixie

Idli dosa batter using mixie


Idli dosa batter using mixie How to make soft idli and crispy dosa using mixie
Cuisine: Indian
Category: Breakfast
Serves: 25 nos
Prep time: 24 Hours
Cook time: 10 Minutes
Total time: 24H10M


INGREDIENTS
      1 cup = 200 ml
  • Idli rice / salem rice – 2.5 cups
  • Round white Urad dal – 1/2 cup
  • Thick Aval / poha – 1/4 cup
  • Methi seeds – 1/2 tsp
  • Salt & water – As needed
METHOD
  • Wash the rice twice and soak it  in a bowl for 2 hours. Wash (once) & soak the dal, aval/poha, methi seeds together in a bowl for 1-2 hours.
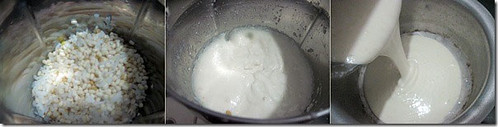
  • Drain the soaked water completely and take the dal mixture in a mixie jar.Add 1/2 cup of  ice cold water and grind for 2 minutes.
  • Again open the lid and add 1/4 cup of water & grind for another minute. It will become a smooth paste..Remove the dal & keep it in a big vessel.U can see micro bubbles in dal.This shows the correct consistency.Choose a big vessel to hold double the quantity of batter.The color of the batter may be slightly yellow.Don’t panic, its because of the methi seeds.
Idli dosa batter using mixie
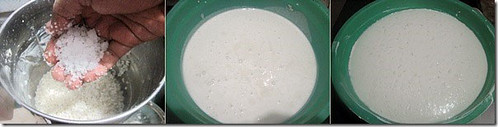
  • Leave the jar for 10 minutes.Let it take rest. Drain the water from the soaked rice and add to the jar.Add the required salt,1/2 cup ice cold water and grind for 2-3 minutes. Now open the lid and add more water in regular intervals till u get a smooth batter.Make sure rice is not coarse or grainy.In total,this batter takes 1.5 – 2 cups of water in total for rice+dal.
  • Now remove the batter & mix with urad dal batter. Mix it well using your hands ( This helps for fermentation) .Keep the batter covered and let it ferment over night or 12 hours.
Idli dosa batter using mixie
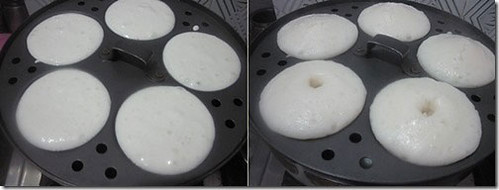
  • The next morning , the batter would be raised well.. Mix it well using a ladle and make idlies in idli plate.Idli may bulge after steaming, so add batter till 3/4th of the mould to get small sized idlies.
  • Steam it for 10 minutes.It will be very soft to touch and non sticky.Serve hot with chutney or sambar !
Idli dosa batter using mixie
Enjoy !
Note
  • As i mentioned use less dal only if the quality is good .Otherwise use 1/2 cup of dal for 2 cups of rice. ie rice n dal should be 4:1.
  • Adding methi seeds gives a nice flavour to dosa. Don’t avoid it.
  • U can add more urad dal to get the softest idlies ie  use 4:1 rice n dal. Here i used 5: 1.
  • U can also replace aval with cooked rice..Addition of aval gives u the golden brown colored crispy dosa like u c in the above picture.
  • Soaking time of minimum 2 hours is a must.
  • For making dosa , take the required batter in a separate bowl , add little water ( 1/4 cup ) .Then make dosa. For crispy dosa , heat the tawa . Drizzle some water & check if its hot. Now reduce the flame and take a ladle ful of batter. Pour & spread it well to make it thin.Pour some oil around the dosa after its half cooked on top.Now increase the flame and let it cook till the sides lift. By this time , the open side will also be cooked. So no need to flip & cook. Fold the dosa and serve hot !
You Might Also Like :


Crispy dosa

TIPS FOR FERMENTATION

After going through some websites ,  i am giving the tips for batter fermentation. Hope it will work for u Smile ..
  • First recommended thing for batter fermentation is to mix the batter using your hands.Mix the dal and rice batter thoroughly.. Uneven mixing causes failures. Mixing them by hand works best!
  • A warm temperature is essential for fermentation. 25 to 28 °C (77 - 82.4 °F) will be ideal. If the weather is cold, keep some warm water in a large bowl and immerse the vessel containing the dough. To help maintain the temperature of the warm water bath, cover it with a blanket, or better, use a regulated heater, like a heating pad or aquarium heater. Even easier, turn on the light in the oven, and use that to keep the batter warm.
  • When u grind the batter , pre heat the oven in 90c for 10 minutes and switch off the oven.Now keep the batter covered inside the oven and turn the oven lights on.. It helps ..
  • Add 1/4 tsp of baking soda or baking powder to the ground batter and then ferment. It will help the batter to raise well in harsh cold conditions..
  • Allow at least 8 - 12 hours to ferment. If you don't see tiny bubbles the next morning, the dough will not rise and you have to start all over again.
  • If nothing works for u , try adding a fermentation starter like a spoonful of commercially prepared idli batter as they have live culture, it helps for fermentation..
  • Use chlorine-free water when grinding, as this will be the water that the batter will have in it when fermenting. Tap water will work, but will inhibit the ferment a little. Most modern water filters remove both chlorine and chloramine. Use non-iodized salt such as ‘Kosher salt’ and Use spring water, boiled or filtered tap water to avoid Chlorine/Fluorine. For people who live in cold countries i have made a separate post for fermentation of idli batter with stepwise pictures.Please check this link.


الأحد، 17 مارس 2013

Linguine with Pea-Basil Pesto and Mushrooms

pea basil pesto pasta

It's not all that often that I cook pasta, but when I do it surely is a comfort. Coming as it does in so many shapes and sizes and varieties, the possibilities for pasta are endless, and if you are extra ambitious you may want to make your own fresh pasta at home. I rather cheated here I suppose because I used fresh pasta from the grocery store down the street. No matter, as it didn't spoil the dish in the least. And it's green too and thus a timely post for an easy St. Patrick's Day meal.

Opting out of a tomato based sauce, I went for this fresh pesto sauce with peas and basil. Keep this one in mind for summer when you have an overabundance of fresh basil growing in your herb garden and fresh peas on hand at your local market. The depth of flavors goes so well with sautéed mushrooms, which are pretty much a must for me when I think of pasta for dinner.

pesto pasta with mushrooms

This dish is vegan friendly too, if you omit the cheese. I was rather sparing with it myself because I wanted the fresh pesto flavor to shine along with the meaty mushrooms, and I don't think you will be disappointed if you leave it out altogether. Use your favorite pasta because it will taste just as well with any noodle or shell pasta, and feel free to load it up with lots of cheese if that suits your fancy too.

Linguine with Pea-Basil Pesto and MushroomsLinguine with Pea-Basil Pesto and Mushrooms
Recipe by
Cuisine: Italian
Published on March 17, 2013

Pasta tossed with mushrooms and a fresh and delicious basil, pea and walnut pesto

Print this recipePrint this recipe

Ingredients:
  • 1/2 oz (14 g) dried mushrooms
  • 3 tablespoons olive oil
  • 1 small onion, chopped
  • 2 cloves garlic, chopped
  • 1 to 2 jalapeños, seeded and chopped
  • 1 1/4 cup fresh or frozen peas
  • a few handfuls of walnuts, chopped
  • large handful of fresh basil, torn or chopped
  • sea salt and fresh cracked black pepper to taste
  • 2 to 4 tablespoons soft goat cheese or ricotta (optional)
  • 8 oz (250 g) button mushrooms, sliced
  • 12 to 16 oz (350 to 450 g) fresh or dried linguine or other pasta
  • 1/2 cup fresh grated Parmesan cheese (optional)
Instructions:
  • Soak the dried mushrooms in 1 1/2 cups of hot water for 20 minutes. Drain, reserving the soaking liquid, and roughly chop the mushrooms. Set aside.

  • Heat 2 tablespoons of the oil in a large skillet over medium heat. When hot, add the onion, garlic and jalapeños, and stir for 3 to 4 minutes to soften the onion. Stir in 3/4 cup of the peas along with most of the walnuts (reserve some for garnish) and continue to stir for another minute. Toss the basil into the pan, pour in 2/3 cup of the reserved mushroom soaking liquid, and season with salt and black pepper to taste. Stir in the cheese if using, remove from heat, and set aside to cool for a few minutes.

  • Transfer the mixture to a mortar and pestle, blender or food processor, and process until mostly smooth, adding more of the reserved liquid as necessary. Set aside.

  • In the same skillet, heat the remaining tablespoon of oil over medium-high heat. When hot, toss in the fresh and dried mushrooms and stir for 5 minutes or until the fresh mushrooms begin to brown and lose some of their juices. Remove from heat.

  • In a large pot, cook the pasta according to the instructions on the package, adding any remaining mushroom soaking liquid to the cooking water along with salt and a drop of oil. Drain, rinse quickly with cold water, and return to the pot and gently reheat, stirring in the pesto and cooked mushrooms. Add a few sprinkles of water if it is too dry and stir in the remaining peas and check for seasoning.

  • Serve hot, garnished with Parmesan, walnuts and fresh basil leaves if desired.

Makes 4 to 8 servings

pesto pasta with mushrooms

Other pasta creations you are sure to enjoy from Lisa's Vegetarian Kitchen:
Kamut Pasta with Sun-Dried Tomato Sauce
Penne with Indian-Style Tomato Sauce and Mushrooms
Jalapeño and Tomato Macaroni & Cheese

On the top of the reading stack: notes

Audio Accompaniment: Danny Cudd

الخميس، 14 مارس 2013

Rice and Cauliflower Pilaf

Rice and Cauliflower Pilaf

Readers will certainly want to try this incredible curried rice and cauliflower dish that I often make for special occasions. Certainly underrated, cauliflower just happens to be a winter vegetable that will enhance your dining experience and it's plenty good for you too. I think the reason vegetables are often absent from the dining table is because many of us grew up with vegetables that were either frozen, canned or cooked into submission so they ended up reaching the plate bland and soggy. The key to this dish is not to overcook the cauliflower. You will want the vegetable to have a just tender texture. Both the cauliflower and rice are a perfect platform for the spices that make this dish extra special.

I have adapted this from Yamuna Devi's Indian bible of authentic dishes entitled Lord Krishna's Cuisine. My regular readers will know that this book was my earliest introduction to Indian cooking shortly after becoming a vegetarian and there was no going back after that.

The recipes are easy adaptable for cooks outside of India and you will find plenty of elegant ideas to grace your breakfast, lunch and dinner tables. If you are new to Indian cooking, this is a most valuable resource, complete with tips and an extensive chapter devoted to general information about basics and important elements of Indian cuisine.

Covered in the book are all the essentials that make up the rich culture of Indian cooking. Dals, breads, vegetable dishes, dairy based dishes, chutneys, sauces and relishes, savories, snacks, sweets and beverages. This is my favorite gift to give if I think my recipient is keen on Indian food and wanting to learn how to make some wonderful dishes in their own kitchen. Perfect for novices and experienced cooks alike, how can you resist over 500 recipes complete with tips and serving ideas.


Rice and Cauliflower PilafRice and Cauliflower Pilaf
Recipe by
Adapted from Lord Krishna's Cuisine: The Art of Indian Vegetarian Cooking
Cuisine: Indian
Published on March 14, 2013

Simple, fragrant and delicious spiced rice pilaf with tender seasoned cauliflower — a stunning side dish for an Indian meal

Print this recipePrint this recipe

Cauliflower:
  • 1/2 cup grated fresh coconut or dried unsweetened coconut
  • 2 to 4 fresh green chilies, seeded and finely chopped
  • 1-inch piece fresh ginger, finely chopped
  • 3 tablespoons fresh parsley or coriander, chopped
  • 1/2 cup whole fat yogurt or coconut milk
  • 1 teaspoon ground turmeric
  • 1 1/2 teaspoons sea salt
  • fresh ground black pepper to taste
  • 3 tablespoons ghee or oil
  • 1 small cauliflower, chopped into 1 1/2 inch pieces
Rice:
  • 1 cup white basmati rice soaked in 2 cups of water for 20 minutes
  • 3 tablespoons ghee or a mixture of butter and oil, or oil
  • 1 1/2 teaspoons cumin seeds
  • 1 teaspoon brown mustard seeds
  • generous handful of dried curry leaves
  • 3 black cardamon pods, crushed
  • 1 teaspoon ground coriander
  • 1/2 teaspoon cayenne
  • a few pinches asafetida
  • 1 scant teaspoon jaggery or brown sugar (optional)
  • lime wedges for garnish
Instructions:
  • Begin by preparing the cauliflower. In a food processor (or your trusty magic bullet) pulse together the coconut, chilies, ginger, parsley, yogurt or coconut milk, turmeric, salt and black pepper.

  • Heat the ghee or oil in a large saucepan over medium heat. When hot, add the cauliflower pieces and stir for 5 to 7 minutes or until they begin to brown. Now add the coconut mixture to the pan and continue to stir for another few minutes until the cauliflower is just tender and the sauce has mostly evaporated. Transfer to a bowl and set aside.

  • Now drain the rice, reserving the soaking water. Heat 1 1/2 tablespoons of the ghee or oil in a large saucepan over medium heat. When hot, toss in the mustard and cumin seeds and stir and for 30 seconds or until the mustard seeds turn grey and begin to splutter and pop. Add the curry leaves, cardamom pods, ground coriander, cayenne and asafetida, and stir for another minute. Add the rice to the pan and stir for one more minute. Now pour in the reserved soaking water, stir in the jaggery or sugar, and bring to a boil. Stir in the prepared cauliflower, reduce the heat to low, cover, and simmer for 20 minutes or until the liquid is absorbed. Remove from heat and let sit for 5 minutes.

  • Add the remaining ghee, butter or oil, fluff with a fork, and serve hot or warm garnished with lime wedges.

Makes 6 servings

More rice dishes you are sure to enjoy from Lisa's Vegetarian Kitchen:
Buttered Lime Rice
Brown Lentils and Rice with Roasted Onions and Spicy Baked Tortilla Chips
Lemon Rice with Toasted Cashews
Baked Italian Brown Rice Balls (Arancini)

KARADAIYAN NOMBU ADAI RECIPE-SWEET&SALT VERSIONS


Karadayan Nonbu or Savitri Vratham is a traditional tamilnadu festival of fasting wherein married women will pray for the wellness and long life of their husbands. This nombu should be done exactly in the time when tamil month 'Masi' ends and the next month 'Panguni' starts. The reason why this fasting is carried out is that “ Savithri fought with yema (the God of Death) to save her husbands (Satyavan) life", the same way the married women should fast on this auspicious day for long life of their husbands. Unmarried woman also observe Karadayan Nombu and pray to Goddess Shakti to get good men as their husband.
Source : http://chandra.subramanianfamily.com/2009/03/karadiyan-nombu.html..

Before marriage , i have not celebrated this festival as my mom don’t have this practice. I heard about this celebration from my MIL.Initially i used to watch my MIL making adai.Now i can confidently make it on my own.It comes out very well. I love tying the yellow rope.More than me, my daughter is more curious about tying the yellow rope in her hand ;) Also we chant a few lines in front of the lamp while tying the rope.ie. “ "Urugadha Vennaiyum oru adayum vaithu nonbu notren oru naalum en kanavar piriyamal iruka vendum". And I am posting this recipe after finishing the celebration in my home :)

For making adai , we make processed rice flour at home.U can also use good quality store bought idiyappam flour. I have tried using both ways and they came out equally well in softness & texture.Usually people make a hole in adai like urad dal vada for even cooking.As my mil don't do that,I too don't put a hole in my adai ;)Its our choice finally!

Karamani /black eyed peas is the main ingredient for this adai. But my MIL adds other grains like ragi , mochaakottai ,chana , green gram , black gram , unpolished rice (nel) , wheat germs , toor dal to make it a mix of nine grains in very little quantity.

The color of sweet adai depends on the color of jaggery u use .


HOW TO MAKE PROCESSED RICE FLOUR

  • Raw rice / Maavu arisi – 1 cup
Wash & soak raw rice for 1.5 hours and drain all the water completely.Spread the rice in a news paper or white cloth to absorb all the excess water . Grind in mixie to make a fine powder. Sieve & dry roast the flour in low flame till u get light fumes from the flour.After roasting, try to draw a small kolam with it. If you able to draw it without cutting, flour is roasted well ( Kolam maavu padham).Sieve or grind once in a mixie if there are lumps after roasting. This is called processed rice flour. We use this flour for making adai.

How to make rice flour at home   How to make rice flour at home

Usually i make the flour ready in the previous day and make adai the next day ..
For 1 cup of raw rice , we get approx 1.75 - 2 cups of flour..


Karadaiyan nombu adai-Sweet&Salt

FOR SWEET ADAI

INGREDIENTS
  • Rice flour – 1 cup
  • Grated jaggery – 1 cup
  • Karamani + **other grains – 1/4 cup + 1 tbsp
  • Water – 1.5 cups
  • Cardamom seeds – few
  • Coconut bits – 2 tbsp
**Use a mix of white or brown channa,ragi,green gram,urad dal,toor dal along with black eyed peas(karamani).use more quantity of karamani which gives nice flavor to this adai.

METHOD
  • Roast karamani and other grains in little oil till nice aroma emanates.. Roast in medium flame for 6-8 mins. Pressure cook the grains adding 1 cup of water. Drain the water and keep the grains aside.
Karadaiyan nombu adai
  • Take water & grated jaggery in a wide bowl .Heat it and melt the jaggery completely. Strain the jaggery syrup and again transfer to the same bowl.
  • Allow the syrup to boil till the jaggery smell leaves..Now add the cooked karamani , coconut bits , cardamom powder and boil for sometime. Keep the flame low & add the rice flour in one hand while mixing with a ladle in other hand. Make sure to mix well without lumps. The mixture will thicken and will become a dough.

Karadaiyan nombu adai
  • After the dough is warm , grease ur palm with oil and take a small ball lime sized ball of dough. Flatten it like masal vada ..
Karadaiyan nombu adai
  • Steam it in idli pot for 10 - 12 minutes.. Remove & enjoy !


FOR SAVOURY/SALT ADAI

INGREDIENTS
  • Rice flour – 1 cup
  • Karamani + **other grains – 1/4 cup + 1 tbsp
  • Water – 2 cups
  • Coconut bits – 2 tbsp
  • Salt – As needed
To grind
  • Green chilli – 2 nos
  • Ginger – 1 inch piece
To temper
  • Cooking oil – 1 tbsp
  • Mustard seeds – 1/2 tsp
  • Urad dal – 1 tsp
  • Hing - 2 generous pinches
  • Curry leaves – few
**Use a mix of white or brown channa,ragi,green gram,urad dal,toor dal along with black eyed peas(karamani).use more quantity of karamani which gives nice flavor to this adai.


METHOD
  • Grind chilli , ginger along with salt to a coarse paste.
Karadaiyan nombu adai
  • Heat oil in a kadai and temper the above ingredients one by one in the same order. Then add water and add the ground green chilli , garlic paste .. Mix well and add the cooked grains, coconut bits . Mix well and allow to boil for sometime.
Karadaiyan nombu adai

  • Then add the rice flour and mix well in low flame to make a dough..
  • After the dough cools down , make small balls. Pat it like vada and steam in idli pot for 10 – 12 minutes..
Karadaiyan nombu adai

Note
I usually make processed rice flour with 1 cup of rice and divide the flour for both adais.
Also roast and pressure cook karamani + other grains together and divide the portions into two.
To get white colored salt adai,do not grind chillies and ginger.Instead,chop them finely and temper it.


Enjoy this festival day offering sweet n salt nombu adai.Ladies,don't forget to tie the rope ;)

الأربعاء، 13 مارس 2013

PAKODA KUZHAMBU RECIPE

 
Pakoda kuzhambu
Blogging has helped me to get many good friends.One such friend is Sudha..We became friends very recently, we discuss much about varieties of recipes..She always encourages me to post unique dishes. Last week when we were chatting , she asked me about pakoda kuzhambu. Though i have not tasted or tried it , i remembered the recipe i wrote in my cookbook long time back..She told its a famous gravy in chennai & asked me to try and post here..I quickly referred some websites to compare with my cookbook recipe and tried it. I loved it very much. The procedure and the taste is very similar to vada curry. After i surfed , i came to know this is a chettinad famous dish and it tastes good for rice , idli & dosa too. This gravy can be made with or without coconut as per our taste. I added little coconut paste for thickness.Also the pakoda recipe i’ve given here is an instant version. I have not used channa dal for making pakoda.Instead i used besan flour and made it like our onion pakoda. Usually Onions are chopped finely and added.I sliced it and used..Pakoda was very crispy..Do try this and let me know how u liked it.
Pakoda - kuzhambu


INGREDIENTS
FOR PAKODA
  • Gram flour/ Besan flour – 6 tsp
  • Rice flour – 2 tsp
  • Big onion – 2 nos ( thinly sliced)
  • Red chilli powder – 1 tsp
  • fennel – 1/4 tsp
  • Cooking soda – A small pinch
  • Curry leaves - Few
  • Salt & Water – As needed
FOR GRAVY
  • Cooking oil – 2 tbsp
  • Mustard seeds – 1/2 tsp
  • Urad dal – 1 tsp
  • Cinnamon – 1 piece
  • Cloves – 2 nos
  • Fennel seeds – 1/2 tsp
  • Small onion – 10 nos (finely chopped)
  • Whole Garlic cloves – 10 nos
  • Curry leaves - few
  • Red chillies – 1 no
  • Tamarind – A big goose berry size
  • Sambhar powder – 2 tsp
  • Salt & water – as needed
  • Grated coconut – 1 tbsp (to grind)
METHOD
  • Take a wide bowl and mix all the ingredients given under “For pakoda” adding little water to make a thick paste. Pinch small balls and deep fry the pakoda till onions turn golden brown.Set aside.
Pakoda kuzhambu tile 1
            Pakoda kuzhambu tile 2
  • In a kadai , heat oil and add cinnamon , mustard seeds , urad dal , fennel seeds, red chillies .. Once they r sautéed add onions , garlic cloves, curry leaves .Saute till onions turn transparent.
  • Now add the tamarind extract , sambar powder, a piece of jaggery and required salt & water. Allow it to roll boil for sometime.
Pakoda kuzhambu tile3
  • Grind the grated coconut to a smooth paste adding little water.
  • Mix the paste in the tamarind mixture.Add some more water if necessary and boil for few minutes. Finally add the pakodas , mix well and switch off the flame.
Pakoda kuzhambu tile 4
  • Garnish with coriander leaves..Serve hot !


Pakoda kuzhambu ladle
Note
  • If u want to make channa dal pakora , soak channa dal for 1 hour and grind it coarsely along with other ingredients given above. Finally sprinkle coriander leaves, mix well and deep fry ..
  • If u do not add coconut paste , the gravy tastes more like vatral kuzhambu..
  • While grinding coconut , u can also try adding fried gram dal , khus khus for variations.
  • Some people adds one small onion and jeera  while grinding coconut..

الثلاثاء، 12 مارس 2013

Classic Greek Salad Revisited

Greek Salad

I've been making my own Greek salad for years. The ones I have tried from most restaurants rarely satisfy. There is just no comparison to homemade versions. First, you typically only get about 4 olives, the Feta is not good quality and tends to be overly salty, and the vegetables are not as fresh as I would like, nor is iceberg lettuce of much use in terms of taste and nutritional value — it adds some crunch, but that's about it.

Classic Greek Salad

From my kitchen, you get a loaded up fairly classic version, with lots of good quality olives that are pitted just before being added to the salad and a decent quantity of delicious Greek sheep milk Feta. In addition to peppers, red onion and cucumber, I've added some slightly bitter endives, radicchio and some fresh leaf lettuce. For best flavor, mix your salad up ahead of time, seal tightly and chill in the refrigerator for a few hours before serving to blend the loveliness.

This is my contribution to No Croutons Required this month. The theme is raw soups and salads.

Greek SaladGreek Salad
Recipe by
Cuisine: Greek
Published on March 12, 2013

A dressed-up modern-style Greek salad with an assortment of leaf vegetables and plenty of Feta cheese and Kalamata olives

Print this recipePrint this recipe

Salad:
  • a few handfuls of leaf lettuce, torn into pieces
  • 4 Belgian endives, trimmed and chopped
  • 1 small radicchio, trimmed and chopped
  • 1 red bell pepper, seeded and cut into strips
  • 1 green bell pepper, seeded and cut into strips
  • 1 banana pepper, seeded and cut into strips
  • 1 small red onion, cut into half rings
  • 1/2 English cucumber, sliced
  • few handfuls cherry tomatoes, halved
  • 1 1/2 cups Feta cheese, crumbled + extra for garnish
  • 1 cup Kalamata olives, pitted
Dressing:
  • 1/3 cup extra virgin olive oil
  • 1/4 to 1/3 cup red wine vinegar
  • 2 to 3 tablespoons white balsamic vinegar
  • juice from 1 fresh lemon
  • 1 teaspoon dried thyme
  • 1 teaspoon dried basil
  • fresh cracked black pepper to taste
  • pinch or two of dried red chili flakes
Instructions:
  • Combine the salad ingredients in a large bowl.

  • In a small bowl, whisk together the dressing ingredients. Pour over the salad and gently toss to coat. Garnish with extra crumbled Feta cheese.

Makes 6 servings
vegetarian Greek salad

More Greek creations you are sure to enjoy:
Leek and Rye Berry Salad with Halloumi Cheese, Sun-Dried Tomatoes and Olives
Quinoa Dolmadakia (Stuffed Grape Leaves)
Skewered Greek-Style Salad

Audio Accompaniment: Erot