الثلاثاء، 26 مايو 2015

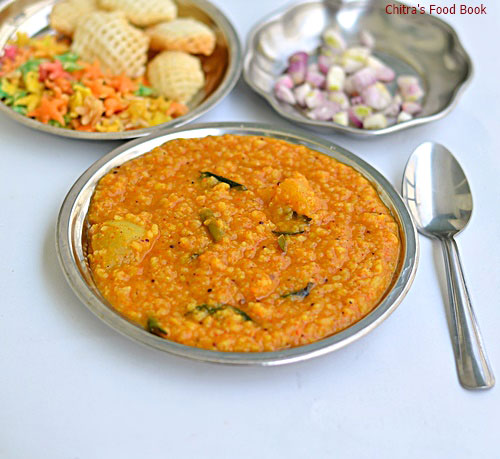
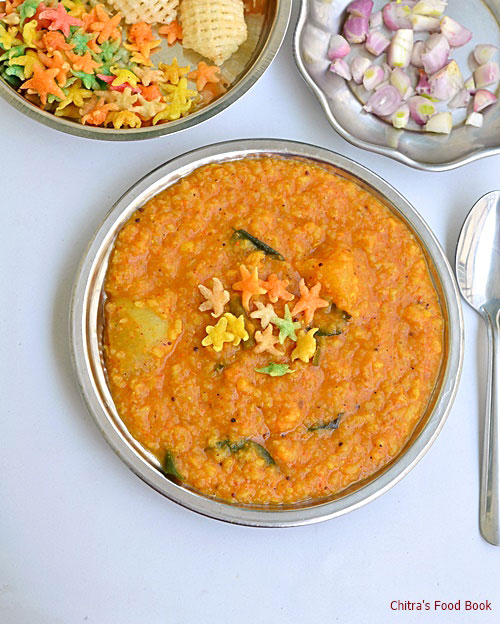
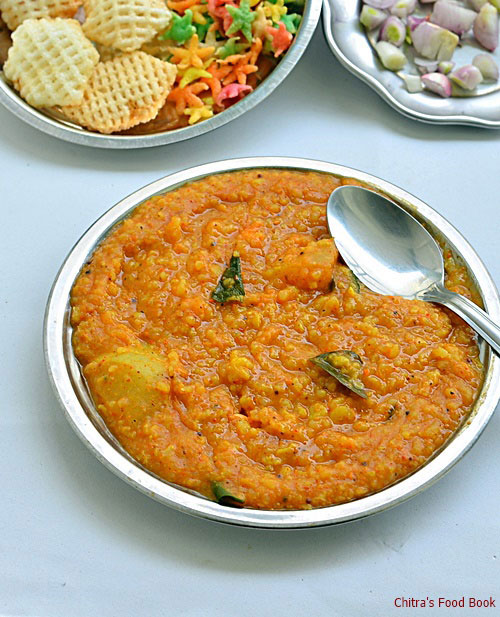
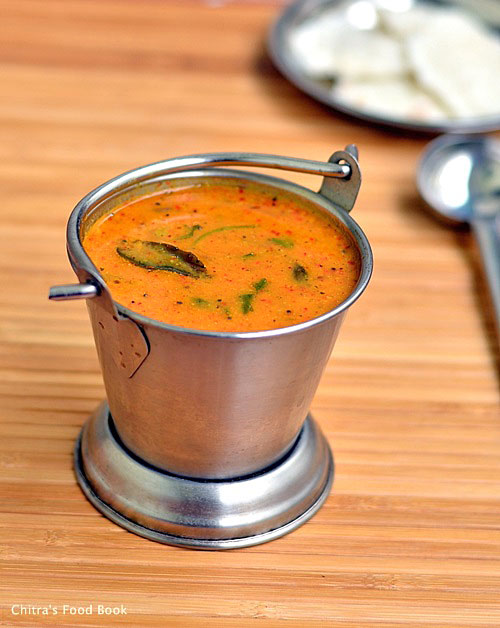
Udupi Sambar Recipe-Hotel Style-Side dish for idli,dosa

Udupi hotel sambar
Last week I tried a new sambar recipe for idli and that too without onion,garlic brahmin version after years.I came across this recipe in “The Hindu” Food safari section.The recipes i have tried from that section is always a super hit in my home.The best example is my soft kulcha recipe.The taste & cooking method of this udipi sambar is very close to my Hotel idli sambar using freshly ground sambar powder.So Sendhil & myself liked it a lot and relished with idli,dosaHappy.Try this recipe if you are looking for a no onion no garlic side dish for idli,dosa & pongal.You will love it !Lets see how to make this Karnataka Udupi's most popular sambar recipe with step by step pictures.


Udupi sambar recipe

Udupi sambar recipe


Udupi sambar recipe Udupi style no onion,no garlic hotel sambar recipe - Side dish for idli,dosa
Cuisine: Indian
Category: Side dish
Serves: Serves 4
Prep time: 10 Minutes
Cook time: 20 Minutes
Total time: 30 Minutes


INGREDIENTS
To pressure cook
  • Toor dal - 1/2 cup
  • Salt & water - as needed
  • Turmeric powder - 1/8 tsp
  • Tamarind - Small lemon sized ball
  • Jaggery - 1 tsp ( Use more if u like sweet sambar)
  • Cooking oil - 2 tbsp
To roast & grind ( for udupi sambar powder)
  • Cooking oil - 1 tsp
  • Dhania/Coriander seeds - 1 tbsp
  • Urad dal - 1.5 tsp
  • Red chillies - 6-7 nos ( Use byadgi chillies for bright red color)
  • Curry leaves - 1 sprig
  • Grated coconut - 3 tbsp
  • Asafetida/hing - 1/8 tsp
  • Methi seeds - 1/2 tsp
To temper & saute
  • Cooking oil or coconut oil - 2 tbsp
  • Mustard seeds - 1/2 tsp
  • Cumin seeds - 1/2 tsp
  • Green chilli - 1 no ( slit into 2)
  • Curry leaves - few
  • Brinjal,Yam or Pumpkin - few pieces
Coriander leaves - to garnish
Ghee – 1 tbsp
METHOD

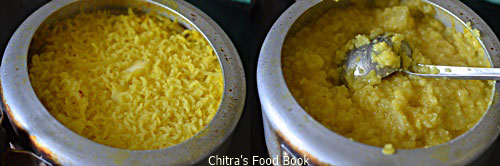
  • Pressure cook toor dal adding turmeric powder,a drop of oil and the required water.I used yam.So i added in the cooker itself.If you are using brinjal or pumpkin,do not add in the cooker.Cook the veggies separately in tamarind water.
Udupi sambar recipe

  • After pressure cooking,mash the dal well with a ladle.Set aside.Heat a kadai and roast all the above ingredients given under “to roast & grind”.Let it cool and grind everything to a smooth paste adding enough water.
Udupi sambar recipe
  • Add this paste to the cooked dal.Mix well and add 1/2 cup of water if the dal is too thick.
  • Heat oil/Coconut oil in a kadai and splutter mustard seeds,cumin seeds,green chilli and curry leaves. Saute for a minute.Add brinjal or pumpkin if using.Saute for a minute and add the tamarind extract,turmeric powder and salt.
Udupi sambar recipe
  • Add the dal + ground paste mixture.Add some water if necessary and allow the sambar to boil well for 5 minutes.Add jaggery when the sambar boils.Lastly garnish with coriander leaves.Transfer to a bowl.
  • Lastly add a tbsp of ghee if desired.Close the bowl with a lid.Serve hot with idli.
Udupi sambar recipe

Enjoy !


Note

  • You can add a tsp of chana dal along with other spices while roasting.
  • For variations,u can add 1/2 tsp of sambar powder while the tamarind water boils.
  • Add more jaggery if u like sweet tasting sambar based on the original one.I used only 1/2 tsp as per my family’s taste.


Try this no onion,no garlic udupi hotel style sambar.Enjoy with idli,dosa!!


Udupi sambar recipe


الاثنين، 25 مايو 2015

Chickpea, Olive and Feta Salad with Chat Masala Dressing

Chickpea, Olive and Feta Salad with Chat Masala Dressing

I'm trying to switch cooking gears from warming soups to cool and refreshing salads after summer made a quick and dazzling appearance after what seemed like a long cold winter and short cool spring. My first thought upon the arrival of hot weather was to make a simple chickpea salad with some fresh crunchy vegetables and my favorite Kalamata olives and sheep milk Feta cheese from a local Greek grocer — easy, nourishing and delicious with tantalizing contrasts of texture and color.

Using quality ingredients always makes these summer bean salads appealing, but what makes this salad different is the use of an Indian spice blend in the dressing. It may seem odd to combine an Indian spice blend with Mediterranean salad ingredients, but chat (or chaat) masala is such a vibrant spice blend that it deserves a wider scope than in just Indian food. A combination of dried mango powder, black salt and various seeds and spices, chat masala is hot, sour and salty all at the same time and goes wonderfully with cool or tangy foods — like a summer salad!

Good pre-blended and packaged chat masalas are easily available at Indian grocers, but you can make your own authentic spice blend that will keep for months using this recipe here.

Chickpea, Olive and Feta Salad with Chat Masala DressingChickpea, Olive and Feta Salad with Chat Masala Dressing
Recipe by
Published on May 25, 2015

Simple, colorful and refreshing summer chickpea salad with a zesty chat masala dressing

Print this recipePrint this recipe

Salad:
  • 1 cup dried chickpeas (3 cups cooked or 2 14 oz cans)
  • 1 yellow, orange or red bell pepper, seeded and chopped
  • 1 jalapeño, seeded and diced
  • 1 pint (2 cups) cherry tomatoes, halved
  • 2 tablespoons flat-leaf parsley, chopped
  • 1/2 cup black or Kalamata olives, pitted and halved
  • 1 cup Feta cheese, crumbled
Dressing:
  • 3 tablespoons olive oil
  • juice from 1 lemon (3 tablespoons)
  • 2 teaspoons red wine vinegar
  • 1 clove garlic, crushed or minced
  • 1/2 teaspoon chili powder
  • 1/2 teaspoon paprika
  • 1/2 teaspoon chat masala
  • 1/2 teaspoon sea salt (optional)
  • fresh ground black pepper
Instructions:
  • Rinse the chickpeas and soak for 8 hours or overnight in several inches of water with a little yogurt whey or lemon juice added. Drain and rinse, then transfer to a medium saucepan and cover with several inches of fresh water. Bring to a boil, reduce heat to low, cover, and simmer for 1 1/2 hours or until soft. Drain and add to a large bowl.

  • Add the remaining salad ingredients.

  • In a small bowl, whisk together the dressing ingredients. Pour over the salad and toss gently.

  • Serve at room temperature or cold.

Makes 6 to 8 servings
Chickpea, Olive and Feta Salad

This is my contribution to No Croutons Required, a monthly event celebrating soups and salads, alternately hosted by myself and Jacqueline of Tinned Tomatoes. I am hosting this month's edition. I am also sharing with My Legume Love Affair, a monthly event celebrating legumes. Started by Susan, the event is now administered by me and kindly hosted this month by
Nupur
of The Veggie Kitchen.

More summer chickpea salads that you will enjoy:
Chickpea, Olive and Feta Salad
Middle Eastern Chickpea and Olive Salad
Chickpea and Tomato Salad with Chat Masala
Chickpea Salad with Chat Masala, Mango and Pomegranate Seeds

On the top of the reading stack: Vegan Richa's Indian Kitchen: Traditional and Creative Recipes for the Home Cook

Audio: Kiasmos
Bisi Bele Bath Recipe-Karnataka Special-Sunday Lunch Recipes Series-17

Bisi bele bath recipe
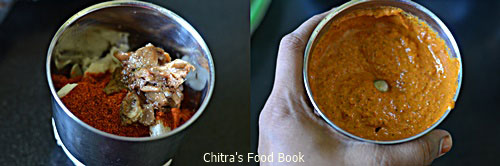
This week’s Sunday lunch recipes is not a biryani post as u all expected.Instead I made Bisi bele bath as per a reader’s request.I posted Homemade bisi bele bath powder few months back and completely forgot about it.But one of my readers reminded me and asked to share bisi bele bath recipe using that powder.Though I have been making it very often,I have not shared this easy recipe here.So I made bisi bele bath and curd rice for our Sunday lunch yesterday just to make this post.It came out really well and tasted similar to the ones made using MTR bisibelebath powder.I referred this You tube video for the recipe,made some changes to make the cooking method even more easy.I have not tasted the authentic bisi bele bath recipe in MTR restaurant but I am a big fan of my (school moms) friend Megha’s bisibelebath.She uses store bought bisi bele bath powder mostly.I am glad this recipe turned out very similar to hers and most importantly I was able to bring the watery consistency.Generally bisi bele bath is served with kara boondi on top.It is one of the best side dish for bisi bele bath. But in my family, both Sendhil & Raksha loves to have it with ghee & raw onion topping. Do try this easy recipe and make this for your lunch box. Don’t forget to reheat it before you eat because bisi bele bath has to be eaten hot as its name suggests(bisi-hot,Bele-dal,Bath-Rice recipe)
Bisi bele bath recipe

Bisi bele bath recipe

Bisi bele bath Recipe - Karnataka Style


Bisi bele bath recipe using Homemade bisi bele bath powder Karnataka style Bisi bele bath recipe using Homemade bisi bele bath powder
Cuisine: Indian
Category: Rice recipes
Serves: Serves 3-4
Prep time: 10 Minutes
Cook time: 20 Minutes
Total time: 30 Minutes


INGREDIENTS
1 cup - 200ml

  • Raw Rice or steamed rice - 3/4 cup
  • Toor dal - 1/2 cup
  • Turmeric powder - 1/4 tsp
  • Water- 6 cups for rice+dal ( Totally I used around 9 cups)
  • Salt - as needed
  • Cooking oil – 2 drops
  • Knol Khol/Kholrabi- 1/2 no
  • Brinjal - 1/2 no
  • Beans - 5 nos
To grind
  • Bisi bele bath powder - 4 tbsp
  • Grated coconut - 1/4 cup
  • Tamarind - Big gooseberry size
  • Jaggery - 1 tsp
  • Water - to grind
To temper
  • Cooking oil - 1 tsp
  • Mustard seeds - 1/2 tsp
  • Curry leaves - few
  • Hing - a pinch
Ghee – 1-2 tbsp
METHOD

  • Take rice,dal,chopped vegetables,salt,turmeric powder,2 drops of oil and 6 cups of water. Cook it for one whistle in very low flame.Remove the lid and mash the rice,dal mixture very well.Add 1 cup of water to it and set aside.
Bisi bele bath recipe
  • Now take the bisi bele bath powder,grated coconut and soaked tamarind along with little water in a mixie jar. Grind it to a smooth paste.
Bisi bele bath recipe
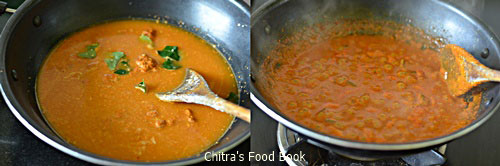
  • Take the ground paste,add 2 cups of water and some salt to it. Mix well and boil the mixture in a kadai.Add some jaggery.Let the mixture roll boil for 5 minutes.You will get a nice smell.
Bisi bele bath recipe
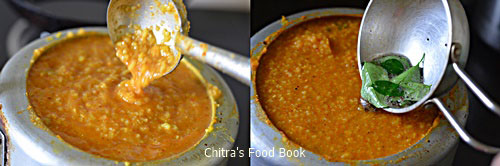
  • Now add the masala to the rice+dal mixture. Mix well and add 1 more cup of water.Check for taste and add more salt & bisi bele bath powder if needed.
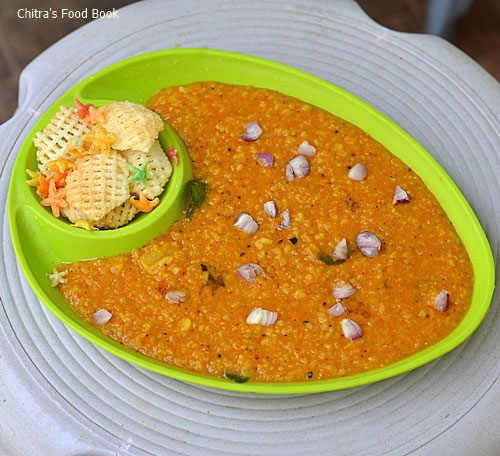
  • Let it boil nicely for 2-3 minutes. Lastly add 1 tbsp of ghee.Mix well.Adjust the consistency of rice by adding more water.It should be pourable.So add more water based on that and check for salt.Temper mustard,curry leaves and hing in a kadai and add to the rice.Mix well and serve hot !!
Bisi bele bath recipe
Yummy,hot bisi bele bath is ready.Serve with kara boondi or raw onions as I did !

Note
  • Add more bisi bele bath powder based on the spice level.
  • You can add more jaggery if u like sweet taste.
  • No need to use carrot or raddish .But u can use peas,chow chow/chayote if u wish.Skip Kholrabi if u don’t like it.
  • Taste the bisi bele bath and adjust the salt whenever needed
  • Addition of ghee at the end gives a great taste.So don’t skip it.
Bisi bele bath recipe

Enjoy eating hot,hot bisi bele bath with kara boondi or Raw onions.Tastes great !!
Bisi bele bath recipe

الخميس، 21 مايو 2015

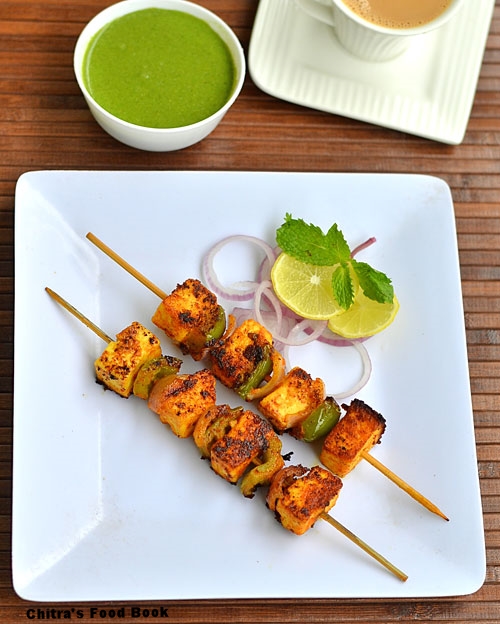
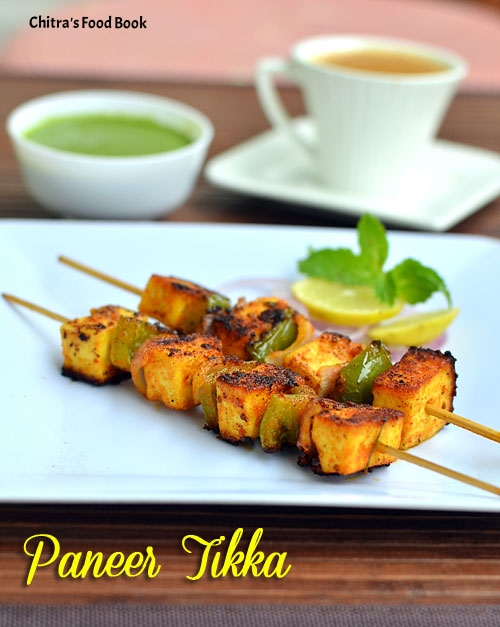
Paneer Tikka Recipe in Tawa &Green Chutney-Stove Top Version

Paneer tikka recipe in gas stove
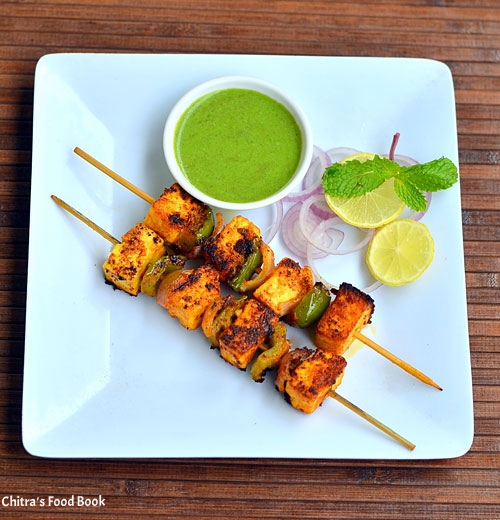
Last week,I made paneer tikka for the first time using gas stove.Even though i have an oven with microwave,convection and grill options,i din’t want to make use of it as it was my first attempt.So i tried in my new non-stick tawa.It came out very well.Paneer was perfectly browned & soft.I watched Sanjeev kapoor channel’s youtube video hosted by my favourite Chef Harpal singh.I had already tried Corn cheese balls following his recipe and it was a super hit among my family and friends.So i tried this recipe without any hesitation.He demonstrated the recipe using gas tandoor but i made the same in tawa.Sendhil loved it and relished the tikka with green chutney.I became very happy and confident enough to try this recipe for my guests too.Soon i must try the same using my oven’s grill option and make a post here.Now lets see how to make paneer tikka using gas stove in TawaHappy.
Paneer tikka recipe

green chutney for tandoori

Paneer tikka recipe-Stove top version & Green chutney


Paneer tikka recipe-stove top version & Green chutney Paneer tikka recipe using Tawa in Gas stove and its most popular side dish - Green chutney
Cuisine: Indian
Category: Side dish
Serves: Serves 2-3
Prep time: 10 Minutes
Cook time: 10 Minutes
Total time: 20 Minutes


INGREDIENTS

  • Paneer - 100 gms
  • Tomato - 1 no ( deseeded,optional,i dint use)
  • Green capsicum - 1/2 no (u can use colourful bell peppers too)
  • Big onion - 2 nos
  • Cooking oil – 2 tbsp
For marination
  • Hung curd or thick curd - 1/2 cup
  • Kashmiri Red chilli powder - 1/2 tsp
  • Tandoori masala powder - 1.5 tsp
  • Ginger&garlic paste - 1/2 tsp
  • Chat masala powder -1/2tsp
  • Kasoori methi - 2 pinches
  • Lemon juice - few drops
  • Salt - as needed
To roast
  • Butter – 1.5 tbsp
  • Besan flour - 1.5 tsp
  • Ajwain - 1/8 tsp
Mustard oil or cooking oil – 2 tbsp + 2 pinch of turmeric powder
Green Chutney
  • Mint+coriander leaves – 1/2 cup
  • Green chillies – 1or 2 no
  • Thick fresh Curd – 1/4 cup
  • Roasted cumin powder – 1/8 tsp
  • Chat masala – a pinch
  • Garlic cloves – 2 nos
  • Ginger – 1/2 inch piece
  • Black salt – 2 pinches
  • Sugar -  1/4 tsp
  • Salt – as needed
METHOD

  • Heat butter in a kadai and roast the ajwain & besan flour.Roast well in medium flame for 2-3 minutes till u get a nice aroma.It will turn like a thick paste.Set aside and let it cool.
  • Soak the skewer in water for 30 minutes to avoid getting burnt.
Paneer tikka recipe
  • Take the hung or thick curd in a wide bowl.Add 1 tbsp of roasted besan mix.Mix the spice powders,g&g paste,salt ,kasoori methi and few drops of lemon juice. Check for taste and set aside.
    • Heat 2 tbsp of mustard oil & when it starts to smoke,add turmeric powder.Switch off the flame immediately & add the oil to the marinated masala.
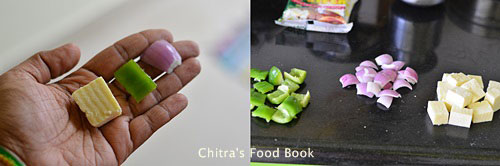
  • Cut the paneer,tomato,capsicum and onion into square shared pieces as shown in the pic.Now add all the veggies to the masala and allow it to marinate for minimum 2 hours or over night in refrigerator.
Paneer tikka recipe
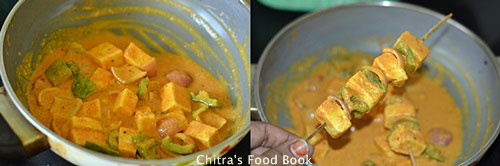
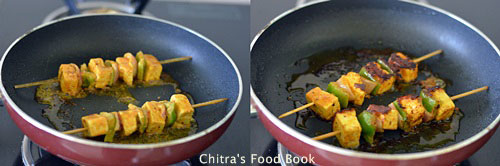
  • Arrange the marinated pieces in a skewer or tooth pick.I placed paneer,then onion,capsicum and i repeated the same order.I finished it with a paneer piece.You can order them as per your wish.Heat 2 tbsp of oil in a non-stick tawa.After the oil is heated,turn the flame to low.Keep the skewer and cover the tawa with a lid.Let it cook for 2-3 minutes.
  • Then turn the skewer and cook the other side till it turns golden brown.Keep turning every now and then till u achieve the color.Onions,capsicum,paneer would be roasted well and will give a nice smell.Remove in a plate and serve it really hot with green chutney to enjoy its best taste.
Alternate method : Instead of skewing all the veggies,u can saute each vegetable separately in oil and then arrange them in toothpick or skewer.
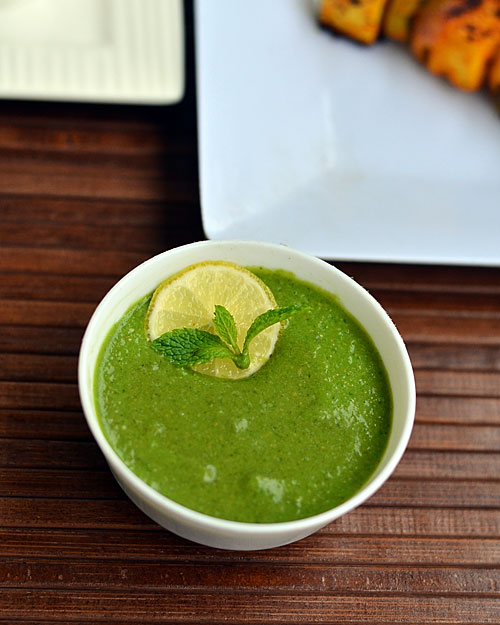
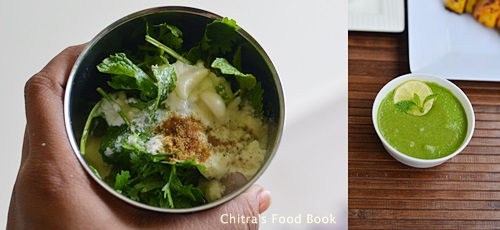
For green chutney : Wash and take mint+coriander leaves in a mixie jar.To this, add all the other ingredients.Grind it to a smooth paste adding curd.Do not add water.Remove the chutney & serve with tikka.

Green chutney


Note


  • Adjust the spices as per your taste.
  • If u don’t have tandoori masala,add garam masala instead.But tandoor masala works the best.


Paneer tikka recipe stove top

Paneer tikka is ready to relish with green chutney & garam garam Chai HappyEnjoy !!
Paneer tikka recipe

الأربعاء، 20 مايو 2015

Savory Fenugreek and Coriander Pancakes

Savory Fenugreek and Coriander Pancakes

I am passionate about savory Indian flat breads. They are a perfect accompaniment to curries and are easy to make too. They do require a bit of patience however because usually only one can be cooked in the skillet at a time. No matter. The effort is well worth it, and in this case the bread requires no kneading.

These pancakes feature fresh fenugreek leaves — also known as "methi" — an annual herb that I was lucky enough to get my hands on. It is commonly used in Indian cooking and that includes the seed and ground powder from the seed. Slightly sweet, with a hint of bitterness, it is well worth using the fresh herb, but if you can't find it — and this is sometimes a challenge — substitute about 3/4 cup dried fenugreek instead. Most Asian and Indian grocers carry the dried leaves, seeds and powder, and often the fresh leaves. These grocers will also carry chickpea flour and chapati (or "atta") flour, but for 1/2 cup of chapati flour you may substitute 1/3 cup sifted whole wheat flour and combine with enough pastry flour to make 1/2 cup.


Savory Fenugreek and Coriander PancakesSavory Fenugreek and Coriander Pancakes
Recipe by
Cuisine: Indian
Published on May 20, 2015

Thin, soft Indian flat breads with a savory fenugreek and coriander flavor

Print this recipePrint this recipe

Masala paste:
  • 4 to 6 green chilies (or fewer if preferred), seeded and chopped
  • 1 clove garlic, crushed
  • 1-inch fresh ginger, finely sliced
  • 1/4 teaspoon sea salt
Pancake batter:
  • 1 cup brown rice flour
  • 1/2 cup chapati (atta) flour*
  • 1/3 cup chickpea (besan) flour
  • 1 teaspoon cumin seeds
  • 1/2 tablespoon ground coriander
  • 1 teaspoon turmeric
  • 1/2 teaspoon paprika
  • 1/4 teaspoon asafetida
  • 1 1/2 teaspoons sea salt, or to taste
  • 2 teaspoons coconut sugar or brown sugar
  • 2/3 cup whole fat yogurt
  • 1 1/2 cups warm water, or as needed
  • 1 2/3 cup fresh fenugreek leaves (methi), roughly chopped*
 
  • 3 tablespoons ghee or sesame oil for frying, or as needed
Instructions:
  • *Substitutions: Substitute 1/2 cup chapati flour with 2 parts sifted whole wheat flour and 1 part pastry flour. Substitute fresh fenugreek leaves with 3/4 cup dried fenugreek leaves.

  • For the paste, combine the chilies, garlic, ginger, salt and 1 teaspoon of water in a small blender to blend into a paste. Alternately, use a mortar and pestle.

  • Whisk together the flours, cumin seeds, ground coriander, turmeric, paprika, asafetida, salt and sugar in a large bowl until well combined. Stir in the yogurt, 1 cup of the water to start with, and the fenugreek leaves. Stir well to combine, adding more water until the batter is pourable but fairly thick.

  • Line a plate with a large piece of foil.

  • Heat a few teaspoons of ghee or oil in a large heavy-bottomed frying pan over medium heat. When hot, ladle about 1/2 cup of the batter into the hot pan and spread out in a circular fashion with the back of the ladle into a thin 7- or 8-inch round. Cover and let cook for a minute. With a spatula, gently flip the pancake and cook for another few minutes, until the bread is golden brown. Transfer the pancake to the plate, fold the foil over to cover, and repeat the process until all of the pancakes are cooked.

  • Enjoy warm or reheat them in a 175° oven. They are best when served the same day that they are made.

Makes about 10 pancakes

Indian Fenugreek Pancakes with Coriander

Other savory Indian breads to enjoy from Lisa's Vegetarian Kitchen:
Besan Roti
Fenugreek Roti
Chickpea Flour Pancakes (Pudla) with Crushed Peas, Ginger, Chilies and Cilantro
Mixed Lentil and Rice Indian Pancakes

Audio Accompaniment: Ben Harper

South Indian Full Meals-Lunch Menu For Guests-Thalai Vazhai Ilai Virundhu

South indian meals

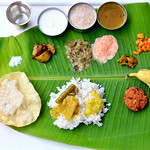
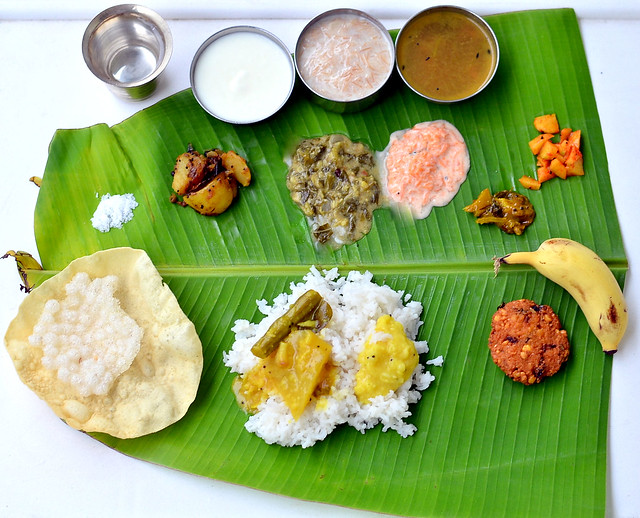
Last week i made this full meals for my guests.Its been years since i posted a South Indian full meal lunch menu here.So i thought of sharing this yummy platter with you all.After Onam Sadya,i din’t get any chance to make an elaborate lunch menu and serve in Thalai Vazha Ilai/Banana leaf.Generally South Indians especially Tamil people make this kind of lunch menu for marriage feast,guests,newly wedded couple/Maapilai virundhu or for festivals and occasions.According to Tamil people,serving food in Thalai Vazhai ilai is considered to be the way of showing love and respect towards our guests.Not just that,there is a traditional serving order that has to be maintained while keeping the dishes in banana leaf.In Tirunelveli,our people give more importance to the serving order.Before i served this platter,i called my mom and asked her about the serving order but still i got confused on where to keep the pickle and kept it wrong i thinkSilly.So i asked my mom again and wrote this post with corrections.There may be slight variations from the write up and picture.So please don’t get confused.I have divided this post into sections for easier understanding.Hope it would help beginners especially newly wedded girls who are new to cooking.In the above platter,u can find (from left)Salt,Poriyal/Curry,Kootu,Thayir pachadi,Pickle,Rasam,Payasam,Curd,Banana,Vada,Rice,Dal,Sambar and Appalam.I have shared all these points based on my own understanding and cooking style.Pardon me for mistakes :)

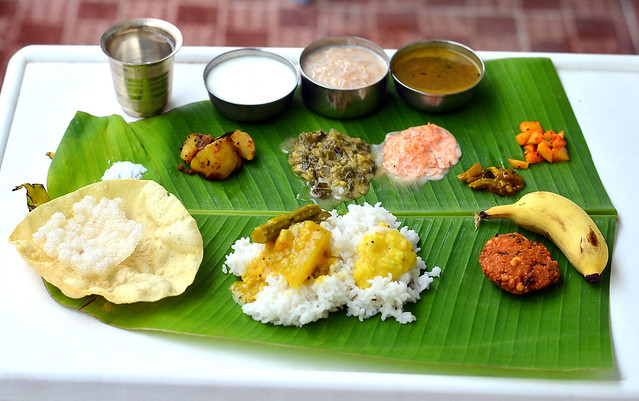
Check out my other state and some more Tamil nadu lunch recipes here


Thalai vazhai ilai virundhu

SERVING ORDER
First lets see how to place the banana leaf and serve the dishes in order.
  1. Always place the banana leaf such that the broader side of leaf should be on the right side of person who is going to eat. 
  2. Start with salt on upper part left side of banana leaf(as shown in the pic).Some people may need more salt in dishes.Hence salt should be kept so that the person can add if its needed.
  3. Then serve the thayir pachadi on the right side upper part.Then comes kootu.Next to kootu keep poriyal,curry/roast.Here i served carrot thayir pachadi,keerai kootu and potato curry.
  4. Lastly keep the pickle varieties next to salt. Don’t forget to keep a tumbler of water.
  5. In the below part of banana leaf,keep the appalam,chips,vadam,masala vada or urad dal vada,Banana in the left side.Keep the rice in the middle of leaf and put some dal +ghee in one corner of rice.In Tirunelveli,people keep the dal in the right side and pour some ghee over it.In another corner of rice,add some sambar with vegetables.
  6. After the person finished eating dal rice,serve the sambar along with ghee if needed.
  7. Next to sambar,serve vathakuzhambu or more kuzhambu if its there.
  8. Then comes rasam.Before serving the curd,serve payasam.Some people wish to have in banana leaf and some prefer to have payasam in bowls.So serve it as per their wish.
  9. Lastly add the buttermilk/curd.
  10. After u finish eating,if its a marriage feast,close the banana leaf by pulling the upper part and cover the bottom part with it.It signifies that the person wishes to have this kind of food very often.Whereas if u have this food in a condolence meeting,then u should close the upper part with bottom part in the reverse manner.
South Indian Lunch menu

South Indian Full Meals


South Indian Full Meals South Indian lunch menu for guests- Banana leaf spread/Thalai vazhai ilai virundhu
Cuisine: Indian
Category: Lunch
Serves: Serves 4
Prep time: 45 Minutes
Cook time: 45 Minutes
Total time: 90 Minutes


INGREDIENTS
Vegetables to be chopped
For sambar
  • Raw mango - 1 no (Use 1/4 mango for pickle)
  • Drumstick - 1 no
  • Big onion - 1 no
  • Green chillies - 3 nos
  • Curry leaves - few
  • Coriander leaves - to garnish
For curry
  • Potatoes - 4 nos
  • Big onion -1 no
  • Curry leaves - few
For kootu
  • Keerai - 1 bunch ( I used mulai keerai)
  • Small onions - 5 nos
Other Ingredients
  • Rice – 2 cups
  • Toor dal – 1/2 cup
  • Moong dal – 1/4 cup for serving + 2 tbsp for kootu
  • Sambar powder – as needed
  • Salt & water – as needed
  • Cooking oil,mustard,urad dal,cumin seeds – as required


    HOW TO COOK A FEAST
    I prepared this lunch menu for 4 adults + 1 kid.It took nearly 1 hour 30 minutes for me to finish the preparation.I started around 10 am and finished making all the dishes except rice at around 11.30 am.I used 2 pressure cookers,a small & a big one and 3 kadai.I always pressure cook the rice at the end while making feast so that you can serve the rice hot hot while eating.No worries even if sambar,rasam and other dishes are cold.In fact making these dishes earlier gives more taste.So the earlier u prepare,the better its taste would be ; ))
  • In the previous day night,wash and soak the dal for vada.Soak it over night.Soak the tamarind in separate bowls for sambar and rasam in the previous day night.
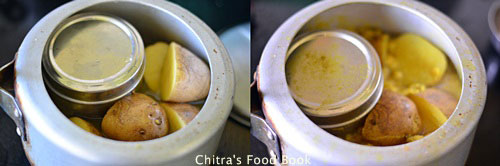
  • The next day morning,start the cooking at least 3 hours before serving time.First take a big pressure cooker and add the toor dal,salt,turmeric powder,hing and a drop of oil (for making sambar).Take a small container or tiffin box like thing that suits the cooker.In that,put the moong dal,water,hing, turmeric powder and a drop of oil.This dal is for serving.Wash and cut the potatoes into two and put them inside the cooker.Hope you can get the idea by seeing the picture.It takes nearly 15 minutes for cooking.
South Indian lunch menu
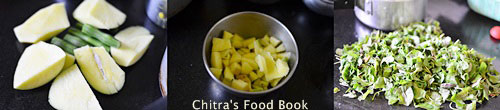
  • In that 15 minutes of time, u can go for chopping works.First grate 2 carrots and finely chop a green chilli for pachadi.Keep in a bowl adding salt.Chop onion,green chillies,Drumstick and mango for sambar.Keep in a plate.Chop a portion of mango into small pieces for pickle.Add salt,red chilli powder and hing to it.Mix well and set aside.Now wash the greens/Keerai twice and chop it roughly.Take it in a small cooker.Chop few small onions for kootu.Keep in a plate.Chop some onions,curry leaves,mint leaves and coriander leaves for vada.
South Indian lunch menu
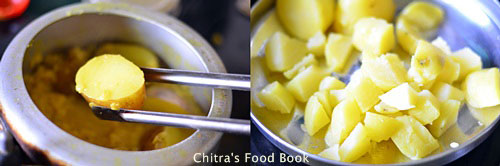
  • By this time,the pressure would be released in the cooker, dals & potatoes would be ready.So remove the potatoes using a tong and keep them immersed in cold water.It helps to peel the skin easily.Chop them into cubes and set aside.
South Indian lunch menu
  • In a small cooker,take the chopped greens,add moong dal,salt and required water.Cook for 1 whistle in low flame.It takes 10 minutes to cook.
  • In that time,do the grinding job.First grind for vada and then for kootu.Keep them in separate bowl.Mix the chopped onions+greens with vada batter & set aside.
  • Now you have cooked the dal for sambar,dal for serving,potato for poriyal and keerai for kootu.So pressure cooking,chopping and grinding jobs are over simultaneously.
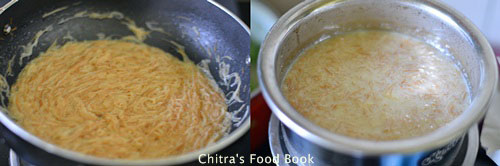
  • Then heat a kadai with ghee and roast the vermicelli for payasam.Add milk and cook it.Transfer the payasam into a bowl and close it with a lid.
South Indian lunch menu
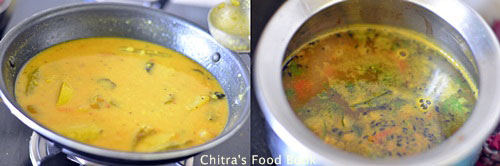
  • In another kadai,make sambar.While the drumstick and mango is getting cooked in tamarind extract,add the ground coconut paste to the pressure cooker in which u cooked the keerai.Let it boil for sometime till kootu thickens.
  • Now the veggies in sambar would have cooked.Add cooked dal to the sambar and let it boil for sometime.Garnish the sambar with coriander leaves and add a tbsp of ghee at the end.Cover the bowl and set aside.Heat oil in another kadai and temper the ingredients for potato curry.Add the peeled potatoes and roast it well.
South Indian lunch menu
  • Sambar,poriyal,kootu making is over.Now heat a small tempering kadai with 3 tbsp of oil and splutter mustard seeds,urad dal,curry leaves,jeera.Add half the tempered items in small quantities to serving dal( thick dal),thayir pachadi and lastly add the chopped onions in the kadai and saute till transparent.Add it to kootu.Add some coconut oil.Close the kootu with a bowl to retain the aroma.
  • Now make rasam and close the bowl by adding a tsp of ghee.Add some water to the tempered moong dal along with salt and hing.Mix well.Similarly add the curd to the grated carrot with some salt.Mix well.Thayir pachadi is ready.
South Indian lunch menu
  • Just 45 minutes before serving,pressure cook the rice in one burner.Heat oil for deep frying in another burner.Make vada,roast papad,chips or vadam.That’s all.Rice,Sambar,rasam,kootu,curry,thayir pachadi,paruppu/dal,vada,appalam is ready.
  • Start to serve following the above mentioned order.Enjoy the feast !
  • TIPS : Add a tbsp of ghee in the sambar,garnish with coriander leaves,check for salt and close the lid of sambar bowl.Addition of ghee & coriander leaves gives a nice aroma to the sambar.Similarly add a pinch of sugar and a tsp of ghee to rasam.It enhances the taste and gives a clear rasam while u serve.
    If u want to finish the entire process within an hour,u can do some pre preparatory jobs in the previous day night.Finish the chopping works and refrigerate the vegetables,grated coconut and carrot in separate zip lock bags.Soak the dal for 4 hours and grind the vada batter.Mix onions,greens and refrigerate the batter too.Doing all these jobs will spare 30 minutes of your cooking time on feast day.So its your choice.Enjoy the South Indian Full Meals : ))

LINKS FOR DISHES WITH CHOICE
Please check out my recipe index page for more sambar,rasam,kootu,poriyal and pachadi ideas.

Try and Amaze your guests and family members with this South Indian Full Meals menu, get the applauseApplause