الأربعاء، 8 يونيو 2016

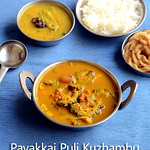
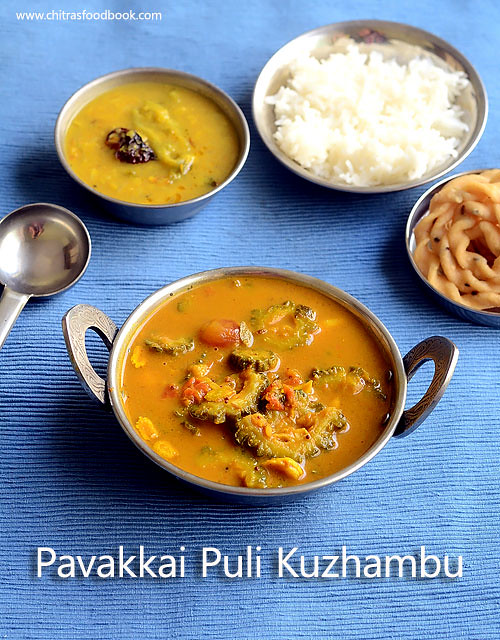
Pavakkai Puli Kuzhambu – Chettinad Bitter Gourd Gravy

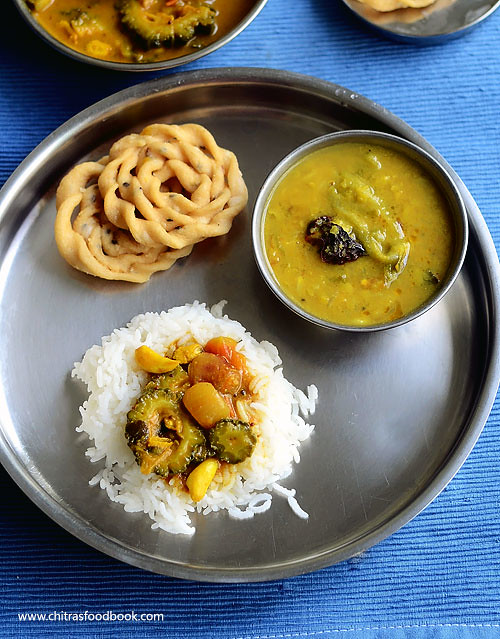
Pavakkai Puli kuzhambu
I try to include bitter gourd ( Pagarkai/Pavakkai in Tamil) in my lunch menu at least once in a week as it is good for diabetes and high in nutrition with lots of health benefits. I make Pavakkai Pitlai & bitter gourd curry/Poriyal very often. Then comes crispy bitter gourd fries and bitter gourd biryani. Recently I came across this Chettinad style Pagarkai Puli Kuzhambu recipe in Solai aachi’s blog. Its my favorite blog for Chettinad recipes.I loved the simplicity  & ease of the recipe and tried it for our lunch. Sendhil told this kuzhambu tastes better than Pavakkai Pitali ( I think he got bored of my usual pitlaiHee hee) From then, I started making this easy, no grind, one pot bitter gourd gravy ( Pavakkai Kuzhambu in Tamil) without coconut very often in my kitchen.Its a very simple kuzhambu recipe that can be made quickly during busy week days or lazy weekends. I make this gravy for Sendhil’s lunch box. Recently my Father visited my place and stayed here for two weeks. My dad loves varieties of Kara kuzhambu recipes. My dad liked it very much.I am happy that I have got a delicious, healthy gravy with bitter gourd. Bachelors and working women can try this if you like bitter gourd.Lets see how to prepare this easy Chettinad style Pavakkai Puli kulambu recipe with step by step pictures.
Check out my other bitter gourd recipes
Bitter gourd Biryani
Bitter gourd Poriyal/stir fry
Crispy bitter gourd fry
Pavakkai Pitlai
Bitter gourd podi
Bitter gourd Rasam/ Uppu saaru
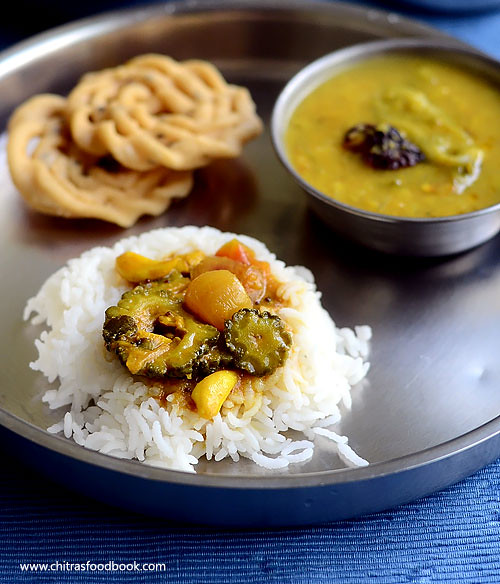

Bitter gourd Puli kuzhambu

Pavakkai Puli Kuzhambu Recipe


Pavakkai Puli Kuzhambu Recipe Chettinad style tangy Bitter gourd gravy for rice
Cuisine: South Indian
Category: Kuzhambu recipes
Serves: Serves 2-3
Prep time: 10 Minutes
Cook time: 15 Minutes
Total time: 25 Minutes


INGREDIENTS

  • Bitter gourd - 1 no (Medium sized)
  • Tamarind - A big gooseberry size
  • Sambar powder – 2 tsp
  • Dhania powder – 1 tbsp
  • Turmeric powder - 1/4 tsp
  • Salt - as needed
  • Water - 1 cup
To temper & saute
  • Gingely oil - 2 tbsp
  • Mustard seeds - 1/2 tsp
  • Methi seeds - 1/4 tsp
  • Fennel seeds - 1/2tsp
  • Urad dal - 1/2 tsp
  • Small onion - 10 nos or big onion - 1 no
  • Garlic cloves - 10 nos
  • Tomato – 1no
  • Curry leaves - few
METHOD

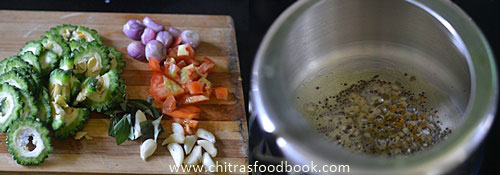
  • Soak the tamarind in water for 10 minutes.In the mean time, wash and slice the bitter gourd into thin rings.Chop the tomato, peel the onion, garlic cloves.
Bitter gourd Puli kuzhambu
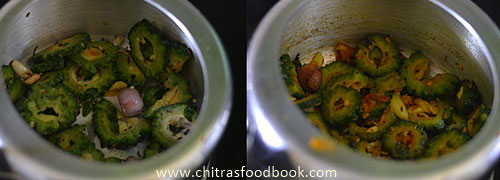
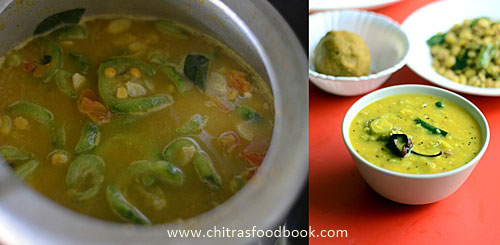
  • In a pressure cooker, heat oil and temper mustard seeds, methi seeds, urad dal, fennel seeds and chopped onion, garlic cloves, curry leaves. Saute till onion turns transparent. Add tomato pieces and saute until mushy. Add the bitter gourd slices, turmeric powder, salt and saute for few minutes.
Bitter gourd Puli kuzhambu
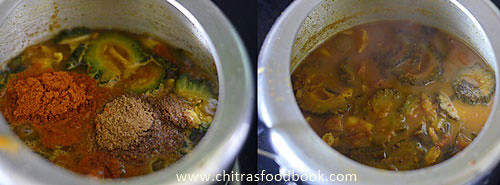
  • Now add 1 cup of tamarind extract, sambar powder, dhania powder.Mix well and pressure cook the gravy for onw whistle in low flame. Open the lid after the steam is released. MIx well and boil for sometime if you feel the gravy is too watery.
Bitter gourd Puli kuzhambu
Enjoy mixing with plain rice adding a tsp of gingely oil !!

Note
Adjust the quantity of sambar powder and dhania powder as per your taste.
You can replace bitter gourd with drumstick or brinjal. But keep the drumstick/ brinjal in a separate bowl inside the cooker because it will become mushy when directly cooked in the gravy.
Do not add more water in the cooker. Gravy will become watery & thin.
Add a tsp of gingely oil while serving !
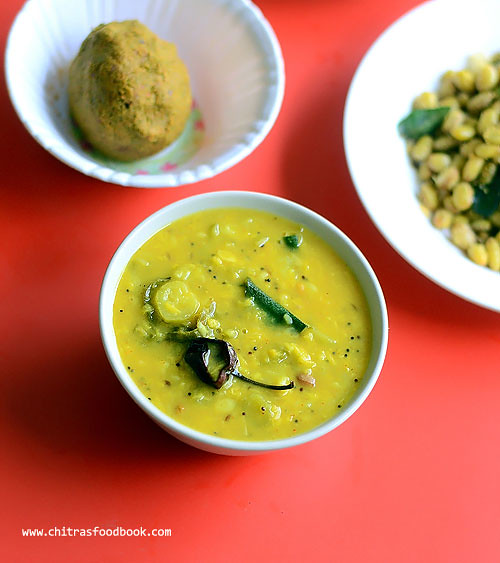
Try this easy, yummy Pavakkai Puli kuzhambu for your lunch and enjoy with any kootu/ dal or just with a papad. We had with Andhra ridge gourd dal and kai murukku Love Struck

Pavakkai puli kuzhambu recipe

الثلاثاء، 7 يونيو 2016

Mysore Masala Dosa Recipe – Dosa Varieties

Mysore masala dosa recipe

Mysore masala dosa is one of the most popular South Indian dosa varieties. Its very famous across Karnataka and is a popular street food in Mumbai too. I have already shared Tamil nadu style masala dosa recipe here.But Mysore masala dosa recipe is a completely different version. A spicy red chutney smeared in crispy, buttery dosa stuffed with mildly spiced potato masala is the highlight of this dosa recipe. Being in Bangalore, Karnataka for the past 10 years, I have tasted this dosa N number of times in almost all the popular restaurants like MTR, Mylari, Darshini, SLV etc. I am yet to taste Gandhi bazaar Vidyarthi Bhavan Hotel Masala dosaWinking. Raksha is a big fan of Mysore masala dosa more than me. It was my long time dream to make this dosa in my kitchen that tastes close to the restaurant. So I was browsing for the same and bookmarked so many recipes.Finally I tried this recipe from HERE. I followed the dosa batter & potato masala recipe from there. For the spicy red chutney recipe, I combined the recipes from THIS & THIS blog. I served this hot & spicy dosa with coconut chutney for our Sunday breakfast. The moment Sendhil & Raksha tasted this dosa, they told “Wow, it tastes just like hotel ones”Love Struck.What else I need, it shows the success of this recipe, Isn’t  it ??Dancing Friends, do try this dosa recipe at home and take the credits Happy .Lets see how to prepare Mysore masala dosa recipe with red chutney, potato masala and coconut chutney recipe with step by step photos !!
Mysore masala dosa recipe

Mysore masala dosa recipe

Mysore Masala Dosa Recipe


Mysore Masala Dosa Recipe How to make South Indian Mysore Masala Dosa Recipe - Spicy Red chutney recipe, Potato masala and Side dish Coconut chutney recipe discussed
Cuisine: South Indian
Category: Dosa Varieties
Serves: 10 nos
Prep time: 10 Hours
Cook time: 20 Minutes
Total time: 10H20Minutes


INGREDIENTS
1 cup – 200ml
For Dosa batter

  • Dosa rice – 1 cup ( Low cost Sona masoori Raw Rice)
  • Chana dal – 2 tbsp
  • Urad dal – 1/4 cup
  • Poha – 1/4 cup ( Thick or thin Aval)
  • Methi seeds – 1/2 tsp
  • Sugar – 1 tsp
  • Salt & water - as needed
For potato stuffing
  • Boiled potato – 2 nos
  • Green chilli – 1 no ( finely chopped)
  • Big onion – 1 no (-do-)
  • Curry leaves - Few
  • Turmeric powder - 1/4 tsp
  • Salt & water - as needed
To temper
  • Cooking oil - 1 tbsp
  • Mustard seeds - 1/2 tsp
  • Chana dal - 1 tsp
  • Urad dal - 1 tsp
For Spicy Red Chutney
  • Fried gram dal/ Hurikadale/Pottukadalai – 1/4 cup
  • Red chilli – 5–6 nos ( Use only Byadgi chillies for bright red color)
  • Small onion – 3 nos
  • Garlic – 4 cloves
  • Grated coconut - 1 tbsp ( optional, I din't use it)
  • Salt - as needed
  • Water - Use less to make thick chutney
  • Tamarind – a pinch
Coconut chutney
  • Grated coconut – 1/3 cup
  • Green chilli – 2 –3 nos
  • Fried gram dal /Roasted gram dal – 2 tbsp
  • Garlic cloves – 4nos
  • Coriander leaves – 1 sprig
  • Curry leaves – 5 nos
  • Salt & water – as needed
METHOD


  • Wash and soak all the ingredients given under “For Dosa batter” for 3-4 hours. Grind them to a smooth paste adding the required water and salt. You can grind the batter in a big sized mixie jar. Remove the batter to a vessel and ferment it overnight or 12 hours.The next morning, batter would have raised well. Mix well and add 1 tsp of sugar. Mix well and leave the batter for 10 minutes without disturbing it. In the mean time, make red chutney, potato masala and coconut chutney recipes.
Mysore masala dosa recipe
  • Wash and pressure cook the potato for two whistles in low flame. Add turmeric powder and salt in the cooker. Remove the potato, peel the skin and mash it well. Set aside. Chop the green chillies and onion. Heat oil in a kadai and splutter mustard seeds, urad dal, chana dal, curry leaves. Add onion, green chillies and saute till transparent. Add the mashed potato, turmeric powder and required salt. Mix well. Add 1/4 cup of water if the masala is too thick and dry. Make the masala like a paste.Keep it in a plate.
Mysore masala dosa recipe
  • Grind the ingredients given under “For spicy red chutney” to a smooth, thick paste. Make sure you don’t add more water. It should be thick and spreadable.Remove the chutney to a bowl.
Mysore masala dosa recipe
  • Similarly, grind the ingredients given under “ Coconut chutney” to a smooth paste. Remove in a bowl.
Mysore masala dosa recipe
  • Now take the dosa batter and mix well. Heat a dosa pan and when the pan becomes hot ( Not smoky hot), sprinkle some water and wipe the dosa pan with a tissue paper or cloth. Keep the flame low and pour a big ladleful of batter. Spread it to a thin circle.
Mysore masala dosa recipe
  • Keep the flame medium now.Do Not drizzle oil. Let the dosa cook in medium flame till it starts to turn golden. Now spread the red chutney all over the dosa and drizzle 2 tsp of oil or butter over the dosa. By this time, dosa will become golden brown. Keep 3 tbsp of  potato masala in the center of dosa and fold the dosa.Do not flip the dosa. Remove in a plate.
    Serve it topped with a small piece of butter.Enjoy with coconut chutney !!
Mysore masala dosa recipe


Note
  • You can use thick or thin poha. Adding sugar gives a nice golden color to the dosa. So do not skip it.
  • Add more or less red chillies based on the taste for red chutney  and coconut chutney recipe.
  • This dosa should be cooked in low to medium flame to get the crispy, golden colored dosa. So cook it patiently. Also make sure, the heat of pan is not less.Low heated pan yields dry dosa.
  • Do not sprinkle oil as soon as you spread the dosa. Drizzle oil only after the dosa is half cooked.Add butter instead of oil for rich taste.

Mysore masala dosa recipe
Enjoy making this Hotel style Mysore Masala Dosa recipe at home and serve hot with coconut chutney ! Tastes great !!
Mysore masala dosa recipe

السبت، 4 يونيو 2016

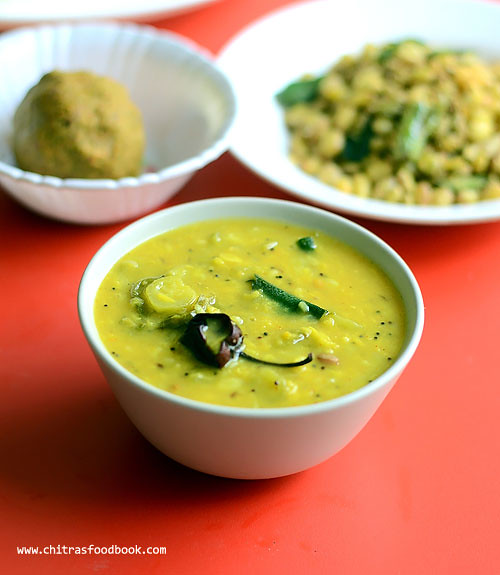
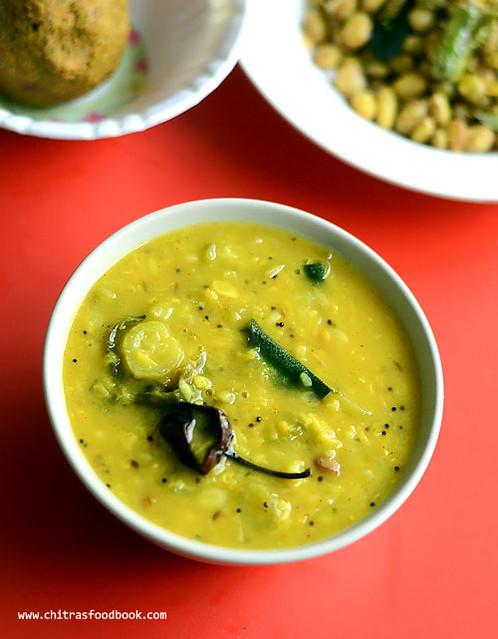
Ridge Gourd Dal – Andhra Beerakaya Pappu Recipe

Andhra beerakaya pappu
Ridge gourd (Turai/Luffa/Torai in Hindi, Peerkangai in Tamil, Beerakaya in Telugu, Hirekai in Kannada, Peechinga in Malayalam) has lot of health benefits.It is low in cholesterol and saturated fats but high in vitamin C, dietary fiber, riboflavin, thiamin, zinc, iron, manganese and magnesium. Usually I make Ridge gourd thogayal or Peerkangai Chutney/kuzhambu for rice. But recently I tried Ridge gourd peel/skin chutney and Andhra Beerakaya pappu for the first time. I followed this dal recipe from Prathiba’s blog. It came out well. Its a quick and easy, one pot dal recipe for rice. Apt for working women and Bachelors. Soon I must try Ridge gourd curry/poriyal and gravy for chapathi too. Lets see how to make this easy Andhra style ridge gourd dal/Beerakaya Pappu.


Beerakaya Pappu recipe

Ridge gourd dal / Beerakaya Pappu Recipe


Ridge gourd dal / Beerakaya Pappu Recipe Ridge gourd dal / Beerakaya Pappu recipe - Andhra style, easy dal recipe for rice
Cuisine: Andhra recipes
Category: Lunch recipes
Serves: Serves 3
Prep time: 10 Minutes
Cook time: 15 Minutes
Total time: 25 Minutes


INGREDIENTS
To pressure cook
  • Ridge gourd - 1 no ( medium)
  • Toor dal - 1/4 cup ( 50 gms)
  • Big onion - 1 no ( Sliced)
  • Green chillies - 2 nos ( add 4 nos for more spicy taste)
  • Tomato - 1 no ( chopped finely)
  • Turmeric powder - 1/2 tsp
  • Red chilli powder – 1/2 tsp
  • Dhania powder/Coriander powder - 1 tsp
  • Cumin powder - 1/2 tsp
  • Water - 1.25 cups
  • Salt - as needed
To temper
  • Ghee - 2 tsp
  • Mustard seeds - 1/2 tsp
  • Urad dal - 1 tsp
  • Red chilli - 1 no
  • Crushed garlic cloves – 5 nos
  • Curry leaves - few
  • Asafetida / hing - 1/4 tsp
METHOD

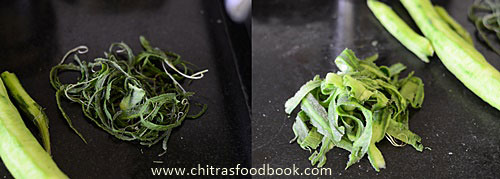
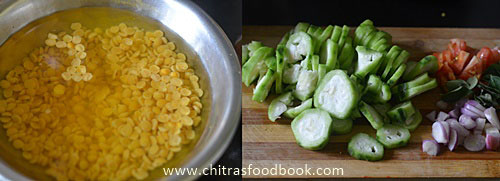
  • Wash and soak the toor dal till you chop the veggies.Wash and remove the ridges and then peel the skin of ridge gourd completely. Use it for making chutney/thogayal if you wish or discard it. Chop the ridge gourd into slices.
Ridge gourd dal

Beerakaya Pappu recipe
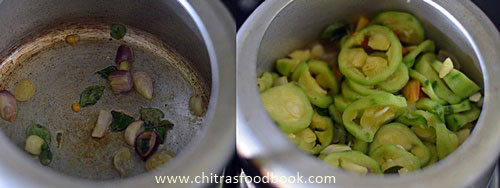
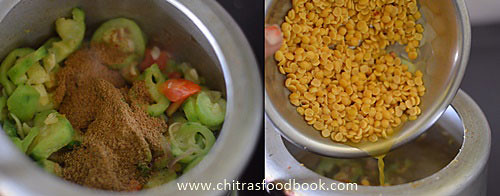
  • In a pressure cooker, heat oil. Saute the onions, slitted green chillies, curry leaves. Saute tomato pieces and add the ridge gourd slices too.Saute for a minute.Add turmeric powder, red chilli powder, dhania powder and salt. Mix well and add the soaked dal, required water. Mix well. Pressure cook in low flame for one or two whistles.
Beerakaya Pappu recipe
  • Remove the lid after the steam is released. Mash the dal and vegetables well. Check for taste and add more salt or red chilli powder if needed. Let it boil for sometime if the gravy is watery. Bring it to desired thickness.
  • Heat oil/ghee in a kadai and when it gets heated , splutter the mustard seeds, urad dal, hing, crushed garlic, red chilli and curry leaves.Add this to the boiling dal. Switch off the flame and serve hot with rice. Don’t forget to add a tsp of ghee while serving.Enjoy !
Beerakaya Pappu recipe


Note
  • Use moong dal instead of toor dal.
  • You can temper with cooking oil instead of ghee.
  • Adding red chilli powder is optional. Its not mentioned in the original recipe. But I added red chilli powder and used less green chillies. If you wish, u can skip red chilli powder and add more green chillies.
  • For masala taste, u can add 1/2 to 1 tsp of ginger-garlic paste in the dal.
Try this easy, yummy Ridge gourd dal and enjoy with plain rice and tsp of ghee !!
Ridge gourd Dal recipe

الجمعة، 3 يونيو 2016

Aloo Bhaji Recipe – Potato Sabzi For Poori

Aloo Bhaji recipe
Recently I tasted Potato sabzi( Aloo Bhaji in Hindi) for poori in a North Indian thali. It was so tasty and a perfect side dish for Poori. Last week when I made Palak Poori, I wanted to try the Aloo Bhaji/Potato Sabzi I had in the hotel. Usually I make South Indian style Potato masala for Poori. But this is a completely different recipe from mine. Actually speaking, Aloo Bhaji can be made in various ways. Though its a North Indian recipe, there are many aloo bhaji versions like Bengali, Gujarati, Maharashtrian, Pakistani etc.Today I have shared a basic Potato gravy adding onion, tomato and masala powders. I am sure you can enjoy this sabzi with Poori & chapati as well if you like semi gravy type side dishes. Do try this easy and yummy aloo bhaji recipe/Potato sabzi for Poori and enjoy with your familyHappy.
Check out How to make Soft Chapathi & Puffy Poori , Palak Puri Recipes too !!
Potato sabzi

Aloo Bhaji Recipe / Potato Sabzi For Poori


Aloo Bhaji Recipe / Potato Sabzi For Poori Easy Side dish for Poori - Potato Sabzi/ North Indian Aloo Bhaji
Cuisine: North Indian
Category: Side dish For Poori
Serves: Serves 3
Prep time: 5 Minutes
Cook time: 20 Minutes
Total time: 25 Minutes


INGREDIENTS
To Pressure cook
  • Potato - 3 nos
  • Big onion - 1 no ( finely chopped)
  • Tomato - 1 no (-do-)
  • Curry leaves - few
  • Red chilli powder - 1.5 tsp ( I used Kashmiri chilli powder)
  • Dhania powder - 1 tsp
  • Turmeric powder - 1/2 tsp
  • Garam masala powder – 1/4 tsp
  • Sugar – 1/2 tsp
  • Salt & water - as needed
  • Kasoori methi - 1/2 tsp crushed
To temper
  • Cooking oil - 1.5 tbsp
  • Cumin seeds - 1 tsp
METHOD

  • Wash and pressure cook potato adding enough water, turmeric powder for 2 whistles in low flame. Remove the lid after steam is released. Discard the excess water and keep the potatoes in a bowl of cold water. Peel the skin of potato and chop them roughly.Set aside.
  • Heat oil in a kadai and splutter cumin seeds.Add finely chopped onions and curry leaves. Saute till transparent.
Aloo bhaji recipe
  • Add tomato pieces and saute until mushy. Add turmeric powder, salt, red chilli powder,  dhania powder, sugar and garam masala powder. Mix well for few minutes. Add 1 cup of water and let the tomato, onion cook well.Add potato pieces. Mash half of the potato pieces using the back of  a ladle. Mashed potatoes will give a thickness to the gravy. Add more water and bring it to the desired consistency as you wish.
Aloo bhaji recipe
Aloo bhaji recipe
  • Lastly add crushed kasoori methi and switch off the flame. Garnish with coriander leaves.
Aloo bhaji recipe
  • Serve with Poori & Enjoy !

Note
  • Adjust the quantity of masala powders as per your taste.
  • You can make the same adding cauliflower too.
  • You can also add some fresh cream at the end to give richness to this sabzi.
  • Adjust the consistency of the gravy by adding more or less water. I made it semi gravy.
Easy, Kids friendly Potato bhaji is ready to be served with Poori !! We relished with Palak Poori Happy
Aloo bhaji for poori

الخميس، 2 يونيو 2016

Palak Puri – Spinach Poori Recipe – Pasalai Keerai Poori

Palak Poori with side dish
As I mentioned in my beetroot poori recipe, I am trying out varieties of Poori recipes in my kitchen during weekends. Last week I tried Spinach Poori ( Palak puri in Hindi, Pasalai keerai poori in Tamil) for our Sunday breakfast. I made North Indian style Aloo Bhaji/Subzi as side dish for Palak poori. Poori came out soft with mild masala flavor. Aloo bhaji was tasting great and its one of the best side dish for Palak puri. Everyone liked it very much. I will post aloo bhaji recipe by tomorrow or Saturday. Today lets see how to make this Palak Puri recipe with step by step pictures.
Check out my South Indian Poori Masala too !
Palak poori

Palak Puri Recipe / Palak Poori recipe


Palak Puri Recipe / Palak Poori recipe Palak Puri - Healthy, colorful poori recipe for breakfast
Cuisine: North Indian
Category: Breakfast recipes
Serves: 12-15 nos
Prep time: 10 Minutes
Cook time: 2 Minutes
Total time: 12 Minutes


INGREDIENTS
1 cup - 200ml
  • Palak / Spinach - 1 bunch ( Puree - 3/4 cup)
  • Atta/Wheat flour - 1.5 cups
  • Ajwain/ Omam – 1/2 tsp OR Cumin seeds – 1/2 tsp
  • Melted ghee – 1/2 tsp
  • Salt & water - as needed
  • Garam masala powder - 1 tsp
  • Green chillies - 2 nos
  • Ginger - 1 inch piece
  • Cooking oil – 1 tbsp + to deep fry
  • Sugar – 1/2 tsp
METHOD

  • Wash and chop the palak leaves. Heat a tbsp of oil and saute the palak leaves, green chilli, sugar till the palak leaves shrink and cooks well. Let it cool. Grind the palak into smooth thick puree without adding water.
Palak puri recipe
  • Take the wheat flour,Ajwain, salt, melted ghee,Garam masala powder, pureed palak in a wide bowl.Mix well without adding water. Let the palak puree spread well with atta. Now add water little by little and make a thick, soft, non-sticky dough.Cover the dough till use. But its better to make puri as soon as you make the dough else poori may absorb more oil.
Palak puri recipe
Palak puri recipe
  • Take a small lemon size dough ball and roll it slightly thick. Dust it once in wheat flour. Roll all the poori and spread them in a  paper or sheet. Poori should not be too thick or too thin.
Palak puri recipe
  • Heat oil to deep fry and put a pinch of dough. If it rises immediately, oil temperature is right.Now drop the poori and let it be in the oil for a second. When it starts to come up, press it with a ladle gently. Puri puffs up well. Now flip the poori and cook the other side.Remove with a slotted ladle and drain in a tissue. Enjoy with sabzi/Aloo Masala.
Palak puri recipe
Palak puri recipe


Notes for making Perfect Poori
  • Addition of ghee keeps the poori soft and gives a nice flavour.But do not add more than the mentioned quantity.
  • Adding sooji/rava is to maintain crispness.The puffed poori won’t break till u break it with ur hands.Some people soak the rava in little water before adding.If u add more quantity of rava, it would be good.But here it is not necessary as we are adding negligible quantity.U can also omit rava and try.It is completely optional. I din’t use rava in this recipe.
  • Adding a pinch of sugar gives a nice golden color to the poori.But it is optional to use.
  • Dough consistency is more important.If u make it too hard or sticky,poori will be too  hard. If the dough is too soft , poori will become very soft.
  • If u feel , u have added very less water and the dough is too tight,beat the dough well for few minutes. It will become soft.Then make pooris.It will come out well.
  • Do not rest the dough.Make puris immediately else it will drink more oil.
  • Always use less flour for dusting else the dusted flour will spoil the oil and will be settled as sediments.So dust only once.U can apply oil on the rolling board and make pooris.
  • Thickness should be medium ie slightly thicker than chapati and it should be even.Else poori will puff only in some places where it is thick.Make sure there are no holes while u roll.Pooris won’t puff up if there is a hole.
  • Right temperature of oil is more important.Never allow it to fume or smoke.Poori will turn dark brown in color.Check the oil as mentioned above and proceed.
  • After u make 2 –3 puris, adjust the flame,check the oil temperature again & fry the pooris.If the oil is too hot,switch off the flame for few minutes to reduce the heat.Else add some more fresh oil to reduce the heat.By doing this way,u can make pooris of even color till the end.

Try this healthy Poori for your kids & Husband and Enjoyyyy !!
Palak puri recipe

الأربعاء، 1 يونيو 2016

My Legume Love Affair #96 - June Edition 2016


I'm excited to host My Legume Love Affair this month. As many of my readers will know, this is a long running event focusing on the goodness of legumes, started by lovely Susan of The Well Seasoned Cook and now administered by me of Lisa's Kitchen. Each month we have a different host but it's my turn now for the month of June. We are at edition #96 this month. I look forward to more legume recipes as legumes are an important and plentiful source of protein, especially if you are a vegetarian or vegan.

It is easy to participate. All you need to do is prepare a legume-centric dish. Link back to this announcement, my blog and also Susan's blog, as she is the original founder of the event. Share your creation using the linky tool at the end of this post by the end of the month. Use of the lovely logo, designed by Susan, is optional, but appreciated.

Only one entry per blogger please and it must be vegetarian. Recipes from archives will only be accepted if reposted and updated with the links required.

For your dish to be included in the roundup, it must contain more than just a few tablespoons of legumes. The slight exception to this are legumes such as fenugreek or tamarind that typically are used in smaller quantities. Fresh or dried beans, lentils, pulses, and the sometimes edible pods that contain these seeds, and derivative products such as tofu or besan, along with fenugreek, carob, and peanuts are all acceptable. The possibilities are endless. Please just ensure that your shining ingredient is in fact a member of the legume family. All types of cuisines and courses are welcome, meaning appetizers, sides, mains and desserts are all acceptable so long as the mighty legume is the key ingredient.

Thanks in advance for your participation and inspiration. I am looking for guest hosts for 2016. Send me an email at legume.lisa AT gmail DOT com or leave a comment on this post if you would like to host. I still have a few spots left for this year.