الجمعة، 24 أبريل 2015

Javvarisi Vadam-Sago Vathal Recipe-Summer Recipes

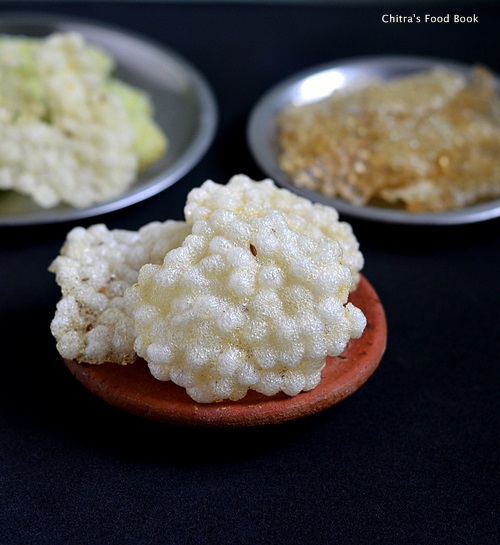
Javvarisi vadam
Javvarisi vadam/Sago fryums is our family favourite vathal recipe.My MIL makes it very nicely adding different colors.Every year she makes it in bulk during summer and pass it to me & my SIL.This year too,she made a batch for us.My FIL sent me a complete video of making this vadam in detail.But i couldn’t share it now as i am totally tied up with my personal works.Very soon,i will update this post with video and step by step pictures.So,lets see how to make this crunchy Javvarisi Vathal recipe.Please refer my Arisi koozh vadam to get some basic idea of how to make vadam.
Sago vathal recipe

Javvarisi Vadam Recipe


Javvarisi Vadam Recipe Javvarisi vadam/Sago vathal recipe - Summer special side dish for rice varieties
Cuisine: Indian
Category: Snacks
Serves: -
Prep time: 12 Hours
Cook time: 30 Minutes
Total time: 12H30Min


INGREDIENTS

  • Javvarisi/Sago - 1/2 kg ( Big variety)
  • Green chillies - 5 nos
  • Cumin seeds/Jeera -2 tbsp
  • Salt - as needed( Use lesser quantity than rice vadam)
  • Water - as needed ( 1:5 ratio of sago & water)
METHOD

  • Wash and soak the Javvarisi/Sago over night.The next morning sago would have soaked well.Grind green chillies adding required water and salt.Set aside.

  • Boil water in a pressure cooker base.Use 1:5 quantity of water.If sago is 1 cup use 5 cups of water.When the water comes to a boil,add green chilli paste & Jeera.
  • Let it cook well in medium flame.Keep stirring.At one stage,the batter will become thick and shiny,transparent.Javvarisi would have cooked very well without any white trace.Squeeze 1/2 of a lemon and mix well.Addition of lemon juice helps to give white colored vadam as shown in the pics.
  • Now wash a dhoti(cotton cloth) OR thick Polythene sheet.Spread it on the floor.Pour a small ladle of batter and make vadam.Let it dry under the sun during daytime and under the fan during night for one day.
  • The next day morning,sprinkle water on the back side of the cloth and remove the vadam.If using plastic sheet,the vadam will come off easily.No need to sprinkle water.
  • Spread the vadam in the cloth or a paper and again Sun dry  in morning and put under Fan for another 2-3 days till they are completely dry.Deep fry in oil and enjoy with rice.
To check whether it is completely dry,deep fry in oil.The vadam should rise immediately as soon as u put in hot oil and it should not stick to the teeth while eating.


Note


  • For variations,u can add food color in the water during intial stage OR add color while adding lemon juice at the end for making vadam in different colors in the same batch.
Making Javvarisi vadam is easy for beginners for too.Try n enjoy with rice varieties.
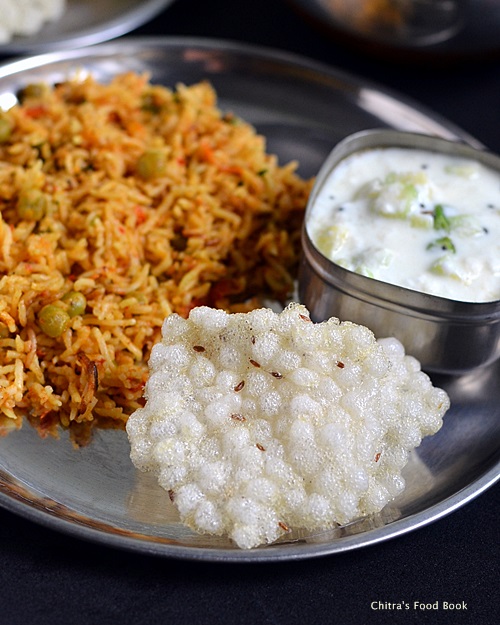
I served it with tomato riceHappy


الثلاثاء، 21 أبريل 2015

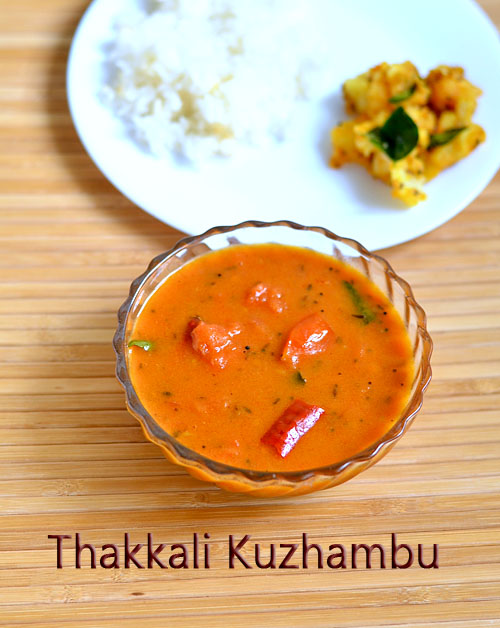
Easy Thakkali Kuzhambu/Tomato Kulambu Recipe


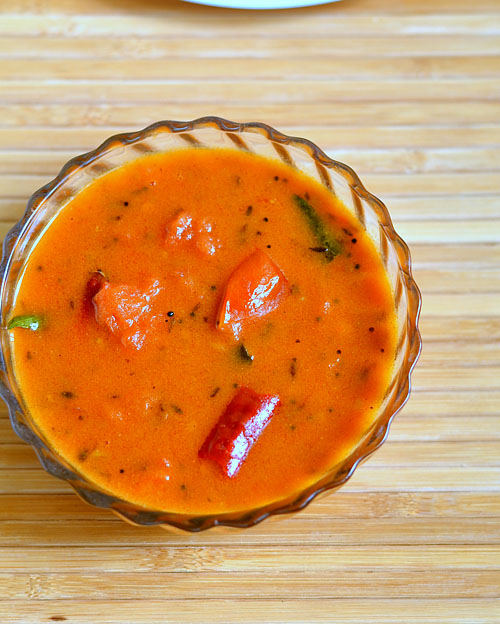
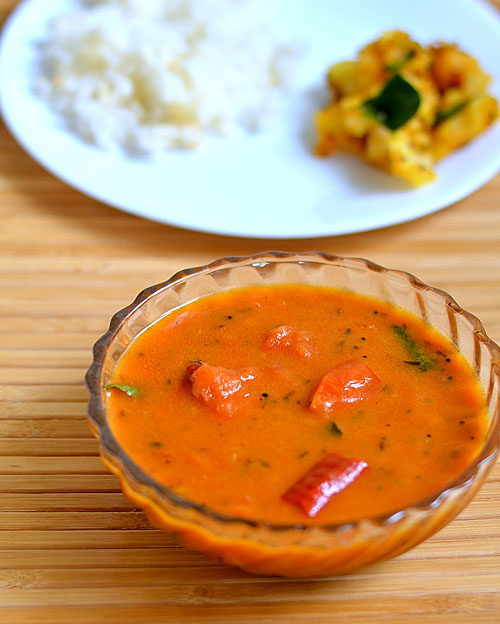
Thakkali kuzhambu recipe
I usually make thakkali kuzhambu for idli,dosa using my mom’s method.It is our family favourite too.But i wanted to try tomato gravy for rice for long time.I have also tried a couple of times but i made in kurma style.So it was not a good pair for rice instead it went well with Idiyappam and Roti.So i was looking for a gravy/kuzhambu recipe without coconut that suits well for rice.I got a perfect recipe from Jeyashri’s blog.I made few changes in the recipe based on my easy brahmin style vatha kuzhambu and tried it for Sendhil’s lunch box yesterday.It was very easy to make with less chopping works and zero grinding job.So Bachelors and working women can give this a shot for making a quick lunch.It was not only easy but also very tasty and finger licking good.Being a tomato lover,i loved this gravy a lot.I am happy that its a no onion no garlic recipe too.Hope this recipe would be useful for my Jain readersHappy.Lets see how to make this yummy,tangy tomato kulambu without coconut for rice.
Check out my 30 kuzhambu varieties for rice if interested !
Thakkali kulambu recipe
 

Thakkali kuzhambu recipe


Thakkali kuzhambu recipe Thakkali kuzhambu/Tomato gravy without coconut for rice
Cuisine: Indian
Category: Gravies
Serves: Serves 2
Prep time: 5 Minutes
Cook time: 10 Minutes
Total time: 15 Minutes


INGREDIENTS

  • Ripe tomato - 4 nos
  • Sambar powder – 2-3 tsp ( add 4 tsp for more spicy taste)
  • Turmeric powder - 1/8 tsp
  • Rice flour - 1 tsp
  • Salt & water - as needed
To temper
  • Gingely oil or cooking oil - 1 tbsp
  • Mustard seeds - 1/2 tsp
  • Urad dal - 1/2 tsp
  • Toor dal - 2 tsp
  • Cumin seeds/Jeera - 1/2 tsp
  • Methi seeds - 1/8 tsp
  • Red chilli – 1 no 
  • Curry leaves - few
  • Hing/asafetida - a pinch
METHOD

  • Wash and chop the tomatoes finely.Dilute rice flour in little water and set aside.

  • Heat oil in a kadai and splutter mustard seeds,methi seeds,urad dal,toor dal,Pinched red chilli and jeera.Saute for a second until dal turns golden.Now add the sambar powder and curry leaves.Saute in medium flame for a minute and immediately add the finely chopped tomatoes.Make sure sambar powder is not burnt.

  • Saute until tomato turns pulpy.Add 1 cup of water and bring to boil.Check for salt and spice.Add more if required.Lastly add the diluted rice flour and Mix well.The gravy will become thick.Add little water and bring to boil.Switch off the flame and serve hot with rice.
How to make thakkali kuzhambu

Enjoy !


Note

  • The quantity of sambar powder may vary based on the tanginess of tomato.
  • Rice flour water acts as a binding agent.Skip if u don’t want to use.Actual recipe din’t call for it.

I served this easy thakkali kuzhambu with rice & easy potato curry.It was yum !
Thakkali kuzhambu recipe

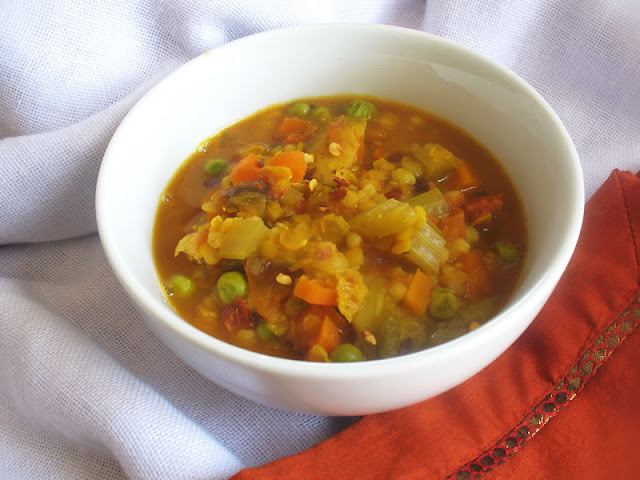
Spiced Red Lentil, Barley and Vegetable Soup

curried lentil and barley vegetable soup

There are times when you don't plan ahead for dinner and you have to make do with staples, unless you want to run out to the grocery store, but that is not always a viable or preferred option. This is one such soup that I put together one afternoon employing the use of odds and ends of produce and basics that I usually always have on hand. The addition of barley and coconut milk add a silky texture to this earthy soup packed full of plenty of root vegetables and robust tomatoes.

Feel free to use whatever vegetables on hand to include in the soup, such as bell peppers, parsnips, green beans, corn and potato, to name just a few. The soup is best with about 3 - 4 cups of vegetables.

Yes, the weather has turned cool again, but I do enjoy soup year round.

 Spiced Red Lentil, Barley and Vegetable Soup Spiced Red Lentil, Barley and Vegetable Soup
Recipe by
Cuisine: Indian
Published on April 21, 2015

Hearty and nourishing soup of lentils, barley and vegetables simmered in a lightly spiced broth of tomatoes, coconut milk and Indian seasonings

Print this recipePrint this recipe

Ingredients:
  • 4 to 6 sun-dried tomatoes
  • 2 tablespoons coconut oil or other oil
  • 1 1/2 teaspoons cumin seeds
  • 1 teaspoon brown mustard seeds
  • 1/2 teaspoon fenugreek seeds (optional)
  • 2 bay leaves or a small handful of crushed dried curry leaves
  • 1/4 teaspoon asafetida
  • 1 medium onion, diced
  • 1-inch piece fresh ginger, grated or minced
  • 1 clove garlic, crushed or minced
  • 3 to 4 green chilies, seeded and minced
  • 3 to 4 cups assorted diced vegetables (I used 2 large carrots, 2 stalks of celery, 6 small Brussels sprouts and 2/3 cup frozen peas)
  • 1 teaspoon turmeric
  • 1 teaspoon ground coriander
  • 2/3 teaspoon paprika
  • 3 medium tomatoes, finely chopped
  • 2 teaspoons tamarind paste
  • 2/3 cup red lentils, rinsed
  • 1/3 cup pearl barley, rinsed
  • 2/3 cup coconut milk
  • 5 to 6 cups water, or more as needed
  • 1 teaspoon garam masala
  • 1 to 2 teaspoons fresh or dried fenugreek (methi) leaves
  • 1 1/2 teaspoons sea salt, or to taste
  • fresh cracked black pepper
  • juice from 1 lemon (3 tablespoons)
Instructions:
  • Soak the sun-dried tomatoes in 1 1/2 cups of hot water for 30 minutes. Drain, reserving the soaking water, and chop. Set aside.

  • Heat the oil over medium heat in a large heavy-bottomed saucepan or soup pot. When hot, toss in the cumin seeds, mustard seeds, fenugreek seeds if using, and bay leaves or curry leaves. When the mustard seeds turn grey and begin to splutter and pop, quickly stir in the asafetida and then add the onion and sauté for 5 minutes. Add the ginger, garlic and chilies and stir for another minute. Now add the chopped vegetables and stir for another 5 minutes. Toss in the turmeric, coriander and paprika, and stir for another minute.

  • Now add the fresh tomatoes, sun-dried tomatoes and tamarind paste to the pan and cook for 5 to 7 minutes until thickened, stirring often. Stir in the lentils and barley and pour in the reserved sun-dried tomato soaking water, coconut milk and 5 cups of water. Bring to a boil, reduce the heat to medium-low, cover, and simmer for 20 to 25 minutes until the vegetables are tender and the lentils and barley are soft. Add up to 1 cup more water if needed.

  • Stir in the garam masala, fenugreek leaves, sea salt, black pepper and lemon juice. Simmer for another few minutes and serve hot.

Makes 6 servings

lentil, barley vegetable soup

More lentil soups to enjoy from Lisa's Vegetarian Kitchen:
Turkish-Style Lentil Soup
Creamy Brown Lentil, Barley and Mushroom Soup
Lentil Soup with Prunes and Apricots
Greek Lentil Soup (Fakes)

الأحد، 19 أبريل 2015

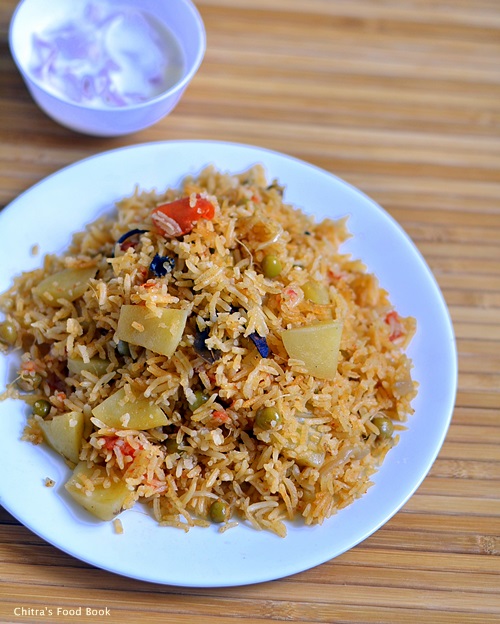
Anjappar Biryani Recipe In Rice Cooker-Sunday Lunch Recipes Series-14

Anjappar biryani recipe
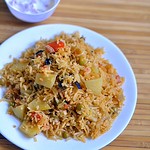
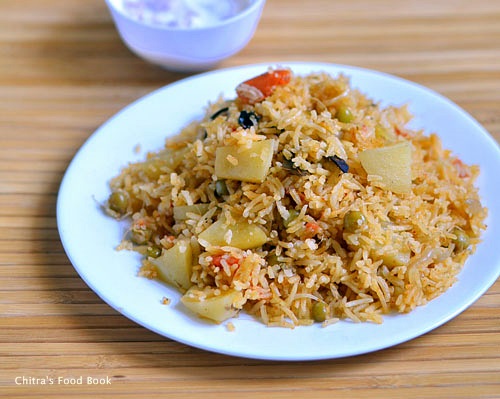
“Evalavo Pannitom Itha Panna MatomaWinking “ haha,This is how i thought when my friend Megha suggested me to try “Anjappar style biryani recipe” using vegetables.I browsed through few Anjappar style chicken biryani recipes and got it from here & here.I mixed up both the recipes and tried it using potato & peas.I usually make biryani using pressure cooker.This time i tried using rice cooker and made it little more spicy as it belongs to Chettinad.The result was yummy and we loved it.After i made this biryani successfully i became very happy & contented that i had tried and shared almost all the popular Tamil nadu biryani recipes like Ambur star biryani, Dindigul Thalappakatti biryani, Coimbatore Angannan biryani, Muslim wedding biryani, Kuska in vegetarian version which was my long time dream.In the line of those yummy biryani recipes,here is yet another interesting and the most popular Anjappar biryani recipe.Friends,do suggest me if u know any other popular biryani recipe across Tamil Nadu.I am eager to try that too.Lets see how to make this flavourful and easy to make Anjappar Biryani Recipe in detail.
Before going to the recipe,I would like to tell something.As I am bit tied up with some personal work, i will try to make a post whenever i find time.Please bear with my irregular postings just for a week.Thanks for understanding.
Check out my other popular Tamil Nadu Biryani recipes

Ambur star biryani

Dindigul Thalappakatti biryani

Coimbatore Angannan biryani

Muslim wedding biryani

Kuska

Anjappar biryani recipe

Anjappar biryani recipe using vegetables


Anjappar biryani recipe using vegetables Anjappar biryani recipe with potato & peas - Sunday special lunch menu series - 14
Cuisine: Indian
Category: Lunch
Serves: Serves 2
Prep time: 20 Minutes
Cook time: 15 Minutes
Total time: 35 Minutes


INGREDIENTS

  • Basmati rice - 1 cup ( India Gate)
  • Potato - 3 nos
  • Green peas - a fistful
  • Green chillies - 2 nos
  • Red chilli powder - 1/2 tsp
  • Salt - as needed
  • Water - 2 cups
To roast rice
  • Ghee – 2 tsp
To saute
  • Cooking oil - 2 tbsp
  • Ghee - 1 tbsp
  • Cinnamon - 1 inch piece
  • Cloves - 2 nos
  • Cardamom - 1 no
  • Biryani leaf - 1 no
  • Big onion -1 no ( sliced)
  • Tomato - 1 no
To grind (optional)
  • Big onion - 1/2 no or Small onions - 8 nos
  • Green chillies - 2 no
  • Ginger - 1 inch piece
  • Garlic - 5 cloves
  • Fennel seeds – 1/4 tsp
To Garnish
Mint + coriander leaves – 3 tbsp ( finely chopped)
METHOD

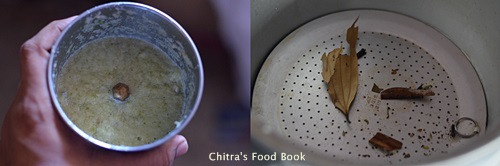
  • Wash and soak the basmati rice for 20 minutes.In the mean time,peel the potatoes and chop into cubes.Slices the onions,cut the tomatoes into small pieces.Slit the green chillies.Grind the ingredients given under”to grind” to a smooth paste adding enough water.(If u don’t want to grind them add 1.5 tsp of g&g paste along with crushed fennel seeds in oil while sauting onions and whole spices)
Anjappar biryani recipe
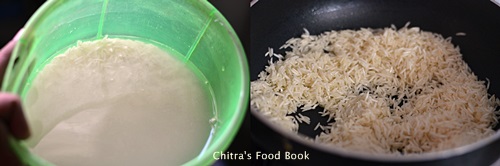
  • Now drain all the water in soaked rice.Heat ghee in a kadai and roast the rice for 2 minutes without breaking them.
Anjappar biryani recipe
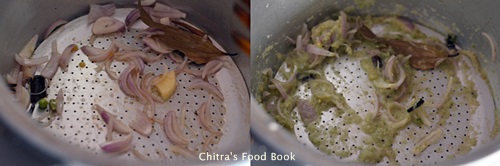
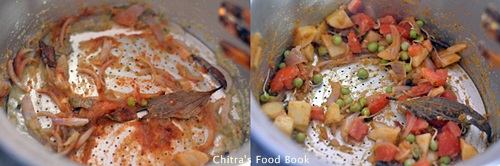
  • Now heat the rice cooker in cooking mode and add oil + ghee in the center of serrated plate.Add cinnamon,cloves,cardamom and biryani leaf.Saute for a second.Now add the sliced onions and slitted green chillies.Saute till transparent.Now add the ground paste and saute until raw smell goes off.Add red chilli powder and mix well.The rice cooker mode may switched into warm mode.No problem,just keep sauting in the heat of plate.Now add the tomatoes and salt.Mix until tomato turns pulpy.Turn the rice cooker to cooking mode and add water.
Anjappar biryani recipe
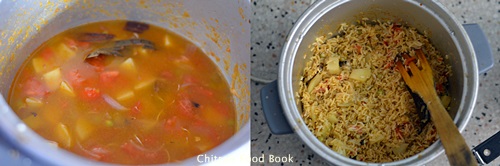
  • Add finely chopped mint+coriander leaves in water.When the water comes to a boil,add rice.Cook it till done.
    Anjappar biryani recipe
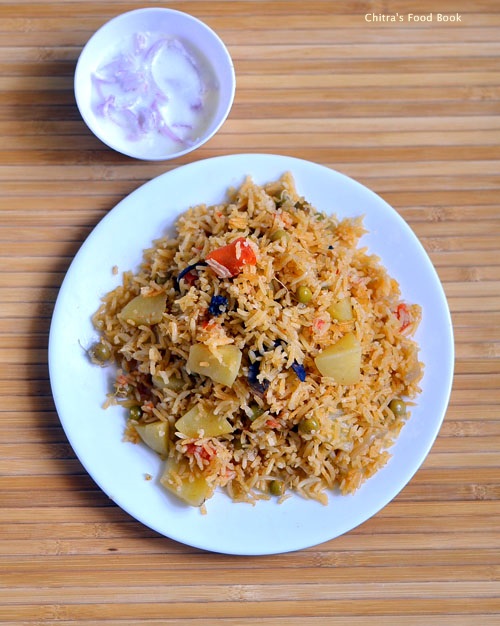
    Enjoy with raita !


Note

  • You can make this biryani using pressure cooker too but change the quantity of water to 1.5 cups.
  • Adjust the quantity of chillies based on your need.
  • You should not add mint+coriander leaves while sauting.Add them only in the water before adding rice.
  • Roasting rice helps to give firm and long grain rice.

Try this yummy Anjappar style biryani recipe in a weekend and Enjoy with your familyHappy
anjappar style biryani

الجمعة، 17 أبريل 2015

EGGLESS VANILLA MUG CAKE RECIPE-MICROWAVE RECIPES

Vanilla mug cake recipe
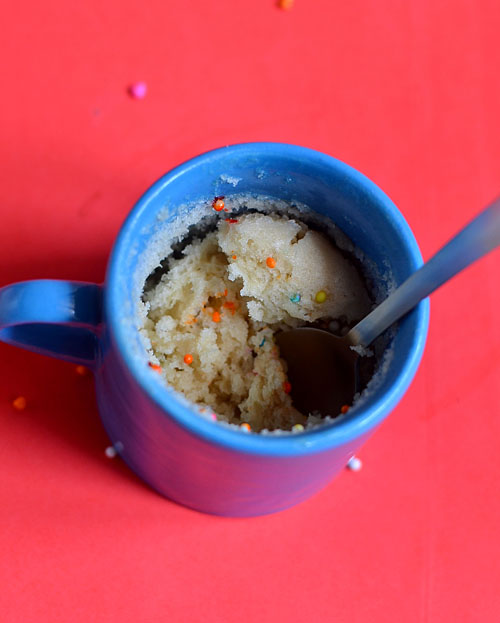
Its been a long time since i shared an eggless mug cake recipe here.After trying some one minute & 5 minute cake successfully,i am much more comfortable & confident in trying out recipes like this.Its my long time wish to try out one minute vanilla cake as it is my most favourite flavour.I have been searching for the same and i finally found it here.It came out super soft n spongy with a lovely vanilla flavor.Try this easy cake recipe for your kids during this summer vacation.It is going to be an instant hit in your family.Let me know your feedback once u try it !I am waiting Happy
Note: You should consume the cake immediately after baking because the bottom of cake may turn slightly chewy due to the heat of the bowl.So please keep this in mind.
Eggless vanilla mug cake recipe

1 Minute Vanilla Mug Cake Recipe


1 Minute Vanilla Mug Cake Recipe 1 Minute Vanilla Mug Cake Recipe - Easy,Instant & tastes delish !
Cuisine: Indian
Category: Cakes
Serves: Serves 1
Prep time: 5 Minutes
Cook time: 1 Minute
Total time: 6 Minutes


INGREDIENTS

  • All purpose flour/Maida - 2 tbsp
  • Sugar - 1.5 tbsp
  • Cooking oil - 3/4 tbsp  (any odourless oil,i used sunflower oil)
  • Milk - 2 tbsp
  • Baking powder-1/4 tsp
  • Vanilla essence- 1/4 tsp ( Increase based on your taste)
  • Salt – a small pinch
METHOD

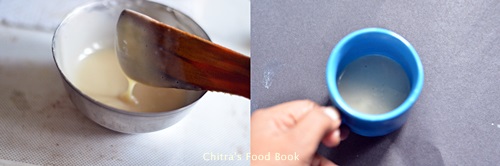
  • In a bowl,take maida,sugar,baking powder and salt.Mix well.To this add the wet ingredients like Milk,oil and vanilla essence.Mix well without lumps and make sure sugar is melted.The batter will fall like a ribbon.It is the right consistency of batter.
Vanilla mug cake
  • Now pour the batter into a microwave safe bowl.I used a porcelain mug.The size of mug should be at least double the size of batter.Microwave it in high power( 800w) for 1 minute.Adjust the timings based on the power of your microwave.The batter will rise till the brim and again goes in.So don’t scare.It won’t spill.
Vanilla mug cake
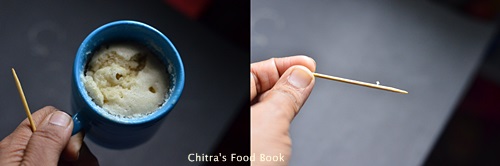
  • Check with a tooth pick.If it comes out clean or with little crumbs,cake it done.If u find wet batter in the tooth pick,bake it for 10-15 seconds more.
  • Serve it warm and enjoy !
Note : You should consume the cake immediately after baking else the bottom of cake may turn slightly chewy due to the heat of the mug.If u don’t want to consume immediately,transfer the cake to another bowl and use it later.


Note

  • Make sure sugar is melted completely before u bake.So mix well for 2-3 minutes.
  • U can use powdered sugar but i am not sure with measurements.
  • U should consume the cake immediately to enjoy its best taste.


Eggless vanilla mug cake recipe

Try this instant,one minute vanilla mug cake.Treat ur kids and loved ones Happy
Eggless vanilla mug cake

الأربعاء، 15 أبريل 2015

French Fries Recipe-Crispy Homemade French Fries

 French fries recipe
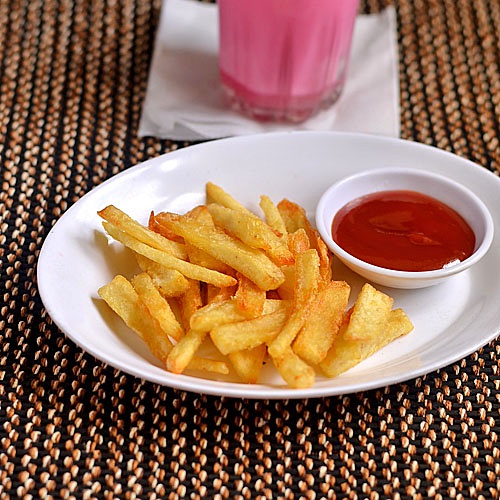
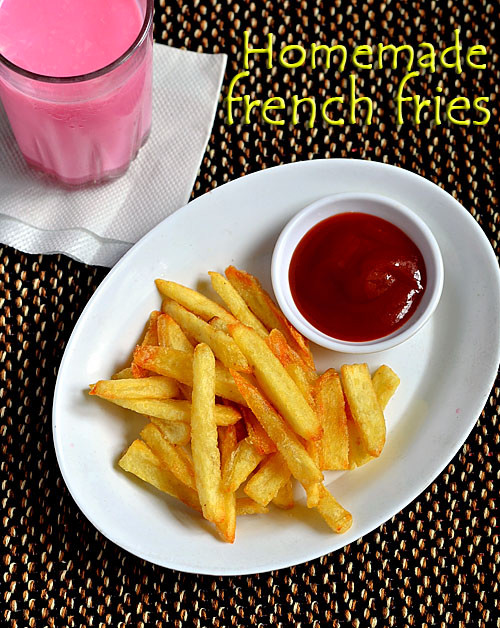
Recently i saw my friend buying a packet of frozen french fries to fry using her newly bought air fryer.It tempted me to try french fries at homeTongue.The success of McDonalds Veg Burger recipe & KFC style veg strips recipes made me confident enough to try this most popular,kids favourite french fries recipe too.I googled so many recipes & videos to make a perfect homemade french fries.As i mentioned in my homemade potato chips post,u need to use the right potatoes to get crispy McDonalds style french fries.People in abroad can use Russets or baking potatoes.In India,u get red colored potato covered with mud.It is called as chips potato.U have to use that variety for best results.If u have these potatoes in hand,just carry on with this recipe.U can make it perfect as shown in the pictureHappy.Here i have just sprinkled salt like in restaurants.U can also season them with organic spices if u wish.And if you are health conscious,u can opt for baked version too.I have given the temperature settings in the method section.When i tasted these fries,i reminded my daughter Raksha.She is in Salem for vacation.She loves these fries a lot and today i missed her very badly Sad.Ok,Lets see how to make crispy,homemade french fries recipe with the picture of potato i used.


Potato pictures
 
French fries
 

Homemade french fries recipe


Homemade french fries recipe How to make crispy french fries at home easily using 3 methods.
Cuisine: Indian
Category: Snacks
Serves: Serves 3
Prep time: 10 Minutes
Cook time: 10 Minutes
Total time: 20 Minutes


INGREDIENTS

  • Red colored potatoes with mud - 2 nos (Big oblong shaped)
  • Salt - as needed
  • Ice cold water or water at room temperature – as needed
  • Cooking oil - to deep fry
METHOD

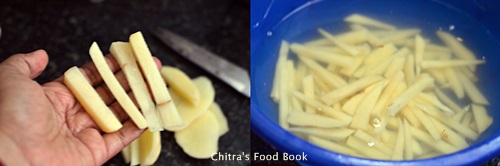
  • Wash and peel the skin of potatoes.Cut them into 1/2 inch thick slices and then into thin strips of uniform size.
French fries recipe
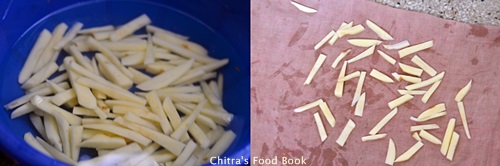
  • Wash the strips in plain water or ice water for 2 –3 times to remove the excess starch content.Now pat it dry in a clean kitchen towel.Leave it open for 5 minutes.Make sure there is no water in the strips and it should be completely dry.
French fries recipe
French fries recipe
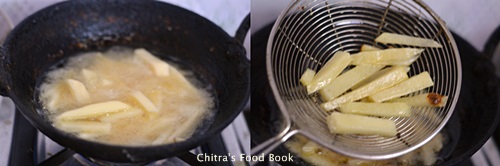
  • Heat oil till medium hot and deep fry the potato strips for 2 minutes in medium flame.It would be oily and soft.Make sure the colour of potatoes are white.Remove & drain them in a tissue paper.Let it cool down completely.Store in zip lock bags and freeze them for later use.If making immediately,follow the next step.
French fries recipe
French fries recipe
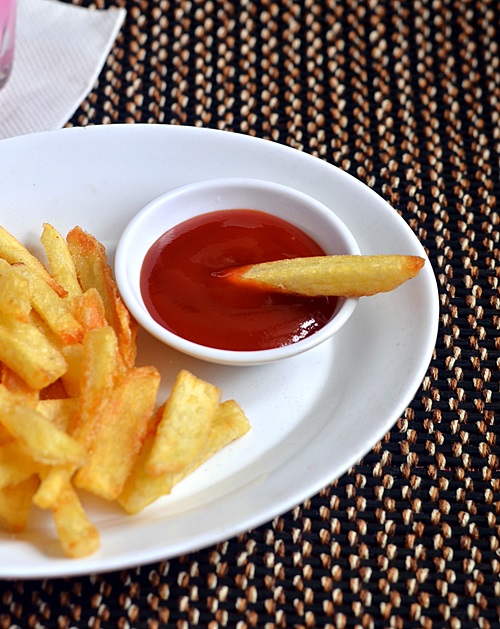
  • Again heat oil till its well heated but not smoky.Now deep fry the potato strips for the second time till it becomes crispy and golden.Keep tossing them for uniform cooking.Remove in a tissue and sprinkle some salt.Serve with tomato sauce.
French fries recipe

  • NOTE : If u want to make them in bulk and store it for later use,after frying for the first time,remove and cool down completely.Store them in a zip lock cover and freeze it till use.Whenever u want to make it,heat oil well and deep fry them.Oil may sizzle & splutter as the potatoes are frozen and coated with ice.So fry them carefully till golden and crispy and serve hot.
  • Baked version : Follow the same steps till  u pat dry the potato strips in kitchen towel.Preheat the oven in convection mode at 200c.No need to cook the potatoes.Arrange the strips in a baking plate and drizzle some oil all over them.Sprinkle some salt or organic seasoning.Mix well and bake them for 25-30 minutes OR till they become crispy.Remove and serve hot.Soon,i will try to make a separate post for this baked version.
    Enjoy !


Note
  • Follow any of the above discussed methods based on your liking.You will get crispy french fries.
  • To make these fries more flavourful,u can sprinkle garlic powder,thyme,basil etc.
  • Use Red colored mud coated potatoes for best results.Other potatoes may turn brown quickly while roasting.
  • Washing the potatoes twice is to remove the extra starch content in the potatoes.It helps u get nice color to the fries.


Homemade french fries
Try these awesome,crispy french fries at home for your kids.They will love it for sure Love StruckBlushing
French fries