الاثنين، 22 أغسطس 2016

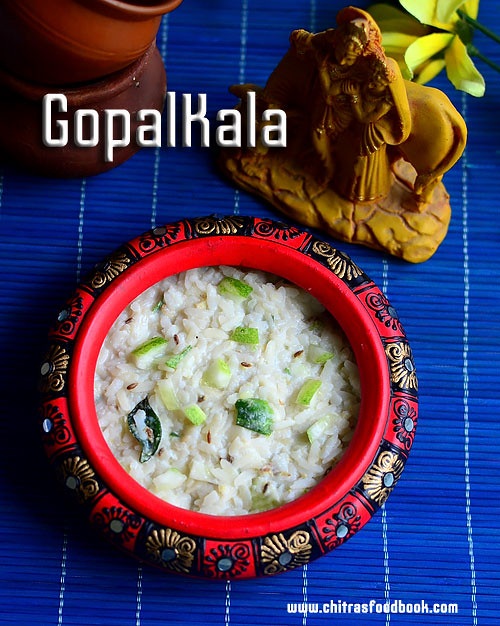
Gopalkala Recipe / Dahi Poha – Easy Krishna Janmashtami Recipes

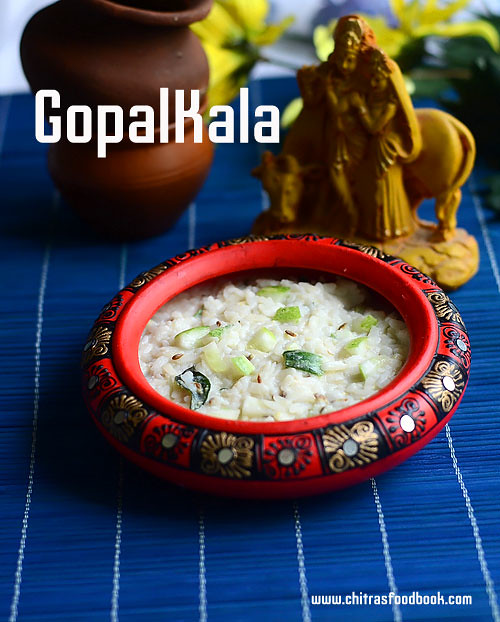
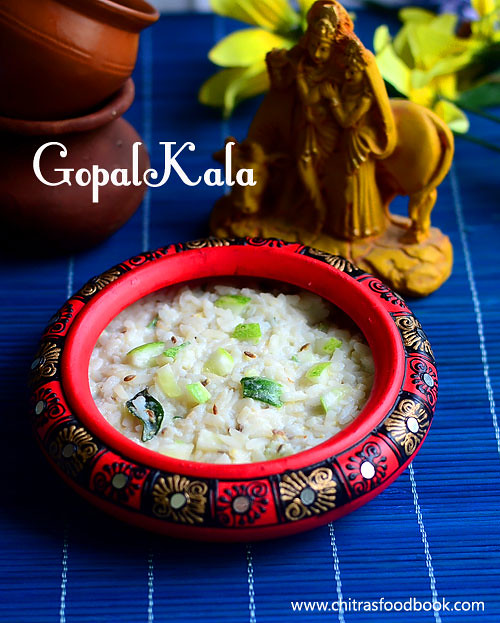
Gopalkala recipe
If you are looking for an easy Janmashtami recipe, Gopalkala is the best choice. It is a most popular dish prepared on the occasion of Janmashtami/Krishna jayanthi in North India. It is prepared in temples, offered to Lord Krishna and served as prasad during the festival for the devotees. When  Lord Krishna was young, he used to mix all his Cowherd friend’s lunch recipes with his favorite curd, butter, milk, made this dish and served his friends. 'Gopal' is the name of Lord Sri Krishna. 'Kala' means the mixture. So this dish is named as Gopalkala. It is is a mix of beaten rice/ poha, curd,milk, ghee, green chilli, sugar, salt and cucumber.This is also called as Dahi poha. I followed the recipe from this space. There is no hard and fast rule to make this dish. This salty and sumptuous dish is prepared in every home in North India where the festival of Janmashtami is observed. It is extremely easy to prepare and hardly takes few minutes to prepare. Try this easy Janmashtami recipe and have a great celebration !


Gopalkala recipe

Gopalkala recipe


Gopalkala recipe Gopalkala recipe - A mix of beaten rice, curd - Easy janmashtami recipes
Cuisine: Indian
Category: Festival recipes
Serves: Serves 2
Prep time: 5 Minutes
Cook time: 10 Minutes
Total time: 15 Minutes


INGREDIENTS
1 cup - 200ml
  • Poha/ Thick Rice flakes - 1/2 cup
  • Boiled milk - 3 tbsp
  • Curd - 1/4 - 1/2 cup ( Adjust)
  • Butter - 1/2 tbsp ( Optional)
  • Sugar - 1/2 tsp
  • Salt - as needed
  • Cucumber - 2 tbsp ( chopped)
To temper
  • Ghee - 1 tsp
  • Cumin seeds - 1/2 tsp
  • Green chilli - 1 no ( finely chopped)
  • Curry leaves - few
  • Ginger - few pieces
METHOD

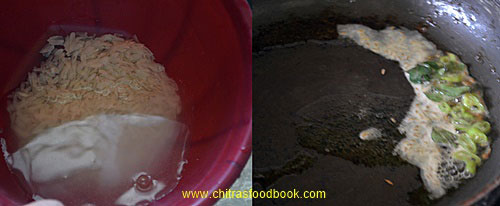
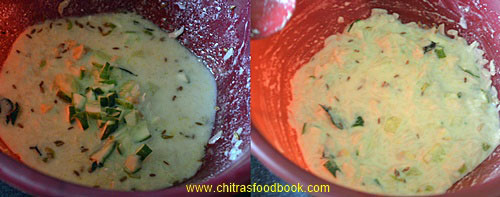
  • Wash the poha/Thick rice flakes twice or thrice. Remove all the debris. To this, add milk, curd, butter, salt and sugar. Mix well. Let it soak for few minutes.In a small kadai, heat ghee. Temper cumin seeds, green chilli, curry leaves and ginger pieces.Add this to the poha mix.Add finely chopped cucumber pieces. Mash the poha well and serve. It thickens over time. So add more curd, mix well and serve accordingly. 
Gopalkala recipe
Gopalkala recipe
Enjoy !
Adding butter and milk is optional. You can add finely chopped guava and banana pieces too. Gopalkala thickens in time. So add more curd and mix while serving.

 
Easy, no cook Dahi Poha/Gopalkala is ready to offer to Lord Krishna !
Dahi poha

الجمعة، 19 أغسطس 2016

Mango Banana Coconut Smoothie

Mango Banana Coconut Smoothie

As I don't usually eat breakfast, smoothies are an ideal way to get needed nutrients to start your day. Fruit is essential for most of my smoothies, along with coconut milk or almond milk and other juices, such as carrot juice and cranberry juice.

This smoothie is one of my tastiest yet and very easy to whiz up in a regular blender — no high speed action needed to make this one that comes together in a few minutes. It's very creamy, with those distinctive mango and banana flavors.


Mango Banana Coconut SmoothieMango Banana Coconut Smoothie
Recipe by
Published on August 19, 2016

Cold, refreshing and delicious smooth frozen mango and banana smoothie with coconut milk

Print this recipePrint this recipe

Ingredients:
  • 1 frozen banana (2/3 cup sliced)
  • 1 cup frozen mango pieces (1/2 large mango)
  • 3 pitted dates, chopped
  • 2/3 cup coconut milk
  • 1 teaspoon turmeric
  • 1 1/2 cups water, or as needed
Instructions:
  • Prepare the banana the night before. Peel, slice, and place on a small parchment lined tray. Pop into the freezer.

  • The same can be done with the mango, but I used frozen mango pieces for convenience.

  • Toss all of the ingredients into a blender and blend until smooth, adding more water if necessary. If you like, add some freshly squeezed orange juice for a citrusy flavour.

  • Serve cold.

Makes about 4 cups or 2 large servings

Mango Smoothie with Coconut Milk and Banana

Other smoothies to enjoy from Lisa's Kitchen:
Beet and Top Green Smoothie with Apple, Orange and Ginger
Pomegranate & Blueberry Oat Smoothie
Raspberry-Banana Oat and Chia Seed Smoothie
Oat-Mango Smoothie with Blackberries

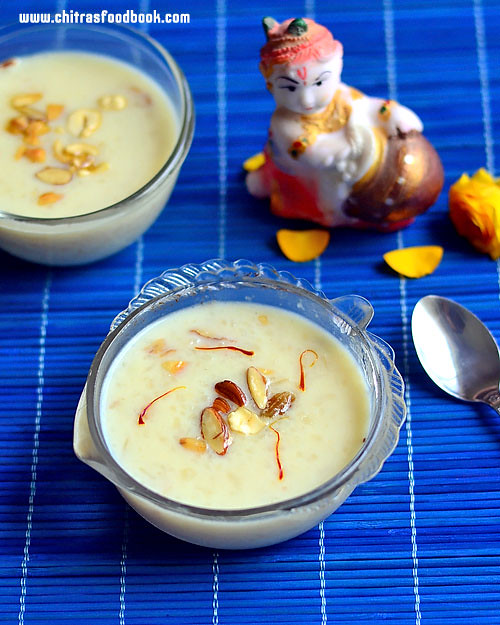
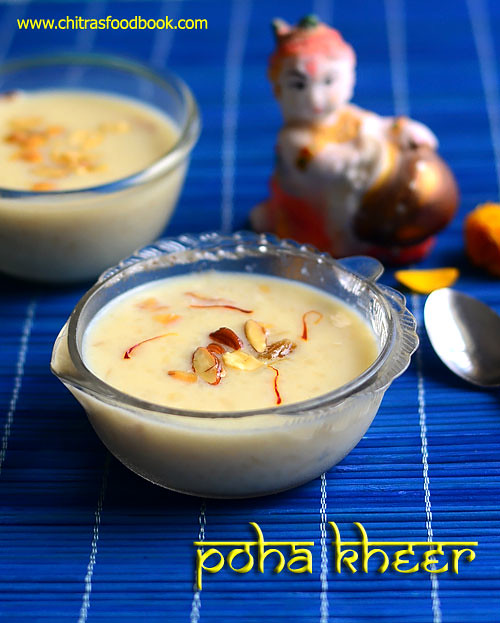
Poha Kheer - Choora Kheer - Aval Payasam - Krishna Janmashtami Recipes

Poha kheer
Poha kheer also known as Choora Kheer ( Aval Payasam in Tamil, Pressed rice/Rice flakes pudding in English, Atukula payasam in Telugu, Avalakki payasa in Kannada) is a creamy, rich North Indian dessert recipe made using Milk, pressed rice, sugar, nuts and cardamom powder. Krishna Janmashtami/Gokulashtami festival is around the corner. We South Indians i.e Tamil people make sweet seedai, Salt seedai, Kai murukku, Paal payasam and appam for the festival whereas North Indians make their specialty recipes like Rice Kheer/ Poha kheer, Kalakand, Shrikand, Gopalkala, Mathura Ke peda and many more. Actually I bookmarked these recipes long back but I couldn’t try them.So this year I started with a North Indian recipe for Krishna Jayanthi festival.. I followed Sanjeev Kapoor’s recipe but used more milk than the mentioned quantity. Its so easy to make and it came out creamy and delicious.This kheer can be given for babies too. Actually Sendhil  & Raksha is not a big fan of Poha kheer with sugar. But they liked this a lot. Try this easy kheer recipe for this Janmashtami festival and offer to God. Lets see how to make poha kheer with step by step photos and a video ( Will update soon) !
Check out my other Krishna Jayanthi recipes HERE
Poha kheer recipe

Poha kheer/ Aval Payasam


Poha kheer/ Aval Payasam Poha kheer/Choora kheer recipe - Krishna Janmashtami Recipes
Cuisine: North Indian
Category: Dessert
Serves: Serves 2-3
Prep time: 5 Minutes
Cook time: 15 Minutes
Total time: 20 Minutes


INGREDIENTS
1 cup - 250ml
  • Thick poha/Aval/Rice flakes - 1/4 cup
  • Milk – 1.5 cups
  • Sugar – 2.5 tbsp
  • Cashews, Almonds and Raisins - 5 each
  • Saffron threads - few
  • Cardamom powder - 1/8 tsp
  • Ghee - 1 tbsp
METHOD

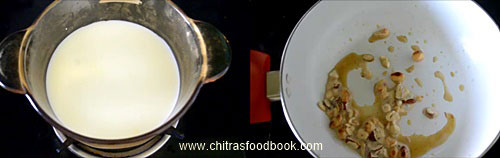
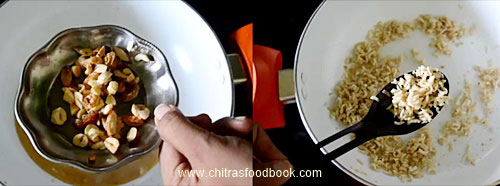
  • Boil milk in a pan. In the mean time, heat ghee in a kadai. Roast cashews, almond and raisins. Remove in a plate leaving the ghee in the pan. In the same ghee, roast poha for 2 minutes. It will roast with a nice flavor. (Skip roasting poha. Just wash and add to milk. Some versions call for this method too)
Poha kheer recipe
Poha kheer recipe
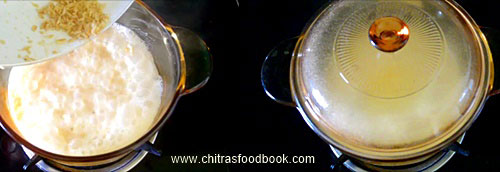
  • Add the roasted rice flakes to the boiling milk. Cover and cook the poha in very low flame. It takes nearly 10 minutes to cook. Mix it well once or twice in between. Make sure the bottom is not burnt. If needed, add 1/4 cup more milk in the middle.
Poha kheer recipe
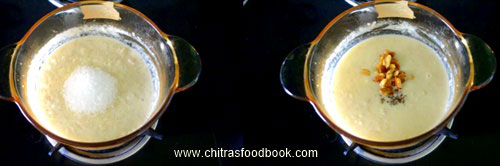
  • After the poha is cooked well, add sugar and mix well. Add cardamom powder and roasted nuts. Add saffron threads if you wish. Mix well and give a boil. Switch off the flame and serve warm.
Note : This kheer thickens over time. So add more milk and sugar while serving to adjust its consistency and sweetness. Boil for a minute and serve warm. Enjoy !

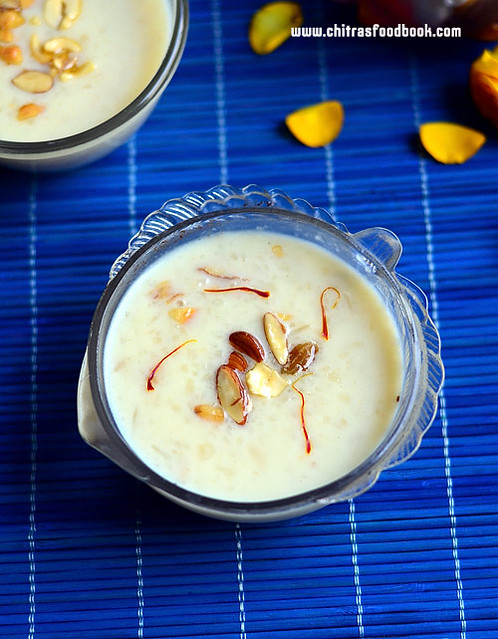
Easy, yummy Poha kheer is ready to enjoy !
Poha kheer recipe


الأربعاء، 17 أغسطس 2016

Easy Hotel Idli Sambar Recipe – How To Make Tiffin Sambar

Hotel style idli sambar
Usually I make Tamil nadu Hotel style idli sambar adding freshly roasted & ground spices. To make my job easier, I started making Idli sambar powder in bulk and use it to my need. Few months back, I watched Venkatesh Bhat’s hotel style idli sambar recipe in Samayal Samayal cookery show. It is a simplified & quick version of restaurant style idli sambar without any grinding job. As I had already tried Kerala ulli sambar recipe (Vengaya sambar), I found this recipe very close to it. So I tried it confidently. As expected, it came out really well. I started making it regularly with my own modifications. This has become Raksha’s favorite idli sambar. It tastes good for all tiffin recipes like Idli, dosa, vada, Pongal and rice upma as well. For variations and to make it more healthy for your kids, you can add vegetables like potato, carrot & use few pieces of pumpkin instead of jaggery to give a natural sweetness in sambar. If you like the taste of this sambar, you can use this sambar recipe for making mini idli sambar and sambar vadai. Try this easy version of idli sambar and prepare a quick side dish for idli, dosa during busy morning hours. Ok, lets see how to make hotel style idli sambar in an easy way !
Check out my other Idli Sambar varieties too !
Hotel idli sambar

Hotel Style Idli sambar Recipe


Hotel Style Idli sambar Recipe Hotel style idli sambar recipe - Quick version
Cuisine: South Indian
Category: Side dish For Idli, dosa
Serves: Serves 3
Prep time: 10 Minutes
Cook time: 20 Minutes
Total time: 30 Minutes


INGREDIENTS
1 cup - 250ml
  • Toor Dal - 1/4 cup
  • Turmeric powder - 1/4 tsp
  • Cooking oil - few drops
  • Water - 2 cups
  • Big onion - 1 no (cubed)
  • Ripe tomato - 2 nos (Small sized, Do not chop it, use whole tomato)
  • Asafetida/Hing - a big pinch
  • Curry leaves - few
  • Red chilli powder – 1/4 tsp
  • Dhania powder – 1/2 tsp
  • Grated jaggery - 1/2 tsp
  • Besan flour – 1 tsp
To temper
  • Cooking oil - 1 tbsp
  • Mustard seeds - 1 tsp
  • Urad dal - 1/2 tsp
  • Sambar powder - 1 tbsp
Ghee & coriander leaves - to garnish

** Skip onion to make no onion, no garlic idli sambar
** Use 3 pumpkin cubes along with dal to get natural sweetness in sambar.
**Add mixed vegetables like carrot & potato with dal to make it more healthy.Use one tomato if its bigger in size or sour in taste .
         
METHOD

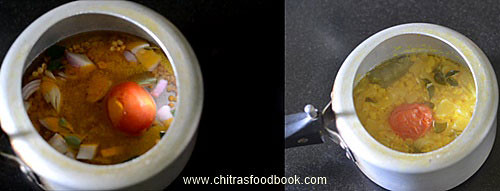
  • Wash and take the toor dal in a pressure cooker base. Add 2 cups of water and let it soak for few minutes till you chop onions. Chop the onion and add to the cooker.Add one whole tomato ( Do not chop the tomato because dal may not cook mushy), turmeric powder, curry leaves, hing and few drops of cooking oil. Add enough water and cook the dal in low flame for 2 whistles. Remove the lid after the steam is released. Mash the dal + tomato very well. Make sure dal is well cooked and mashed well.
Hotel style idli sambar recipe
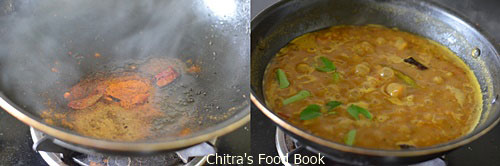
  • Add red chilli powder, dhania powder, jaggery and required salt. Dilute besan flour in 1/4 cup of water and add to the cooked dal ( ** Adding besan flour helps to get a creamy texture to this sambar and blends well with dal). Mix well. In a kadai, heat oil. Splutter mustard seeds, urad dal & sambar powder. Saute for few seconds without burning sambar powder. Do not change its color. Add the mashed dal to the kadai. Boil the sambar for  few minutes by adding chopped coriander leaves and ghee. Switch off the flame ,cover the sambar with a lid and give a standing time of one hour before serving.
    Hotel style idli sambar recipe
  • Enjoy with hot idli, dosa & pongal. Drizzle a tsp of sesame oil or ghee if you like !

Try this easy version of hotel idli sambar at home and enjoy with piping hot idlis !
You will love it Love Struck
Hotel style idli sambar recipe

الثلاثاء، 16 أغسطس 2016

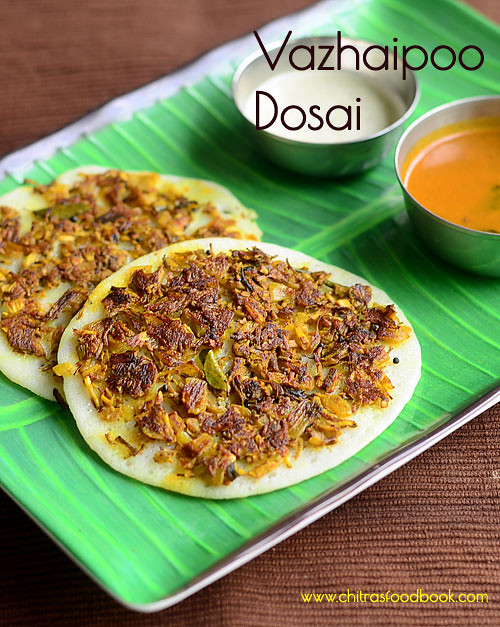
Vazhaipoo Dosai Recipe – Banana Flower Dosa

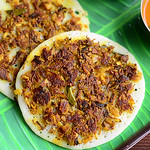
Vazhaipoo dosai
Recently I tasted vazhaipoo uthappam in Salem Saravana bhavan – Aasai Dosai restaurant. It was very tasty and I din’t have the feel of eating vazhaipoo. As its a healthy dosa, I wanted to try at home. I was able to guess the ingredients of the masala(topping) and recreated the same. It came out very closeDancing. Sendhil loved it a lot. Most of us make Vazhaipoo usili, vazhaipoo vada  and even vazhaipoo adai at home. This vazhaipoo dosa is sure a welcome change from them. The consumption of banana flower would be more in this dosa. Make this dosa for your husband and ask him to guess the ingredientsWinking. He would love its taste for sure and definitely becomes surprised to know it is a vazhaipoo recipe. This dosa tastes the best with coconut chutney . Make sure you use fresh banana flower and its not bitter to taste.Ok, let see how to make restaurant style, healthy vazhaipoo uthappam recipe for your breakfast/dinner with step by step photos.
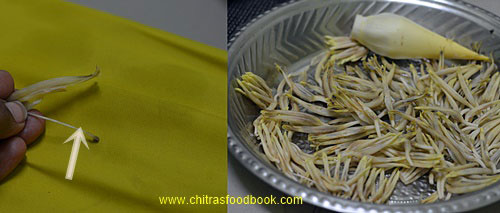
Don’t forget to check out my how to clean vazhaipooVazhaipoo kuzhambu, Vazhaipoo vadai, vazhaipoo poriyal, Vazhaipoo usili and vegetable uthappam recipes.


Banana flower dosa

Vazhaipoo dosa/ Banana flower dosa recipe


Vazhaipoo dosa/ Banana flower dosa recipe Vazhaipoo/Banana flower dosa recipe – Healthy dosa variety for breakfast/dinner
Cuisine: South Indian
Category: Main - Breakfast
Serves: 7 nos
Prep time: 10 Minutes
Cook time: 15 Minutes
Total time: 25 Minutes


INGREDIENTS
1 cup - 250ml
For the masala
  • Vazhaipoo/Banana flower - 1 no
  • Big onion - 2 nos
  • Green chillies - 2 nos ( thinly sliced)
  • Curry leaves - few
  • Chilli powder or sambar powder - 1/2 tsp
  • Turmeric powder - 1/4 tsp
  • Salt & water - as needed
  • Lemon juice – few drops (optional)
To temper
  • Cooking oil - 2 tbsp
  • Mustard seeds - 1/2 tsp
  • Urad dal - 1 tsp
  • Cumin seeds - 1 tsp
  • Hing/Asafetida - a big pinch
METHOD

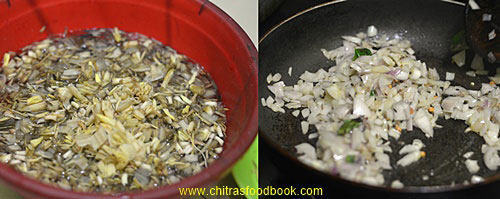
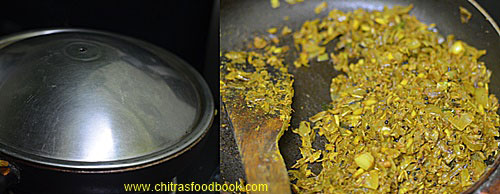
  • Wash and clean the vazhaipoo ( Refer this post on how to clean vazhaipoo). Chop it finely and keep them immersed in water till use. Finely chop the onion and green chillies.
Vazhaipoo dosai
  • In a kadai, heat oil and splutter mustard seeds, urad dal, cumin seeds.Add finely chopped green chillies and saute till its color changes. Add onions,curry leaves and saute till transparent.
  • Vazhaipoo dosai
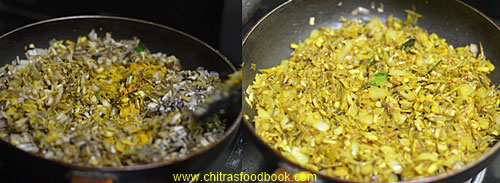
  • Now add the turmeric powder, chopped vazhaipoo, red chilli powder or sambar powder, required salt. Mix well. Mix well until vazhaipoo shrinks and cooks well. Cover the kadai with a lid and simmer the flame. Let the vazhaipoo cook soft. Stir it once in the middle.Switch off the flame and add few drops of lemon juice if needed. Check for taste.
Vazhaipoo dosai
Vazhaipoo dosai
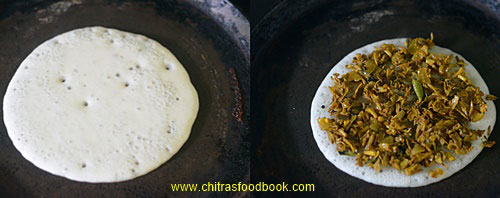
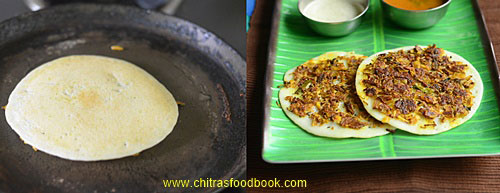
  • Heat a dosa pan and pour 1 ladleful of batter. Spread it slightly for making uthappam. After you see the bubbles over the dosa, spread the vazhaipoo masala over the dosa and drizzle a tsp of gingely oil over the dosa. Flip the dosa carefully and cook for a minute.

Vazhaipoo dosai
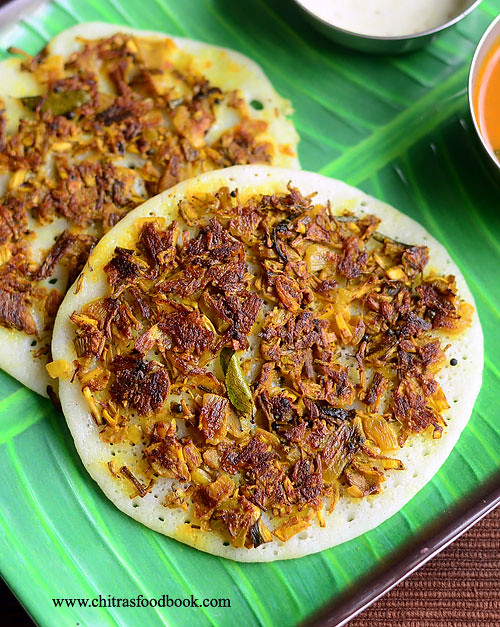
  • Remove the dosa and serve hot with chutney or sambar ! Enjoy !
Vazhaipoo dosai
Note :  Add more green chillies or chilli powder as per your wish.

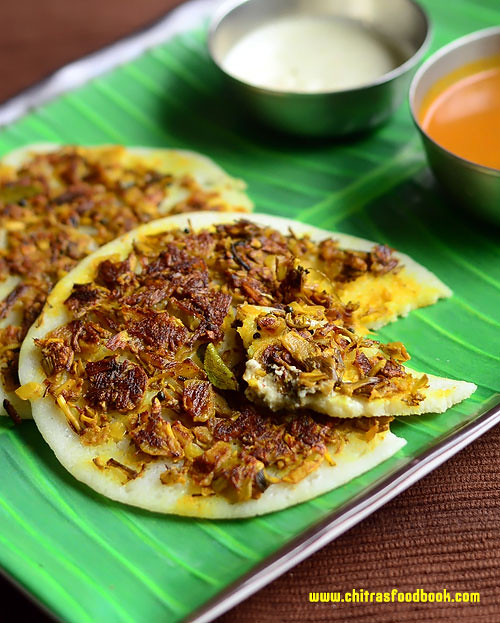
Yummy, healthy vazhaipoo dosa is ready to serve with coconut chutney and sambar !
 Vazhaipoo dosa


الاثنين، 15 أغسطس 2016

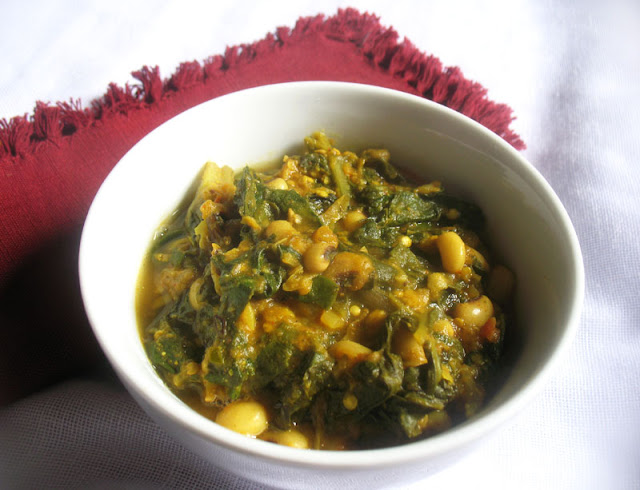
Spicy Black-Eyed Pea Curry with Swiss Chard and Roasted Eggplant

Spicy Black-Eyed Pea Curry with Swiss Chard and Roasted Eggplant

Black-eyed peas have long been one of my favorite legumes, adding a welcome earthiness to dishes comprised of tangy, zesty or spicy flavors that make them a wonderful base in curries. In this nourishing curry, earthiness takes the main stage with roasted eggplant and Swiss chard.

The eggplant isn't really the main star in this dish, but it does add texture and roasting the vegetable brings out a delightful hint of sweetness. Fried eggplant is enjoyable too, but roasting brings out a unique flavor profile that I don't find frying quite matches — it was so good just as is, with salt just out of the roasting pan, that it's a wonder any of the eggplant ended up in the curry. Next time I might try it in a salad to appreciate the goodness of this under appreciated vegetable.

Spicy Black-Eyed Pea Curry with Swiss Chard and Roasted EggplantSpicy Black-Eyed Pea Curry with Swiss Chard and Roasted Eggplant
Recipe by
Cuisine: Indian
Published on August 15, 2016

Wholesome and nourishing, sweet and earthy black-eyed pea curry with Swiss chard and roasted eggplant

Print this recipePrint this recipe

Ingredients:
  • 2/3 cup dried black-eyed peas (2 cups cooked)
  • 1 large globe or Italian eggplant
  • 1 bunch Swiss chard, trimmed and chopped
  • 2 teaspoons olive oil
  • 2 shallots, mined
  • 2 green or red chilies, seeded and finely chopped
  • 2 teaspoons curry powder
  • 1/2 teaspoon ground coriander
  • 1/2 teaspoon ground cumin
  • 1/2 teaspoon ground mustard powder
  • 1/2 teaspoon garam masala
  • 1 medium tomato, finely chopped
  • 5 tablespoons water, or more as needed
  • juice from 1 lemon (3 tablespoons)
  • 1 teaspoon sea salt, or to taste
Instructions:
  • Rinse the black-eyed peas and soak in several inches of water for 6 hours or overnight. Drain and rinse, then transfer to a large saucepan and cover with fresh water. Bring to a boil, reduce heat to medium-low, cover, and simmer for 40 to 60 minutes. Take care not to overcook — the beans should be tender but not be falling apart. Drain and set aside.

  • To prepare the eggplant, cut of the stem and bottom edge and then cut in half lengthwise. Score the flesh into diagonal 1-inch lines, then turn and score again until you have a diagonal pattern. Take care not to cut through the skin. Sprinkle with some salt and let sit for 40 minutes. Rinse and squeeze out any excess water. Brush the eggplant with some oil and transfer to a roasting pan. Bake in a preheated 400° oven until the flesh appears collapsed and is wrinkly. Remove from heat and let cool for about 10 minutes, season with a bit of salt, and remove the flesh from the eggplant. If there is too much water, drain in a strainer. Set aside.

  • Heat the oil over medium heat in the same saucepan used to cook the black-eyed peas. When hot, toss in the shallots and chilies and sauté for 2 to 3 minutes. Now add the spices and stir for another minute, until fragrant. Add the tomato, cook for another few minutes, and then add the eggplant and black-eyed peas, and cook for another few minutes, stirring often.

  • Pour a few tablespoons of water into the pan and add handfuls of chard at a time until wilted. Add more water as necessary. Add the lemon juice and salt to taste near the end of the cooking time. Remove from heat, cover, and let sit for a few minutes before serving.

Makes 4 to 6 servings

Black-Eyed Pea Curry with Chard

This is my contribution to Eat Your Greens, a monthly event co-hosted by Shaheen and The VegHog.

Other black-eyed pea dishes to enjoy from Lisa's Kitchen:
Black-Eyed Peas with Coconut Milk, Curry Leaves and Spices
Black Tea and Gingered Black-Eyed Peas
Black-Eyed Peas with Fenugreek and Tomatoes
Black-Eyed Peas with Mustard, Cumin and Curry Leaves
الجمعة، 12 أغسطس 2016

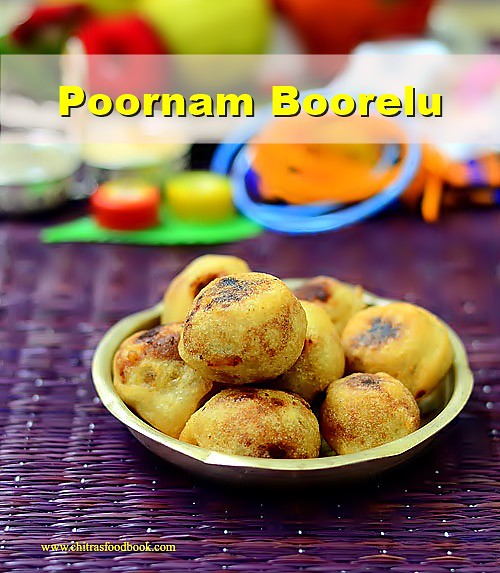
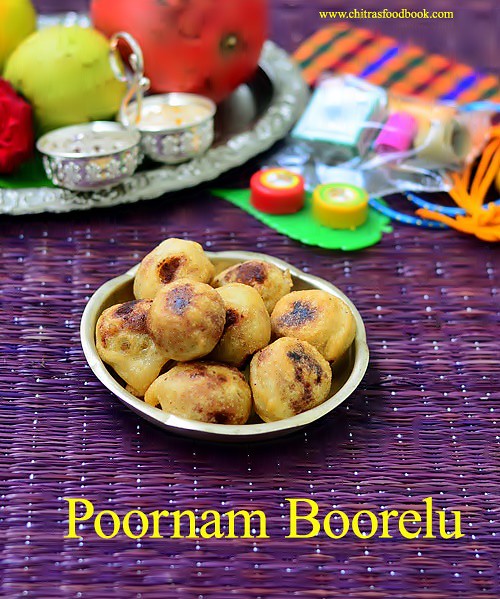
Poornam Boorelu Recipe – How To Make Poornalu – Andhra Burelu

Poornam boorelu
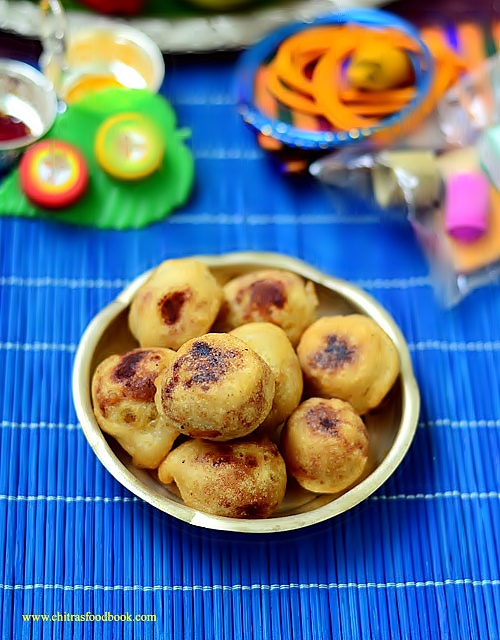
Poornam Boorelu/Poornalu/ Burelu (In Telugu) is one of the most important Neivedyam /Prasadam recipes for Varalakshmi Vratham in Andhra. Most of the people make this during Diwali and Ganesh chaturthi too. Boorelu is very similar to Tamil nadu style Suzhiyam/Suzhiyan recipe but the ingredients used for the outer covering is different. In suzhiyan, maida and rice flour is used for the outer covering whereas boorelu needs rice + urad dal batter (Just like dosa batter) for the covering. Otherwise, the procedure for making Pooranam is one and the same. Pooranam ( Stuffing) can be made with Senaga pappu ( Chana Dal ), Pesarapappu ( Moong dal ) or Kobbari ( Coconut). This morning I tried it for pooja and of course to post this special recipe on this Varamahalakshmi festival day. Even though its my first attempt, it came out very well and I am happy with the result. For this recipe, I asked my neighbor Sowjanya who is from Andhra. She told, on Varamahalakshmi, they make a count of 9 boorelu/poornalu and offer to God. It should be consumed only by the family members after the pooja. So its a must and should sweet recipe to be made for them during this festival.She shared her recipe along with some useful tips too. Thank you Sowjanya for the perfect recipe. We all loved it. Do try this Andhra special sweet recipe for festivals and have a great celebration. Ok, Lets see how to make Pooranam Boorelu ( Poornalu) with step by step pictures.
Andhra boorelu

Pooranam Boorelu Recipe


Pooranam Boorelu Recipe Pooranam Boorelu - Andhra style senagapappu boorelu recipe
Cuisine: Indian
Category: Sweet
Serves: 9 nos
Prep time: 5 Hours
Cook time: 3 Minutes
Total time: 5H03Minutes


INGREDIENTS
For the stuffing/Pooranam
  • Chana dal - 1/2 cup
  • Grated jaggery - 3/4 cup
  • Water - 1/3 cup
  • Cardamom - 2 nos
  • Grated coconut - 1//4 cup
For the outer covering
  • Raw rice - 1/2 cup
  • Round white urad dal - 1/4 cup
  • Water - as needed
  • Salt - A pinch
  • Sugar - 1/2 tsp
  • Cooking oil - to deep fry
METHOD

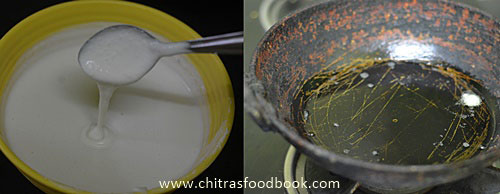
  • Wash and soak the rice and dal together for minimum 4 hours. Over night soaking is also fine. Grind it to a slightly coarse paste in dosa batter consistency adding required water. Make sure batter is not too thin. Set the batter aside for one to 5 hours. But I used it immediately without resting time.
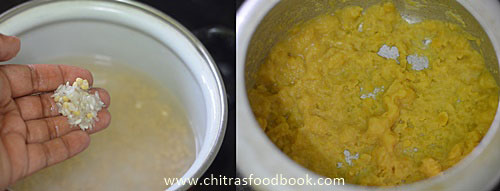
  • Wash and pressure cook chana dal adding enough water. Chana dal should be blossomed and retain its shape ( i.e when you press the dal, it should become mushy) Do not over cook the dal. Grind it to a coarse paste without adding water or mash it with a ladle.
Poornalu - Poornam boorelu
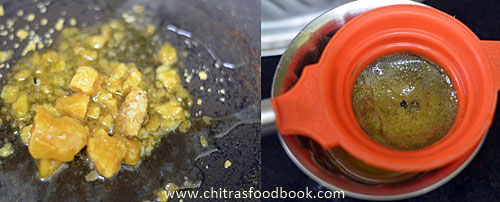
  • In a pan, melt jaggery adding water. Strain it to remove the impurities using a metal strainer. Boil the syrup till it becomes frothy or reaches one string consistency. Add the ground chana dal paste, cardamom powder and grated coconut. Mix well till it becomes a whole mass and leaves the sides of pan. Switch off the stove and let it become warm. Make balls of golf balls size and arrange in a plate.
 Poornam boorelu
 Poornam boorelu
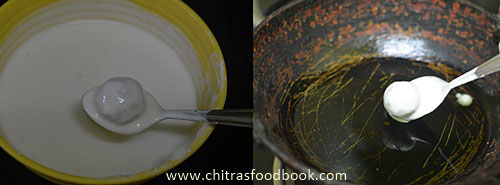
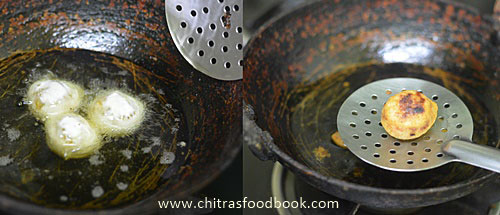
  • Heat oil to deep fry. Test the oil temperature by dropping a pinch of batter. If it rises to the top, oil heat is just right. Simmer the flame completely.Take the ground batter, add sugar, mix well. Dip a stuffing ball into the batter using a spoon. Wipe the excess batter in the sides of vessel and deep fry the balls in medium flame till it turns slightly golden with brown spots.Do not fry for long time. Remove in a tissue. Offer to GOD and get the blessings. Enjoy  eating!
 Poornam boorelu
 Poornam boorelu
 Poornam boorelu
NOTE : You should make 9 or 5 balls and offer to GOD. It should be eaten only by the family members.Do not give this as prasad to others.

Tip 1 : Adding sugar in the batter gives a mild sweet taste to the outer covering too. So it won't taste bland.
Tip 2 : Poornam should be thick and there should not be any moisture content in it else it will disperse in oil when you deep fry the balls.So add besan flour if needed to make the stuffing thick.
Tip 3 : If the batter is thin, you can add some rice flour to bring the right consistency.


Note
  • You can use the remaining batter to make dosa or punugulu.
  • While cooking dal , if u add more water , drain the excess water and grind to a smooth paste. 
  • If there is more moisture in the cooked dal, you can add some besan flour to thicken the stuffing quickly.
  • It stays soft and good for 1-2 days.
Enjoy this delicious traditional Andhra sweet at home !
Pooranam boorelu