الاثنين، 21 مارس 2016

Gujiya Recipe – Holi Recipes

Gujiya recipe
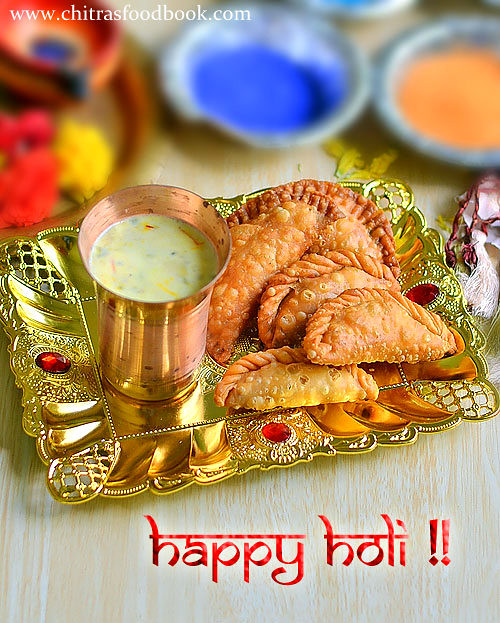
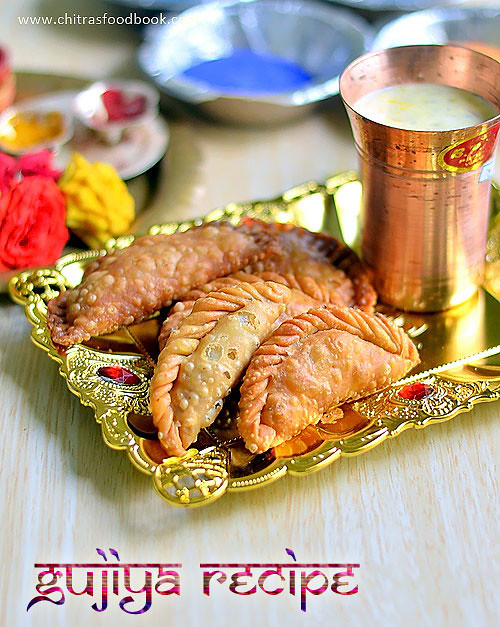
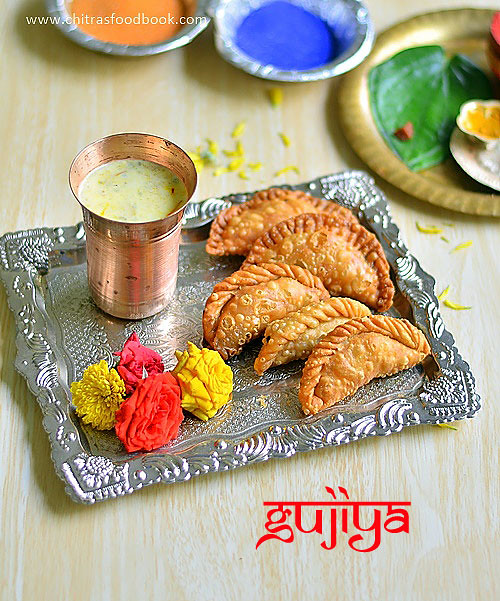
Holi festival is around the corner.When I was looking for Holi special recipes, I found Gujiya is a must to do recipe for this festival. When I browsed for the recipe, I found it was very similar to Sweet samosa/Karanji , Chandrakala and Suryakala sweet recipes. Of course there are some slight variations between each of them. So this time I tried an Authentic North Indian style Gujiya following the recipe shared by Sandhya Soni, a member of Facebook’s Chef at large group.Here is the link. It came out very well. I was very happy & satisfied with the result. Sendhil & Raksha loved it too. So I thought of sharing this wonderful recipe as my contribution to Holi festival recipes. I used khoya/mawa for gujiya filling as mentioned in the original recipe. If you wish to try without khoya, you can replace it with dessicated coconut and powdered nuts.Please refer my Sweet samosa recipe to know its procedure. Try it and share with your friends and relatives on HOLI day !! Have a colorful celebration.Lets see how to make Gujiya recipe with mawa fillingHappy
How to make gujiya - Full recipe video

Gujiya recipe

Gujiya recipe


Gujiya recipe How to make gujiya with khoya/mawa filling - Holi festival recipes
Cuisine: Indian
Category: Sweet
Serves: Yields 8-10 
Prep time: 30 Minutes
Cook time: 20 Minutes
Total time: 50 Minutes


INGREDIENTS
1 cup = 200ml
  • Maida - 1 cup
  • Melted ghee - 1.5 tbsp ( at room temp)
  • Water - as needed
For filling
  • Unsweetened khoya - 1/2 cup  ( I used Amul)
  • Powdered sugar - 1/2 - 3/4 cup ( based on taste)
  • Chopped nuts - 2 tbsp ( badam, cashew,pista)
  • Roasted sooji - 3 tbsp
  • Cardamom powder - 1/8 tsp
  • Cooking oil - to deep fry
METHOD

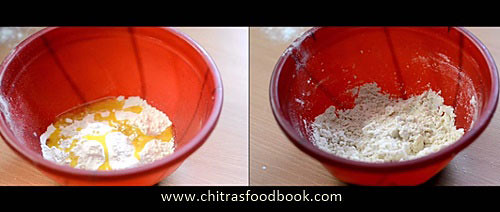
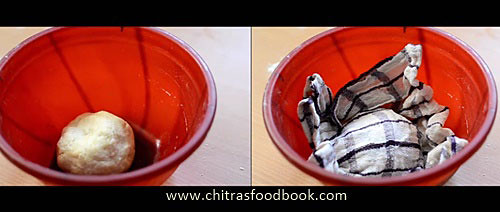
  • Take a wide bowl and add the flour.Add the melted ghee at room temperature and mix the flour.After the ghee is well mixed with the flour, add water little by little and make a smooth dough. Knead the dough for 5 minutes and rest it for 30 minutes. Cover the dough with a wet cloth.
Gujiya recipe
Gujiya recipe
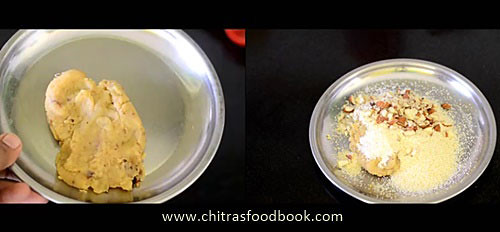
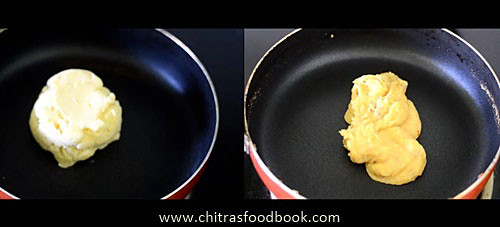
  • In the mean time,make the filling. Take the unsweetened khoya in a non-stick kadai. Heat the khoya in medium flame and mix until it leaves the pan and starts to rotate with the ladle. The color of khoya will turn golden brown. This process takes around 10 minutes or more. So do it patiently in low to medium flame.Remove in a plate. Dry roast the sooji well. Collect in another plate.
  • Gujiya recipe
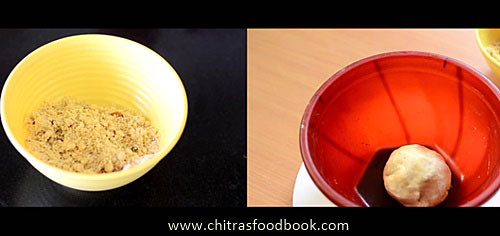
  • Let the cooked khoya  & roasted rava cool down completely. Now mix the finely chopped nuts, powdered sugar, khoya and rava very well till the mixture looks crumbly.Add cardamom powder,mix well. Stuffing is ready.
Gujiya recipe
Gujiya recipe
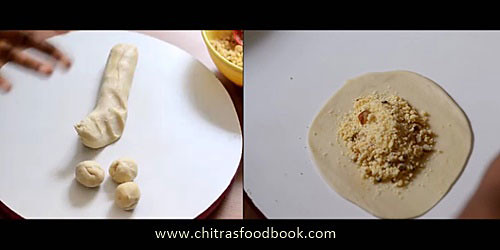
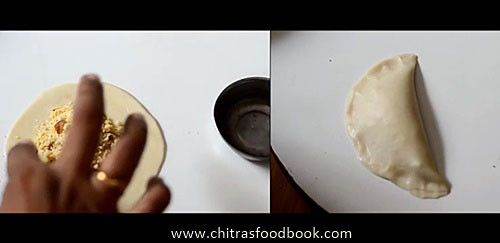
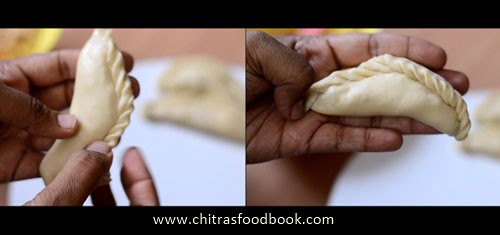
  • Now take the dough and roll it to a cylinder.Make balls of equal size.Roll the ball into small poori and keep a tbsp of stuffing in the center.Apply water on the corners and fold the poori into a half moon shape. Now fold the edges as shown in the pic OR press the corners with a fork.
Gujiya recipe
Gujiya recipe
Gujiya recipe
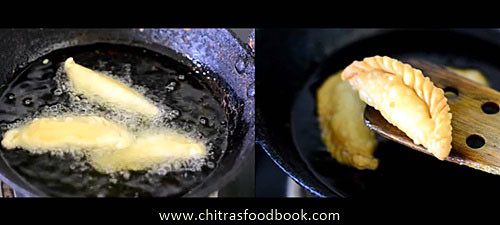
  • Heat oil and drop a pinch of batter. If it rises to the top and does not brown, oil heat is just right. Now keep the flame low to medium and drop the gujiya.Deep frying the gujiya patiently in low to medium flame give you really crispy gujiyas. So do not  hurry up while frying. Do not over crowd the kadai. Fry 2-3 gujiyas based on the size of kadai. Deep fry them in batches.
Gujiya recipe
  • Cook the gujiya patiently on both sides by flipping now and then. Once the bubbles cease and gujiya turn golden brown, remove them in a tissue. Drain the excess oil and serve hot OR store them in an air tight box after it comes to room temperature.It stays good for a week !! But to enjoy its best taste, eat it on the same day of preparation.Enjoy !
Gujiya recipe


Note

  • Adjust the quantity of powdered sugar based on your taste buds.
  • Deep frying in medium flame for long time gives a crispy gujiya.
  • For best taste, serve gujiya as soon as you prepare them.
  • Another important point is “Rolling” .Roll the dough like a thick poori. It should be thick in the centre and slightly thin in the corners. If u make it very thin , stuffing will ooze out in the oil while deep frying and the oil becomes a waste . Please be careful .I had experienced thisSad . If u make it too thick , it takes more time to cook and spiral corners may not be cooked properly.To avoid this disaster , first make one , deep fry in little oil. If u get it right , proceed making the remaining ones.Else adjust the rolling and try again.This will surely help.
  • Suppose if the stuffing ooze out in oil , immediately switch off the stove and remove the sweet. Strain the oil and reuse it.
Enjoy these yummy Gujiya & Thandai on HOLI Day and have a great celebration !
Gujiya recipe

الأحد، 20 مارس 2016

Baked Quinoa Balls with Peanut Dipping Sauce

Quinoa Balls with Peanut Dipping Sauce

Little people like me need lots of protein. And this tasty little appetizer idea provides a good and tasty dose with quinoa, beans and peanut butter. I adore little bites, and these little savory balls can be served as a light meal too, as they are quite filling.

But these baked quinoa balls have more than just protein. Combined with sun-dried tomatoes, jalapeño, tamari, ground ginger and coconut milk, they have a wonderful rich and deep Thai-style flavor, and the zesty peanut butter dipping sauce with lime, tamari, coconut milk and toasted sesame oil is just heavenly. You won't be thinking about how healthy these are!

Almond or other nut butters can be used instead of the peanut butter if desired.

Baked Quinoa Balls with Peanut Dipping SauceBaked Quinoa Balls with Peanut Dipping Sauce
Recipe by
Adapted from Ricki Heller
Cuisine: Thai
Published on March 20, 2016

Healthy protein-rich baked quinoa and peanut butter balls served with a savory peanut butter, lime and tamari dipping sauce

Print this recipePrint this recipe

Ingredients:
  • 1/2 cup dried quinoa (1 1/2 cups cooked)
  • 1/3 cup dried navy beans (1 cup cooked)
  • 6 sun-dried tomatoes
  • small handful of fresh cilantro or parsley
  • 1 clove garlic, chopped
  • 3 tablespoons natural smooth or chunky peanut butter
  • 1 tablespoon tamari (soy) sauce
  • 2 tablespoons ground flax seeds, soaked in 4 tablespoons of warm water for 15 minutes
  • 1/4 cup coconut milk
  • 1/3 teaspoon ground ginger
  • 1 jalapeño, seeded and chopped
Sauce:
  • 3/4 cup natural smooth or chunky peanut butter
  • 1/4 cup coconut milk
  • juice from 1 lime (2 tablespoons)
  • 2 tablespoons tamari (soy) sauce
  • 1/4 cup fresh cilantro or parsley, chopped
  • 2 teaspoons toasted sesame oil
  • 1 teaspoon maple syrup or honey
  • water as needed
Instructions:
  • Rinse the quinoa and soak in 1 cup of water for 8 hours or overnight. Rinse the navy beans and soak in several inches of water over the same 8 hours or overnight.

  • Drain and rinse the navy beans, then transfer to a small saucepan and cover with fresh water. Bring to a boil, reduce heat to medium-low, cover, and simmer for 1 hour or until soft. Drain and let cool to room temperature.

  • Meanwhile, bring the quinoa to a boil in a small saucepan, then reduce heat to low, cover, and simmer for 15 to 20 minutes or until the water is absorbed. Remove from heat, fluff with a fork, and let cool to room temperature.

  • Soak the sun-dried tomatoes in hot water for 30 minutes, then drain and chop.

  • Once the quinoa and navy beans have cooled down, transfer to a food processor. Pulse until the mixture is chunky. Now add the sun-dried tomatoes and the remaining ingredients, and process until a smooth mixture is formed.

  • Line a baking sheet with parchment paper and preheat an oven to 350°.

  • Grease your hands with oil and shape the quino mixture into small balls, about 1 1/2 inches in diameter. Place on the prepared baking sheet and bake for 30 to 35 minutes until nicely browned, turning the balls halfway through the baking time.

  • Remove from the oven and let sit on the baking sheet for another 10 to 15 minutes so they firm up.

  • To make the sauce, combine all of the ingredients in a small food processor or blender and process until smooth, adding water as needed to thin your desired consistency.

  • To serve, drizzle some of the sauce over the balls. Best served warm or at room temperature, but the balls and sauce and be refrigerated for up to several days in sealed containers. Bring to room temperature before serving.

Makes 18 to 20 balls and about 1 1/2 cups sauce

quinoa balls

I'm sharing this with Jac's weekly Meat Free Mondays event.

More little bites to enjoy from my kitchen:
Baked Mini Vegetable Chickpea Samosas
Chickpea Avocado Bites with Sun-Dried Tomatoes
Mung Dal Vada (Fried Indian Lentil Fritters)
Chana Vada (Chana Dal Peanut Patties) with a Tamarind Chili Sauce

الخميس، 17 مارس 2016

Mango Sambar Recipe – Raw Mango Recipes

Raw mango sambar
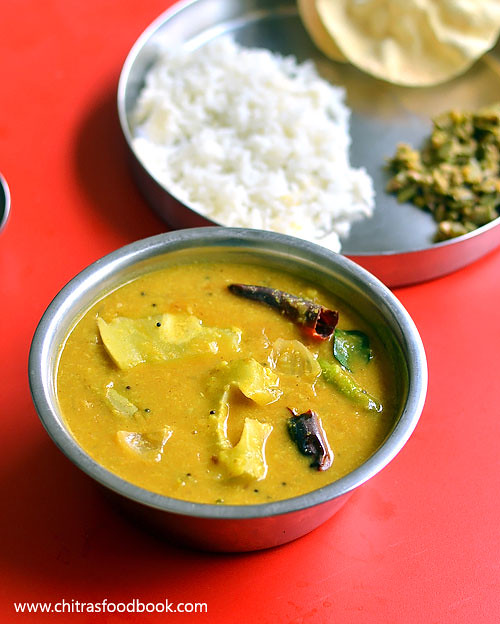
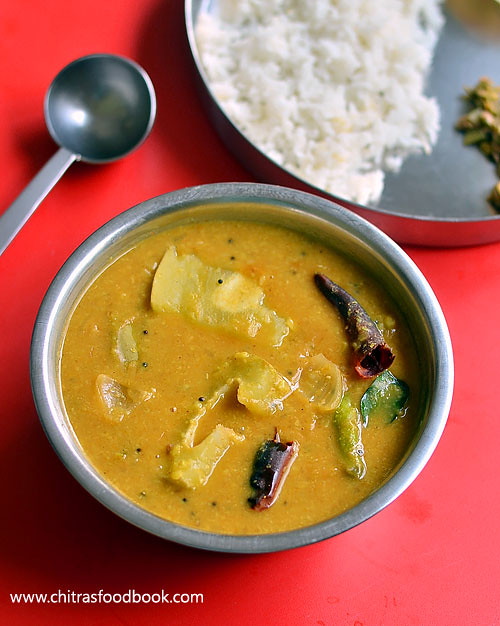
Last year I wanted to start my mango recipes with this yummy raw mango sambar. But I couldn’t. This year at least let this sambar be my first mango recipe as its my most favorite. I learnt this recipe from my MIL. My mom & MIL never fails to make this sambar during mango season.We call it as “Manga sambar” in Tamil. My Mom makes mango sambar along with drumstick. So its more like drumstick mango sambar. Her recipe is Tirunelveli based version. I will try to make a separate post for that. This is my MIL’s version which is very easy to make without any grinding job. Its like my basic onion sambar recipe but there are slight variations in the quantity of tamarind and spices as we use sour raw mango here. Whenever my MIL make this sambar, she reserves 2 big mango pieces for meLove Struck as I love to eat those soft,spicy and juicy cooked mangoes the mostDrooling.When i was making this sambar, all these nostalgic memories were running behind my mind :)..Ok. Lets see how to prepare this yummy raw mango sambar recipe !


Raw mango sambar

Mango sambar recipe


Mango sambar recipe How to make raw mango sambar recipe for rice
Cuisine: Indian
Category: Gravies
Serves: Serves 3
Prep time: 10 Minutes
Cook time: 20 Minutes
Total time: 30 Minutes


INGREDIENTS
1 cup = 250ml
To pressure cook
  • Toor dal - 1/3 cup
  • Turmeric powder - 1/8 tsp
  • Hing – a pinch
  • Water - 2 cups
  • Cooking oil - few drops
To boil in tamarind extract
  • Raw mango - 1/2 no ( 6 pieces)
  • Tamarind - A small gooseberry size
  • Big onion - 1 no ( cube cut)
  • Green chilli - 1 no ( slitted)
  • Curry leaves - few
  • Hing/Asafetida - 1/8 tsp
  • Turmeric powder - 1/8 tsp
  • Sambar powder - 1.5 tsp
  • Salt & water - as needed
To temper
  • Cooking oil - 1 tbsp
  • Mustard seeds - 1/2 tsp
  • Methi seeds - 1/4 tsp
  • Cumin seeds - 1/2 tsp
  • Red chilli - 1 no ( pinched into 2)
Coriander leaves – few ( to garnish)
METHOD

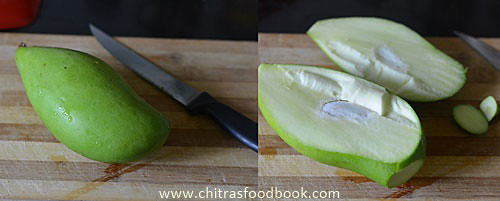
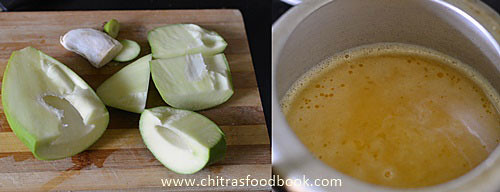
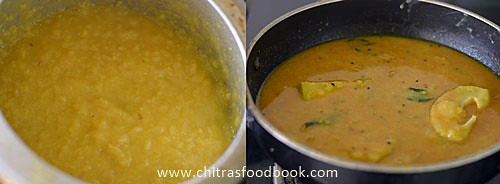
  • In a pressure cooker base, take the toor dal, turmeric powder,water, hing and few drops of cooking oil. Pressure cook in low flame for one whistle. Open the cooker after the steam is released and mash the dal well.Wash and cut the mango into two vertical pieces.Remove the seed in the center. Cut the mango into big pieces as shown in the picture.
mango sambar recipe
mango sambar recipe
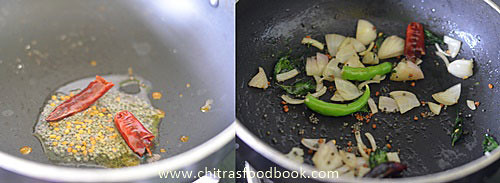
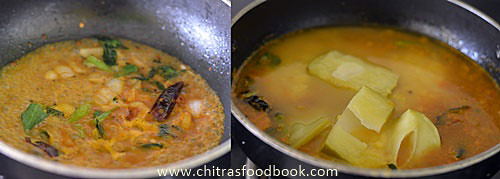
  • In a kadai, heat oil and splutter methi seeds, mustard seeds,red chilli and curry leaves. Add onions and green chilli. Saute until onion turns transparent. Add the tamarind extract, salt, turmeric powder,sambar powder,hing and few raw curry leaves. Let the tamarind extract boil for sometime. Now add the raw mango pieces and 1/2 cup of water.
mango sambar recipe
mango sambar recipe
  • Let the mango pieces cook well in tamarind extract.It takes 7-8 minutes to cook well. Stay nearby and keep an eye on the mango pieces. Usually raw mango pieces cook quickly. Take a piece in a ladle and touch the flesh part. If its soft, mango is cooked well. Mango should retain its shape.Make sure its not mushy.
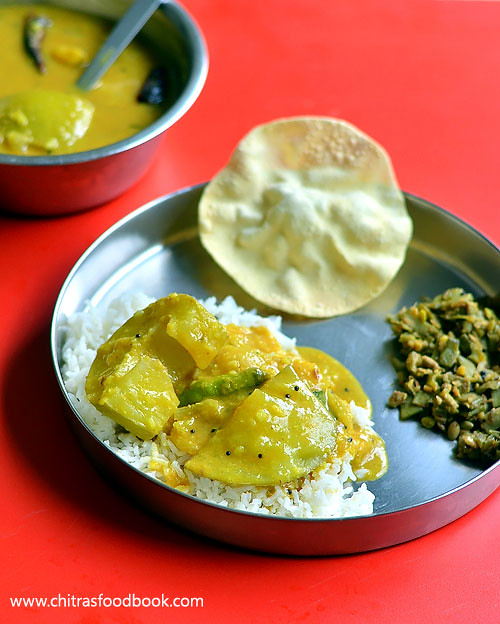
  • Now add the boiled and mashed dal. Mix well and give a roll boil.Switch off the flame and garnish with coriander leaves.Serve hot with rice adding few drops of ghee! Enjoy !
mango sambar recipe


Note
Adjust the quantity of tamarind and sambar powder according to the sourness of mango.
You can also use toor dal & moong dal in equal quantity to make this sambar.
If you feel the mango is over cooked, remove the pieces after the sambar is done. Add the pieces just before serving so that mango will retain its shape while serving.
Enjoy this yummy mango sambar for your lunch ! I had with rice & broad beans poriyal Happy
mango sambar

الثلاثاء، 15 مارس 2016

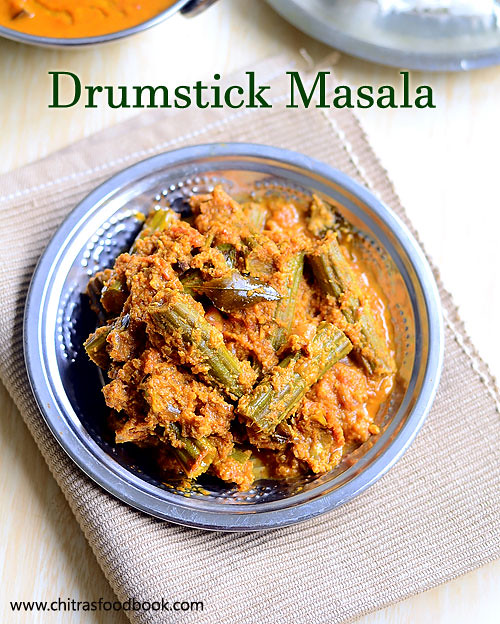
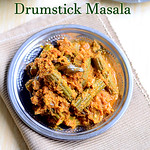
Drumstick Masala – Murungakkai Masala Poriyal Recipe

drumstick masala
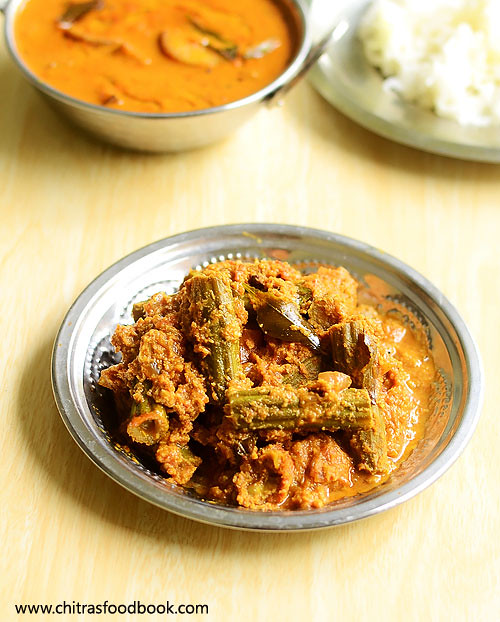
Usually I make drumstick poricha kuzhambu or sambar( Murungakkai in Tamil, Mulakada in Telugu, Nuggekai in Kannada, Muringakka in Malayalam ) whenever I buy this vegetable. But this time I bought drumstick to try some different recipes with it. When I was browsing, I found this South Indian style drumstick masala curry recipe here. Basically I love fry/poriyal recipes made using whole garam masala. So I tried this recipe for our lunch yesterday along with brinjal kara kuzhambu without any second thought. It came out very well. We loved it a lot and got thumbs up from Sendhil. It was a good side dish for dal rice & curd rice. If you like, you can have it with chapathi too. Do try this masala for a change and share your feedback with meHappy.Lets see how to prepare this yummy drumstick masala for rice.
Murungakkai masala

Drumstick/Murungakkai masala recipe


Drumstick/Murungakkai masala recipe Drumstick/Murungakkai masala recipe for rice
Cuisine: South Indian
Category: Side dish for rice
Serves: Serves 2
Prep time: 10 Minutes
Cook time: 20 Minutes
Total time: 30 Minutes


INGREDIENTS

  • Drumstick/Murungakkai - 1 no
  • Big onion - 1 no ( chop finely)
  • Garlic cloves - 4 nos (-do-)
  • Tomato - 1 no (-do-)
  • G&G paste - 1/4 tsp
  • Red chilli powder - 1 tsp
  • Dhania powder - 1 tsp
  • Turmeric powder - 1/4 tsp
  • Salt & water - as needed
  • Sugar or jaggery – a pinch
To saute
  • Cooking oil - 1 tbsp
  • Cinnamon - 1 inch piece
  • Cloves - 2 nos
  • Cumin seeds - 1/2 tsp
  • Curry leaves - few
To grind
  • Grated coconut - 1/4 cup
  • Fennel seeds - 1 tsp
  • Water – as needed
METHOD

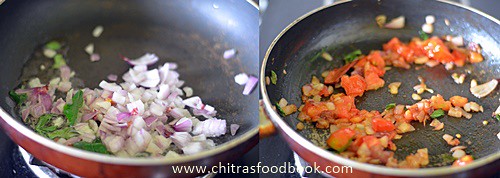
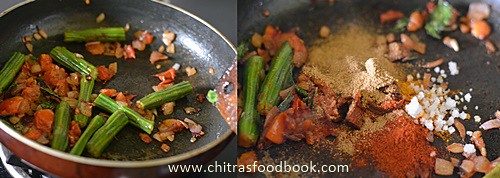
  • Wash & chop the drumstick into finger size pieces. Slit it half way till the center.Grind coconut, fennel seeds to a smooth paste adding required water.In a kadai, heat oil & saute cinnamon, cloves, cumin seeds. Add onions, curry leaves, g&g paste. Saute until its raw smell goes off. Now add the finely chopped tomato pieces and saute until mushy. Add the drumstick pieces now. Mix well.
Drumstick masala
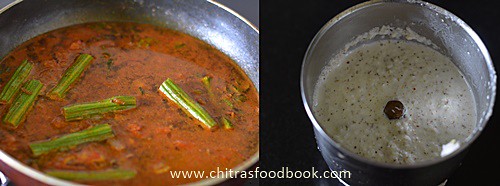
  • Add red chilli powder, dhania powder, turmeric powder and salt.Saute for a minute and add the required water. Cover & cook the drumstick till its done.
Drumstick masala
Drumstick masala
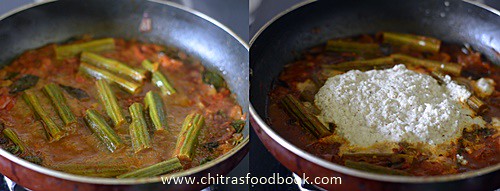
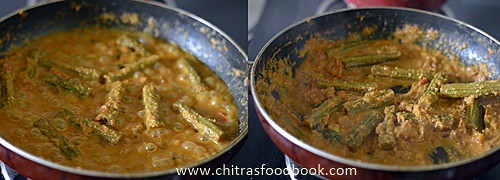
  • After the drumstick is cooked well, add the ground coconut paste and saute until the masala thickens.Switch off the flame and serve hot with rice!!
Drumstick masala
Drumstick masala
Enjoy !

Note
  • Adjust the quantity of red chilli powder & dhania powder as per your taste.
  • If you like to have it as a gravy, add more water and adjust its consistency. I made it thick like a curry/poriyal.

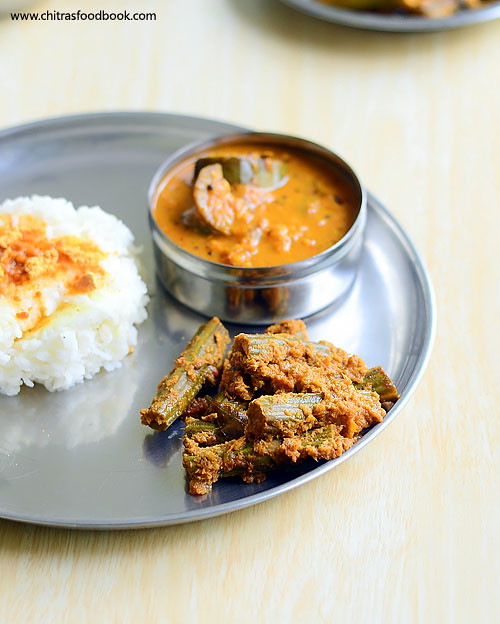
Try this yummy drumstick masala for rice. It tastes yum !! I served it with Brinjal Kara kuzhambu : ))
Murungakkai masala poriyal

السبت، 12 مارس 2016

Hummus With Za'atar

Hummus With Za'atar

Many people think of hummus as a snack or appetizer, but for a little person like myself it's a meal! And a simple, convenient and tasty meal at that. Hummus is also a terrific canvas for adding or experimenting with your favorite flavors … maybe it's Middle Eastern in origin, but that's no reason not to try adding Indian, Ethiopian or other flavors.

But for this hummus, I've returned to Middle Eastern flavors. This is actually a very basic, light creamy and fluffy hummus made with chickpeas, tahini, toasted pine nuts, lemon juice and garlic. But seasoned with za'atar, it's an extraordinary treat. For those of you who haven't tried it yet — and you should! — za'atar is a unique Middle Eastern blend of aromatic dried herbs, sumac, black salt and toasted sesame seeds that adds a wonderful zesty and salty flavor to dishes. You'll love even just the smell of it.

Pre-blended commercial versions of za'atar are easily available these days from large grocers. To tell the truth, I've never even tried a commercial variety, so I can't speak to their quality. But it's so easy to make at home, and stores well in a tightly sealed and refrigerated container, that the thought of buying it never occurs to me. You can find my recipe for homemade za'atar here. I've included 2 tablespoons of za'atar strictly as a suggestion — you may wish to add more.

Hummus and Za'atarHummus and Za'atar
Recipe by
Cuisine: Middle Eastern
Published on March 12,2016

Creamy chickpea hummus served with a zesty, salty and aromatic Middle Eastern blend of herbs and toasted sesame seeds

Print this recipePrint this recipe

Ingredients:
  • 1 cup dried chickpeas (3 cups cooked or 2 14 oz cans)
  • 2 tablespoons pine nuts
  • 2 tablespoons olive oil + extra for serving
  • 1/3 cup tahini
  • 2 cloves garlic, chopped
  • juice from 1 lemon (3 tablespoons)
  • 1 1/2 teaspoons sea salt, or to taste
  • 2 tablespoons za'atar, or to taste
  • paprika
Instructions:
  • Rinse the chickpeas and soak for 8 hours or overnight in several inches of water. Drain and rinse, then transfer to a medium saucepan and cover with fresh water. Bring to a boil, reduce heat to medium-low, cover, and simmer for 1 to 1 1/2 hours or until soft. Drain, reserving the cooking liquid. (If using canned chickpeas, rinse thoroughly.)

  • Meanwhile, toast the pine nuts in a dry unoiled skillet or saucepan over medium-low heat, tossing or stirring frequently, for 10 minutes or until lightly browned.

  • Transfer the chickpeas to a food processor and add the pine nuts, 2 tablespoons of olive oil, 1/4 cup of the reserved chickpea cooking liquid (or water if using canned chicpeas), the tahini, garlic, lemon juice and salt. Process until smooth, adding more of the reserved chickpea cooking liquid or water as necessary to reach a light creamy consistency. Taste for seasoning and add more salt or lemon juice as desired.

  • Transfer the hummus to a shallow bowl and drizzle with olive oil. Sprinkle with za'atar and paprika, and serve with chopped fresh vegetables or toasted pita triangles.

  • Refrigerate leftover hummus for a few days or freeze for up to a month.

Makes about 4 cups

hummus

This is my contribution to My Legume Love Affair, a monthly event celebrating the goodness of legumes. Started by lovely Susan, I am now the administrator. This month Shaheen of Allotment to Kitchen is kindly hosting.

More hummus ideas from Lisa's Kitchen:
Spicy Hummus
Marinated Sun-Dried Tomato Hummus with Olives
Pumpkin Hummus
Turkish Yogurt Hummus

On the top of the reading stack: Choosing Raw: Making Raw Foods Part of the Way You Eat

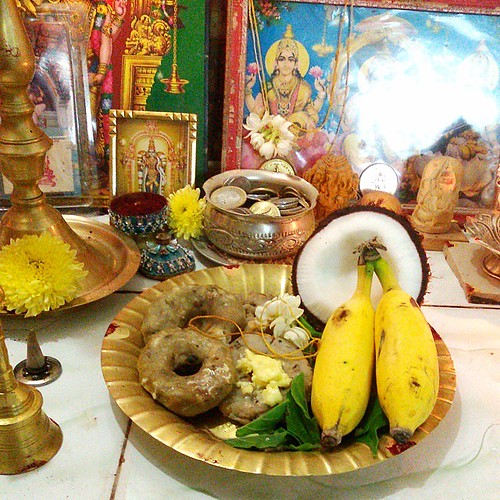
Karadaiyan Nombu Pooja Procedure

Karadaiyan nombu procedure

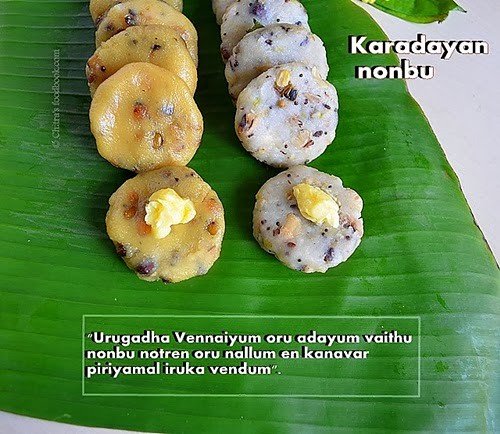
Karadaiyan Nombu/Nonbu is a traditional festival of fasting observed in remembrance of the Satyavan – Savitri legend.As it an important festival of India, I thought of sharing its pooja procedure/Pooja vidhi for beginners and wanted to keep a record of all our festival celebrations in my blog for my future reference.There is a story/Katha behind this festival. I have shared it in detail below.Click this link for nonbu adai recipe for neivedyam. A princess, Savitri through her unparalleled devotion saved her husband, Satyavan, from the clutches of death.So this festival is also known as Savitri vratam in Tamil / Savitri Vrat in Hindi. On this day, Women observe fasting and pray for the wellness and long life of their husbands. This nonbu/vrat should be done exactly in the time when Tamil month 'Masi' ends and the next month 'Panguni' starts.I have shared the nonbu timings for different parts of world below. Please check it.Fast is observed from the sunrise on the supposed transition day and ends with the Puja.Women break the fast by eating the Karadai (Made of Rice & dal) preparation with unmelted butter by chanting a slokha.
In short, the reason why this fasting is carried out is that “ Savithri fought with yema (the God of Death) to save her husbands (Satyavan) life", the same way the married women should fast on this auspicious day for long life of their husbands. Unmarried woman also observe Karadaiyan Nombu and pray to Goddess to get good men as their husband.Prayers are offered to Gowri Devi and women meditate on Savitiri and wear a yellow thread round their neck as they chant the following slokha/slokam.
Throram Krishhnami subhake saharitham
Dharami aham bharthu
Ayushya Sidhartham supreethabhava sarvadha

The following is the Tamil chant

Urukaadha Venneyum oradaiyam naan nootren
Orukkalum en kanavar ennai vittu pririyadhirukka vendum

"உருகாத வெண்ணெயும் ,ஓர் அடையும் நோற்று உனக்கு நான்  வைத்தேன் ,எந்நாளும் என் கணவர் எனை விட்டு நீங்காத அருள் தருவாய்" என்று  அம்மனை நோக்கி வேண்டி நமஸ்கரிக்கவும்.

which means I offer butter and the rice made out of kaar arisi.Bless me that I live happily with my husband for long.

Karadaiyan nonbu adai

Story of Karadayan Nombu

Savithri was born as the daughter of King Asrapathi. Savitri was a princess of a rich kingdom in ancient India and was the only child of her parents. When she reached marriageable age, she told her father that she would herself search for a suitable husband for her and she wished to marry Sathyavan who lived in the forest.Despite being warned by the palace astrologer that he would die within a year of marriage,she married Sathyavan.Days passed and the last day of Satyavan's life as per the prediction dawned.On that day, Satyavan made Savitri sit under a tree and went to fetch fruits and logs for fuel. After sometime, he returned feeling very tired. Savitri made him lie in a bed made of fresh green leaves keeping his head in her lap. As Satyavan started closing his eyes, there appeared in front of Savitri, a huge figure with a bison for his vahana. Savitri with her dedication and devotion could immediately recognize the figure as that of Yama, the God of death.
She immediately saluted him and asked him the purpose of his visit. Yama replied that as destined Satyavan's life span was over and he had come to take his life to the other world. Saying this Yama started walking away with Satyavan's soul. Savitri left the body of the lifeless Satyavan under the tree and started following Yama. Yama forbade her from following him, saying she could not follow him to the other world, as Yama loka was inaccessible to living beings. Only souls of dead beings are taken there. Savitri insisted on following her husband’s soul. Yama could not stop her from following him. At last, Yama agreed to grant her three wishes on condition that she would go back. She agreed. She asked as the first boon, that her in-laws get back their lost kingdom which Yama granted readily. For the second wish she asked that, as she was the only child of her parents, they get more children. This was also granted by Yama immediately. As the last wish, she asked that she be granted the wish of having many children which also was granted by Yama in his eagerness to get rid of her. Only after granting this wish, did Yama realize that he had been tricked into granting Satyavan life, as a pious and pathivratha (chaste) woman like Savitri cannot have children if Satyavan were to be dead. Yama had to accept his defeat and restore the life of Satyavan. Savitri came back to the tree where she had left the lifeless body of Satyavan. By the blessings of Yama, Satyavan woke up as if from his sleep and Savitri narrated the happenings to him. To offer her gratitude to the Gods, Savitri immediately made a simple neivedyam with available things on hand, Rice & dals and tied the mangala sutra once again as her husband had got back his life.Her offerings were durwa grass and peepal leaves.She performed neivedhyam with wild rice and toor dal. That is kaar arisi and thuvaram paruppu.The preparation is known as Karadai nombu adai - the festival takes its name from the unique Kara Adai dish. It is believed that Savitri cooked such a dish and offered it to Lord Yama along with unmelted butter as a sort of thanksgiving for sparing her husband’s life.

Source: http://jaishreesblog.blogspot.in/2008/03/karadayan-nombu.html

Nombu Timings

In 2016, the date of Karadaiyan Nonbu is March 14 and the time to break the fast is at between 10:00 AM and 10:40 AM (Indian Standard Time). In United States it is on March 13. Australia Time is on March 14 at 3:48 PM.Singapore and Malaysia Time is 12:30 1:48 PM on March 14.
  • The USA timings are - Panguni Masam begins at 12:48 AM on March 14, 2016 Eastern Standard Time in USA
  • begins at 11:48 PM on March 13, 2016 Central Standard Time in USA
  • begins at 9:48 PM on March 13, 2016 Pacific Standard Time in USA
  • begins at 10:48 PM  on March 13, 2016 Mountain Standard Time in USA
Please note that the exact time of Maasi ending and Panguni starting varies from country to country. So the apt and ideal choice is to consult your temple priest or check with elders or refer your regional Panchangam. The time I have given below is based on Indian calendars and Panchangam. I referred The Hindu blog and asked my in-laws to confirm these timings. In USA,in some places, month starts at mid night. So you may not able to do the pooja at that time, you can perform it the next day early morning sunrise i.e before 6am or in an auspicious time of that day.

 Click on this kolam to view with video
Click on this picture to view how to draw it with video :)

Ingredients required for Pooja
  • Rice flour paste (for drawing rangoli) – Refer my in-laws blog for kolam ideas
  • Lamps
  • Flowers
  • Betel leaves, nuts, coconut, banana
  • Rice,Legumes ( black eyed peas – We keep a mix of 9 grains) and Unmelted butter
  • Jaggery,cardamom, chilli,Ginger and seasoning ingredients for making sweet & spicy adai.
  • Camphor,Incense stick
  • Yellow rope tied with a flower in the center.
How to perform pooja

For pre preparatory work,sweep the house.Wash the lamps and keep kumkum dots on the eve of festival. Prepare the homemade rice flour, roast and keep it ready for the next day use.
On the festival day morning, we wake up early and take head bath. Draw Rangoli/Padi kolam in the entrance using rice flour paste(Maakolam) and in front of the pooja room. Roast the black eyed peas and pressure cook for one whistle.Prepare sweet adai by mixing rice flour and cooked peas in jaggery syrup.Similarly prepare salt adai too.Steam both the adai in an idli pot and set aside.After finishing the neivedyam works, decorate the pooja room. Make yellow thread by greasing a thread with turmeric powder.Tie a flower in the center of rope. The number of threads should be equal to the number of woman+girls at home along with one for Goddess Lakshmi. After decorating the pooja room, light the lamps.At the time of pooja, wear a silk saree. Keep the Nombu adai with umelted butter on top of adai in a plate. In another plate, keep the broken coconut, betel leaves,nuts and banana.In the same plate, keep the yellow ropes too.Do the neivedyam, show the dhoop & dheep. Perform Mangala aarti by chanting the slokha.

"உருகாத வெண்ணெயும் ,ஓர் அடையும் நோற்று உனக்கு நான்  வைத்தேன் ,எந்நாளும் என் கணவர் எனை விட்டு நீங்காத அருள் தருவாய்" என்று  அம்மனை நோக்கி வேண்டி நமஸ்கரிக்கவும்.

After finishing the pooja, sit in the same place and tie the yellow rope for Goddess Lakshmi and then tie a rope around your neck and around the wrist for unmarried girls.i.e Married women should tie the thread around the neck and unmarried girls should tie it around the wrist. After tying the rope, take one adai along with unmelted butter and eat it.Ladies should eat this adai and break the fasting.Then it should be distributed to the members of family.If you wish, you can fall at the feet of your husband and get his blessingsHappy. This is how Karadaiyan Nonbu is performed in our house. This procedure may differ as per places. Consult the elders about your family practice and do the pooja.

NOTE : The thread you tied around the Lakshmi Idol can be removed after few days once its worn out and tied to a plant or dispersed in river water. The thread tied around the women can be tied to the mangal sutra if you wish OR tie it for a plant or branch of a tree. Women who are not able to perform this pooja on Nombu day can do this pooja on the following Tuesday or Friday in Panguni month. 

Click this link for Karadaiyan nombu Sweet adai & salt adai recipes using homemade rice flour  in detail with step by step pictures.
I hope beginners would find this post useful for performing this pooja. Have a blessed day !
Thanks for visiting this page.