الجمعة، 8 مايو 2015

Nungu Paal/Ice Apple Kheer-Nungu Recipes

Nungu recipes
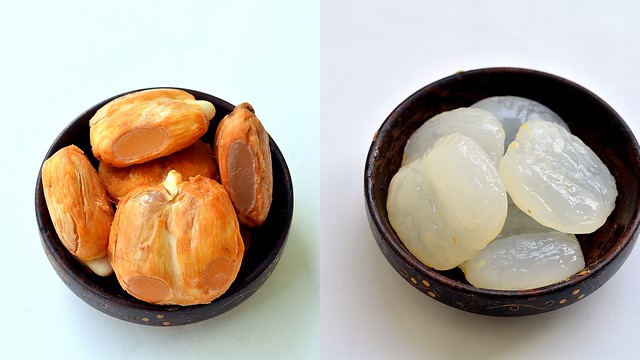
In Summer season,i love to enjoy few things.One among them is eating Palm fruit/Ice apple(Taati Munjalu in Telugu,Nungu(நுங்கு) in Tamil,Tale Hannu or Taati ningu in Kannada,Tari in Hindi, Taal in Bengali, Pana Nangu in Malayalam,Munjal in Urdu, Lontar in Indonesian,Ton Taan in Thai, Tadfali in Gujarati, Targula in Konkani, Tadgola in Marathi, Myanmar and sometimes Ice-apple in British English especially by the immigrants living in India.(Source:Wikipedia).I love to eat Nungu as such more than making recipes with it.But recently,when i was talking with my friend Shalini,she told me to try Nungu kheer and tender coconut pudding recipes.This morning i tried this easy,no cook nungu paal recipe for the first time and we loved it a lot.It tastes the best only when serve chilled.My dad told me another interesting Nungu Sarbath recipe which is very popular in Tamil nadu.I will try to post that recipe soon.Now lets see how to make this easy nungu recipe.Enjoy this drink and feel cool in this summerCool
Nungu
Nungu juice

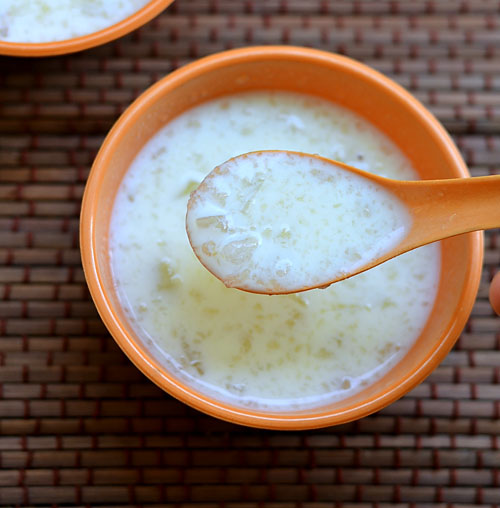
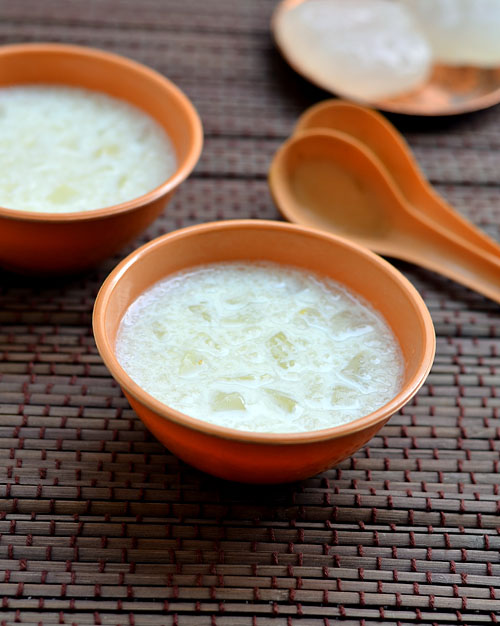
Nungu Paal/Ice apple kheer

Nungu Paal/Palm fruit kheer Easy,no cook Nungu paal recipe - One of the best coolant for summer
Cuisine: Indian
Category: Summer recipes
Serves: Serves 2
Prep time: 10 Minutes
Cook time: 5 Minutes
Total time: 15 Minutes


INGREDIENTS

  • Boiled milk - 1 cup
  • Nungu/Palm fruit - 3 nos
  • Sugar - 1 tbsp
  • Cardamom powder or rose essence - as needed
METHOD

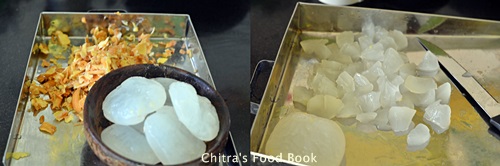
  • Wash and peel the skin of nungu/Ice apples.Chop them into pieces.Reserve a handful of nungu pieces for garnishing.
Nungu recipes
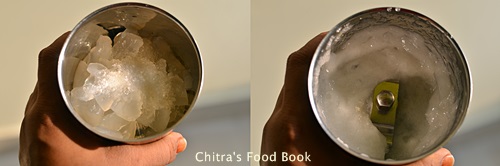
  • Grind the remaining to a smooth paste adding sugar.
Nungu recipes
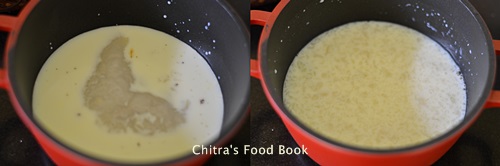
  • Take the boiled milk at room temperature ( Milk should not be hot).Mix the ground nungu paste with the milk,cardamom powder and check for sweetness.Add more sugar if needed.
Nungu recipes
  • Refrigerate for an hour.Garnish with the chopped nungu pieces and serve chilled.
Enjoy !


Note

  • You can replace nungu with tender coconut pieces.
  • For variations,u can add rose milk essence in milk instead of cardamom powder.It will look colourful and tasty too.
Have this refreshing drink and enjoy this summer Winking
Nungu paal

الخميس، 7 مايو 2015

White Paneer Korma Recipe-Paneer kurma-Paneer Recipes

Paneer korma recipe
Recently I heard about Saravana bhavan white vegetable kurma from a reader and got a request to post it.I am yet to try that recipe.Today i made this white kuruma using paneer after seeing the recipe in a cookbook by Deepa sekar.She had given the title as”Paneer Pasanda” but i guess paneer pasanda recipe is different.This gravy is very much related with Shahi paneer masala.So I named it as “Paneer white korma” after seeing its colorWinking.This gravy is of pucca North Indian style and not related to South Indian kurma in any ways.There is neither tomato nor coconut used in this recipe.Boiled,cooked onions with milk makes the base for this gravy.So this korma has got a mild sweet taste which i loved it the most.Basically i like the combination of sweet and spice taste in gravies.So i loved this gravy to the core and i licked the kadai thoroughly before washingTongueSilly.This white kurma(vellai kurma) tastes the best with chapathi/Roti & Naan but not with rice.I packed it for Sendhil’s lunch box today and waiting for his feedbackWaiting.Friends,if u like mildly sweetish gravies,do try this recipe.I am sure kids would enjoy this with chapathi.
Check out my restaurant style Paneer butter masala , Palak paneer recipe , Kadai paneer

Paneer-korma-recipe

Paneer white kurma recipe


Paneer white kurma recipe White paneer korma recipe
Cuisine: Indian
Category: Gravies
Serves: Serves 2
Prep time: 10 Minutes
Cook time: 15 Minutes
Total time: 25 Minutes


INGREDIENTS

  • Paneer - 1/2 cup
  • Garam masala powder - 1/4 tsp
  • Kasoori methi - 1/4 tsp
  • Salt & water - as needed
  • Milk - 2 cups
  • Corn flour or rice flour - 1 tsp
  • Sugar – 1 tsp
To grind
  • Big onion - 2 nos ( Cook in water)
  • Cinnamon - 1 inch piece
  • Cloves - 2 nos
  • Cardamom - 1 no
  • Green chillies - 3 nos
  • Cashew nuts - 3 nos
  • Ginger - 1.5 inch piece
  • Garlic cloves - 4 nos
To saute in oil
  • Ghee – 1/2 tbsp
  • Cooking oil – 1.5 tbsp
  • Cumin seeds/Jeera – 1/2 tsp
METHOD

  • Chop the paneer into cubes or thin strips as i did.Keep it in hot water till use.This helps to keep the paneer stay soft until use.Slice onions and cook them in 1 cup of water.
Paneer korma recipe
  • Drain the excess water and grind onions along with cinnamon,cloves,cardamom,green chillies,ginger,garlic,cashews using 1/2 cup of milk.Set aside.
Paneer korma recipe
  • Heat oil + ghee in a kadai and splutter cumin seeds. Add the ground onion paste and cook in very low flame.Add salt and saute till raw smell goes off.Add 1 tsp of sugar.Mix well.
Paneer korma recipe
  • Mix 1tsp of corn flour to the remaining 1.5 cups of milk and add it to the gravy.Boil well for few minutes till the gravy thickens a bit.Lastly add the paneer strips,crushed kasoori methi and garam masala powder.Mix well.Give a quick boil and switch off the flame.
Paneer korma recipe
Paneer korma recipe
This gravy thickens as time proceeds.So adjust its consistency by adding milk and check for salt.Enjoy with chapathi !

Note
  • For variations u can add 1 tsp of red chilli powder and 1/2 tsp of dhania powder instead of green chillies. But the color of gravy turns orange’ish like paneer butter masala.
  • Adjust the quantity of milk based on need.Kasoori methi gives a restaurant touch.So never skip it.

Check out my restaurant style Paneer butter masala , Palak paneer recipe , Kadai paneer

Enjoy this yummy paneer gravy with chapathi or naan.Tastes rich and creamy !
Paneer-korma-recipe

الأربعاء، 6 مايو 2015

Mini Idli Sambar-Ghee Sambar Idli Recipe-14 Idli Sambar

Mini idli sambar
Hello friends,Sorry i couldn’t post biryani recipes in my Sunday lunch series for the past two weeks.As i was having continuous trips to Salem,i couldn’t do it.I will come up with a yummy biryani this weekend for sure.Today’s post is a kids friendly breakfast recipe.Yes,it is Mini idli sambarDrooling.It is popularly known as ghee sambar idli,14 idly sambar in Tamil nadu.My friends here call it as Button idli sambar,Coin idli sambar etc etc by different names.This is my daughter’s favorite breakfast/dinner recipe.Generally I make idli sambar for dinner more than breakfast.I follow my hotel idli sambar recipe with some modifications for making mini idli sambar.Most of the people make this sambar in a simple way just by adding sambar powder and tamarind.But i always make it using freshly ground sambar masala and tomatoes(without tamarind and vegetables).My friend Shalini suggested me to use raw onions and coriander leaves along with ghee for topping which adds great taste to this recipe.You can drink/eat this sambar with raw onions as such even without mini idlis.This combination tastes soo good.Last year i conducted a small party at my home for Raksha’s birthday.
On that day,i made mini idli sambar, vermicelli pulao and curd rice along with corn cheese balls , chips,  ice cream and gulab jamun.This mini idli sambar was a super hit among my friends and kids.Everybody asked for second serving and the whole sambar bowl got emptied quicklyHappy.I was thinking to share this recipe in my blog for long time.But i couldn’t.At last i made it yesterday just for blogging sake.It came out really well.Sendhil liked it a lot.For parties,you can make it in bulk quantity easily if u have mini idli stand with 3 plates and you can serve them hot anytime by reheating the sambar.Friends,try this kids favorite ghee sambar idli during this vacation and take the credits from your family members.Lets see how to make this mini sambar idli recipe in detail.
Ghee sambar idli recipe

Mini idli sambar recipe


Mini idli sambar recipe How to make 14 idli sambar/ghee sambar idli recipe.
Cuisine: Indian
Category: Breakfast
Serves: Serves 2
Prep time: 10 Minutes
Cook time: 20 Minutes
Total time: 30 Minutes


INGREDIENTS
1 cup - 200ml
For idli
  • Idli dosa batter - 2 cups
  • Rice flour -1.5 tsp( optional)
  • Water & salt - add only if needed
  • Oil - to grease
  • Ghee - to serve
For sambar
  • Toor dal - 1/2 cup
  • Turmeric powder - 1/8 tsp
  • Hing/Asafetida – 2 pinches
  • Cooking oil - few drops
  • Ripe tomatoes - 3 nos ( Do not chop)
To roast & grind
  • Cooking oil - 1 tsp
  • Dhania/Coriander seeds - 2 tsp
  • Chana dal - 1 tbsp
  • Red chillies - 2 nos
  • Methi seeds - 1/4 tsp
  • Grated coconut - 2 tbsp ( 2 small finger size pieces)
To saute in oil
  • Cooking oil - 1 tbsp
  • Mustard seeds - 1/2 tsp
  • Jeera/Cumin seeds - 1/2 tsp
  • Hing - few pinches
  • Small onions - 10 nos
  • Curry leaves - few
  • Sambar powder - 1/2 tsp
  • Salt & water - as needed
  • Jaggery – a small piece
For topping
  • Coriander leaves - for topping
  • Finely chopped big onion - 1 no ( for topping)
  • Ghee - few tsp to drizzle on top
METHOD

  • Pressure cook toor dal adding turmeric powder,hing,whole ripe tomatoes( I don’t chop tomatoes because dal may not turn mushy) and a drop of cooking oil.Cook for one whistle in very low flame adding 2 cups of water(If u wish, You can add drumstick and other vegetables in a bowl and cook separately inside the cooker).Remove the lid and mash the dal with tomatoes using a whisk.
Mini idli sambar recipe
  • Peel and chop onions.Heat oil in a kadai and roast all the ingredients given under “to roast and grind” in medium flame till the dals turn golden.Make sure u don’t burn the dhania seeds.Lastly add the coconut ,mix well and switch off the flame.If using pieces of coconut,just add it at the beginning and roast it along with dals.Grind everything to a fine powder and set aside.Mix this powder with the cooked & mashed dal.
Mini idli sambar recipe
  • In the same kadai,heat oil and temper mustard,jeera.Saute small onions,curry leaves.Add a cup of water,sambar powder,required salt,jaggery,turmeric powder,hing and cook the onions well.
Mini idli sambar recipe
  • Add the cooked dal + ground masala powder mixture to the sambar and add 1/2 cup of water to adjust the consistency.Boil well for few minutes till you get a nice aroma.
  • Switch off the flame and garnish with coriander leaves.Transfer the sambar to a vessel and add 2 tsp of ghee.Keep it closed and give a standing time of 30 minutes to 1 hour for all the taste to blend well.
Mini idli sambar recipe
  • To make mini idlis,take 1 cup of idli batter and add 1 tsp of rice flour if u want to thicken the batter.Mix well .Grease the mini idli stand with oil and spoon the batter in each hole.Steam in idli pot for 10 minutes till they are done.Keep it in a hot box/Casserole till serving.
  • While serving,reheat the sambar.Take a small bowl and pour 2 ladleful of sambar.Put the idlis, add few tsp of ghee,finely chopped coriander leaves,onions and serve hot.
Mini idli sambar recipe

Enjoy !
Note
  • I have not used vegetables here.If u wish to add some veggies,take the chopped carrot,drumstick,potato in a small bowl and pressure cook with dal by keeping the bowl inside the cooker.
  • You can also saute the finely chopped tomatoes along with onions instead of pressure cooking with dal.
  • Adding jaggery gives a nice sweet taste to sambar.U can replace the jaggery by adding few pumpkin pieces to add natural sweetness.
  • If u want to make this sambar in a simple way without grinding masala,add 1 tsp of sambar powder and 1/2 tsp of red chilli powder while cooking onions.


Try this yummy mini idli sambar for your kids during this vacation and make them happyHappy
Mini idli sambar recipe

الاثنين، 4 مايو 2015

Savory Chana Dal Fritters with Tomatoes and Spices

Savory Chana Dal Fritters with Tomatoes and Spices

I don't typically deep-fry foods as I generally prefer baked versions of savory appetizers to keep the mess and grease down. But there are exceptions. Like these Indian spiced chana dal fritters for example. As it turns out, these light, crispy and spicy fritters weren't very oily at all, and I enjoyed them for lunch smothered with a homemade chutney. Crispy on the outside but delightfully moist and airy in the inside, these easy-to-make fritters are a treat indeed. And very addictive. They are best served warm and fresh out of the pan, but they do keep well covered in the fridge for a day or so. Simply heat them up covered with foil in the oven in a low temperature preheated oven and enjoy them again.

Chana Dal Fritters

I served these with a fresh coconut chutney with tamarind and cilantro.

Savory Chana Dal Fritters with Tomatoes and SpicesSavory Chana Dal Fritters with Tomatoes and Spices
Recipe by
Adapted from Lord Krishna's Cuisine: The Art of Indian Vegetarian Cooking
Cuisine: Indian
Published on May 4, 2015

A blend of chana dal, tomatoes and Indian spices turned into light, crispy golden-brown fritters — delicious served with a chutney for lunch or as an appetizer

Print this recipePrint this recipe

Ingredients:
  • 2/3 cup chana dal, rinsed
  • 1 1/2 tablespoons ghee or other oil
  • 2 to 3 green chilies, seeded and minced
  • 1-inch piece ginger, grated or minced
  • 1/2 tablespoon coriander seeds
  • 1/2 teaspoon fennel seeds
  • 1/2 teaspoon turmeric
  • 1 teaspoon ground cumin
  • 1/4 teaspoon cayenne
  • 1/4 teaspoon asafetida
  • 2 medium tomatoes, seeded and diced
  • water as needed (about 1/4 cup to 1/3 cup)
  • 2 tablespoons + 1 teaspoon arrowroot powder
  • 1 teaspoon sea salt, or to taste
  • peanut oil or other high-smoking point oil for frying
Instructions:
  • Soak the dal in enough water to cover for 5 to 6 hours. Drain, rinse again, and transfer to a food processor.

  • Heat the ghee or oil in a small saucepan over medium heat. When hot, add the chilies, ginger, coriander seeds and fennel seeds, and fry for 2 to 3 minutes. Add the turmeric, cumin, cayenne, and asafetida, stir a few times, and then add the tomatoes. Simmer, stirring often, until the tomatoes are reduced to a fairly thick paste. Set aside to cool a bit.

  • Add 4 tablespoons of water to the dal in the food processor and pulse for 3 to 4 minutes, stopping often to scrape down the sides as needed and also adding a bit more water as need. You want a smooth and airy batter. Add the tomato mixture, arrowroot and sea salt, and process for another 30 seconds. Scrape the batter into a bowl.

  • Heat 2 1/2 inches of oil in a large heavy-bottomed saucepan or deep frying pan over medium heat. When the oil is hot, drop a small bit of the batter into the oil. When the oil is ready, the batter should rise immediately to the top. Carefully lower several portions of about 1 1/2 tablespoons of the batter into the hot oil, taking care not to crowd the pan. When the patties begin to rise to the surface, gently move them around to brown evenly. This should take about 3 to 4 minutes, until crisp and golden. Remove with a slotted spoon and drain on paper towels. Repeat with the remaining fritters. They can be kept warm in a 225° oven until the fritters are finished. They can also be reheated for a few minutes under the broiler.

  • Serve hot or warm with your favorite chutneys and sauces.

Makes about 12 fritters or 4 servings

chana dal fritters with spices

Other Indian savories to enjoy:
Chana Vada (Chana Dal Peanut Patties) with a Tamarind Chili Sauce
Potato Patties Stuffed with Spiced Green Peas (Aloo Matar Tikki)
Vegetarian Samosa Cakes with Tamarind Chutney
Samosa-Style Stuffed Baked Potatoes

Audio Accompaniment: chirping birds

الجمعة، 1 مايو 2015

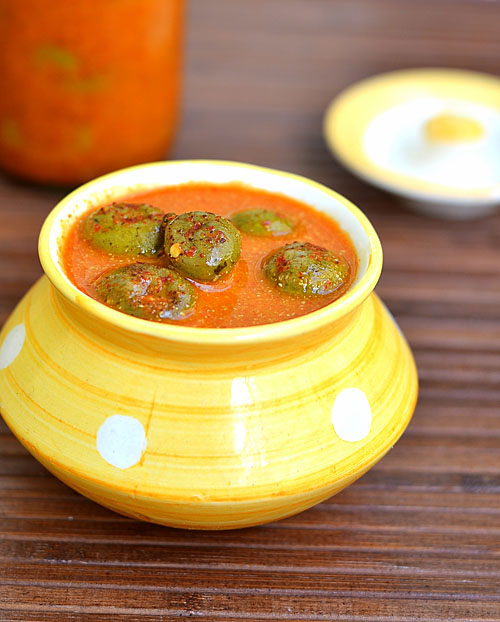
Maavadu Urugai Recipe-Vadu Mangai Pickle-Baby Mango Pickle

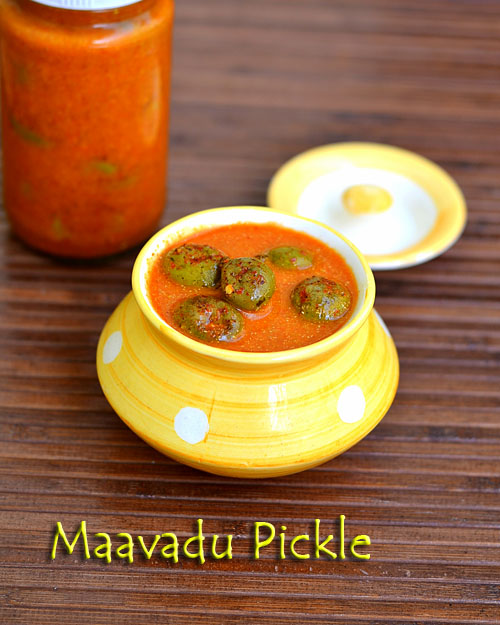
Maavadu urugai recipe
Basically i am a big fan of pickle recipes right from my Childhood.I need to have at least one pickle variety for my curd rice.I don’t mind about the oil,salt and preservatives in itTongue .My appa is just the same like me.He can eat even paruppu sadam,lemon rice,rasam rice and other rice recipes with pickle as side dish.Even though we like all the pickles,Vadu manga urugai is our family favourite.My mom doesn’t make pickles getting afraid of fungus formation.So my dad used to tell a brahmin(yer)paati nearby our house to make this pickle for us.We used to store it for an year and relish it with curd rice.And now,after marriage,i became very happy when i saw my MIL making pickles at home.She is an expert in making many pickle varieties like onion,garlic,Raw mango,Nellikai,Naarthangai etc etc.This year,i bought baby mangoes in Bangalore and tried this pickle by myself following my MIL’s recipe.I was very happy and completely satisfied with the result.Thanks a ton Aunty for teaching me this easy and yummy maavadu pickle.I thank her everyday when i eat this pickle with a plateful of curd riceHappy.Don’t hesitate to try this baby mango pickle even if you are a beginner.Just follow the recipe,u will get it right.Lets see how to make maavadu/Vadu mangai pickle at home with stepwise pictures.
Check out my other pickle recipes here How to make maavadu pickle

Maavadu urugai/Baby mango pickle


Maavadu urugai/Baby mango pickle How to make Maavadu urugai/Baby mango pickle at home
Cuisine: Indian
Category: Pickles
Serves: -
Prep time: 10 Minutes
Cook time: 7 days
Total time: 7 days 10 min


INGREDIENTS

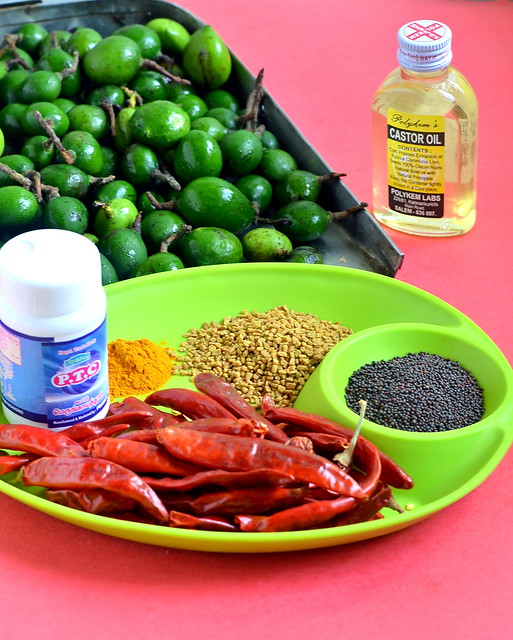
  • Baby mangoes/Vadu mangai- 5 cups ( heaped)
  • Red chillies - 35 nos ( use 40 nos for more spice)
  • Methi seeds - 2 tbsp
  • Mustard seeds - 1.5 tbsp
  • Turmeric powder - 1 tsp
  • Hing/Asafetida - 1 tsp
  • Rock salt/Crystal salt - as needed
  • Castor oil – 2 tbsp
To temper
  • Gingely oil - 2 tbsp
  • Mustard seeds - 1 tsp
METHOD

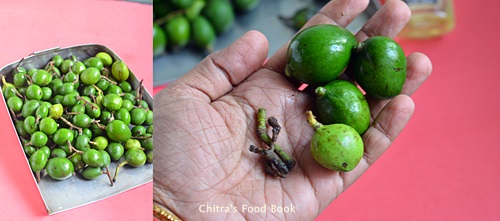
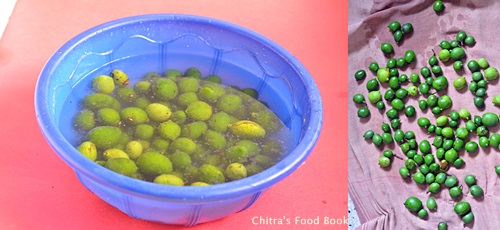
  • Remove the stalk/Kaambu of baby mangoes if they are very big.Ignore this step if the stalk is small.Wash them well and spread it in a towel .Pat it dry.Take the baby mangoes in a porcelain bowl(Peengaan jaadi) or glass bowl as other vessels may react.
Maavadu pickle
Maavadu urugai recipe
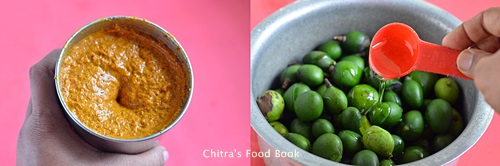
  • Now apply oil all over the baby mangoes.In a kadai,dry roast the methi seeds till golden brown in medium flame. In a mixie jar take the mustard seeds,roasted methi seeds,red chillies,turmeric powder,Hing and rock salt.Powder them nicely.Now add water and make a smooth paste.
Maavadu pickle
Maavadu urugai recipe
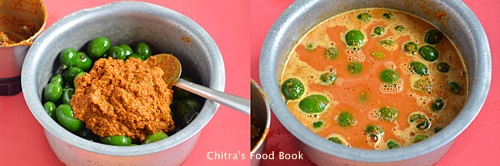
  • Add this paste to the baby mangoes and coat it well.Mix with a ladle and not with your hands.Now add water till the mangoes immerse well.Make sure water is not more.Mix well with a ladle.Check for salt and add more if needed.
How to make maavadu urugai
  • Cover the bowl with a cotton cloth and keep it under the sun for a day.Mix well once or twice in the middle.Remove and keep it closed over night.Repeat the same procedure for 5-7 days.Baby mangoes will start to shrink and soak well.Enjoy with curd rice.
You can eat the mangoes in the second day itself.But it needs at least a week to ten days to enjoy its best flavor and taste.

Enjoy !


Note

  • Some version calls for roasting the chillies along with methi seeds and hing. But my MIL always add it raw.So i too follow her method.
  • Adjust the quantity of red chillies as per your taste.
  • U can also replace red chillies with chilli powder.Use Kashmiri chilli powder for best color.
  • Mustard seeds gives a nice flavor to this pickle.So don’t skip it.But do not add more as it may give a bitter taste. 
  • This pickle tastes the best only after a week.So let it dry under sun.Do this patiently.
Check out my other pickle recipes here .
How to make maavadu urugai
Try this pickle in this mango season and relish it all through the yearHappy
Maavadu pickle

No Croutons Required - May 2015 edition of Vegetarian Soups and Salads

No croutons required

It's my turn to host No Croutons Required this month. For those new to the event, Jacqueline and myself alternately host - the focus is on vegetarian soups and salads. We welcome submissions from around the world, so whether it is warming up or cooling down, be sure to share your recipe.

It's easy to participate.

All you have to do is:

Make a soup or salad that is suitable for vegetarians and showcase it on your blog.

Link back to this announcement and my blog as I am the host for May, and also Jacqueline's blog, as she is my partner in arms for this venture.

Add your recipe using the linky tool at the end of this post by the 28th of this month. Only one entry per blogger please.

The roundup will be posted at the end of the month.

We are very much looking forward to your inspired creations, as always. You can never have enough recipe ideas is my motto.