السبت، 22 نوفمبر 2014

EASY HOMEMADE GRANOLA(MUSELI)RECIPE-DIY


Homemade museli

Muesli/Granola is a popular breakfast dish based on raw rolled oats and other ingredients including grains,fresh or dried fruits,seeds and nuts,mixed with milk,soy milk, yogurt or fruit juice.It is available in a packaged dry form,ready made,or made fresh.There are slight differences between museli and granola.Please find them here.Recent days Sendhil is taking store bought museli & granola bars to his office to have it during break time.As u all know store bought brands are very costly.So i wanted to give it a try at home.When i browsed for the same, i found a very simple and easy recipe here.Its just a three step process.I did some changes in the original recipe and tried it.It came out very well and crunchy.Anyone can make it with easily available ingredientsCool .Sendhil loved it a lot.Even i liked it very much and i am having it for my breakfast once in a week.Its really a healthy,tummy filling breakfast recipe for weight watchers like me and a good replacement for my regular plain(kellogs)corn flakes.Lets see how to prepare granola/Museli at home easily.

Homemade-museli-recipe

Homemade museli recipe


Homemade museli recipe How to make museli/granola at home easily at home
Cuisine: Indian
Category: Breakfast
Serves: 2-3cups
Prep time: 10 Minutes
Cook time: 20 Minutes
Total time: 30 Minutes


INGREDIENTS
To mix
  • Quick oats - 1 cup ( i used quaker)
  • Kellogs corn flakes - 1/2 cup ( crushed coarsely)
  • Flax seeds - 1/4 cup
  • Hazelnuts - a handful ( roughly chopped)
  • Raisins or dry grapes - A handful ( roughly chopped)
  • Almond/Badam - 1/4 cup ( chop into thin slices)
  • Cranberries or dates - 2 tbsp (optional) , chop roughly
  • Cinnamon powder – 1/2 tsp ( crush 2 inch cinnamon piece into fine powder)
  • Vanilla extract – 1 tsp
  • Honey - 2.5 tbsp
  • Cooking oil or olive oil - 1 tbsp
  • Condensed milk - 1/2 tbsp ( optional)
  • Salt - a pinch
METHOD

  • Chop the nuts and dry fruits finely and set aside.In a wide bowl,take the oats,flax seeds and coarsely crushed corn flakes.Mix everything well together.
Homemade-granola-recipe
  • To this,add honey,cinnamon powder,vanilla essence,cooking oil and condensed milk(optional).Mix well using your clean hands.Make sure there are no lumps in the mixture.
Homemade-granola-recipe-1
  • Grease a baking tray with little cooking oil and spread the museli mixture all over the plate.Pre Heat oven in convection mode at 180 c for 10 minutes.Then keep this plate and bake at 180 c in convection mode for 20 –25 minutes.Remove it once in 10 minutes,mix well with a spatula and again bake it.The color of raisins and cranberries would turn golden brown with a nice baked smell.The oats will turn crunchy.Remove after 20 minutes and let it cool completely.After it cools down,it will become super crunchy.Store in an air tight bottle and use as needed.
Homemade-granola-recipe-2

Enjoy it for your breakfast or lunch adding a cup of hot milk or munch as it is !


Yummy,crunchy homemade granola is ready to munch adding hot milk.Its a tummy filling breakfast recipe for weight watchers Smile.


Museli-recipe


الخميس، 20 نوفمبر 2014

VARAGU ARISI PONGAL RECIPE/KODO MILLET PONGAL-MILLET RECIPES


varagu arisi pongal recipe

Very recently i started making upma & pongal varieties using millets.I tried Ven pongal using Varagu( Kodo millet in English,Koden/Kodra in Hindi,Harka in Kannada,Arikelu in Telugu,Koovaragu in Malayalam- Source-Wikipedia) for the first time.It came out very well.As u all know Varagu rice/Kodo millet has amazing health benefits.It is basically a digestion friendly millet.It is rich in phytochemicals,Phytate that helps in reduction of cancer risks.It helps to reduce the body weight which is most needed for obese people.It helps to overcome irregular period problems in women.It helps to reduce knee & joint pains.It is good for diabetic people.It reduces nervous disorders especially in eyes.And this pongal is a very easy and tummy filling breakfast recipe.Just 1/2 cup of varagu arisi is enough to serve 2-3 people because it doubles in quantity once its cooked.It tastes very similar to our regular rice pongal with full of flavors.My daughter Raksha loves pongal a lot.When i gave this for her breakfast today,she couldn’t identify its varagu rice pongal and not our usual oneWinking.We had with coconut chutney as side dish.It was yumLove Struck.Do try this easy and healthy pongal recipe for your breakfast or dinner.I am sure your entire family would love it.
check out my other millet recipes here.

varagu arisi pongal

Varagu arisi pongal/Kodo millet pongal recipe


Varagu arisi pongal/Kodo millet pongal recipe Varagu arisi pongal recipe - Healthy millet recipe for breakfast !
Cuisine: Indian
Category: Breakfast
Serves: Serves 3
Prep time: 5 Minutes
Cook time: 20 Minutes
Total time: 25 Minutes


INGREDIENTS

  • Varagu arisi/Kodo millet - 1/2 cup
  • Moong dal - 1 tbsp
  • Water - 2 cups
  • Salt - as needed
To temper
  • Ghee - 1 tbsp
  • Pepper corns - 1/4 tsp
  • Cumin seeds/jeera - 1/2 tsp
  • Hing/Asafetida - a small pinch
  • Ginger - 1/2 inch piece ( finely chopped)
  • Green chillies - 1 no ( small sized)
  • Curry leaves - few
METHOD

  • Wash the kodo millet ,drain and set aside.In a pressure cooker base,heat ghee and add the moong dal,pepper corns.Saute for a minute in low flame.Make sure the color of dal should not change.Then add the cumin seeds/jeera and saute till it turns light golden.Lastly add the curry leaves,green chillies & hing.Stir it.Add the measured water and required salt.
varagu-pongal-1
  • Add the washed & drained millet and ginger pieces.Close the cooker and cook for one whistle in low flame.It will take nearly 10-12 minutes.
varagu-pongal-2
  • Remove the lid and mix well.Add a tsp of ghee and serve hot !Tastes the best with coconut chutney !
Enjoy !


Note

  • Serve this pongal when its hot to enjoy its best taste.When it cools down,it will become slightly hard.You can reheat the pongal while serving by adding little water and mix well in flame for few seconds.
  • You can follow the same method and make pongal with thinai & samai too.
  • Replace ghee with cooking oil if u are calorie conscious.But ghee gives great flavor.
  • Add a tsp of ghee while serving for kids.

Serve this healthy,easy varagu pongal with chutney and sambar.Tastes yummy !
Kodo millet recipes


الأربعاء، 19 نوفمبر 2014

VAZHAIPOO PORIYAL RECIPE-BANANA FLOWER CURRY/STIR FRY


Vazhaipoo poriyal recipe

Vazhaipoo poriyal has become one of our favourite vazhaipoo recipes.It is very easy to make when compared with vazhaipoo usili and super tasty without onion.I learnt this recipe from my MIL.Nowadays i am making this very often in my kitchen next to vazhipoo vadai & vazhaipoo kuzhambu.Check out my post on “How to clean vazhaipoo/Banana flower with stepwise pictures” to know how to clean,chop n store it in advance to make your morning job hassle-free.Lets see how to make this healthy valaipoo poriyal/Banana flower curry recipe at home easily Happy.It tastes the best with sambar sadam and paruppu rasam !

Vazhaipoo-poriyal

Vazhaipoo poriyal/Banana flower curry recipe


Vazhaipoo poriyal/Banana flower curry recipe Easy n delicious vazhaipoo poriyal recipe - Tasty side dish for sambar rice !
Cuisine: Indian
Category: Curries
Serves: Serves 4
Prep time: 15 Minutes
Cook time: 15 Minutes
Total time: 30 Minutes


INGREDIENTS

  • Chopped banana flower - 2 cups
  • Moong dal - 2 tbsp
  • Turmeric powder - 1/2 tsp
  • Sambar powder - 1 tsp
  • Salt - as needed
To temper
  • Cooking oil - 1 tbsp
  • Mustard seeds - 1/2 tsp
  • Urad dal - 1 tsp
  • Grated coconut - 1/4 cup
  • Sugar - 1/8 tsp
METHOD

  • In a wide bowl,take the chopped banana flower,moong dal,salt,turmeric powder and sambar powder.Mix well using your hands and set aside for 15 minutes.It will leave little water.
vazhaipoo-poriyal-recipe-1
  • In a kadai,heat oil and temper mustard,urad dal and curry leaves. After the dal turns golden brown, add the vazhaipoo mixture and mix well.Keep the flame low and cover cook for sometime.You don’t need to add water because the water in banana flower itself is sufficient.Keep the flame low and cook it with a lid for 10-15 minutes.Toss it once or twice in the middle.
vazhaipoo-poriyal-recipe-2
  • After the banana flower is completely cooked,add the grated coconut,mix well for a minute.Remove and serve.You can add few drops of lemon juice if u want tanginess.We don’t do it usually.
vazhaipoo-poriyal-recipe-3
Enjoy !


Note

  • Cleaning and chopping banana flower takes more time.So make it the previous day,keep the chopped flowers immersed in buttermilk and use it next day.Squeeze the buttermilk completely and then proceed as mentioned above.

Stay Connected  -     
 

I served this vazhaipoo poriyal recipe with rice,paruppu rasam and papad.It was lovely Smile

vazhaipoo poriyal

الثلاثاء، 18 نوفمبر 2014

Staple Corner: How to Make Your Own Za'atar

zaatar

My first taste of this popular Middle Eastern herb and sesame seed blend was an extraordinary burst of tangy, zesty and salty flavors. I make a lot of spice blends for my kitchen from scratch, but never one that tasted so good just on its own. In fact, it is eaten almost on its own, often served with just bread and olive oil. Highly aromatic as well as delicious, consider using za'atar to make simple oil or yogurt dressing or sprinkle it on fresh tomato slices or Middle Eastern vegetable dishes.

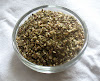
Although recipes for za'atar — also spelled as "zahtar", "zatar" or "zaatar" — vary from region to region and even from family to family within the Middle East and North Africa, each preparation features a combination of dried herbs such as thyme, oregano or marjoram mixed with ground toasted sesame seeds and salt. Other seeds or herbs are also sometimes added according to the local or family custom. This version includes black salt — also called rock salt — and dried fenugreek leaves to impart a smokier and tangier flavor. Dried sumac — the berry of a small temperature deciduous shrub — is also commonly added. Ground to a powder, sumac is easily found in any Middle Eastern grocer and in many Asian grocers.

Za'atarHomemade Za'atar
Recipe by
Cuisine: Middle Eastern
Published on November 18, 2014

A tangy, zesty and salty blend of herbs and toasted sesame seeds from the Middle East

Print this recipePrint this recipe

Ingredients:
  • 1/4 cup white sesame seeds
  • 1 tablespoon ground sumac
  • 1 teaspoon black (rock) salt
  • 2 tablespoons dried oregano
  • 2 tablespoons dried thyme
  • 1 1/2 tablespoons dried marjoram
  • 1 teaspoon dried fenugreek (methi) leaves (optional)
Instructions:
  • Toast the sesame seeds in a dry unoiled skillet over medium-low heat for 5 to 10 minutes, tossing frequently, until lightly browned.

  • In a mortar and pestle, grind together the sumac and salt. Add the sesame seeds and grind further. Add the herbs and fenugreek leaves if using and grind a few more times, making sure everything is well combined.

  • Keep stored in a sealed glass jar in the refrigerator for up to 4 months.

Makes about 3/4 cup

bread with zaatar and olive oil

Other homemade spice blends to liven up your food:
Garam Masala
Curry Powder
Goda Masala
Sambar Powder

On the top of the reading stack: Plenty More by Yotam Ottolenghi

Audio Accompaniment: Thomas Tallis

ONION TOMATO THOKKU RECIPE-SIDE DISH FOR IDLI DOSA


Tomato-thokku-recipe

Is there anyone in your house says NO to this simple yet yummy onion tomato thokku recipe when you make it as a side dish for idli,dosa and chapathi ? No One, right ?? But in my house,both dad & daughter says BIG NOOOOOO when i make this as side dish.Basically i am a great fan of tomato recipes especially tomato thokku.I can have more than 10 idlis when my mom makes this as a side dish.After marriage,i have tried it many times following my mom’s recipe using Bangalore tomatoes.Sendhil & Raksha used to have it by showing odd facesSmug.So i completely stopped preparing it for years.Recently i watched Vijay tv’s samayal samayal with Chef Venkatesh Bhat in which he showed Neer dosa with this chutney (he mentioned this recipe as onion tomato chutney) as side dish.At that time,my in-laws were here in my place & they had brought ripe naatu thakkali ( Tangy tomatoes ) from Salem,Tamilnadu.My MIL told me to try this thokku for breakfast as they love it very much like me.I too tried hopelessly thinking Sendhil & Raksha won’t like it.But to my surprise,they both loved it a lot and Sendhil said “ Its good & tasty” for nearly 4-5 times and had two more idlis tooDancing.I was wondering what made the difference between this version & my mom’s version.Is it the addition of garlic or the tangy Tamilnadu tomatoes,something has made the magic and this recipe was a super hit among my family.Thanks a lot Chef Happy.I have done it thrice so far but only with naatu thakkali( In Bangalore they call it as “Naatti”).Friends do try this recipe using naatu thakkali if u have in hand,even thokku haters would love it for sure.For tomato lovers,Bangalore tomatoes would do !!
Check out my Easy tomato thokku recipe without onion & garlic if interested !

Onion tomato thokku recipe

Onion tomato thokku recipe


Onion tomato thokku recipe Onion tomato thokku recipe - A very tasty side dish for idli,dosa n chapathi !
Cuisine: Indian
Category: Side dishes
Serves: Serves 3
Prep time: 10 Minutes
Cook time: 15 Minutes
Total time: 25 Minutes


INGREDIENTS

  • Ripe tomatoes - 3 nos
  • Big onion - 2 nos
  • Garlic cloves - 6 nos
  • Turmeric powder - 1/8 tsp
  • Red chilli powder - 1 - 1.5 tsp
  • Sugar - a pinch
  • Curry leaves - few
  • Hing/Asafetida - a big pinch
  • Salt & water - as needed
To temper
  • Cooking oil - 2 tbsp
  • Mustard seeds - 1/2 tsp
  • Urad dal -1 tsp
  • Red chillies - 2 nos ( pinch into 2 )
Coriander leaves – few ( finely chopped to garnish)
METHOD

  • Wash and chop the tomatoes and onions very finely.Heat oil in a kadai and temper all the ingredients given under “ to temper” in the same order.
  • Add finely chopped garlic cloves and saute for few seconds. Then add finely chopped onions and saute till they turn transparent.Then add finely chopped tomatoes.Saute till tomato turns mushy adding the required salt
onion-tomato-thokku-step1
  • Add turmeric powder,red chilli powder,hing and sugar.Mix well for a minute. Then add 1/2 cup of water and let the mixture cook well for few minutes.Switch off the flame when the mixture is slightly wet with little water because it will become too dry when it cools down.So switch off  the flame at the right time..Remove and add chopped coriander leaves.
onion-tomato-thokku-step2
Enjoy with idli,dosa and chapathi !


Note

  • Use ripe tomatoes for best results.
  • Adjust the quantity of chilli powder as per your spice level.
  • Adding a pinch of sugar helps to balance all the taste.


Enjoy my favourite onion tomato thokku with hot idlis,dosa & chapathi.It tastes awesome Happy
Onion-tomato-thokku

الأحد، 16 نوفمبر 2014

HOW TO CLEAN VAZHAIPOO/BANANA FLOWER-INDIAN COOKING BASICS


How-to-clean-vazhaipoo

Recently one of my friends in abroad told me to make a post on “How to clean & chop vazhaipoo ie Banana flower/Plantain flower.Also I have planned to share vazhaipoo poriyal recipe in the upcoming week.So before posting that recipe,i thought this post would be useful to you all.Cleaning & chopping vazhaipoo is not that difficult as one thinks.Its just a time consuming job,that’s it.Otherwise its very easy to cook & u can make very tasty recipes with it.As u all know its a super healthy vegetable with amazing health benefits.It contains various vitamins like Vitamin A, C, and E. They also contain potassium and fibers. This makes them an excellent health food and a source of healthy nutrients.It helps to reduce menstrual bleeding & pain.Cooked banana flowers along with curd or yogurt increases the progesterone hormone in the body and reduces bleeding.Calculated intake of banana flowers reduces blood sugar levels. It also increases the total haemoglobin levels in the body.So friends,don’t avoid buying vazhaipoo just by thinking about its cleaning process.Listen to your favourite songs or watch some megaaaa serials,this cleaning job will be done within no timeWinking.I follow this usually.If not, at least ask your maid to do this job for you.Try to include vazhaipoo & vazhaithandu in your cooking at least once or twice in a month.Its very very healthy and it makes miracles!Soon i will make a detailed post on how to clean & chop vazhaithandu/Banana stem with its health benefits.In this post,i have also shared some simple tips and tricks for easy chopping and to maintain its color after chopping.Hope it would be useful to all beginners.Thanks for visiting this page.Have a great Sunday !
Check out some of the delicious vazhaipoo recipes below
Vazhaipoo kuzhambu
Vazhaipoo vadai
Vazhaipoo usili

Banana flower

How to clean vazhaipoo


How to clean vazhaipoo How to clean & chop vazhaipoo/Banana flower.
Cuisine: Indian
Category: Cooking basics
Serves: -
Prep time: 30 Minutes
Cook time: 20 Minutes
Total time: 50 Minutes


INGREDIENTS

  • Banana flower/Vazhaipoo - 1 no
METHOD

  • Spread 2-3 newspapers one over the other Or spread a thick sheet on the floor to prevent stains.Grease your hands with gingely oil very well.Cleaning vazhaipoo makes your fingers black.So this will help to avoid blackening of hands and fingers OR wear some thick gloves.
  • Take 1/4 cup of curd and mix with 2 cups of water.Mix it well & make buttermilk with it.Keep it ready.
  • Now take the banana flower and when u remove the cover,u will see bunches of flowers.Take out the bunch and place it in the newspaper.Remove all the florets and collect in the newspaper.
How to clean vazhaipoo-1
Vazhaipoo kuzhambu step1_thumb[3]
  • Initially u will find big sized florets.But when u keep on removing,u will find very small florets.So keep the big ones and very small ones separately.Don’t forget to eat the cone shaped,blossom part which is very tender and  small in size.Eat it as such.It is very good for stomach ulcers.
Vazhaipoo kuzhambu step2_thumb[2]
  • Take a big floret and remove the stamen(kaalan) and thin white colored cover portions( some people don’t remove this part.My MIL don't remove but my mom does it).Refer picture below. Repeat the same for all the big florets.No need to remove the stamen part for very small ones.You can chop & use as it is.
How-to-clean-vazhaipoo-2
  • Chop the big florets finely using a knife and keep them immersed in buttermilk till use. This helps to prevent blackening of banana flower.Do this with all big florets.Similarly chop the small florets and put it inside the buttermilk.( In the below picture,i have added turmeric powder, moong dal and salt to the chopped vazhaipoo and kept it ready for making poriyal.so the color looks yellow.I will try to update a clear picture soon.
How-to-clean-vazhaipoo-3
I usually take a bunch of florets in hand and remove the stamen and cover part & chop it with a knife keeping as a bunch and dip in buttermilk.
TIPS TIPS
You can do this cleaning process without chopping in the previous day night and keep it refrigerated in a zip lock bag.If u chopped it,immerse in buttermilk and refrigerate.The next day morning,u can make delicious recipes with it.Suppose if u feel difficult or lazy to chop,here is an easy method of chopping.ie. Take a handful the cleaned banana florets in a big sized mixie jar,run the mixie once or twice for a second.Florets will be coarsely ground.Now take the florets and dip in buttermilk.Repeat the same with all the florets.Refrigerate it overnight and use it the next day.
Check out some of the vazhaipoo recipes below
Vazhaipoo kuzhambu
Vazhaipoo vadai
Vazhaipoo usili

Banana flower-1