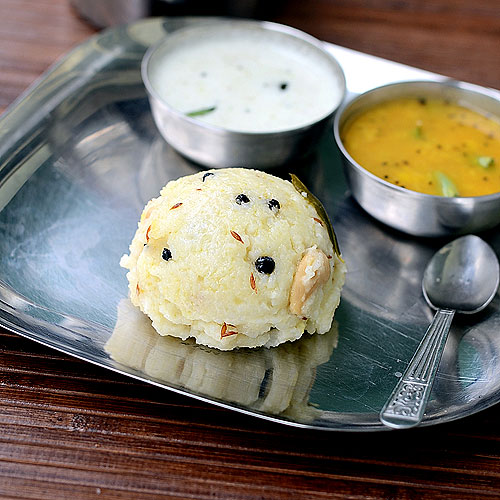
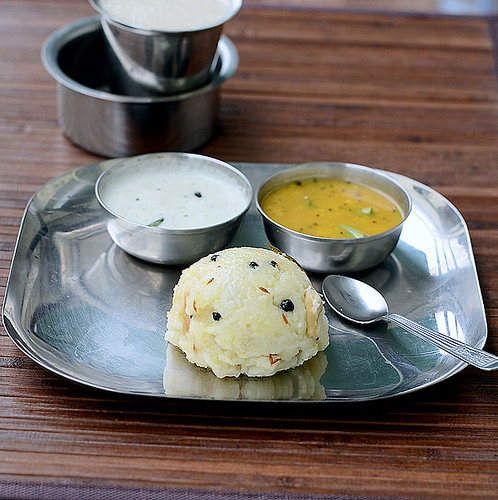
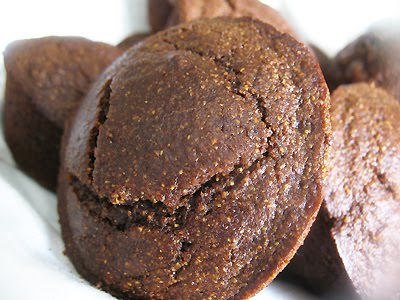
Ven pongal also known as ghee pongal & khara pongal is one of the most popular South Indian breakfast recipes.My Mom & MIL makes it very well. Though they follow different methods,i like both the versions.I usually follow my MIL’s method as my husband Sendhil is fond of it .My mom adds crushed pepper but my mil adds whole pepper & cumin along with other ingredients as per our family liking.To me, its a very easy one pot meal.So I usually make pongal in busy mornings & mostly for my guests.The taste & softness of pongal depends not only in the quantity of ghee but also on the quality of rice & quantity of water,rice ratio .In Tamilnadu,we get pongal rice(Raw rice/Pacharisi).We use it for making sakkarai pongal & ven pongal .Here in Bangalore,i buy the costliest , good quality Sona masoori raw rice.In this post,I have shared my MIL’s method.It’s a very easy and quick method using pressure cooker.I have used moderate quantity of ghee in this recipe.If u r planning to try for your guests , add more ghee before serving otherwise just follow this recipe for the first time and adjust the amount of ghee if u wish.I’ve given my mom version in the “Notes” section.Do try any method based on your liking.Remember pongal should be served hot to enjoy its best taste
  . As u all know the best side dish for pongal are coconut chutney, Tiffin Sambar & brinjal gosthu! Ok, Lets see how to make ven pongal aka ghee pongal – an awesome Breakfast recipe !
I have uploaded a full video recipe for your reference.Hope u will find it useful.
.My mom adds crushed pepper but my mil adds whole pepper & cumin along with other ingredients as per our family liking.To me, its a very easy one pot meal.So I usually make pongal in busy mornings & mostly for my guests.The taste & softness of pongal depends not only in the quantity of ghee but also on the quality of rice & quantity of water,rice ratio .In Tamilnadu,we get pongal rice(Raw rice/Pacharisi).We use it for making sakkarai pongal & ven pongal .Here in Bangalore,i buy the costliest , good quality Sona masoori raw rice.In this post,I have shared my MIL’s method.It’s a very easy and quick method using pressure cooker.I have used moderate quantity of ghee in this recipe.If u r planning to try for your guests , add more ghee before serving otherwise just follow this recipe for the first time and adjust the amount of ghee if u wish.I’ve given my mom version in the “Notes” section.Do try any method based on your liking.Remember pongal should be served hot to enjoy its best taste I have uploaded a full video recipe for your reference.Hope u will find it useful.
Ven pongal recipe video
Ven pongal recipe
 How to make Ven pongal/Ghee pongal recipe easily using pressure cooker - One pot method
 Cuisine: South Indian
Category: Breakfast Recipes
Serves: Serves 3
Prep time: 5 Minutes
Cook time: 15 Minutes
Total time: 20 Minutes
INGREDIENTS
1cup = 200 ml
|
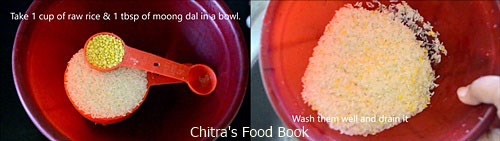
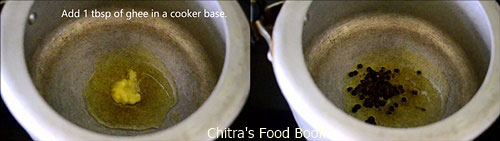
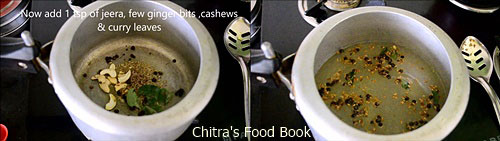
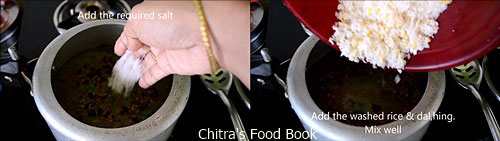
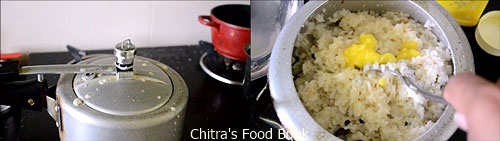
METHOD
 |
Note
|

Enjoy this easy & yummy South Indian breakfast recipe with your favorite side dish !


 Print this recipe