الثلاثاء، 31 يوليو 2012

No Croutons Required - The Winner for July


The challenge for July was to come up with a vegetarian soup or salad that is especially satisfying during hot summer months. We received plenty of tempting submissions and the choice was not easy, but we do have a winner. Congratulations to Michelle of The Tiffin Box who came up with this mouthwatering Home Grown Parsley and Potato Soup that takes advantage of garden goodness.


Jacqueline will be hosting the August edition of No Croutons Required. Check back at the beginning of the month for the theme.

الاثنين، 30 يوليو 2012

CAKE RUSK–STEP BY STEP RECIPE

CAKE RUSK2
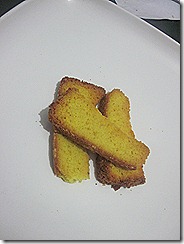
I recently started my experiments in baking and i have tried some cakes ( Yet to be posted) n cookies ..I am a big fan of rusk.I love its mild sweetness, flavour and crispness.When i was having my tea with a rusk, my husband told me about the cake rusk he had in a bakery.He told it was very nice and he loved its taste. From then my search started and it ended up here and here. I got attracted by the pictures and  tried it. I referred both the recipes and made some changes as per our taste.I was searching for an eggless recipe but i dint get it. So i used eggs in my kitchen for the first time to try out this yummy stuff. YES, it was a big success. Being a beginner in baking , i felt proud and happy after seeing the result.. Thanks a lot !!  Beginners like me can dare to give this a try. !! This recipe yields nearly 15-20 pieces of cake rusk. But i used half of the cake to make the rusk . So i got only 10 pieces. By the time i clicked , i had only 3 pieces left over in my hand . So the shapes may not look good but believe me it tasted gr8.
A small intro to cake rusk for those who are not aware of: Cake rusk is an asian dessert  and is a kind of double baked cake which goes well with chai/ tea.It is light brown in color & crispy in texture and taste.These crispy browned cake rusks are quite popular in Pakistan.

INGREDIENTS
1cup - 200ml
  • All purpose flour / Maida – 1.25 cups (1 + 1/4 cup)
  • Sugar –  3/4 cup ( 1 cup minus 3 tbsp)
  • Cooking oil – 1/2 cup
  • Eggs – 3 nos
  • Vanilla essence – 1/2 tsp
  • Salt – 1/4 tsp
  • Baking powder – 1/4 tsp
  • Yellow food color – A pinch ( i used yellow powder. If u have the liquid add few drops in egg mixture)
  • Cardamom powder – A pinch  ( Optional) ( I dint use)

METHOD
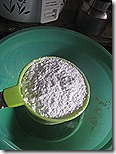
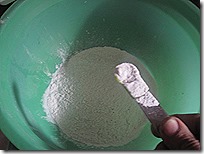
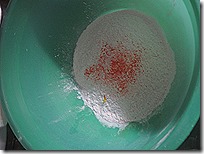
Sift maida , baking powder, salt and food color together.Set aside.
IMG_5296IMG_5298IMG_5301
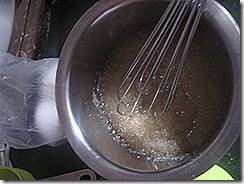
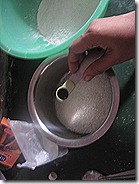
In a wide bowl take the sugar and cooking oil. Mix well till sugar dissolves.Add the vanilla essence and mix well.
IMG_5300.IMG_5302IMG_5299
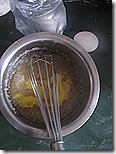
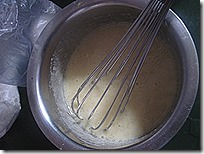
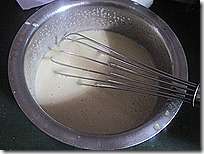
Then add the eggs one by one and beat well till u get a fluffy mixture. ( I used hand whisk.But i felt electric whisk would do well)
IMG_5303IMG_5304IMG_5306
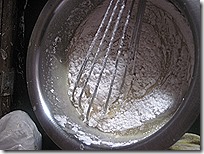
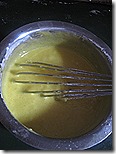
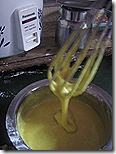
After adding all the eggs beat for another 8-10 mins.Now add the sifted maida slowly and keep stirring the mixture.
IMG_5308IMG_5309IMG_5310
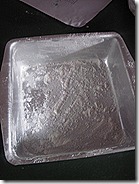
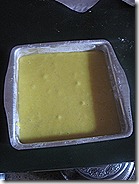
No need to add water or milk. U’ll get the correct consistency if u follow the same quantity of ingredients as i mentioned.Now transfer the dough into a greased  square shaped cake pan.Pat on all the sides of cake pan for even spreading.
IMG_5307IMG_5311
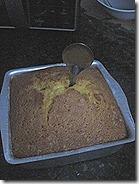
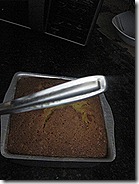
Pre heat the oven to 180c for 10 mins in convection mode.Then place the cake tray and bake the cake for 30-35 mins . Mine exactly took 35 mins. But it depends on the power of ur MW. So keep an eye after 20 mins. Check whether the cake is done by inserting a knife or spoon .If it comes out clean , ur cake is done.
IMG_5312IMG_5313IMG_5314
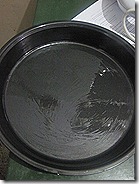
Transfer the cake to a wire rack or a plate and keep as such for 15-20 mins.Then invert the tray , the cake will come out easily.Remove the extra upper crust part and make a square shape cake.
IMG_5316IMG_5317
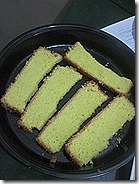
After it completely cools down , cut the cake into the desired rusk shape. (ie, Lengthy 1 inch thick slices)
IMG_5321IMG_5323
Again transfer the slices into a greased cookie tray . Arrange and bake them again in a pre-heated oven in 180c.
IMG_5322IMG_5324
Bake in convection mode at 180c for 10 mins. Turn it once and bake for another 10 mins.Please keep an eye after 5 mins. If u get the desired brown color , please remove and let it cool.I baked it in two batches.
IMG_5325

NOTES
  • If u want to make a eggless version  try replacing the eggs by egg substitute powder or follow the eggless sponge cake recipe . Hope it will work. As i tried for the first time i dint want to take risk. So i halved the original recipe and followed as such. Soon i’ll make an eggless version and update it.
  • While baking the cake , keep checking after 20 – 25 mins whether the cake is done.
  • While baking the rusk, keep an eye as it tends to brown faster and it gets burnt. Make sure the center portion should be slightly browned not much like the sides..
  • First keep the rusk for 10 mins and then change the other side. Set another 10 mins.
  • After 10 mins , remove the plate and touch the center portion, If it is too soft , switch off the oven and allow the plate inside the hot oven.
  • It gets roasted by the heat inside the oven . I did the same. If u feel it has to be roasted , again bake it for 5 more minutes.
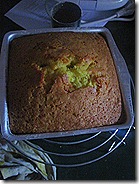
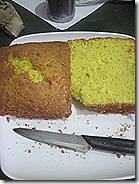
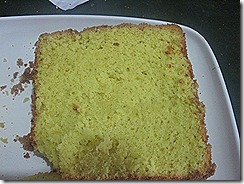
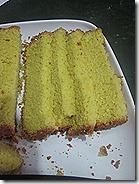
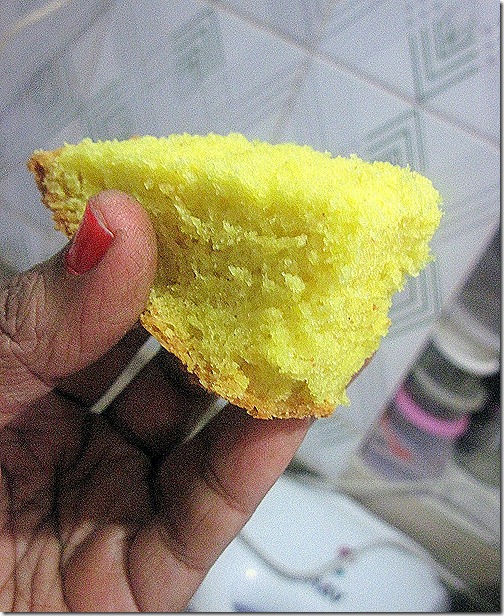
  • I used half portion of cake as such for my doter and we enjoyed eating it. It was very soft and spongy. Here is a picture of cake. So if u wanna make a sponge cake , u can surely try this recipe

SPONGE CAKE

الأحد، 29 يوليو 2012

Homemade Olive Tapenade Pizza

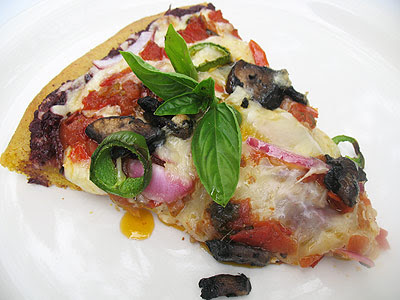
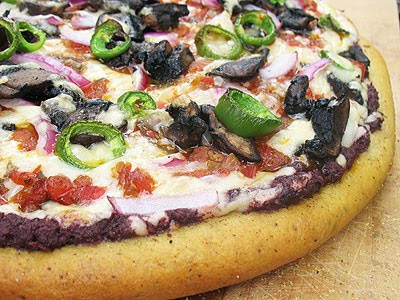
Fresh homemade pizza is always a treat, especially with a soft chewy homemade pizza crust! Smothered in a robust homemade black olive tapenade, plenty of delicious good quality soft cheeses, some sautéed portobello mushrooms, and some jalapeños and fresh basil from my garden, this is a colorful and extravagant pizza loaded with wonderful flavors and textures. I served it to my husband and good friend Basil outside on the deck on a beautiful summer evening — good food, good people and good weather are all the ingredients you need for a perfect dinner.

The perfect results were also a tremendous relief after a rather disastrous crumbling pastry I had made for a rhubarb and strawberry pie just days earlier (delicious nonetheless). And dessert redemption soon followed with a beautifully executed pineapple upside-down cake too.

Homemade Olive Tapenade Pizza

Homemade is the way to go, and my diners are asking for more. The best parts of making your own dough are that you can add different seasonings and spices into the blend, and that you can control the size and thickness of your pizza. The dough recipe below makes enough for two 12-inch pizzas, so after making this pizza I have enough dough in the freezer to make another round soon. Next time I think I will incorporate sun-dried tomatoes into the sauce and focus on Greek cheese or maybe another variant of my famous paneer pizza.
Homemade Olive Tapenade Pizza

Homemade Olive Tapenade PizzaHomemade Olive Tapenade Pizza
Recipe by
Published on July 29, 2012

Rich delicious pizza smothered with homemade black olive tapenade, delicious soft cheeses, sautéed portobello mushrooms, jalapeños and fresh basil

Print this recipePrint this recipe

Dough recipe makes two 12-inch pizza crusts. Instructions for making one 12-inch pizza below. If making two pizzas, double the tapenade and topping ingredients.

Pizza dough:
  • 1 tablespoon sugar
  • 1 cup warm water
  • 1/4 oz (8 g) package of yeast
  • 3 1/4 cups unbleached white flour or spelt flour
  • 1/2 teaspoon sea salt
  • 1 tablespoon of curry powder (optional)
  • 1/4 cup olive oil + more for brushing
  • cornmeal
Olive tapenade:
  • 1 cup black olives, pitted and chopped
  • 1/2 cup fresh basil leaves
  • 2 teaspoons capers
  • 1 large clove garlic, chopped
  • 1/4 cup olive oil
  • juice from 1 small lemon
  • sea salt to taste
  • fresh cracked black pepper to taste
Pizza toppings:
  • 1 large portobello mushroom, sliced
  • 3 cups soft fresh shredded cheese (I used a combination of Gouda, Fontina and Mozzarella)
  • 1 cup tomato sauce (suggestions here and here)
  • 1 small red onion, sliced into thin rings
  • 2 - 3 jalapeños, seeded and sliced into rounds
  • fresh basil leaves for garnish
Instructions:
  • Begin by making the dough. Dissolve the sugar in the warm water, making sure the water is "bathtub" warm but not hot. Sprinkle in the yeast and stir gently for about a minute until it dissolves. If the yeast clumps, the water is too cold and the process should be restarted. Let sit in a warm place for 5 minutes or so until you have a smooth beige-colored mixture and a layer of bubbles forms on the surface.

  • In a large mixing bowl, combine 3 cups of the flour with the salt and curry powder (if using). Make a well in the center of the dry mixture and pour in the yeast-water mixture and olive oil. Mix the ingredients together, beginning in the center and incorporating the flour from the sides of the bowl. Continue until a soft dough is formed.

  • Lightly flour a large cutting board or wood surface and dust your hands with flour. Knead the dough by pushing it away from you, folding it over, and moving it forward. Rotate the dough and continue. Add some of the remaining 1/4 cup of flour as needed until your dough is no longer sticky — about 5 minutes. Keep kneading for another 10 to 15 minutes until the dough is smooth and elastic.

  • Shape the dough into a ball and transfer to a well-oiled large bowl. Brush the dough with more olive oil and cover the bowl tightly with plastic wrap. Leave the dough to rise in a warm place for 1 1/2 hours, after which the dough should have doubled in size.

  • While the dough is rising, prepare the toppings for the pizza. Combine the tapenade ingredients in a food processor or blender and process until a coarse paste is formed. Taste for seasonings, and set aside.

  • Meanwhile, heat a tablespoon of olive oil in a large skillet over medium-high heat. When hot, toss in the mushrooms and sauté for 5 or 6 minutes or until the mushrooms begin to lose their moisture and start to "squeak" in the pan. Remove from heat and set aside.

  • Prepare a 12-inch vented pizza pan by lightly brushing it with olive oil and sprinkling with a light coat of cornmeal.

  • To finish the dough, punch it with your fist and divide into two portions. If making one pizza, reserve one of the portions by wrapping in plastic wrap and freezing for later use. Lightly flour a large cutting board or wood surface, and flour a rolling pin. Roll the dough out into a roughly 1/4-inch thick round shape, making sure the edges are slightly thicker than the rest of the dough. Add flour when needed to keep from sticking, and pick up the dough and turn several times to stretch. Transfer the dough to the prepared pan and form a ridge around the edges with your hands.

  • Preheat an oven to 500° and move the rack to the second-from-top position. Brush the dough with olive oil and lightly scatter 1/4 cup of the cheese over top.

  • Spread the olive tapenade evenly over the dough. Top with tomato sauce, followed by most of the remaining cheese, mushrooms, onion and jalapeños. Scatter the last of the cheese over top and bake for 10 to 15 minutes or until the cheese is starting to bubbling and the crust is crisp and lightly browned.

  • Remove from heat and lightly brush the edges of the crust with a little more olive oil. Garnish with fresh basil leaves, cut into wedges, and serve hot or warm.

Makes 4 to 8 servings
pizza slice

More cheese goodness from Lisa's Vegetarian Kitchen:
Paneer Tikka Pizza on Naan Bread
Mushroom, Ricotta and Asiago Cheese Pizza
Mini Pizzas Served on Toasted English Muffins
Indian-Style Macaroni and Paneer Cheese with Spinach

On the top of the reading stack: No Treason by Lysander Spooner

Audio Accompaniment: Bonnie "Prince" Billy

الجمعة، 27 يوليو 2012

Curried Potato and Cauliflower Pancakes

potato cauliflower pancakes

Crispy potato pancakes are always a classic comfort food, but with part of a fresh local cauliflower in hand I decided to go off in another direction and make some simple soft and fluffy potato and cauliflower pancakes instead. Cooking the potatoes and cauliflower before incorporating into the batter is what gives these pancakes their pillowy texture and enhances their eggy flavor. Seasoned with a gentle hint of curry and a few fresh green chilies, they're absolutely delicious served with a homemade coriander chutney, but they're wonderful topped with sour cream or even just ketchup too.


Curried Potato and Cauliflower PancakesCurried Potato and Cauliflower Pancakes
Recipe by
Cuisine: Indian
Published on July 27, 2012

Smooth, fluffy and eggy potato and cauliflower pancakes with a gentle hint of curry spices and green chilies

Print this recipePrint this recipe

Ingredients:
  • 1 lb (1 large or 2 small) potatoes, chopped
  • 1/2 medium cauliflower head, stemmed and trimmed, chopped
  • 2 fresh green chilies or jalapeños, seeded and chopped
  • 2 green onions, chopped
  • small handful fresh parsley or coriander, chopped
  • 1 teaspoon curry powder
  • 1/4 teaspoon turmeric
  • 1/4 teaspoon cayenne
  • 1/2 teaspoon sea salt
  • 3/4 cup all-purpose flour
  • 1/4 cup buttermilk
  • 3 eggs, separated
  • olive oil for brushing
Instructions:
  • Roast, boil or steam the potatoes and cauliflower as desired until softened. Add the cooked potatoes and cauliflower, chilies or jalapeños, green onions, parsley or coriander, curry powder, turmeric, cayenne and salt to a food processor. Process until smooth.

  • Add the flour, buttermilk and egg yolks to the processor and process until combined. Pour the batter into a large mixing bowl.

  • In a small bowl, beat the egg whites until stiff peaks form. Fold into the batter. The batter should be smooth and pourable, but should hold together and not be too thin — add up to a 1/4 cup more flour if necessary.

  • Brush a griddle with olive oil and heat over medium heat. When hot, pour 1/3 cup of the batter on to the griddle and cook for 3 to 5 minutes or until small bubbles appear on the surface. Flip and cook for 3 to 5 minutes or until each side is golden brown.

  • Remove from heat and keep warm in a 150° oven while you cook the remaining pancakes. Serve hot or warm topped with coriander chutney, sour cream or homemade thick tomato sauce or chutney.

Makes twelve 3-inch pancakes
Indian Potato Pancakes

Other savory pancake recipes you may enjoy:
Spicy Potato Pancakes
Corn Pancakes with Fresh Chunky Salsa
Mushroom Oven Pancake with Chive Sauce

On the top of the reading stack: Indian cookbooks

Audio Accompaniment: ChillOut, Downtempo Video Mix

الأربعاء، 25 يوليو 2012

Zesty Black Bean and Avocado Salad

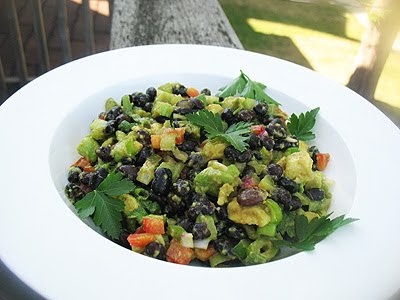
Black Bean and Avocado Salad

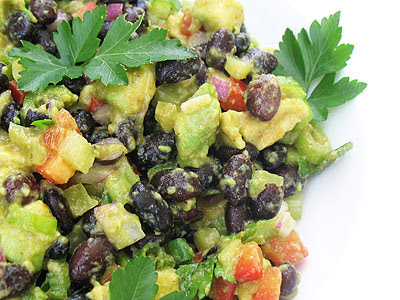
Summer is the season for making simple and undemanding but fresh and refreshing bean salads that provide necessary protein and nutrients without taxing either your digestive system or your time and patience in the kitchen. Fresh vegetables and herbs from your garden or local market create beautiful contrasts in color, taste and texture that please the eye and the palate. Crunchy celery and peppers and creamy avocado combine with tender black beans and a zesty cilantro, lime and chili vinaigrette to create this vibrant, healthy and refreshing salad that is certain to be a hit on your patio table this year.

Zesty Black Bean and Avocado SaladZesty Black Bean and Avocado Salad
Recipe by
Cuisine: Mexican
Published on July 25, 2012

Simple, vibrant, healthy and refreshing summer black bean salad with crunchy celery and peppers and creamy avocado dressed in a zesty cilantro, lime and chili vinaigrette

Print this recipePrint this recipe

Salad:
  • 3 cups cooked black beans (1 cup dried or 2 14 oz cans)
  • 2 tablespoons red wine vinegar
  • 1 medium avocado, diced
  • 1 stalk celery, diced
  • 1 green onion, sliced
  • 1 cubanelle pepper or 2 jalapeños, seeded and diced
  • 1/2 red bell pepper, seeded and diced
Dressing:
  • 1/4 cup olive oil
  • 1 tablespoon champagne or white wine vinegar
  • 1 fresh green chili or jalapeño, seeded and minced
  • small handful fresh cilantro, finely chopped
  • juice from 1 lime
  • 1/2 teaspoon sea salt
  • fresh ground black pepper to taste
Instructions:
  • If cooking black beans for this recipe, rinse and soak for 8 hours or overnight covered in several inches of water with a little yogurt whey or lemon juice added. Drain and rinse, then transfer to a medium saucepan and cover with several inches of fresh water. Bring to a boil, reduce heat to medium-low, cover, and simmer for 1 hour or until the beans are tender but not falling apart. Drain.

  • Transfer the beans to a mixing bowl. Pour the red wine vinegar over the beans and toss. Let stand to cool to room temperature. (If using already cooked beans, let stand to warm to room temperature.)

  • Add the vegetables to the beans. In a separate small bowl, whisk together the dressing ingredients and pour over the salad. Toss to combine.

  • Serve at room temperature. You can also make this ahead of time and refrigerate for 2 to 3 hours for serving cold, although the avocado should be peeled and chopped as close to serving time as possible.

Makes 4 to 6 servings
Zesty Black Bean and Avocado Salad

More bean salads from Lisa's Kitchen:
Black Bean Mango Salad
Chickpea and Tomato Salad with Chat Masala
Summer Chickpea Salad

On the top of the reading stack: No Treason by Lysander Spooner

Audio Accompaniment: Dream Stalker - Kair

ANDHRA THALI | ANDHRA LUNCH


ANDHRA THALI
Its been my long time wish to try other state foods.I really got bored of making our usual sambar, vathakulambu etc..So with my hubby’s acceptance and guidance i tried andhra thali as a first step .He had tasted andhra food in some restaurants like Nandini , Nagarjuna .So he told me the names of dishes they serve in the platter .I googled and found good recipes from some of the blogs. They came out very well. My hubby thoroughly enjoyed all the dishes i made. I too loved it. My daughter who is a fussy eater loved the food. I was very happy that my first attempt in andhra food was a big success. SmileWhile cooking i found some ingredients ,they use commonly in almost all the recipes.They use Red chillies , Ginger & Garlic paste , Hing and ajwain. .I think these ingredients gives the aroma and spiciness in their food. My house was filled with nice aroma when i prepare all these dishes.People who love spicy foods must try andhra food. Ok,coming to the platter ..
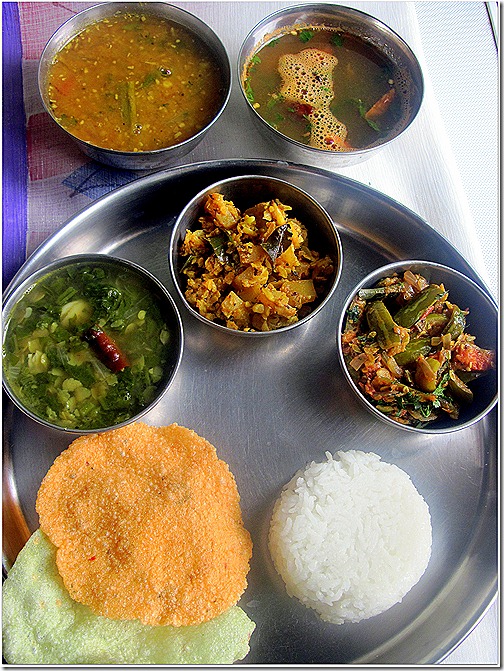
In the above picture u can see Andhra Sambar , Tomato Rasam , Mamdikaya cauliflower pachadi , Ivygourd poriyal  ( Tindora curry) , Palakura pappu ..

PALAKURA PAPPU / DAL PALAK

My hubby told this recipe tasted exactly like the one he had in restaurants. Thanks a lot sailu’s food .

INGREDIENTS
1 cup - 200ml
  1. Toor dal/red gram dal/kandi pappu – 2 handfuls or 1/4 cup
  2. Palakura/palak/spinach leaves –2 small bunches ( washed and finely chopped)
  3. Big onion – 1 no ( chopped)
  4. Turmeric powder -  a pinch
  5. Green chillies – 2-3 nos ( slit lengthwise)
  6. Ginger – 1/2 inch piece ( chopped)
  7. Thick Tamarind extract – a tsp ( soak berry sized tamarind and add the extract)
  8. Salt & water – as needed
For seasoning (Use a tsp of ghee)
  1. Mustard seeds – 1/2 tsp
  2. Cumin seeds/jeera – 1/2 tsp
  3. Urad dal- 1/2 tsp
  4. Garlic cloves, crushed – 3-4
  5. Red chillies – 2 nos (pinched )
  6. Curry leaves – few

METHOD
  1. In a pressure cooker, place dal, washed and finely chopped palak leaves, onions, green chillies, ginger and turmeric powder. Add 1 to 2 cups of water and pressure cook upto 2 whistles.
  2. Heat ghee in a kadai, add mustards seeds and after they start to dance , add cumin seeds, urad dal,  crushed garlic, pinched red chillies and curry leaves and fry for half a minute.
  3. Add this to the pressure cooked dal along with salt and combine. Add the tamarind extract and cook on slow to medium flame for 5-7 mts without lid or till you get the consistency of your choice.Add water if necessary
Enjoy mixing with plain white rice and ghee !!
NOTE
  1. For variations u can try sauting the onions , green chilles , palak leaves in little oil before pressure cooking with dal.
  2. Always do the seasoning in the end.
  3. If u want u can do the seasoning using oil and add little ghee on top of the dal.
  4. Give a standing time of at least half an hour before serving for all the tastes to blend.

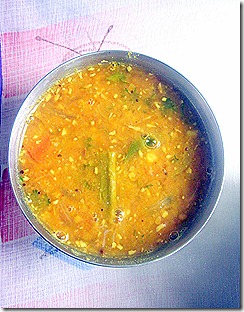
  ANDHRA SAMBAR

I got the following recipes from here. If u wanna try varieties of andhra thali,u must visit this blog to get a good idea. She has given a nice collection of recipes.Thanks Srinithya Smile


ANDHRA SAMBHAR
INGREDIENTS
  1. Carrot,potato – 1 no each
  2. Drumstick- 1 no
  3. Tomato  - 1 no (chopped)
  4. Big onion –1 no ( chopped)
  5. Toordal- 1/2 cup
  6. Gooseberry sized tamarind – soak in warm water.
  7. Red chilli powder – 1/2 tsp
  8. Madras sambar masala / any sambhar powder – 1 tsp
  9. Poppy seeds/gasalu-1 tsp
  10. Coconut dry / kobbari –2tsp
  11. Ginger garlic paste- 3/4 tsp
  12. Oil-2 tbsp

To temper

  1. Mustard seeds -1 tsp
  2. Jeera / cumin seeds –1 tsp
  3. Hing -2 pinches
  4. Red chillies – 1 no ( pinched to two)

coriander leaves – to garnish.
METHOD
  1. Pressure cook toor dal and the vegetables . Set aside.
  2. Dry roast poppy seeds, grated coconut and grind it to make a paste along with sambhar powder. keep aside.
  3. In a wide mouthed kadai , add oil and temper the mustard seeds , jeera , hing and turmeric.
  4. Add the G&G paste and saute well. Add the chopped onion and tomato pieces.
  5. Saute till tomato turns mushy.Add the tamarind extract and salt , few curry leaves.Allow it to boil for few mins.
  6. Now add the cooked dal and veggies along with ground poppy seeds paste.
  7. Boil for 10 mins in medium flame. Remove and add coriander leaves.
Serve with hot , plain white rice adding little ghee !!
NOTE
  1. The vegetables should not be over cooked.
  2. As per the original recipe , madras sambar masala is used . But i used my home made sambar powder.
  3. I also used red chillies while tempering and i tempered at the end.

MAMDIKAYA CAULIFLOWER PACHADI | RAW MANGO CAULIFLOWER PACHADI

Thought she has given varieties of pachadi in her blog , i chose this one just becoz of this  combination. I wanted to try this combo and as it sounded unique and different.I’ve got an yummy raw mango dish to add in my mango recipes list. Smile
MAMDIKAYA PACHADI
INGREDIENTS
  1. Green Raw mango pieces  - 1no ( medium sized)
  2. Grated cauliflower florets -1/2 cup
  3. Garlic cloves – 5-6 nos ( chopped)
  4. Red chilli powder –2  tsp
  5. Roasted cumin fenugreek powder-1/8 tsp
  6. Turmeric-1/8 tsp
  7. Chopped garlic pods-3 tbsp
  8. Salt-to taste
  9. Water – As needed.
To temper
  1. Oil-1 tbsp
  2. Mustard seeds-1 tsp
  3. Jeera – 1/2 tsp
  4. Curry leaves chopped – few
  5. Hing-2 pinches

METHOD
  1. Peel the skin of raw mango and chop it finely.(Its better if u grate it )
  2. Remove the cauliflower florets and add in boiling water along with little turmeric powder and salt.
  3. Remove and grate it. Set aside.
  4. Heat oil in a pan add mustard  , jeera , curry leaves and hing
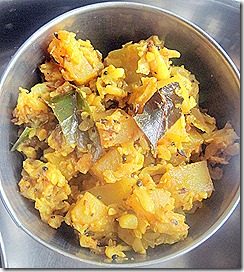
  5. Add garlic and fry till brown.Now add veggies and fry for 2 seconds
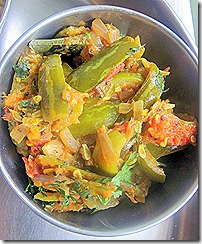
    and close lid and cook till soft,stir in middle to avoid burning. Add little water if necessary.
  6. Add chilli  powder , turmeric powder and salt.
  7. Mix and cook for sometime.
Serve with rice as a side dish !!

TINDORA TOMATO CURRY | IVYGOURD TOMATO STIR FRY

I have never used tindora in my cooking . So for a challenge i tried this curry . My husband who hates tindora  loved this a lot. Smile
TINDORA FRY
INGREDIENTS
  1. Dondakaya/ivy guard chopped length wise-1 cup
  2. Chopped tomato –1 no
  3. Chopped big onion – 1no
  4. G&G paste – 1/2 tsp
  5. Red chilli powder- 2 tsp
  6. Salt-to taste
  7. Curry powder-2 tsp ( i used garam masala powder)
  8. Dry coconut powder-1tsp ( i used grated coconut)
  9. Turmeric-1/8 tsp
  10. Oil-3 tbsp
To temper
  1. Mustard seeds-1 tsp
  2. Jeera  - 1/2 tsp
  3. Curry leaves- few
  4. Coriander leaves- few to garnish

METHOD
  1. Pressure cook ivy guard pieces till done ,drain excess water and set aside.
  2. Fry the pieces in 1 tbsp of oil until crisp and set a side
  3. Heat oil in a pan and  temper all the above ingredients.Add onion  , ginger garlic paste and fry for 5 minutes till raw smell emanates.
  4. Then add tomatoes  and cook till soft.
  5. Add all the powders ,  salt and ivy guard pieces.Fry for 5 more minutes.
  6. Add coriander leaves and serve.
It smells and tastes gr8 with rice as well as roti. !!
NOTE
  1. I dint deep fry the tindora pieces instead  i shallow fried it for sometime and proceeded the recipe.
  2. Make sure the tindora is not overcooked while pressure cooking.

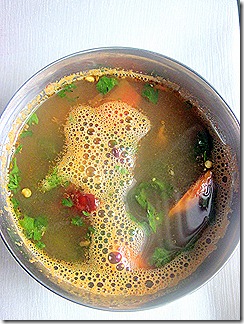
TOMATO DAL  RASAM

I made slight changes in the actual recipe to suit my hubby’s taste. It tasted excellent and flavourful the next day. I reheated the rasam and used the same for two days Winking smile

ANDHRA RASAM
INGREDIENTS
  1. Finely chopped tomatoes-3 nos
  2. Berry sized Tamarind
  3. Cooked tuvar dal -1/4 cup
  4. Ajwain/vamu /carom seeds/omam-1/2 tsp
  5. Hing-2 pinches
  6. Crushed garlic- 4 cloves
  7. salt-to taste
  8. Red chillies-2 nos
  9. Turmeric powder -2 pinches
  10. Black pepper powder – 1 tsp
To temper
  1. Mustard seeds – 1/2 tsp
  2. Jeera – 1 tsp
  3. Curry leaves – few
Coriander leaves – to garnish.

METHOD
  1. Pressure cook toor dal with little turmeric powder till mushy and set aside.
  2. In a cooking bowl,  add water , tomatoes and tamarind.
  3. Cook till soft and reserve the boiled water .
  4. Grind the tomatoes and tamarind to make a paste.
  5. Crush ajwain with hands and set a side.
  6. Heat oil in a pan add cumin,mustard,hing,ajwain and dry chillies.
  7. Fry well and add garlic pieces.saute till golden brown.
  8. Now add mashed dal,tomato paste, water, crushed ajwain , pinched red chillies , salt and pepper powder.
  9. Boil for sometime . I added little sugar while boiling.
  10. Garnish with coriander
Serve hot !!

Technorati Tags: ,,,,,,,,,,,,,,,,,,,