An enormous array of fresh exotic vegetables and fruits is something I've become accustomed to seeing in the big city supermarkets and ethnic grocery stores, but it's something that would have astonished me as a girl growing up in a small northern Ontario town where dinner produce consisted mostly of potatoes, onions, carrots, corn and peas with brussels sprouts, cabbage and cauliflower occasionally making their appearance on the supper plate.
I like to take advantage of the abundance to be found in my urban centre and test produce that is completely new to me. I've discovered the delights of
bottle gourds,
bitter melons,
mustard greens and
plantains this way, and the exercise adds adventure to the kitchen and the dining experience.
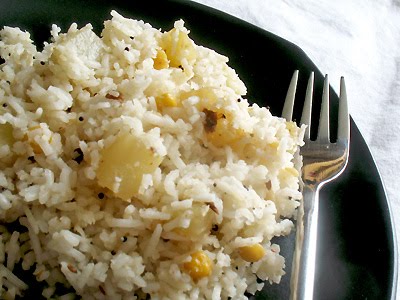
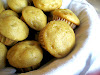
This time around I've added a chayote to the basket and come up with a lightly spiced white rice dish to serve as a backdrop for it. Pronounced "chi-YOH-tee", the chayote or custard marrow is the fruit of a squash plant native to central America that looks like a green apple with a large wrinkled pleat tucked in at one end, with a firm white crispy and juicy flesh like an apple and a mild and slightly sweet flavor that resembles the tastes of apples, cucumber and summer squash. The chayote is widely used in Latin America and in the American South, where it is known as a mirliton or merleton. It's also used occasionally in India where it goes under the charming name of "chow chow" and where it's mild flavor makes it a perfect vehicle for the characteristic assertive spicing of Indian food.
Although paired here with cumin, coriander, cloves and cayenne, this chayote rice is really quite mild and serves as a delicious and palate-soothing accompaniment to a hot and zesty curry. Tender pieces of lightly cooked chayote add wonderful bursts of crisp, juicy and refreshing light sweetness that make a wonderful contrast in flavor and texture to the soft buttery rice and astringent spices. This is really a lovely dish to add to any Indian meal, and I quite plan to use chayote again soon … possibly just simmered in a little milk or cream with cinnamon and nutmeg for a simple palate-cleansing dessert.
The recipe below includes instructions for opening a chayote and removing its single seed. I must note that it's considered by some people desirable to peel a chayote with kitchen gloves or under running water to avoid an irritating stickiness from the raw vegetable (a stickiness that disappears when cooked), but I was not bothered myself. When buying a chayote, look for one that is firm but not too hard and with an unblemished skin.
 Indian-Spiced Chayote (Chow Chow) Rice Indian-Spiced Chayote (Chow Chow) Rice |
Recipe by Lisa Turner
Cuisine: Indian
Published on April 26, 2013
Simple and lightly spiced basmati rice with tender pieces of crisp and juicy chayote — a great side for a spicy curry
Ingredients:
- 1 chayote
- 1 cup basmati rice
- 1 teaspoon sea salt, or to taste
- 2 tablespoons dried grated coconut
- 1/2 teaspoon tamarind paste (optional)
- 1 tablespoon ghee or olive oil
- 1 tablespoon urad dal
- 1 tablespoon chana dal
- 1/2 teaspoon brown mustard seeds
- 1/4 teaspoon cumin seeds
- 1/4 teaspoon fenugreek seeds
- 3 whole cloves
- 1/4 teaspoon ground coriander
- 1/4 teaspoon cayenne
- pinch of asafetida
- fresh ground black pepper
Instructions:
Peel the chayote and run a knife gently through the fruit lengthwise until you can pry the two halves apart. Use a knife to gently pry the seed out of the center. Chop the fruit into small pieces and set aside. Rinse the rice and add to a medium saucepan. Add 1 3/4 cups of water and bring to a boil. Immediately reduce the heat to low, cover, and simmer undisturbed for 15 minutes or until the liquid is absorbed. Fluff with a fork and stir in the salt. Set aside. Meanwhile, toast the coconut in a dry skillet or small saucepan over medium-low heat, tossing frequently, for 10 minutes or until the coconut is lightly browned. Remove and set aside. If using, dissolve the tamarind paste in 1/2 cup of hot water. Heat the ghee or olive oil in a medium saucepan over medium heat. When hot, toss in the urad dal, chana dal, brown mustard seeds, cumin seeds, fenugreek seeds and cloves, and stir for 30 seconds or until the mustard seeds turn grey and begin to splutter and pop. Add the ground coriander, cayenne and asafetida, stir once, then add the chopped chayote and the tamarind water. Turn the heat down to medium-low and cook partially covered for 10 to 15 minutes, stirring occasionally, or until the chayote is just tender but still crisp. Add more water if the pan becomes too dry. Remove the chayote from the heat and discard the cloves. Gently fold the chayote and toasted coconut into the rice and season with black pepper. Serve at room temperature.
Makes 4 to 6 servings |
Other Indian side rice dishes you will enjoy:
Yellow Lemon Rice with Fried CashewsTamarind and Coconut Pulao Rice Sweet and Spicy RiceGreen Tea & Curry Rice

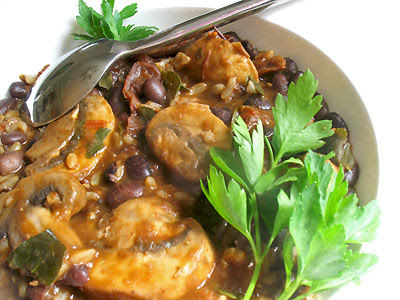 Black Bean Chili with Mushrooms and Toasted Spices
 Print this recipe