الأحد، 30 سبتمبر 2012

Fenugreek (Methi) Mattar Paneer

Fenugreek (Methi) Mattar Paneer

One of my earliest introductions to Indian cuisine was mattar paneer. The essential components are lightly pan-fried cubes of luscious paneer cheese and plump green peas gently simmered in a elegantly spiced tomato-based gravy. The spicing, consistency of the sauce, and texture of the paneer vary greatly however, depending on the cook running the kitchen — obviously this can be a source of considerable culinary inspiration if you judge by the popularity of this classic dish that originates from Northern India and now a mainstay on menus all across the globe.

This version has a thicker sauce than an ordinary mattar paneer, flavored with a generous amount of fenugreek or methi leaves. This is my second mattar paneer flavored with these uniquely bitter but tangy leaves. They're easily available at any Indian and most Asian grocers, but you can substitute spinach if needed with an added pinch of fenugreek powder or seeds.


Methi Mattar PaneerFenugreek (Methi) Mattar Paneer
Recipe by
Cuisine: Indian
Published on September 30, 2012

Thick, creamy, spicy and fragrant curried peas and paneer cheese flavored with fenugreek leaves

Print this recipePrint this recipe

Ingredients:
  • 14 oz (400 g) paneer cheese
  • 3 tablespoons olive or sesame oil
  • 2/3 cup dried fenugreek leaves
Paste:
  • 1 large onion, chopped
  • 1 clove garlic, chopped
  • 1 1/2 inch piece fresh ginger, chopped (1 1/2 tablespoons)
  • 2 to 4 fresh green or red chilies, seeded and chopped
  • 2 to 4 dried whole red chilies
  • 1/2 cup raw cashews
  • 1/2 teaspoon water
Sauce:
  • 2 tablespoons ghee, butter or oil
  • 1 teaspoon black mustard seeds
  • 1 teaspoon cumin seeds
  • 1/2 teaspoon nigella (kalonji) seeds (optional)
  • 1 teaspoon ground coriander
  • 1 teaspoon garam masala
  • 1/2 teaspoon chili powder
  • 1/2 teaspoon ground cumin
  • 1/2 teaspoon turmeric
  • 1/2 teaspoon amchoor powder (optional)
  • 1/4 to 1/2 teaspoon cayenne
  • 1/4 teaspoon asafetida
  • 2 tomatoes, partially seeded and finely chopped
  • 1 cup fresh or frozen peas
  • 1 1/2 teaspoons sea salt, or to taste
  • small handful dried fenugreek leaves
  • fresh cream or plain yogurt for garnish
Instructions:
  • Cut the paneer cheese into 3/4-inch to 1-inch cubes. Heat the olive or sesame oil in a large skillet or wok over medium heat. When hot, add the paneer cubes to the pan and cook, turning often, until browned on all sides. Transfer to a plate lined with paper towel to drain the oil.

  • Meanwhile, soak the fenugreek leaves in hot water for 15 to 20 minutes. While this is soaking, combine the onion, garlic, ginger, fresh and dried chilies, cashews and 1/2 teaspoon of water in a food processor or blender and process until you have a smooth paste, adding more water if needed.

  • Using the same pan used to cook the paneer, heat the ghee, butter or oil over medium heat. When hot, add the mustard seeds, cumin seeds and nigella seeds if using, and stir for 30 to 60 seconds or until the mustard seeds begin to splutter and pop. Immediately add the prepared paste and cook for 5 minutes.

  • Toss in the ground spices and asafetida, stir a few times, then add the tomato, fried paneer cubes, peas and salt. Drain the soaked fenugreek leaves, squeezing as much liquid as you can from the leaves and reserving the soaking liquid. Stir the fenugreek leaves into the pan and bring the pan to a boil. Add some of the reserved fenugreek soaking water to the pan to thin the sauce to your desired consistency. Turn down the heat to medium-low and simmer for 5 to 10 minutes. Taste for seasoning.

  • Serve hot or warm, garnished with a few sprinkles of dried fenugreek leaves and a swirl of quickly whisked cream or yogurt.

Makes 4 to 6 servings
Fenugreek (Methi) Mattar Paneer

More paneer dishes you are sure to enjoy from Lisa's Vegetarian Kitchen:
Massaman Curry with Paneer Cheese
Mattar Paneer with Fresh Mint
Mung Beans with Paneer Cheese

الجمعة، 28 سبتمبر 2012

No Croutons Required - The Winner for September

no croutons required

The challenge for September was to come up with a soup or salad suitable for Vegans. We had a short, but sweet selection of entries this month. Congratulations to Helen of Fuss Free Flavors who served up a stylish Tenderstem and Semi-Confit Tomato Salad. This elegant side would grace any autumn dinner plate.


Jacqueline will be hosting the October edition of No Croutons Required. The theme this month is vegetarian sandwiches; certainly sandwiches are a lovely accompaniment to soups and salads.

الخميس، 27 سبتمبر 2012

GUACAMOLE– MEXICAN AVOCADO DIP |AVOCADO RECIPES


guacamole dip final

I wanted to try avocado dip, Guacamole for long time. I was looking for tortilla chips & nachos here.Last week i got a pack of nachos and i immediately tried this dip..This one is easy to make, healthy n tasty too..I referred the recipe here..Now, without this dip, we are not able to eat nachos Winking smile. I’ve given few tips at the end about how to buy good avocados . Its for beginners. Please go through it.For health benefits , please click here..

INGREDIENTS
  • Ripe avacado – 1 no
  • Big onion – 2 nos
  • Green chilli – 1-2 nos
  • Tomato – 1 no  ( Deseed and chop)
  • Lemon juice – 1.5 – 2  tsp
  • Coriander leaves – 2 tbsp
  • Salt – As needed.
  • Pepper powder – 1/2 tsp ( adjust)
METHOD
  • Cut the avocado in half and remove the seed & take the pulp using a spoon & discard the skin.
  • Using a fork, mash the avocado roughly. Don’t overdo it.It should be little chunky.
  • Chop the onions,  green chillies , coriander leaves very finely.
  • Now in a big bowl , take all the finely chopped veggies except tomato.
  • Mix everything and add the avocado pulp. Mix little.
  • Close the bowl with a plastic wrap or lid & refrigerate it until use.
  • When u r about to serve , chop the tomatoes finely and add it to the dip.Mix well, check for salt and spice .
Serve with nachos or tortilla !!
guacamole dip 4

NOTE
  • I have given the quantity of ingredients as per our liking. Please add or subtract them as per ur wish Smile
  • Chilling tomatoes changes the taste of the dip. So please don’t chop or add to dip until ready to serve ..
  • Always keep the guacamole mixture wrapped or covered to prevent oxidation and change of color.
  • Refrigerate until ready or make it fresh n eat.


guacamole dip 1
TIPS
How to buy good avacados
  • There are varieties of avacados available in the market. They are Hass, Lamb Hass, Gwen, Reed, or Sharwil , Bacon and Zutano..
  • Bacon and Zutano varieties are light in flavor.
  • Others have a nutty taste.
  • Good avacados can be first identified by its color.Ripe avacado looks dark green to black in color.. Some varieties look light green in color.
  • When you want to examine them. Take an avacado and keep it in ur palm. Just press it lightly.Do not use ur finger tips as it may bruise them.
  • If it gives slightly , it is ready to eat. If it is over ripe, pressing them gives a mushy feeling and ur fnger may sink into the skin.  If the skin is hard to touch and if it doesn’t give , the avacado is not ripe yet.
  • If u planning to keep it for somedays, u can buy the unripe avacado , wrap it in a paper and keep it for 4-5 days to ripen.It can be kept in room temperature.
  • Avocados can be stored in a refrigerator until eaten to slow the ripening process.
  • Avocados with the highest oil content are the Hass, Pinkerton, Sharwil and Fuerte varieties.
  • This buying method may be useful for people who plan to use avocado oil for health and diet or skin and beauty purposes.

الأربعاء، 26 سبتمبر 2012

Tempeh Stuffed Mushroom Tapas

stuffed mushrooms with tempeh and quinoa

Food is a central feature of pretty much any holiday gathering that I can think of, and this is especially true of winter celebrations. Not only do we need to eat, but we like to eat, and us cooks tend to get more creative and ambitious with our culinary offerings on special occasions.

Unfortunately, vegans, vegetarians and carnivores alike are all too familiar with the frustrations of holiday gatherings precisely because of the central role food plays at such times. Winter holiday gatherings and meals are traditionally dominated by meat, poultry and fish, and thus our more carnivorous family and friends serve up meals without a knowledge of what makes for balanced, filling and delicious vegan and vegetarian fare, apprehensive because they want us to enjoy the culinary aspect of the festive occasion as much as they do. Similarly, even experienced vegan and vegetarian cooks preparing the bulk of the holiday spread hope they can provide enough dishes to satisfy the appetite and stimulate the palates of all their diners, especially if neither meat nor seafood is served.

You can imagine my delight then when I was contacted by Zel Allen who offered me a complimentary copy of her new book, Vegan for the Holidays: Celebration Feasts for Thanksgiving through New Year's Day. I've been a vegetarian for over 20 years and have learned to adapt and often make much of the food for family dinners enjoyed by carnivores as much as by the vegetarians present. But you never can have enough recipe ideas, and the unique charm of this book is that it is specifically designed for special occasions with recipes free of all animal products.


Ms. Allen stays true to the flavors and pairings traditionally associated with Thanksgiving, Christmas, Hanukkah, Kwanzaa and New Year celebrations. Between the covers you will find unique, elegant and often bold recipes of varying complexity for appetizers, starters, graceful comfort foods, sensuous mains and sides, irresistible desserts and treats, and even beverages to suit the occasion. The innovative offerings are made with ingredients that are accessible to most cooks and you'll be pleasantly surprised how easy and straightforward the recipes are to prepare. The grace and distinction that characterizes each dish will leave everyone satisfied. Equally important is that the food is presented with a view to healthful eating, so you needn't feel too guilty if you find yourself over-indulging. This is a book that will have you counting your blessings rather than your calories.

After flipping through the pages, my appetite stimulated, I just had to start cooking right away.

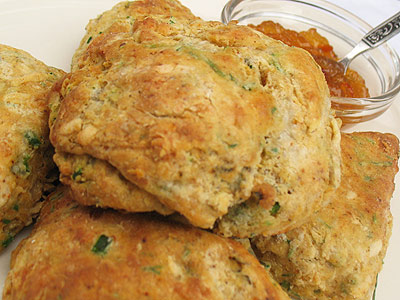
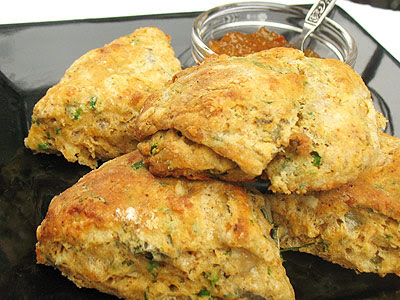
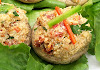
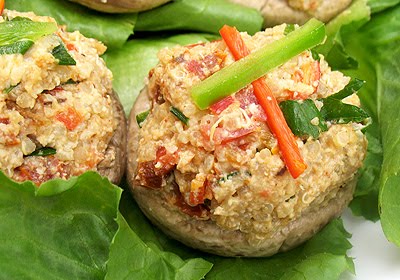
Mushroom connoisseur that I am, the first dish I tried was tempeh bacon stuffed mushrooms. Of course, this is a vegan recipe, so there is no actual bacon included. I adapted the recipe because I enjoy playing with different flavor combinations and textures. Ms. Allen certainly seems to enjoy doing the same.

I fried tempeh strips in oil sprinkled with smoky chipotle powder until crispy instead of using tempeh bacon, substituted quinoa for the bread cubes, and spiced it up further to achieve a smoky flavor with the rather liberal use of the chipotle powder in the stuffing too. In addition, I came up with a light salad dressing for the leaves that line the plates.

The recipe for these luscious little tapas appears in the New Year celebration chapter of the book but I think they would be a welcome treat for any occasion. Serve as appetizer or as a feature on a tapas platter. Myself, I could easily eat a good few of these for dinner, all by myself, and come away from the table quite satisfied.

Tempeh Stuffed MushroomsTempeh Stuffed Mushrooms
Recipe by
Adapted from Vegan for the Holidays: Celebration Feasts for Thanksgiving through New Year's Day
Published on September 26, 2012

Plump and juicy mushrooms stuffed with a savory mixture of spiced quinoa and smoky chipotle fried tempeh — a delicious and surprisingly nourishing appetizer

Print this recipePrint this recipe

Ingredients:
  • 12 to 15 large button mushrooms
  • 2 cups water
  • 2 tablespoons tamari
Tempeh:
  • 3 tablespoons sesame or peanut oil
  • 6 oz (170 g) tempeh, cut into 1-inch strips
  • 1 teaspoon chipotle powder
  • 1/2 teaspoon paprika
  • sea salt to taste
Stuffing:
  • small handful of sun-dried tomatoes
  • 1/2 cup raw cashews
  • 1/2 cup cooked quinoa
  • 1 large tomato, partially seeded and finely chopped
  • 2 scallions, finely chopped
  • 3 tablespoons fresh chives, minced
  • 1 jalapeño, seeded and finely chopped
  • 1/2 teaspoon chipotle powder
  • 1/4 teaspoon cayenne
  • juice from 1 lemon (3 tablespoons)
  • fresh ground black pepper to taste
  • sea salt to taste
Salad:
  • 2 tablespoons olive oil
  • 2 teaspoons champagne, white wine or rice vinegar
  • a few splashes of white balsamic vinegar
  • fresh ground black pepper
  • fresh salad greens
Garnish:
  • small handful of fresh parsley, chopped
  • 1 jalapeño, cut into thin strips
Instructions:
  • Remove the stems from the mushrooms and wipe clean with a damp cloth. Bring the water and tamari to a boil over high heat in a large skillet. Add the mushroom caps and cook for 3 to 5 minutes, flipping them occasionally, until just tender but not shrunken — take care not to overcook them. Remove with a slotted spoon, drain on paper towels, and set aside.

  • Wipe the skillet clean and return to the stove. Turn the heat down to medium and heat the oil. When hot, add the tempeh pieces and sprinkle with chipotle powder, paprika and some salt. Stir to coat. Fry the strips, flipping often, until browned and crisp on both sides. Remove from the pan. When cool enough to handle, chop the strips into small pieces.

  • Meanwhile, soak the sun-dried tomatoes in hot water for 20 minutes, then drain and chop. Grind the cashews into fine crumbs using a grinder or food processor.

  • Transfer the cashews to a medium bowl and add the chopped tempeh, sun-dried tomatoes, quinoa, fresh tomato, scallions, chives, jalapeño, chipotle powder, cayenne, lemon juice, black pepper and a few pinches of salt. Stir well to combine. Add a little water or soaking liquid from the sun-dried tomatoes if the mixture is too dry. Taste and adjust the seasoning. Fill each mushroom with a generous scoop of the stuffing.

  • To serve, whisk together the olive oil, vinegars and black pepper to taste in a small bowl. Line serving plates or a serving platter with fresh greens and sprinkle with the dressing. Arrange the stuffed mushroom caps on the salad and garnish each with chopped fresh parsley and thin strips of jalapeño.

Makes 12 to 15 appetizers
mushroom tapas

Then I was intrigued and tempted by Santa's favorite panforte. This nut and dried fruit chunky, sweet and chewy treat is highly addictive — I could barely control the urge to eat more than a few small squares at one sitting.

panforte

Now I am eager to try some of the dazzling vegetable dishes and substantial mains in addition to more starters, little bites and tempting desserts. Topping the entrée list are pistachio and sweet pea torte with roasted-tomato aïoli, savory lentil terrine with mushroom-wine sauce, savory chickpea Yule log and shiitake tornadoes in cashew cream sauce. Glazed beets in maple-balsamic sauce and chestnut-smothered brussels sprouts are appealing sounding side vegetables dishes and you couldn't go wrong with wild rice and chestnut pilaf or curried pumpkin-peanut soup. My list of appetizers and starters to make is already quite extensive, and I'm intrigued by a recipe for homemade Parmesan cheese made with almonds and anxious to try some of the vegan pastries.

Though all of the recipes are vegan, vegetarians could adapt some of them to include dairy. But vegetarian that I am, after test tasting some of the recipes, I don't think you will feel the need to do so.

Vegan for the Holidays is a festive guide to help you create your own special meals that will be sure to impress everyone present. Vegans surely won't be disappointed, carnivores won't miss the meat, and vegetarians won't miss their dairy. Ms. Allen certainly demonstrates that vegan food is far from boring. I will be cooking from this book all year long, no matter the occasion. Don't be surprised if your non-vegan friends start asking you for recipes after trying some of the fare.

You can purchase a copy from the author's website or through Amazon.

The opinions expressed here are my own. I am not affiliated with the author nor her publisher.
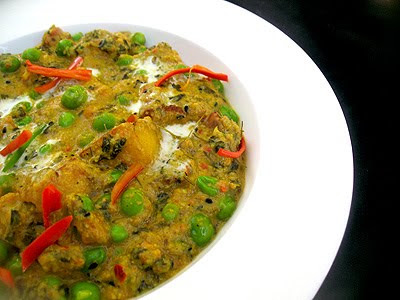
الثلاثاء، 25 سبتمبر 2012

Sweet Fried Plantains and Coconut-Peanut Butter Sauce

In the past year or so I've made a little sport of occasionally picking up vegetables or fruits I've never eaten before and giving them a whirl in the kitchen, sometimes from the suggestions of readers, other times out of simple curiosity after passing them in the market aisles. Bottle gourds, bitter melons and mustard greens have all made an impression on me in this fashion, and it's always rewarding to add new experiences and perspectives.

This time a couple of plantains made it into the basket for the first time. Large and thick-skinned banana cultivars, the starchiness, lower sugar content and more neutral flavor of green unripe plantains makes them a staple cooking vegetable in much of the world, as opposed to the soft and sweet bananas we usually eat here in North America.

sweet plantains

But my plantains were ripe, which means that much of their starch content had been converted to sugar … still less sweet and milder than a banana, they're still not very appealing to eat on their own. But frying slices of ripe plantain in hot oil is a popular treat in central America, which is what I did. As the slices turn a rich reddish-brown, the sugar caramelizes and the firm flesh inside the sweet crunchy exterior softens into a mellow, slightly banana-y and melt-in-your-mouth creamy filling. They're beautiful to look at, and astonishingly tasty without being too sweet. Dressed with a simple coconut milk and peanut butter sauce, these sweet fried plantains are a lovely, quick and easy treat.

Select ripe plantains for this snack — green plantains will taste bland and feel starchy in the mouth. You can tell when plantains are ripe when they are yellow with dark splotches and yield to the touch.

Sweet Fried Plantains and Coconut-Peanut Butter SauceSweet Fried Plantains and Coconut-Peanut Butter Sauce
Recipe by
Cuisine: Central American
Published on September 25, 2012

Soft melt-in-your-mouth fried plantain slices with a sweet crunchy exterior, served with a simple coconut milk and peanut butter sauce

Print this recipePrint this recipe

Ingredients:
  • 3/4 cup coconut milk
  • 3 tablespoons natural peanut butter
  • 1/4 teaspoon ground cinnamon
  • 2 tablespoons honey or other natural liquid sweetener
  • 2 ripe plantains, room temperature
  • peanut oil for frying
Instructions:
  • Heat the coconut milk in a small saucepan over low heat. When warm, add the peanut butter and stir until incorporated into the coconut milk. Stir in the ground cinnamon, then add the honey and stir until dissolved. Continue to simmer at a low heat for 5 to 10 minutes or until the sauce has thickened. Remove from heat and set aside.

  • Heat a 1/4-inch of peanut oil in a large skillet over medium heat. Meanwhile, cut off the tapered ends of the plantains. Run a knife down the lengths of of the plantains on one side, cutting just through the peel. Pull back the peels and cut the plantains into 1/4-inch slices.

  • When the oil is hot, add the plantain slices and fry until reddish-brown, about 5 to 6 minutes per side. Remove with a slotted spoon or flipper and drain on paper towel.

  • Serve warm with generous spoonfuls of the coconut peanut butter sauce.

Makes 2 to 4 servings
sweet fried plantains

Other quick and easy fruit treats you may enjoy:
Apricot Rum Fritters
Cream Cheese and Caramel Strawberry Dip
Red Fruit Salad

On the top of the reading stack: paperwork

Audio Accompaniment: Lustmord - Place Where The Black Stars Hang

الاثنين، 24 سبتمبر 2012

Thai Red Curry Tempeh Soup

Thai Red Curry Tempeh Soup

My hope of an extremely hot summer morphing into a pleasant warm and sunny fall certainly hasn't come about, and that has me dashing round the kitchen to generate some heat. As nothing can quite match the soothing feeling of mouthfuls of steaming hot soup gradually warming your body from head to toe, the thought of a bowl with some extra spicy flair combined with the comforting goodness of autumn vegetables soon became a reality.

This Thai red curry soup is elegant and surprisingly light despite the addition of earthy vegetables and crispy pieces of meaty tempeh. I especially like the creamy coconut broth made with homemade Thai red curry paste that serves as a base for lightly cooked vegetables. The coconut milk tempers the spices in a subtle way that allows the sensuous heat of the curry to shine. You may wish to reduce the amount of tempeh used in your soup, and that's okay, because the marinated and fried tempeh is delicious for snacking on, so go ahead and fry up the whole package anyway. You can munch on the tempeh as an appetizer in anticipation of the next course. You may of course omit the tempeh altogether for a lighter version of this dish though I personally enjoyed the chewy texture it imparts to the whole culinary experience.

Thai Red Curry Tempeh Soup

This soup made a perfectly satisfying and balanced dinner, especially when served alongside a bed of piping hot white rice. An added bonus is that this soup makes good use of any leftover quick-cooking vegetables that may be pining away in your fridge.

While preparing this soup, special attention must be paid to the intensity of the red curry paste that you are using. Taste a wee bit of the paste to get a sense of what it is going to contribute to the dish. Remember, you can always add more near the end of the cooking time, but if you add too much right to begin with, your palate might burst into flames.

Thai Red Curry Tempeh SoupThai Red Curry Tempeh Soup
Recipe by
Adapted from The Meat Lover's Meatless Cookbook: Vegetarian Recipes Carnivores Will Devour
Cuisine: Thai
Published on September 24, 2012

Vegetables and tempeh simmered in a warming, colorful and wonderfully fragrant and delicious coconut broth seasoned with homemade Thai red curry paste

Print this recipePrint this recipe

Tempeh:
  • 8 to 12 oz (225 to 350 g) tempeh, cut into 1/2-inch strips
  • 4 to 6 tablespoons tamari or soy sauce
  • 2 teaspoons sesame oil
  • juice from 1 lime
  • 2 tablespoons sesame oil for frying
  • sea salt to taste
Curry:
  • 2 tablespoons sesame oil
  • 2 shallots, finely chopped
  • 1-inch piece fresh ginger, grated or minced
  • 2 to 3 fresh red chilies, seeded and finely chopped
  • 1/2 teaspoon ground coriander
  • 1/2 teaspoon ground cumin
  • 2 to 3 tablespoons Thai red curry paste,to taste
  • 19 oz (550 mL) coconut milk
  • 2 to 3 teaspoons brown sugar
  • 1 1/2 tablespoons tamari or soy sauce
  • zest and juice from 1 lime
  • 3 to 4 cups mixed vegetables (I used a combination of cauliflower florets, corn, chopped green beans, diced carrots and dried and fresh mixed mushrooms)
  • fresh basil leaves for garnish (optional)
Instructions:
  • Begin by preparing the tempeh. In a flat shallow baking pan, whisk together the tamari or soy sauce, 2 teaspoons of sesame oil, and lime juice. Place the tempeh pieces into the pan and toss to coat with the marinade. Spread the pieces out evenly. Let this sit for 15 to 20 minutes, stirring and flipping the tempeh pieces occasionally.

  • In a large skillet, heat the 2 tablespoons of sesame oil over medium heat. When hot, remove the tempeh from the pan with a slotted spoon or spatula and transfer to the skillet. Fry, flipping every few minutes, until the tempeh is nicely browned and crispy on both sides. Add more oil if necessary. Transfer the tempeh to a bowl, pat off any excess oil with paper towels and gently toss with a few sprinkles of sea salt. Set aside.

  • Make the curry by heating the sesame oil over medium heat in a large saucepan. When hot, add the shallots, ginger and fresh chilies. Stir and cook for 5 minutes or until the shallot soften and just begin to brown. Toss in the spices and red curry paste and stir the mixture constantly for a minute or two.

  • Now whisk in about half of the coconut milk and bring to a simmer for a few minutes, stirring occasionally. Add the brown sugar, tamari or soy sauce, lime zest, and the rest of the coconut milk, and whisk until blended.

  • Stir the vegetables into the pan and turn the heat down to medium-low. Cover the pan and simmer for 10 to 15 minutes, stirring occasionally, until the vegetables are just tender and the broth is somewhat thickened. Add water as desired for a thinner consistency. Part way through the cooking time, add the prepared tempeh to the pan, reserving a few pieces for garnish. Stir in the lime juice, cover, and let simmer for a few minutes longer.

  • Ladle into bowls and garnish with the remaining pieces of tempeh and fresh basil leaves if desired.

Makes 4 to 6 servings
More captivating tempeh recipes from Lisa's Vegetarian Kitchen that will be sure to please:
Oseng Oseng Tempe
Thai Tempeh Patties with a Red Chili Dipping Sauce
Baked Tempeh & Japonica Rice Casserole
Tempeh Breakfast Hash-Up

On the top of the reading stack: a pile of post-it-notes and notebooks

Audio Accompaniment: Vladislav Delay

الأحد، 23 سبتمبر 2012

Baby Corn Stir Fry - Two Versions | Baby Corn Recipes


baby corn stir fry

This is a simple stir fry which goes well for rice n roti. I got this idea from my neighbour. I have given two versions .. One is my version in which i followed the method of potato curry and the second one is my neighbours' version which is purely a south Indian style . Based on ur liking, try any. Both tastes good .. I pressure cooked the baby corn to ensure proper cooking but that step is purely optional. We can just saute the baby corns, cover and cook by sprinkling little water as my neighbour suggested..

INGREDIENTS
  • Baby corn – 8-10 nos
  • Big onion – 1 no (finely chopped)
  • Ginger – 1 inch (-do-)
  • Garlic cloves – 6 nos ( –do-)
  • Red chilly powder / Sambhar powder –3/4 - 1 tsp
  • Garam masala powder - 1/2 tsp
  • Salt & water – as needed
  • Lemon juice – 1/2 tsp ( adjust)
  • Curry leaves – few
  • Coriander leaves – few
To Temper:
  • Olive oil / cooking oil – 1 tbsp
  • Mustard seeds – 1/2 tsp
  • Jeera – 1/2 tsp

METHOD
  • Pressure cook baby corn for 1 whistle..Set aside.
  • In a kadai , heat oil and add the mustard seeds & jeera, once they start to splutter , add onions,ginger & garlic pieces,curry leaves.
  • Saute well. Add little turmeric powder, salt and mix well.
  • Now add the sambhar/ red chilly powder. mix well.
  • Finally add the cut baby corn slices. Saute well for few mins .
  • Add coriander leaves , lemon juice and remove..
Serve hot with rice n roti!!
NOTE
  • Ginger&garlic paste can be used instead of ginger , garlic pieces.
  • Baby corn need not be pressure cooked. Instead it can be sauteed in oil & cooked by covering it in the kadai sprinkling little water in between..
  • Tomatoes can be used instead of lemon juice..

BABY CORN STIR FRY – VERSION 2

INGREDIENTS
  • Baby corn – 8-10 nos
  • Big onion – 1 no (finely chopped ) (optional)
  • Salt – as needed
  • Turmeric powder – 1/4 tsp
To grind:
  • Grated coconut – 1/4 cup
  • Green or Red chillies – 3 nos
  • Jeera – 1/2 tsp
To temper:
  • Oil – 1 tbsp
  • Mustard seeds – 1/2 tsp
  • Urad dal – 1/2 tsp
  • Curry leaves - few

METHOD
  • Grind the items given under “to grind” without adding water.
  • Cut the baby corn into lengthy 1 inch strips.
  • In a kadai , heat oil and splutter mustard seeds, jeera & curry leaves.Saute onions if u use them..
  • Add the baby corn and saute well.
  • Now add the ground coconut , turmeric powder & salt.
  • Saute till the raw smell emanates.
  • sprinkle little water , mix well.
  • Cover & cook till the baby corn is done.
  • Add water whenever necessary. Always keep the flame in medium & stir well every now & then to avoid burning.
  • After the baby corn is cooked well, add fresh coriander leaves & remove.
Serve hot  with rice!

السبت، 22 سبتمبر 2012

Eggplant Quinoa Bites with Pesto

eggplant bites

Only recently have I realized the endless possibilities of cooking with eggplant. I have only cooked with it on a few occasions until recently, but now it's often on my grocery list as I explore this underrated and sadly neglected vegetable. Many people in my circle of acquaintances think that eggplant is flavorless, bland and soggy, yet so many of the recipe books I own contain numerous recipes for eggplant and the local market always has a good supply on hand all year round. I guess that eggplant is not as unpopular as I originally thought.

It all depends on how you prepare this vegetable, though technically it is a fruit. True, it doesn't really have much flavor, but from a culinary point of view it is a rather ideal vegetable to cook with because it absorbs seasonings and flavors well. Eggplant doesn't keep for long, so it is best to purchase it a day or so before using it. Lightly salting the eggplant and letting it sit for an hour or so before patting the slices dry helps get rid of some of the moisture and bitterness. If you are adding it to soups or stews, add near the end of the cooking time. You don't need to peel the eggplant because the skin is edible, but most cooks do unless they want to bake it whole in the oven, or stuffed. In either case, the skin will not likely be consumed.

Bake it, steam it, fry it, roast or broil it, and you will come up with various serving ideas. Eggplant is commonly included in stews, soups and casseroles, curries, salads, sandwiches and pasta dishes among other favorites appearing on the dinner table. Often overlooked is that eggplant really does shine on its own as the center piece of a tapas platter or as a standalone appetizer to stimulate the palate before the main course. To illustrate this claim, I came up with these little eggplant bites. I defy eggplant skeptics to stop at only one.

The quinoa here is mixed with a rather unconventional pesto as part of the topping, but I found it worked perfectly, adding an extra layer of flavor to the tapas.

In addition to serving as an appetizer, you may want to include them as part of a light lunch or dinner, served with a lightly dressed lentil or leafy green salad. A word of caution if you are serving them as an appetizer prior to a full course main: these little nibblers are addictive, so resist the temptation to eat too many, or serve them well in advance before the rest of your culinary efforts grace the dinner table.

Eggplant Quinoa Bites with PestoEggplant Quinoa Bites with Pesto
Recipe by
Published on September 22, 2012

A wonderful appetizer of broiled eggplant slices topped with a quinoa pesto and melted cheese

Print this recipePrint this recipe

Quinoa:
  • 1/3 cup quinoa (1 cup cooked)
Eggplant:
  • 1 large eggplant, peeled and cut into 1/2 inch slices
  • olive oil
  • sea salt and fresh cracked black pepper
Pesto:
  • 4 to 5 sun-dried tomatoes
  • 1/2 cup packed fresh basil, roughly chopped
  • 1 teaspoon chipotle powder or chili powder
  • juice from 1 small lemon or lime (2 tablespoons)
  • 1/4 cup olive oil
  • sea salt to taste
Other ingredients:
  • 2 small tomatoes or 1/2 pint cherry tomatoes, sliced
  • 8 oz (225 g) fontina or mozzarella cheese, cut into slices
  • 1/2 cup fresh grated Parmesan cheese
Instructions:
  • Rinse the quinoa and soak overnight in 2/3 cup of water. Bring to a boil in a small saucepan, reduce the heat to low, cover, and simmer for 15 minutes or until the liquid is absorbed. Let cool for five minutes and fluff with a fork. Set aside.

  • Prepare the eggplant by lining a baking sheet with parchment paper. Rest wire racks over the baking sheet and brush with olive oil. Brush both sides of the eggplant slices with olive oil and lightly salt them. Arrange on the wire racks and leave them to rest on the rack for 1 hour.

  • Bake the eggplant slices in a 400° oven for 25 to 30 minutes until they soften and begin to brown slightly. Flip them over once halfway through the baking time.

  • Meanwhile, soak the sun-dried tomatoes in hot water for 30 minutes, then drain and chop.

  • Prepare the pesto. In a food processor or using a mortar and pestle, blend together the sun-dried tomatoes, basil, chipotle powder or chili powder, lemon juice, olive oil and sea salt. Add more olive oil if it needs thinning. Taste for seasoning. Mix the pesto into the cooked quinoa.

  • Preheat your broiler and move the rack to the top of the oven.

  • To assemble, spoon and spread some of the quinoa-pesto mixture over the baked eggplant slices, top with a slice of tomato or a few slices of cherry tomatoes, a slice of fontina or mozzarella cheese, and sprinkle with some of the grated Parmesan.

  • Place the pan under the broiler and broil until the cheese begins to melt and bubble and brown a bit, about 5 minutes. The eggplant should be slightly browned on the edges. Take care not to burn the eggplant.

  • Remove from heat and let cool for 3 to 5 minutes before serving.

Makes about 16 rounds
eggplant tapas

Other small bites from Lisa's Vegetarian Kitchen you are sure to enjoy:
Stuffed Mushrooms with Sun-Dried Tomatoes, Goat Cheese and Olives
Olive Cheese Balls
Goat Cheese Olive Balls
Stuffed Jalapeno Peppers with Goat's Cheese and Sun-dried Tomatoes

On the top of the reading stack: Simply More Indian: More Sweet and Spicy Recipes from India, Pakistan and East Africa

Audio Accompaniment: Robert Rich

الجمعة، 21 سبتمبر 2012

No Croutons Required - Vegan Soups and Salads

The challenge for August was to come up with a soup or salad suitable for vegans. Thanks to everyone who contributed one of their creations. The roundup is short this month, but the submissions we received are sure to tempt and please your palate and certainly prove that vegan dishes are delicious, fulfilling and nourishing. I will announce the most popular submission at the end of the month with input from friends and family. Please vote for your favorite via email or in the comment section to help us come up with the winner for September's challenge. Neither my submission, nor Jacqueline's, is eligible for the vote.


Our first entry this month is from Janet of the Taste Space with a moist and creamy Chickpea and Tofu Tahini Scramble Salad. This dressed up tofu scramble has an intriguing blend of flavors and textures. Browned crumbled tofu, plump chickpeas and sweet cherry tomatoes are gently sautéed in a sauce consisting of tahini, homemade hummus, tamari and lemon juice and served on a bed of fresh spinach. This dressed up beauty will be on my menu quite soon. (Toronto, Ontario, Canada)


My contribution to the vegan menu selection is this elegant Thai Mushroom Soup with Coconut. Mixed earthy dried and fresh mushrooms are simmered in a broth of shallots, fresh galangal, lemongrass, coconut milk, homemade green curry paste, tamari and a wee bit of sweetener. Subtle coconut milk tempers the rather bold and layered complexity of the seasonings, and the fresh lemon juice completes the dish with a vibrant flourish. (London, Ontario, Canada)


Rita of Rita Cooks Italian serves up FAGIOLINI CON SUGO DI POMODORO FRESCO (runner beans in fresh tomato and garlic sauce). I rather like the Italian name of this simple and graceful dish. This was Rita's solution to an abundance of runner beans. The delicately cooked beans are dressed up in an elegant tomato sauce seasoned with fresh garlic, fresh basil and chives. The liberal use of olive oil in the sauce certainly contributes some depth to this delightful side. (London, England, UK)


Johanna of Green Gourmet Giraffe welcomes spring with a Kale Potato and Quinoa Stew. Johanna originally set out to make a soup with fresh garden kale, but instead it evolved into a thicker pot full of nourishing vegetables. Onions, carrots, parsnip, cabbage and celery are lightly stir fried and then simmered in a homemade freezer scraps stock, along with potatoes, sweet potatoes, tomato paste, garlic, smoked paprika, quinoa, kale and cooked black beans and borlotti beans. The homemade vegan Parmesan that tops each serving adds a "salty and sharp cheesiness" to the stew. Pure comfort food that will warm and nourish on a cold chilly day. (Melbourne, Australia)


My dear friend Jackie and co-host of this monthly event shares one of her favorites that no doubt will become a favorite of mine too. My jaw dropped when I set my eyes upon this stunning Herbful Pasta Salad with Mushrooms. How distinguished is this light and zesty salad with chestnut mushrooms sauteed in olive oil and garlic, combined with Dishi Volanti pasta, and dressed with a mixture of fresh basil and dill, lemon juice, garlic, olive oil and balsamic vinegar? The gourmet quality of this dish proves that gourmet does not necessarily mean complicated. (Scotland, UK)


Our final submission this month is from Helen of Fuss Free Flavours. This Tenderstem and Semi-Confit Tomato Salad might be fuss free, but it certainly will appeal to even the fussiest of eaters. Lightly cooked tenderstem broccoli comes together with rich tasting semi-confit tomatoes infused with fresh herbs and olive oil and served over some fresh spinach leaves, drizzled with some olive oil and fresh lemon juice for a fresh burst of flavor, and finally topped with dry toasted sesame seeds and chili flakes to add a crunchy texture and subtle touch of heat to the dish. (London, England, UK)

Jacqueline will be hosting the October edition of No Croutons Required. Check back at the beginning of the month for the theme.

الخميس، 20 سبتمبر 2012

Instant Oats Dosa | Indian Oats Recipes

instant oats dosa 1
I make this oats dosa once in a week.This dosa will be crispy in the edges and soft in the middle. The crispness of this dosa lies in the consistency of batter like rava dosa.Adding more water makes it look dry.So add the water correctly.Wheat flour & oats gives the softness.. Do try this healthy dosa for breakfast or dinner. It tastes great with coconut chutney. I tried idli podi using horse gram as an accompaniment for this dosa which i’ll post soon ..Make this dosa & serve immediately for better taste. Oats tastes the best when it is eaten hot ;) Lets see how to make Instant oats dosa with Indian oats !
INGREDIENTS
1 cup - 200ml

  • Powdered oats – 1/4 cup  ( I used quaker quick oats)
  • Wheat flour – 1/4 cup
  • Rice flour – 1/8 cup
  • Sooji/rava – 3 tbsp
  • Pepper corns – 1 tsp
  • Jeera – 1.5 tsp
  • Ginger – 1 inch  (chop finely)
  • Curry leaves – few
  • Coriander leaves – few
  • Sour buttermilk – 1/4 cup OR sour curd - 2 tbsp
  • Salt & water – as needed.
  • Big onion – 1 no (finely chopped – optional) ( i don’t use)

METHOD

  • Powder the oats and mix with all other flours together adding the required salt .. ( Dry roast the oats before powdering them is optional)
  • Add the pepper corns, jeera , chopped ginger , curry leaves and coriander leaves.
  • Add the sour butter milk , salt and mix well..Add the required water to adjust the batter consistency.
  • Heat the dosa tawa and sprinkle little oil ..
  • Then pour the batter in a circular motion from the corner towards the center. Fill the gaps by sprinkling more batter.
  • Drizzle little oil around the dosa and keep the flame high for few secs.
  • The corners of dosa will lift automatically. Now flip the dosa and reduce the flame. Cook for sometime and remove.
  • Enjoy with any chutney or podi !!

instant oats dosa2


NOTE

  • I usually dry roast the oats for few mins and then powder it.This time i powdered without roasting which also tasted good.So roasting is optional but it gives an additional flavour.
  • Adding finely chopped onions is purely optional. I don’t add it.
  • U can also add crushed pepper corns instead of adding whole ones.
  • U can make this dosa by adding rice flour & sooji along with oats.
  • Ragi flour can also be added instead of sooji to get the crispness.This makes the dosa healthier but the color of the dosa will be black.
  • Batter should be watery . If u make the first dosa, u’ll get to know how much water has to be added to get crispy dosas. Add water and adjust the salt .

 Technorati Tags: ,,,,,,,,,,,,,

الأربعاء، 19 سبتمبر 2012

Indian-Style Spicy Cheese Scones

masala scone

One of my specialties and favorite creations to pull from a steaming hot oven are surely quick breads such as biscuits, scones, muffins and loaves. The aroma tantalizes the senses and stimulates the appetite. I always find the transition from summer to fall rather difficult to adapt to and turning on the oven warms the toes. The only drawback is having the patience to enjoy one until it is cool enough to eat. Generally speaking, I prefer savory to sweet. I am also a spice fanatic so it seemed natural for me to come up with a spicy savory biscuit, or scone if you prefer.

Now, I don't want to start a discussion on the confusion and controversy over what constitutes a scone versus a biscuit, nor get into what a cracker, cookie or shortbread means. A few years back Johanna of Green Gourmet Giraffe tried to make sense of this rather complicated culinary matter. Really, it seems to depend on the region of the world you reside in or what you were brought up to understand by learning the word attached to object placed in front of you. To make things even more confusing, here in North America the terms biscuit and scones are often used interchangeably, as are cracker and biscuit, and sometimes they are sweet and sometimes not.

But enough about that. Scone or biscuit, what really matters here is this spicy baked delight that has just enough heat to please spicy-minded palates but subtle enough for even the more timid amongst us. The cheese helps cool the masala blend and compliments the moist and flaky layered texture of the biscuit. Of course, if you are like me you may be inclined to increase the amount of spice. The possibilities are endless — a basic scone dough is a blank canvas to be explored and adorned.

masala biscuit

Some tips: Much like muffins, over-mixing results in tough biscuits or scones. You want nice flaky biscuits that will rise. On the other hand, don't be afraid of the dough either. Biscuits that are underworked may turn out crumblier than you want and that would be … crummy! A combination of gentle kneading and folding over the dough a few times until smooth is the key to a biscuit that will be moist, flaky, and rise to perfection. For softer biscuits, place the formed dough closer together on the baking sheet. For crisper biscuits, place the rounds about an inch apart.

Of course, practice makes perfect and surely friends and family won't mind coming around to evaluate your test batches.

Indian-Style Spicy Cheese SconesIndian-Style Spicy Cheese Scones
Recipe by
Cuisine: Indian
Published on September 19, 2012

Simple, moist and flaky cheese scones with gentle Indian spicing and heat

Print this recipePrint this recipe

Ingredients:
  • 1 cup unbleached white flour or spelt flour
  • 2 teaspoons baking powder
  • 1/4 teaspoon baking soda
  • 1/2 teaspoon sea salt
  • 2/3 teaspoon garam masala
  • 1/2 teaspoon cayenne
  • 1/2 teaspoon chili powder
  • pinch of ground ginger
  • pinch of ground cinnamon
  • 2 tablespoons cold unsalted butter
  • 1/2 cup cold whole milk
  • 1/2 cup grated extra-old sharp Cheddar cheese
  • 2 tablespoons fresh chives, finely chopped
  • 2 to 3 fresh green or red chilies, seeded and finely chopped
  • handful of dried curry leaves
Instructions:
  • Line a large baking sheet with parchment paper.

  • In a large bowl, sift together the flour, baking powder, baking soda, spices and salt. Cut the cold butter into small squares and add to the dry ingredients. Working quickly and using a pastry cutter or your hands, cut in the butter until it resembles plump pea-size pieces. Make a well in the center of the ingredients.

  • Pour in the milk, mix a few times, then add the Cheddar cheese, chives, chilies and curry leaves, and stir until the dough comes together. The dough should be moist and a bit sticky. Take care not to over-mix. At this point you may want to let the dough rest in a bowl in the fridge for about a half hour covered with some plastic wrap.

  • Preheat an oven to 425°.

  • Turn the dough out onto a floured surface and flour your hands. Gently knead the dough a few times, fold over the dough, turn and repeat a few times until the dough is smooth.

  • Pat or roll the dough out with a floured rolling pin until it is roughly 3/4 inches thick. Cut into 2-inch or 2 1/2-inch rounds with a floured cookie or biscuit cutter and transfer to the baking sheet. Roll out any remaining dough and repeat.

  • Alternately, cut the patted or rolled out dough into squares or wedges or gently shape the dough into rounds and transfer to the baking sheet.

  • Bake in the middle of the oven for 8 to 10 minutes or until the scones rise and turn a light golden brown. Let cool on a wire rack for five minutes. Serve warm or at room temperature.

Makes 8 scones
masala  Indian scone

More spicy treats you may enjoy from Lisa's Kitchen:
Cayenne Peanut Butter Cookies
Spicy Parmesan Crackers
Jalapeno Cheddar Scones

On the top of the reading stack: Mortality by Christopher Hitchens

Audio Accompaniment: Robert Fripp