الأربعاء، 29 يونيو 2016

Ridge Gourd Curry – Beerakaya Curry–Turai Ki Sabji

Turai ki sabji
I started to explore varieties of ridge gourd recipes (Ridge gourd in English, Turai/Luffa/Torai in Hindi, Peerkangai in Tamil, Beerakaya in Telugu, Hirekai in Kannada, Peechinga in Malayalam, Ghiya Tori in Urdu ) in my kitchen. Recently I shared Andhra style Ridge gourd dal / Beerakaya pappu recipe for rice.Today I have posted a North Indian style Ridge gourd curry. I followed this recipe from Mullai’s blog. It is known as Turai Ki Sabji/Sabzi in Hindi. It tastes good with rice and roti as well. Yesterday I prepared this sabzi and dal for my lunch. It was simple yet comforting. I ate this curry with plain rice adding ghee. You can make this as a side dish for roti. I am sure it tastes better with roti. Lets see how to make this easy, yummy and healthy Ridge gourd sabji recipe.
Check out my South Indian Peerkangai chutney( gravy )for rice.


Ridge gourd curry

Ridge gourd curry / Turai Ki sabji recipe


Ridge gourd curry / Turai Ki sabji recipe North Indian style Turai ki Sabzi for rice and roti !
Cuisine: North Indian
Category: Side dish for roti, rice
Serves: Serves 2
Prep time: 10 Minutes
Cook time: 10 Minutes
Total time: 20 Minutes


INGREDIENTS
1 cup - 200ml
  • Ridge gourd - 1 no ( Medium sized)
  • Big onion - 1 no ( finely chopped)
  • Ripe tomato - 2 nos ( Small, Finely chopped)
  • G&G paste – 1/2 tsp
  • Turmeric powder - 1/8 tsp
  • Red chilli powder - 1 tsp
  • Dhania powder – 1/2 tsp
  • Garam masala powder - 1/2 tsp
  • Mustard seeds – 1/2 tsp
  • Urad dal – 1 tsp
  • Cumin seeds - 1/2 tsp
  • Salt & water - as needed
  • Cooking oil - 2 tbsp
  • Coriander leaves – to garnish
METHOD

  • Wash and peel the ridges ( rough part) of ridge gourd. Discard it. Peel the skin and reserve it to make thogayal or chutney with it. Now chop the ridge gourd into small pieces. Chop the onion, tomato and set aside.
  • Heat oil in a kadai or a pressure cooker base and splutter mustard seeds, Urad dal, cumin seeds and curry leaves. After the dal turns golden, add the onion, G&g paste.Saute till the raw smell leaves it. Then add the chopped tomato pieces.
Ridge gourd curry
  • Saute till tomato turns mushy. Now add the chopped ridge gourd pieces.Add the required salt while sauting. Add turmeric powder, red chilli powder, dhania powder and garam masala powder. Mix well for few minutes until you get a nice masala flavor.
Ridge gourd curry
  • Add 1/2 cup of water, mix well and cover the kadai with a lid. I transferred everything into a cooker and cooked for one whistle in very low flame. Open the cooker after the steam is released. Boil for sometime if the curry is watery. After it thickens, switch off the flame. Garnish with coriander leaves.Enjoy with roti and rice !!
Ridge gourd curry
Ridge gourd curry


Note
  • Adjust the quantity of spices as per your need.
  • Use Kashmiri chilli powder to get nice color as you see in the picture.
Enjoy this yummy sabzi with rice and roti. I had it with dal !
Ridge gourd curry

الاثنين، 27 يونيو 2016

Muslim Khichdi Recipe – Dal Khichdi

Muslim khichdi recipe
I got this recipe from Captain TV cookery show. It was demonstrated by a Muslim lady, Mrs. Humayun ( Sorry I don’t remember her name exactly) and she told its one of the traditional breakfast recipes of Tamil Muslims. This is an entirely different version from our usual dal kichdi recipes served in hotels. Its cooking procedure and ingredients are more like biryani. So I got impressed with the recipe and thought of trying out this authentic version. I made it for our Sunday lunch along with curd rice and fruit custard. It was mildly spiced and tasted yummy with nice flavor of moong dal and masala .I served this khichdi with Mint leaves chutney/Pudina chutney as suggested by her. Sendhil & Raksha loved it and told me prepare this for their lunch box too Happy. Its a very easy, quick, one pot meal ideal for breakfast and lunch box. Try this onceBring it on. Ok, lets see how to make this easy, one pot Muslim style Khichdi recipe for breakfast/ lunch!
Check out my Muslim Veg Dalcha and ghee rice recipes too !
Muslim khichdi

Muslim Khichdi Recipe


Muslim Khichdi Recipe Muslim khichdi recipe using rice, moong dal and vegetables served with Mint chutney - A healthy breakfast recipe with a side dish !
Cuisine: Indian
Category: Breakfast recipes
Serves: Serves 3
Prep time: 10 Minutes
Cook time: 20 Minutes
Total time: 30 Minutes


INGREDIENTS
1 cup - 250ml
  • Basmati rice - 1 cup
  • Moong dal - 1/4 cup
  • Mixed vegetables - 1/2 cup (1 carrot, 1 potato, a handful of green peas)
  • Water - 1.5 cups
  • Salt - as needed
To saute
  • Cooking oil - 3 tbsp
  • Cinnamon, cloves, cardamom - 2 each
  • Big onion - 1 no
  • G&G paste - 2 tsp
  • Green chillies - 2 nos ( use 4 nos for more spicy)
  • Tomato - 2 nos ( small)
  • Mint + coriander leaves - a handful
  • Turmeric powder - 1/4 tsp
  • Ghee - 2 tsp
METHOD

  • Wash and soak basmati rice for 30 minutes. Wash and soak the dal in another bowl separately. In the mean time, chop the onion, tomato, mixed vegetables.
Muslim khichdi recipe
  • Heat oil in a pressure cooker base and saute cinnamon, cloves and cardamom. Now add the sliced big onion,g&g paste slitted green chilli and saute until onion turns transparent and raw smell goes off.
Muslim khichdi recipe
  • Now add the chopped tomato pieces, mint + coriander leaves, turmeric powder, salt. Saute till tomato turns pulpy. Drain the excess water from the soaked dal and add the dal to the cooker. Saute for a minute. Add the chopped vegetables and mix well.
Muslim khichdi recipe
Khichdi recipe
  • Add 1.5 cups of water and check for taste after the water starts to boil Add more salt or put some slit green chillies if you want to add more salt or make it more spicy.Mix well and add the soaked, drained rice. Mix well and pressure cook in low flame for one whistle. Remove the lid after the steam is released. Fluff the rice with a fork. 
Khichdi recipe
  • Serve hot with Mint chutney and onion raita .Enjoy !
For Mint chutney
Take a handful of mint leaves + coriander leaves in a mixie jar. Add 3 tbsp of grated coconut, 2 green chillies, 1/2 tsp of cumin seeds, salt , a pinch of turmeric powder and a small piece of tamarind. Grind everything to a smooth paste. Serve it with khichdi.

Note

  • Add 3-4 green chillies for spicy taste.
  • Do not forget to use mint+coriander leaves as it gives a nice flavor. Add Mint leaves at least.
  • Adding ghee at the end gives richness and nice flavor. Skip it if you don’t want to increase the calorie.
Try this easy, healthy one pot meal at home and enjoy !
Muslim khichdi recipe

الأحد، 26 يونيو 2016

Dressed Up Kale Salad

Dressed up Kale Salad

With the wicked heat and high humidity here in London, Ontario lately, salads are surely in order. And the simpler and healthier, the better. This also happens to be the time of year to take advantage of seasonal vegetables, and as kale is one of my favorites, this leafy and earthy vegetable was the star of this show in a salad that is completely vegan too.

I came across Johanna's Only-Kale-Can-Save-Us-Now salad and was suitably intrigued — not just by the name, but by the flavors. I've adjusted it to some degree, but the creamy base of the dressing retains the essential ingredients of tahini, lemon juice, a bit a maple syrup for a hint of sweetness, and nutritional yeast for a cheesy flavor without actually adding any dairy. It is light, delicious and wholesome.

I'll be making it again this weekend, as it is going to be another scorcher. Served along with chickpea olive salad with za'atar and cherry tomatoes and vegan potato salad dressed with avocado, you will have a perfect summer meal for a number of guests without too much fuss that can easily be enjoyed on the patio.
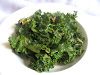


Dressed Up Kale SaladDressed Up Kale Salad
Recipe by
Adapted from Green Gourmet Giraffe
Published on June 26, 2016

Simple and healthy kale salad tossed with a creamy and flavorful tahini and lemon dressing

Print this recipePrint this recipe

Ingredients:
  • leaves from half bunch of kale (6 to 7 stalks)
  • 1 1/2 tablespoons nutritional yeast
  • 1 tablespoon tahini
  • juice from 1/2 lemon (1 1/2 tablespoons)
  • 1 tablespoon maple syrup, honey or agave nectar
  • 1 shallot, minced
  • water as needed
  • hemp seeds or toasted sesame seeds for garnish (optional)
Instructions:
  • Remove the kale leaves from the stalk and tear into pieces. Rinse well and pat dry.

  • In a large bowl, whisk together the nutritional yeast, tahini, lemon juice, sweetneer and shalot. Add water as necessary to thin to a thick but pourable consistency.

  • Add the kale to the bowl and mix with your hands until everything is well blended. Sprinkle with seeds if desired, and serve.

Makes 4 servings

Kale Salad

This is my contribution to Eat Your Greens, a monthly event co-hosted by The Veg Hog and Allotment 2 Kitchen. The Veg Hog is hosting the June 2016 edition.

More Kale recipes from Lisa's Vegetarian Kitchen:
Tuscan-Style Pinto Bean Soup with Kale
French Lentil Soup with Mushrooms, Sun-Dried Tomatoes and Kale
Caldo Verde (Portuguese Potato and Kale Soup)

الجمعة، 24 يونيو 2016

Batata Poha Recipe – Gujarati Aloo Poha – How To Make Potato Poha

Batata poha
Batata poha ( Batata – Potato, Poha – Rice flakes in English, Aloo Poha in Hindi) is a quick breakfast and teatime snacks recipe which is very popular in Gujarat and Maharashtra. Recently I posted Maharashtrian Kanda pohe recipe( Onion poha). Following that, I tried this Gujarati style Batata poha recipe without onion and garlic for our breakfast.There is no much difference between ingredients of Gujarati & Maharashtrian style batata Poha recipes. So I don’t want to follow the same recipe with slight variations instead I tried this recipe in which spice powders and Garam masala powder were used.I am really not sure whether this is the authentic Gujarati version but it came out very flavorful and definitely tastier than our usual Kanda batata pohaWinking. Working women and bachelors can try this for making quick breakfast or dinner and enjoy it with a hot chai. You will find it tummy filling and healthy too !Lets see how to prepare Gujarati Batata poha/ Aloo Poha recipe with step by step photos !
Check out my Karnataka style Chitranna & Tamilnadu Lemon Aval upma, Milagu Jeeraga Aval recipes too.
Batata poha -Gujarati Aloo poha

Batata poha recipe - Gujarati Aloo Poha Recipe


Batata poha recipe - Gujarati Aloo Poha Recipe How to make aloo poha - Gujarati Batata poha without onion and garlic for quick breakfast !
Cuisine: North Indian
Category: Breakfast/ snack
Serves: Serves 2
Prep time: 10 Minutes
Cook time: 10 Minutes
Total time: 20 Minutes


INGREDIENTS
1 cup - 250ml
  • Thick poha - 1 cup
  • Potato - 1 no ( medium. peeled and sliced thinly)
  • Peanuts - 2 tbsp
  • Cooking oil - 3 tbsp
  • Mustard seeds - 1/2 tsp
  • Cumin seeds - 1/2 tsp
  • Curry leaves - few
  • Asafetida/Hing - a pinch
  • Red chilli powder - 3/4 to 1 tsp
  • Dhania powder -1 tsp
  • Garam masala powder - 1/2 tsp
  • Sugar – 1 tsp
  • Salt & water - as needed
  • Turmeric powder - 1/4 tsp
To garnish
  • Coriander leaves - few
  • Pomegranate seeds - a handful
  • Lemon juice - few drops
  • Raw onion - finely chopped ( optional, I din't use)
METHOD

  • Wash the thick poha at least twice to remove the dust. Soak it in enough water. i.e the level of water should be just 1/2 inch above poha. Close the bowl with a lid and let it sit for 10 to 15 minutes. In the mean time, wash & peel the skin of potato. Chop it into thin slices as shown in the picture so that it can cook quickly.

  • Heat 1 tbsp oil in a kadai and roast the raw peanuts first. In the same kadai, add another 2 tbsp of oil and splutter mustard seeds, cumin seeds and turmeric powder along with roasted peanuts.
Batata poha recipe
  • Add the chopped potato pieces, curry leaves and mix well ( If using boiled potato cubes, add it at the end along with Poha, no need to saute it).Add turmeric powder and salt for the potato to saute & cook quickly. Cover the kadai for sometime, simmer the flame and let the potato pieces cook till soft. Now add the red chilli powder, dhania powder, garam masala powder , sugar and if needed some turmeric powder. Mix well till all the spices well blend with cooked potato.
Batata poha recipe
Batata poha recipe
  • Lastly add the soaked poha and mix well till all the masala coat well. Check for taste and add more salt or spice powders as per your need.
Batata poha recipe
  • Gujarati batata poha

    After the poha is heated well, switch off the flame and garnish with finely chopped coriander leaves, sprinkle some lemon juice. Add some pomegranate seeds if you wish. Serve hot with a cup of Chai/Tea. Enjoy !!


Note
  • You can saute finely chopped onions along with potato pieces if you wish.It is known as Kanda batata poha in Hindi i.e Onion Potato Poha
  • Do not reduce the quantity of oil. Oil is more important to make a tasty poha. It doesn’t look dry !
  • Adjust the quantity of spices as per your taste
  • Adding sugar gives a mild sweetness to the dish. So skip it if you don’t like.
  • Using thin poha is also OK but soak it adding correct amount of water else the dish will become mushy.
Try this easy, yummy Gujarati breakfast dish at home and enjoy with a cup of chai !
Gujarati batata poha

الخميس، 23 يونيو 2016

Eggless Digestive Cookies Recipe – Whole Wheat,Oats Cookies Without Butter

eggless digestive biscuits
We buy digestive biscuits regularly even though its costly.Every time I used to see the list of ingredients on the back of pack to try on my own.And I kept searching some good recipes for homemade digestive biscuits aka whole wheat,oats cookies. In Raksha’s school, this year they have strictly restricted store bought cakes, cookies and packed juices for snacks box. Only homemade digestive cookies are allowed. Finally time hath come to try my hands on itWinking.I followed this recipe & I baked an eggless, butter less digestive cookies using whole wheat flour, quick cooking oats and plain milk.For Vegan version, use almond milk instead. Actual recipe had butter in it. But I substituted butter with cooking oil and tried it today.You can call this as oats cookies too.It came out very well, perfect with a crunchy texture. We loved it very much & ate 2-3 cookies without any guiltLove Struck. Its so easy to make and a good tea time cookies for weight watchers.For kids, you can use butter, add some Choco chips, M&M etc for variations. After tasting these cookies, Raksha told its taste is similar to UNIBIC digestive biscuitsHappy . I felt very happy and proud with my baking Dancing.Friends, do try this easy, simple oats cookies without eggs and butter at home & enjoy it for your tea time with your loved ones. Even beginners can dare to try it. Ok, lets move on to the recipe !


Eggless oats cookies

Eggless digestive cookies recipe


Eggless digestive cookies recipe Eggless, butter less digestive cookies with oats, wheat flour & brown sugar.
Cuisine: Indian
Category: Cookies recipes
Serves: 15 nos
Prep time: 10 Minutes
Cook time: 17 Minutes
Total time: 27 Minutes


INGREDIENTS
1 cup - 200ml
  • Wheat flour - 3/4 cup
  • Quick cooking oats - 3/4 cup
  • Brown sugar or Demerara sugar - 1/2 cup (+ 2 tbsp, optional)
  • Odorless Cooking oil or unsalted butter - 1/3 cup  ( Use 60gms of butter at room temperature)
  • Boiled & cooled milk - 2 tbsp  ( Vegans use almond milk)
  • Baking soda - 1/2 tsp
  • Vanilla essence - 1 tsp ( completely optional)
METHOD

  • In a mixie jar, take the oats and demerara sugar.Grind to a smooth powder. If using brown sugar, grind oats alone. I used 2 tbsp more demerara sugar.  If using brown sugar or white sugar, use 1/2 cup only.
Eggless oats cookies
  • Take the ground oats+sugar, wheat flour and baking soda in a wide bowl. Mix well. Make a dent in the center and add 1/4 cup of cooking oil. ( If  using butter,  mix the unsalted butter at room temperature). Mix well and try to make a crumbly dough. Add milk and make a smooth dough.
Eggless oats cookies
  • If you feel the dough is too dry and not becoming a whole mass, add some more oil ( may be 1-2 tbsp) and make it thick, non-sticky and smooth.No problem if there are mild cracks in the dough. Suppose If you have added more milk or oil and dough is too wet and sticky, add some wheat flour and bring it to right consistency. Hence adjust the quantity of oil based on the wheat flour and ground oats texture. Never add milk more than 2 tbsp because it makes the cookie sticky, will crack & takes long time to cook as well. So be careful while making the dough.
  • After you make the dough, keep it inside the polythene cover or foil and refrigerate the dough for 15 minutes. By doing this way, dough will stiffen and becomes easy to roll and handle.
Eggless oats cookies
  • Take a portion of dough and roll it tight to 1/4 inch thickness. Make shapes using a mould or the lid of a bottle. Grease a baking tray or line it with butter paper. Its better to line the tray with butter paper so that it will be easy to remove the cookies from the tray after baking.
Eggless oats cookies
  • Arrange the cookies on the tray leaving enough space because these cookies will flatten & expand while baking. Preheat the oven at 180 c and bake the cookies for 15-18 minutes in convection mode. Mine got done in 17 minutes.Cookies will turn golden brown in color. Initially the cookies would be soft to touch immediately after baking but it hardens and becomes crispy as it cools down. Cookies will easily come off  from the tray.So remove the tray from the oven and keep it outside for 15 minutes or till it cools down. Serve it with coffee or tea. Store in an air tight box immediately after the cookies cool down. It will become soggy if kept in air for long time. Enjoy with tea/coffee !
Eggless oats cookies


Note
  • Adjust the quantity of oil based on the flours.
  • Adding baking soda helps to get a crispy cookies.So do not avoid it.
  • Do not add more milk for making the dough. Make sure dough is non sticky. if sticky, add some wheat flour and bring it to a non sticky dough.

eggless digestive biscuits

Enjoy this healthy, crispy, eggless, butter less oats cookies @ Digestive cookies for your teatime !!

eggless digestive biscuits

الاثنين، 20 يونيو 2016

Pumpkin Sambar Recipe – Poosanikai Sambar–Parangikai Sambar

pumpkin sambar
Usually I make red or yellow Pumpkin gravy or pumpkin poriyal ( Manjal Poosanikai/Parangikai in Tamil, Mathanga in Malayalam, Kumbalakayi in Kannada, Kaddoo in Hindi) – My mil’s recipes for our lunch. Both are my favorite recipes. But Sendhil doesn’t like them. So I have to make some other kuzhambu or side dish specially for him whenever I cook Pumpkin.  Recently he suggested me to try pumpkin sambar for rice instead of making other dishes with it. Usually I add few pieces of yellow pumpkin in my hotel idli sambar recipe to get the mild sweetness. But this is the first time, I am making manjal poosanikai sambar for rice. So I asked the recipe from my MIL, combined it with my mixed vegetable sambar recipe and made it for our lunch along with Vendakkai poriyal. Sendhil liked it very much and ate all the pumpkin pieces happily.He told sambar tastes much better than pumpkin chutney and poriyalHappy. Abbaaa, I am feeling relieved that I can make him eat pumpkin with this sambar recipeWinking. Friends, do try this easy and yummy poosanikai sambar/pumpkin sambar for your lunch. You can have this sambar with idli,dosa too. Ok, lets see how to make it with step by step photos !
Parangikai sambar

Pumpkin sambar recipe


Pumpkin sambar recipe Pumpkin sambar/poosanikai sambar recipe for rice
Cuisine: South Indian
Category: Sambar recipes
Serves: Serves 3
Prep time: 10 Minutes
Cook time: 20 Minutes
Total time: 30 Minutes


INGREDIENTS
1 cup - 200ml
To pressure cook
  • Toor dal - 1/3 cup
  • Turmeric powder - 1/4 tsp
  • Cooking oil - few drops
  • Water - 2 cups
  • Poosanikai/Pumpkin pieces - 12 cubes
To temper & saute
  • Cooking oil - 1 tbsp
  • Mustard seeds - 1/2 tsp
  • Methi seeds/Vendhayam - 1/4 tsp
  • Urad dal - 1/2 tsp
  • Cumin seeds - 1/2 tsp
  • Red chilli – 1no ( pinched)
  • Curry leaves - few
  • Hing/Asafetida - 1/8 tsp
  • Big onion or small onion – 1 no / 10 nos
  • Green chilli - 2 nos (slitted)
  • Sambar powder - 2 tsp
  • Dhania powder - 1 tsp
  • Red chilli - 1 no
  • Ghee - 2 tsp ( to add at the end)
  • Coriander leaves – few ( to garnish)
METHOD

  • Soak tamarind in 1 cup of warm water for 15 minutes.Wash and soak toor dal adding 2 cups of water, turmeric powder and cooking oil. Wash and peel the skin of pumpkin and cut into big sized cubes as shown in the pic below.Take the pieces in a small bowl that fits in the cooker and keep it inside the cooker without adding water. Let the dal pressure cook for one or two whistles in very low flame. Open the cooker after the steam is released and remove the pumpkin bowl. Mash the dal well with a ladle.
Pumpkin sambar recipe
  • Chop the onions, slit green chillies and keep it ready. In a kadai, heat oil and temper mustard seeds, methi seeds.Once they start to splutter, add the urad dal, cumin seeds, pinched red chilli and curry leaves. Add sliced onion, slitted green chillies and saute until onion turns transparent.
Pumpkin sambar recipe
  • Now add 1 cup of tamarind extract, sambar powder, dhania powder, turmeric powder, salt and cooked pumpkin pieces. Add raw hing and few torn curry leaves while the sambar boils. Let it boil for 5 minutes. Add 1/2 cup of more water in the middle if needed.
Pumpkin sambar recipe
  • Now add the cooked & mashed toor dal. Mix well and let the sambar boil for another 3-4 minutes or till the desired thickness is reached. Switch off the flame and transfer the sambar to a bowl.Garnish it with coriander leaves and add 2 tsp of ghee.Cover it with a plate and serve after 30 minutes standing time. Mix with hot rice and enjoy with any poriyal and appalam !
Pumpkin sambar recipe

Pumpkin sambar recipe
    Enjoy !

Note
  • The spiciness level would be normal for this sambar. If you want more spicy sambar, add more green chillies or some red chilli powder along with dhania powder.
  • You can use red pumpkin or white pumpkin too. But chop them into big pieces so that it doesn’t become mushy while pressure cooking. Never cook pumpkin pieces along with dal. Keep them in a separate box inside cooker but do not add water. This helps to cook the pumpkin soft and it retains its shape too.
Enjoy this yummy yellow pumpkin sambar with plain rice and poriyal.Tastes yumm !!
Pumpkin sambar recipe