الأربعاء، 30 أكتوبر 2013
Pasta Please #10 - The Lasagne Roundup
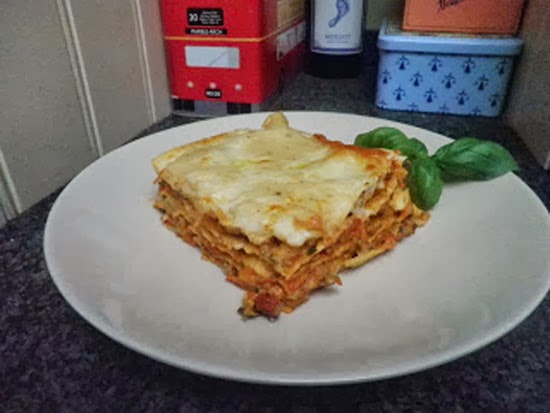
First up is this Kid-Friendly Healthy Vegetarian Lasagna from Amy of Fit and Fabulous After 40. This dish is "just right" we are told and I have no doubt. It's also a good way to sneak in some vegetables that your kids might not ordinarily eat. Onion, courgette, carrots, basil, oregano, turmeric, soya mince and basil tomato sauce make up the vegetable base, and then comes together with a creamy béchamel sauce along with mozzarella. Lots of layers of goodness on this plate.
I'm up next with my signature Vegetarian Mushroom and Spinach Lasagna. I've perfected it over the years and it never fails to please. Homemade succulent mushroom and vegetable tomato sauce with carrots, celery, jalapenos, garlic and fresh herbs and a bit of spice nestle in with fresh noodles, lightly wilted spinach, creamy ricotta, parsley and fontina cheese; then the whole dish is topped with freshly grated Parmesan cheese. A balanced elegance and pure comfort is what you will experience when you try this, and happy diners too.
Caroline came up with a Butternut Squash and Sweet Potato Lasagna that certainly has me hungry as I imagine the layers of textures and flavors going on here. Sweet potato and butternut squash snuggle in with the noodles and a white sauce made up of Parmesan, ricotta, egg yolks, milk and nutmeg. The dish is then sprinkled with bread crumbs. I'm certainly intrigued by the idea of squash in a lasagna.
And on the subject of squash, our next submission from Shaheen of Allotment 2 Kitchen also features this mighty vegetable. Pull up a chair and consider serving this lovely Butternut Squash and Spinach Lasagna next time you want to feed a small crowd or have leftovers on hand, because leftover lasagna is fantastic. A rich bechamel sauce that includes cheddar cheese and herb and garlic tones, comes together with the noodles, squash, spinach, parsley and some additional cheese. I can almost taste it.
Yet more squash in this tempting Vegetarian Lasagna with Butternut Squash and Kale from Morgan of Peaches Please. This luscious pan of goodness won't fail to provide comfort on a cold autumn day. Squash is roasted with olive oil, nutmeg and seasoning, kale leaves are tossed with red wine vinegar, a buttery milk sauce with shallot, sage and tarragon is simmered up, ricotta is mixed with balsamic and then it all comes together with some sliced apples and Mozzarella. Such an intriguing flavor profile in this dish. Yes please.
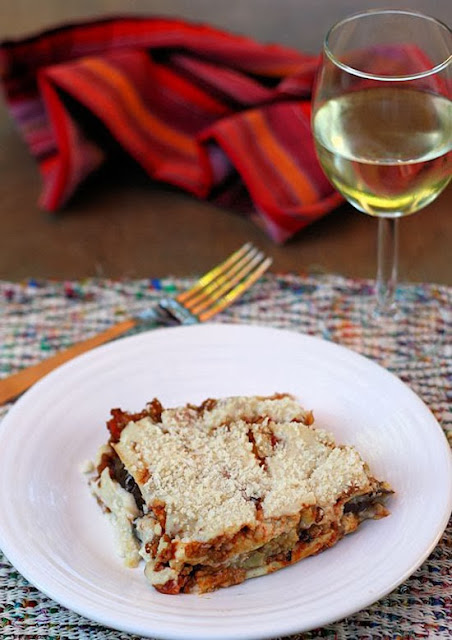
Our final submission is from Claire of Chez Cayenne. Served up is this rich and comforting Greek Eggplant Lasagna and it's vegan too. Moussaka inspired, this creative dish includes a tomato sauce with onion, garlic, ground round, cinnamon, allspice, black pepper, and red pepper flakes and a béchamel sauce with almond milk, vegan Parmesan and nutmeg. The noodles get cozy with the sauces and slices of eggplant. I bet seconds were in demand. Serve with a crispy green salad and a glass of wine.
And that concludes the roundup. Jacqueline is hosting the event next month and the theme is going to be mushrooms, so I'm excited of course. Stay tuned for the announcement on Jac's blog.
الثلاثاء، 29 أكتوبر 2013
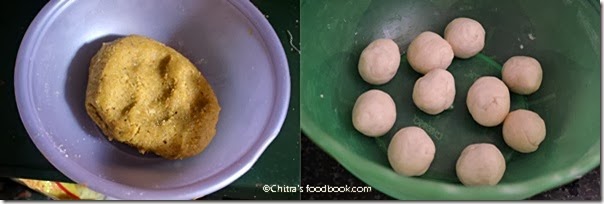
SURYAKALA,CHANDRAKALA SWEET RECIPE–DIWALI SWEETS RECIPES
Suryakala,Chandrakala
INGREDIENTS
1 cup - 200ml
To make dough
For Sugar Syrup
|
|
الاثنين، 28 أكتوبر 2013
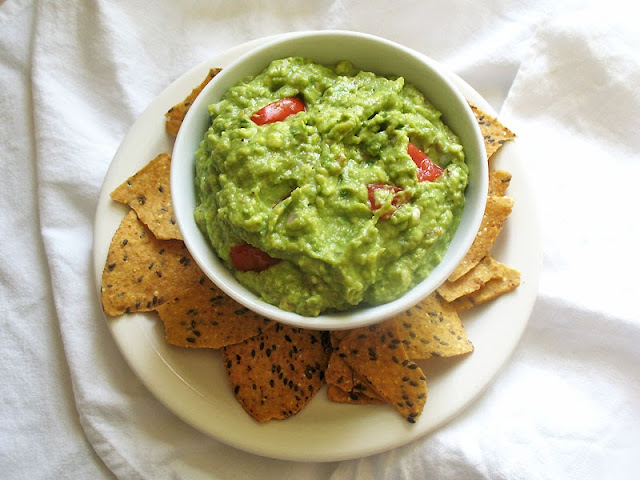
Spicy Pesto Guacamole
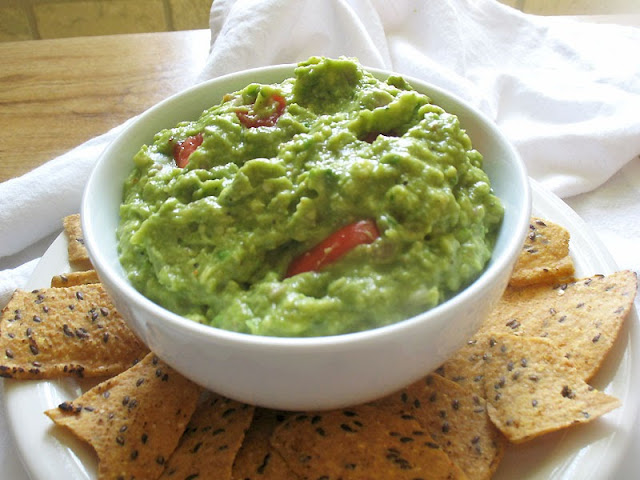
My tried and tested guacamole has always received rave reviews from my guests, but I wanted to step things up a notch this time around and, after seeing a few recipes for pesto guacamole, I was sold on the idea, especially as there was basil from my backyard that I wanted to use and I have never been known to turn my nose up at pesto — and certainly not at guacamole. As tends to happen in my kitchen, this one is spiced up.
 |
| Spicy Pesto |
As the weather gets cooler, and we spend more time indoors and indulge in a bit more snacking, what better way to do so than with this healthy dip that goes well with any chopped vegetables, toasted pita triangles and certainly tortilla chips. It's perfect anytime of year and a patio favorite. My best friend Basil pipes up here and describes the whole experience after trying it with some healthy baked tortilla chips:
First bite begins with flavors of avocado, basil, tomato, onion and lime, followed up with a distinct transmission of salt to introduce a pepper rush, warmly tingling the palette. A lingering aftertaste of lime is later detected.Well, make it yourself and let me know what you think.
Speaking of tortilla chips, those tortilla chips you see nestled up to the bowl of guacamole are really quite the tastiest tortilla chips I've ever had. Made with sprouted grains, sprouted legumes and sprouted seeds, and without any unpronounceable ingredients, these tortilla chips from Way Better Snacks are not just wonderfully crunchy and tasty, they're about as guilt-free a snack as you can get — check out their ingredients page. Terrific not only with the guacamole, I've enjoyed these chips numerous times for making nachos or just for snacking on as is. I did receive a sample of these chips from Way Better, but quite honestly I've added them several times to my own shopping list after finishing what was already a generous sample to begin with.
And now, not only did I get to enjoy these chips, but Way Better is also going to give THREE of my U.S. or Canadian readers a box containing FIVE different bags of their tortilla chips from blue corn, multigrain, sweet chili, sweet potato and black bean.
The contest will run until November 11th and is open to readers in Canada and the US. Entering is easy. All you have to do is leave a comment on this post and mention your favorite way to serve up tortilla chips. I also invite you to follow my facebook page, but that's not necessary to enter the giveaway. Please do leave your email address with your comment if you don't have one associated with your blog or don't have a webpage so I can contact you should you win the random draw.
Note: I received some samples of these chips for possible review and loved them. After my verdict, I worked with a company representative to offer a giveaway to my readers. The opinions expressed here are my own as is the recipe.
 Spicy Pesto Guacamole Spicy Pesto Guacamole | |||
| Recipe by Lisa Turner Cuisine: Mexican Published on October 28, 2013 Creamy, spicy and tangy homemade guacamole with a delightful and fragrant basil pesto
Pesto:
|
More dips and spreads from Lisa's Vegetarian Kitchen you are sure to enjoy:
Kalamata Olive Tapenade
Spicy Red Pepper Hummus
Red Lentil and Toasted Walnut Tapenade with Olives and Sun-Dried Tomatoes
Corn and Pinto Bean Dip
On the top of the reading stack: the stacks are scattered about at the moment
Audio Accompaniment: A Person Disguised as People
الأحد، 27 أكتوبر 2013
HOW TO MAKE SUGAR SYRUP FOR SWEETS (VIDEO POST) | DIWALI SWEETS RECIPES
Hi friends ,
I wanted to make this post on "How to make sugar syrup for various Indian sweets with stepwise pictures" but i couldn't.Even this time i am doing post in the last minute.Sorry for that:(My parents are here and i was busy in attending family functions.Diwali is nearing our door steps. I hope most of u would have started trying diwali sweets and snacks. Many of u would have got it right and some people would have lost due to sugar syrup. Here is a video post for those who want to learn and see the different stages of sugar syrup. Last year i made a post on sugar syrup consistency with step by step pictures.. From that time i wanted to post a video to help beginners like me.I am happy that i could make it at least now
In this post , i have given 3 videos . One for “How to remove the dirt /scum from sugar” and another one for "Different consistencies of sugar syrup” and the third one for “Jaggery syrup consistency for adhirasam”.
After taking so many videos , i am satisfied with this one and posted here. As i had camera in one hand , i couldn’t use both the hands for mixing and testing the syrup.I usually check the syrup by touching the syrup from the corner or back of the ladle. Here i have not mentioned the time taken for each consistency as i switched off the flame every time to take videos for each consistency.Roughly it takes 3-4 minutes( in medium flame) right from switching on the stove to reach half string .After that it took 1-2 minutes for reaching further consistencies.I’ll try to update the timings soon. I used 1 cup of sugar and 1/2 cup of water to make the consistencies reach very slowly. But it takes lesser water than this quantity.
Thanks for watching these videos. I hope these videos are helpful for beginners to understand the consistencies to certain extent.Keep practicing. U’ll become the master
Thanks for watching these videos. Hope it is understandable and useful ! .Keep these videos as reference and practice on ur own. U’ll get it right for sure
Wish u all a very happy and safe diwali
الجمعة، 25 أكتوبر 2013
Mushroom Masala (Succulent Mushrooms with Tomatoes and Spices)
Mushrooms of any shape and variety are welcomed with open hands and a ready fork in my kitchen, and when I spice them up, as I did in this curry, bliss enters the equation.
This happens to be an ideal curry to serve alongside some savory bites, such as samosa or pakora. It works just as well as any sauce that you might make on the side to go along with your favorite savories. Needless to say, it is also divine served as a side with dal, rice and any Indian flat bread that you might fancy. My only regret is that I didn't double the recipe. Surely this dish will now become a staple in my kitchen.
Note: The yogurt in this dish is purely optional, so this dish is easily vegan-friendly. Coating the mushrooms with yogurt does however add a nice touch and helps them brown but I don't think there would be a appreciable difference. Don't let the list of ingredients intimidate you — I assure you it's really an easy dish to prepare.
 Mushroom Masala (Succulent Mushrooms with Tomatoes and Spices) Mushroom Masala (Succulent Mushrooms with Tomatoes and Spices) | ||
| Recipe by Lisa Turner Cuisine: Indian Published on October 25, 2013 Plump, tender succulent mushrooms simmered in a colorful and flavorful tomato curry sauce
Sauce:
|
Best-Ever Mushroom Sauce
Mushroom Curry
Mushrooms Paprika (Houby Paprikas)
Mushroom Risotto
Audio Accompaniment: Minilogue
On the top of the reading stack: The Great Vegan Bean Book: More than 100 Delicious Plant-Based Dishes Packed with the Kindest Protein in Town! - Includes Soy-Free and Gluten-Free Recipes!
الأربعاء، 23 أكتوبر 2013
Roasted Broccoli with Miso-Tahini-Tamari Sauce
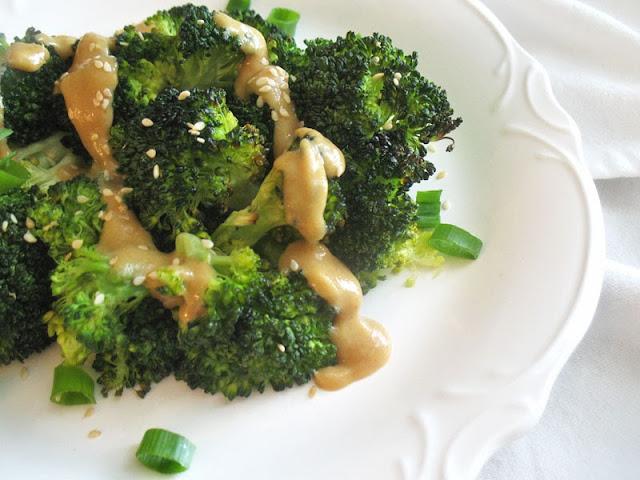
Good for you? Of course, and I'll happily munch on a few raw florets or pieces of the crunchy stalk myself, but broccoli is one of those vegetables that seems to need a little help to make it more appetizing for many people. Fortunately, that's really easy to do by roasting it and dressing it with a simple sauce.
Roasting broccoli brings out a lively sweet flavor that you may never know the vegetable had — far more intense than the slightly washed out taste of steamed or broiled broccoli. And roasting it also brings out an attractive vibrant green color and pretty contrasts in the slightly charred tips that make broccoli an even more appealing vegetable to put on the plate.
A plate of roasted broccoli may be quite appealing as it is, as far as I'm concerned, but after having gone through the only very slight trouble of roasting it I like to enhance it with a drizzle of a fresh and equally trouble-free sauce, like this easy-to-make, no-cook and big flavor Asian-style made with miso, tahini and tamari sauce and spiked with fresh ginger and a little cayenne for a bit of a kick. So simple and nourishing besides, you can put the sauce together while the broccoli is roasting for a delicious and healthy plate that takes no more than 30 minutes from start to finish. I served this with pan-fried teriyaki mushrooms and cashews for a lovely and simple light dinner.
You'll also have plenty of sauce if you're relatively sparing — enough to roast a second broccoli head or a head of cauliflower to go with it later in the week, as the sauce will keep for a week refrigerated in a tightly sealed container.
 Roasted Broccoli with Miso-Tahini-Tamari Sauce Roasted Broccoli with Miso-Tahini-Tamari Sauce | |||
| Recipe by Lisa Turner Cuisine: Asian Published on October 23, 2013 Quick, easy and attractive, roasted broccoli is dressed with a nourishing and tasty Asian-style miso and tahini dressing for a great light meal
Ingredients:
|
Other broccoli recipes you will enjoy:
Broccoli-Cauliflower Mornay
Brown Rice and Blue Cheese Gratin with Cauliflower and Broccoli
Curry-Laced Potato, Carrot and Broccoli Soup
On the top of the reading stack: The Southern Vegetarian Cookbook
Audio Accompaniment: Reference
الثلاثاء، 22 أكتوبر 2013
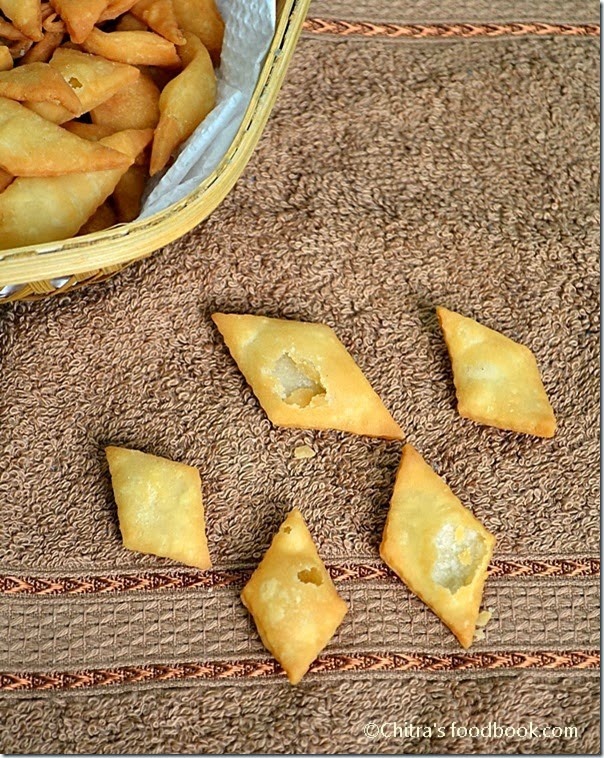
SPICY DIAMOND CUTS | SAVOURY MAIDA BISCUITS RECIPE – DIWALI SNACK RECIPES
Maida khara biscuit /savoury maida biscuit is a very easy and tasty diwali snacks recipe..I learnt this recipe from my MIL.My mom makes a similar one called “thukkada”,Tirunelveli special snack with wheat flour. I’ll share it soon.This one is with maida.I hope most of u make this snack at home. Generally we all add red chilli powder and the color of this biscuit would be golden brown. I told my mil that i wanted white colored chips.She told me to use green chillies instead of red chillies.As she said , my biscuits were half white in color and not red/golden brown. Thanks a lot aunty
1 cup - 200ml
|
TIPS
- Oil should be luke warm and not too hot.Vanaspathi/dalda can be used instead of oil. If so use 3 tbsp..
- Dough should not be sticky. It should be soft and pliable.Dust with maida while making chapathi. Roll chapthis thinly to get a crispy biscuit.
- Deep fry in low to medium heat oil to get crispness as well as color.
- These biscuits tastes great by next day .It needs minimum half day for all the flavours to infuse well.

















 Print this recipe
