الجمعة، 30 سبتمبر 2016

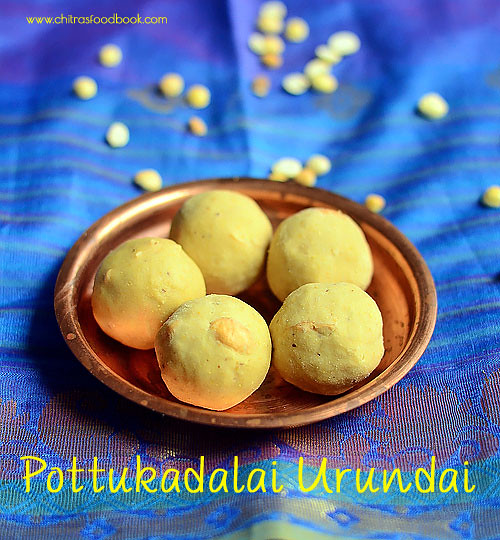
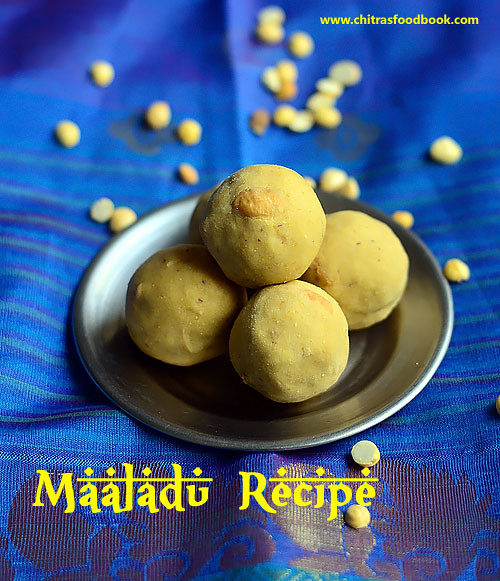
Maladu Recipe(Roasted Gram Ladoo) – Pottukadalai Urundai

Maaladu recipe
Maladu/ Maa ladoo (Fried gram dal laddu Or roasted Gram ladoo in English) is one of the very popular and easiest laddu recipe in South India especially in Tamil nadu. Some people call it as Pottukadalai urundai or pottukadalai ladoo as well. It can be made quickly in few minutes. When I was thinking of some easy Navratri sweets to distribute to the guests, ladoo recipes came to my mind. Ladoo is one of the best crowd pleaser sweets and this maa ladoo is a kids friendly snack, healthy sweet too. I have made this with sugar and nuts. You can even use jaggery, roasted raisins to make it more healthy.Friends, do try this easy laddu recipe during this Navarathri along with a sundal variety.Offer to God and distribute it to your friends along with thamboolam. Ok, Lets check how to make maaladu recipe with step by step pictures.


Pottukadalai urundai

Maaladu recipe - Fried Gram dal laddu


Maaladu recipe - Fried Gram dal laddu Maaladu/ Maa ladoo - Ladoo made with roasted gram. Easiest laddu recipe ever !
Cuisine: Indian
Category: Sweet
Serves: 5 nos
Prep time: 2 Minutes
Cook time: 5 Minutes
Total time: 7 Minutes


INGREDIENTS
1 cup - 200ml
  • Roasted gram/Fried gram dal/Pottukadalai - 1/2 cup
  • Sugar - 1/4 cup
  • Cardamom seed - 1 - 2 nos
  • Melted ghee – 2 to 2.5 tbsp
  • Cashews - 4 nos ( Break into pieces)
METHOD

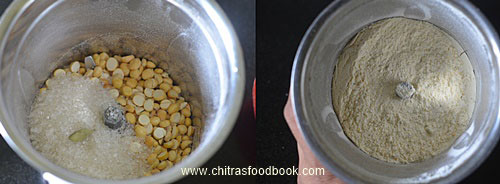
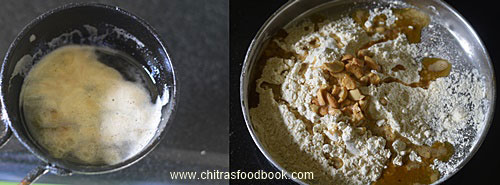
  • In a dry mixie jar, take the measured fried gram dal, sugar and cardamom. Powder nicely. Transfer to a plate.
    maa ladoo recipe
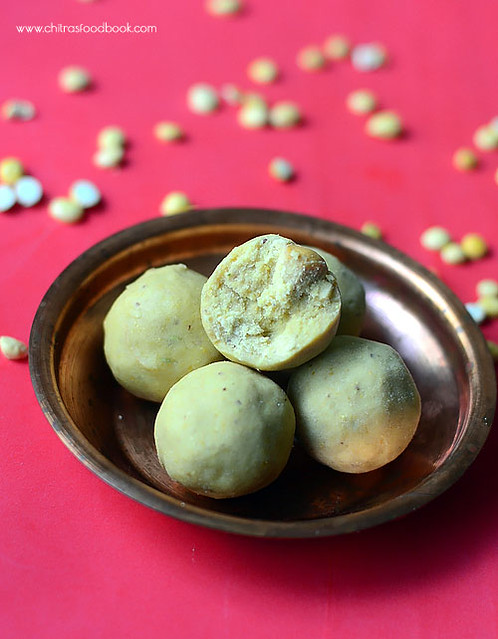
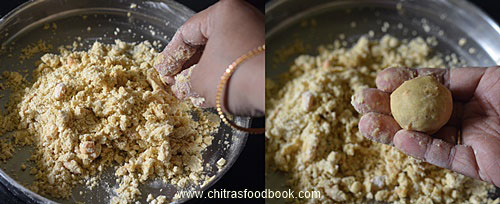
  • In a small kadai, heat ghee and roast the broken cashews till golden in color. Add the cashews along with ghee to the powdered dal. Mix well with a spoon. Remember the mixture will be hot to touch. Once it turns warm and bearable, shape into small balls and make ladoo. Arrange in a plate and give a standing time of 30 minutes. Initially ladoo may look slightly yellow in color. As time proceeds, it will look white. Serve and enjoy !!
    maa ladoo recipe
     maaladu recipe

Try this easy laddu recipe and enjoy at home !
Maaladu recipe

الأربعاء، 28 سبتمبر 2016

Bread Halwa Recipe – How To Make Bread Ka Halwa

Bread halwa recipe
Bread halwa came to my mind when I saw few leftover bread slices in my kitchen.I am making this easy halwa recipe for the second time.First time I tried bread halwa without milk by adding sugar syrup and ghee.It was good in taste but not so rich.Then I watched few bread halwa video recipes where they added khoya or condensed milk instead of milk. I felt that If I had added Khova/mawa, the taste would have been much better. But this time I prepared bread halwa with milk and followed a different procedure as Khoya is not easily available in my place. I will make a post adding khoya soon. For this recipe, I followed Tarla Dalal and used less milk & ghee when compared to other bread halwa recipes on net.It came out really well and satisfied my expectancyPeace Sign.Its process and making is so easy.I am sure its a rich, quick, Indian style dessert recipe made with easily available ingredients to serve your surprise guests and a good choice to use leftover dried bread slices.Kids would love it for sure.You should eat it hot or warm to enjoy its real taste. If you want to make a super rich and tasty bread halwa, you can deep fry the bread pieces in ghee just like double ka meetha or add ground cashew+ badam paste to the halwa.For variations, you can try this halwa with rusk and bread crumbs too. But adjust the quantity of milk and sugar. Ok, Lets see how to make bread halwa recipe with step by step images and a video.
Check out my Shahi tukda recipe – Low calorie version !


Bread halwa - Video recipe

Bread halwa recipe

Bread halwa recipe


Bread halwa recipe How to make bread halwa - Easy version !
Cuisine: Indian
Category: Dessert recipes
Serves: Serves 2
Prep time: 5 Minutes
Cook time: 10 Minutes
Total time: 15 Minutes


INGREDIENTS
1 cup - 250ml
  • Milk bread slices – 6 nos ( I used Spencers bread)
  • Sugar – 4 tbsp
  • Milk – 1/2 cup
  • Cashews and badam - a fistful ( chopped)
  • Melted Ghee – 1/4 cup
  • Cardamom powder – 1/4 tsp
METHOD

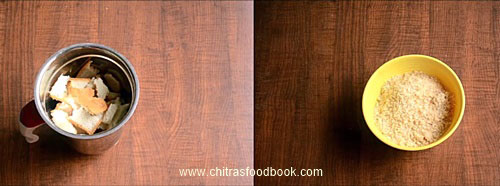
  • Take 6 slices of milk bread ( I used 3 days old bread) and chop into small pieces roughly. Grind to a fine powder. Set aside in a bowl. ( Do not use too soft n fresh bread. You can't powder it.In that case, microwave it for a minute and then powder it.)
    Bread halwa recipe
  • Heat 1/4 cup of ghee in a kadai. Roast sliced cashews and badam till golden brown. Remove in a plate.
    Bread halwa recipe
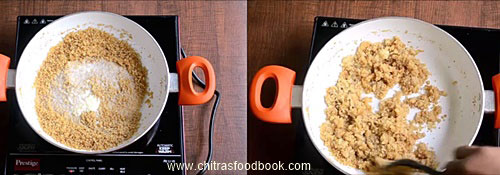
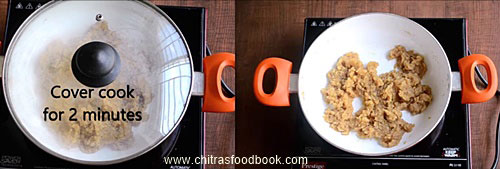
  • To the remaining ghee, add the powdered bread.Roast well for 2-3 minutes till you get roasted aroma. To this, add 1/2 cup of milk and 4 tbsp of sugar. Mix well till sugar melts and milk is absorbed by the bread. Mixture will become thick and wet. ( If you feel the mixture is too dry, add little more milk Say 2 tbsp) Cover and cook the mixture for 2 minutes.
    Bread halwa recipe
    Bread halwa recipe
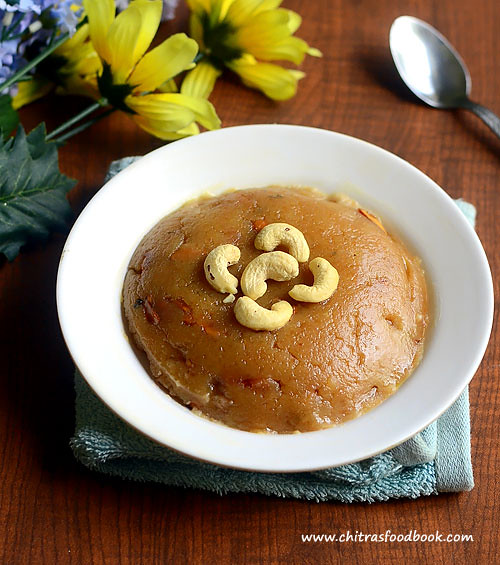
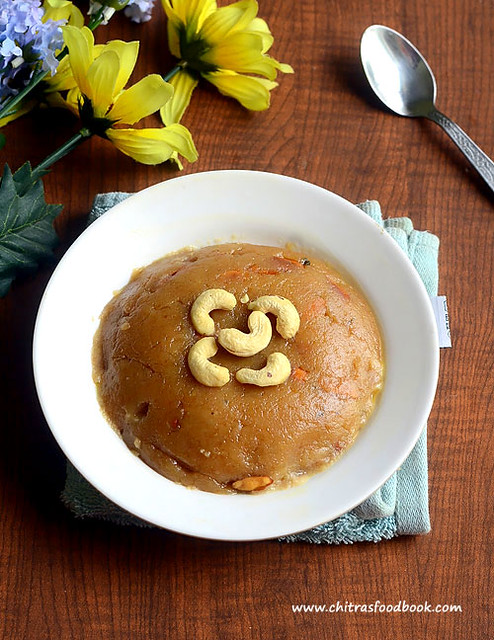
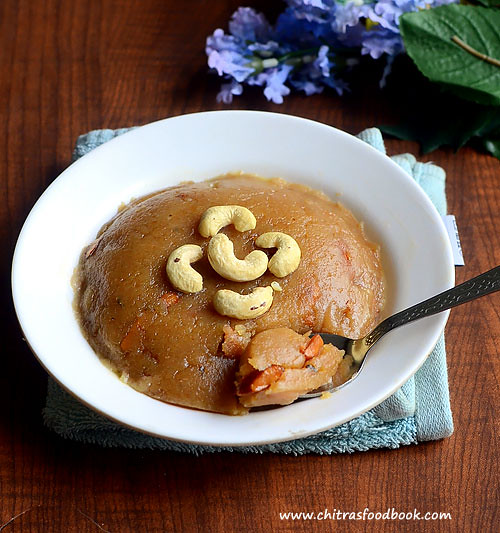
  • After 2-3 minutes, open the lid.Mix well and add cardamom powder, roasted nuts. Keep mixing till the mixture becomes thick, shiny and starts to leave traces of ghee in the sides of pan. It will be non-sticky to touch. Transfer to a bowl and serve hot OR press the halwa to make shape. Invert in a plate and serve warm or cold. Remember, this halwa tastes the best when served hot /warm.
    Bread halwa recipe
    Bread halwa
Enjoy !

Note
  • No need to remove the sides of bread.The color of this halwa looks brown as I din’t remove the sides. If you remove the sides, the color of halwa may slightly change.
  • Add more sugar according to your taste buds.
  • Do not reduce the quantity of ghee. It may change the flavor and consistency.
  • Instead of adding roasted nuts, you can try adding cashew + badam paste along with sugar to get more richness.
Do try this easy, yummy bread halwa and enjoy !
Bread halwa

الاثنين، 26 سبتمبر 2016

Cooking Tips For Working Women – Indian Cooking Ideas

Cooking tips for working women
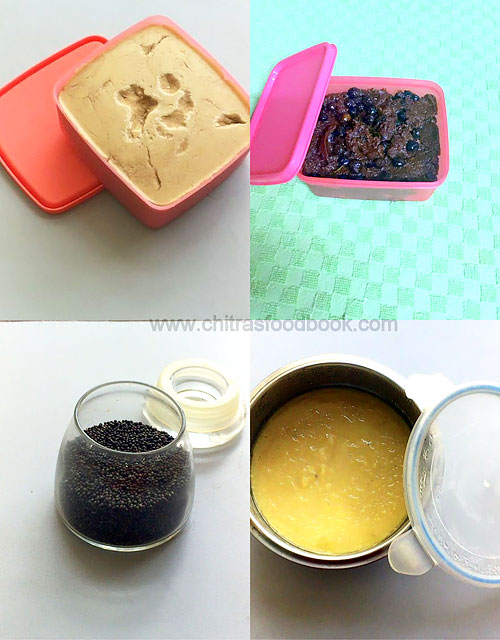
Friends, this post is all about useful cooking tips for Indian working women, beginners in cooking, bachelors, stay at home moms with babies in hand and for house wives who wish to finish the morning chores quickly and easily without any tension .These pre-preparation ideas would help you feel relaxed and manage to do quick and easy cooking during the busy, hectic weekdays. Recent days I have been getting mails to share some simple lunch menu ideas for busy weekdays by spending less time in kitchen. Very soon I will start a lunch menu series suggesting some easy and healthy Indian lunch recipes for daily cooking. Before that, I wanted to make a post about useful cooking tips & pre preparations to make the job easier. As I have worked for an year after marriage, I have seen & heard from my colleagues about the difficulties in managing home and career.Time management plays a major role here. For me, there was no problem at all as I was in a joint family. My in-laws did all the household chores and supported us very well.In this present day nuclear family setup, many people does not get the luxury of moral & physical support of elders to share cooking and other household responsibilities. So it would be really tiresome and stressful if we don’t plan things ahead. I hope these simple, handy tips and tricks would  be helpful to make the kitchen chores easier and stress freeHappy. Don’t worry, these pre-preparations won’t eat your weekend’s relaxing hours. You may need to spend just 2-3 hours to finish all these works or you can get the help of your servant maid to finish this job quickly. This will save lot of time during busy weekdays. Before going to this post, I must thank my friend Shalini for helping me to frame these points as she is regularly following these things.Love you lots dear Love Struck. She also shared some pictures from her kitchen. I have made them as a collage and given below. Friends, I hope this post would be useful to plan & manage things easier. Working women and bachelors, please share your valuable tips you follow in your daily cooking in the comments section. It would be of great help for the people who read this post. Thanks in advanceHappy. Ok, now lets see some smart cooking tips and secrets to be a super wife and momWinking.This post is with more & more of stories and essays. Please bear with meTongue.

DISCLAIMER : All the points I have shared below is based on the ideas I got from my working friends. I have also gone through some websites and magazines for more tips. Please modify or skip the suggestions as per your wish & need. You need to have a refrigerator, pressure cooker and some good air tight containers to make & store the dishes.

Cooking tips for working women Indian

SOME USEFUL GADGETS

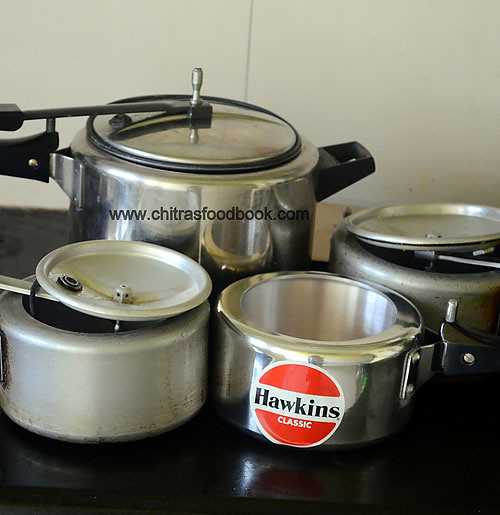
According to me a 2 burner gas stove, 3 small pressure cookers, few ladles, mixing bowl and a mixer grinder is enough to cook even for 10 people. Pressure cooker is my biggest strength. It helps to cook any food quickly and easily. I have shared the pictures of  my cookers above for your reference.I use 3 Hawkins small sized pressure cookers ( 1.5 liters and 2 liters) and one 5 liter cooker. I use 2 of them for lunch preparation and 1 for cooking breakfast. I use the big sized cooker only for my guest. I will share how I use these cookers for quick cooking in my upcoming lunch menu series.

Cooking tips for working women - Indian
Pic courtesy – My friend Shalini
PLAN AHEAD

Make a weekly timetable for the menu according to your family's preferences. Keep a list of all the dishes you want to cook in the following week and write down all the required ingredients so that you can purchase all the groceries and vegetables as per the list.If you don’t like to spend time in grocery shopping, go for a monthly purchase. Refer my “Monthly Grocery list” post for the idea. You can buy vegetables once in 10 days and store them in refrigerator.  I follow this every month to save my time spent in shopping.

GRIND THE BATTER

This point is especially for people who rely on Idli dosa recipes. Grind Idli dosa batter, Appam batter, Adai batter during weekend and store it for a week. You can even make millet idli, dosa batter and store it for one day. Idli, dosa batter is a real savior in Indian cooking. You can make idli, dosa, uthappam, Paniyaram for breakfast and dinner as well. Similarly you can also grind and keep batter for dosa varieties like Set dosa, sponge dosa, poha dosa etc. It will help you for sure. My friend Shalini's maid helps her to grind varieties of idli and dosa batters during every Sunday for the whole week's use. Even though I am a house wife, I too grind all the batters during weekends and use it mainly for the week's breakfast because I don't want to hit my head thinking about breakfast recipes during busy morning hours. Generally I make Instant dosa varieties, Instant idli varieties like oats idli, rava idli, upma recipes like wheat rava upma, vegetable rava kichdi, millet recipes, Ragi roti, Phulka or stuffed paratha varieties for my dinner. I try to avoid consuming rice at night.
Check out my Idli varieties post for varieties of idli,dosa batter. Check out my easy dosa batter recipe too ! For other options, you can make instant dosa varieties, upma varieties for breakfast or dinner.

MAKE ROTI DOUGH

Make roti dough well in advance and refrigerate it. The kneaded dough will remain fresh for at least 2-3 days. You can make use of this dough for making roti , poori and stuffed paratha. Remember to store in an air tight box. Take only the required quantity of dough from the box and immediately refrigerate the leftover dough.  But try to use it within 3 days.

PREPARE THE SIDE DISHES

When we have idli, dosa batter in our hand, we start to hit our head for making side dishes. That’s quite natural. So prepare some side dishes like tomato thokku without onion, tomato thokku with onion, onion tomato chutney, garlic chutney, Raw onion chutney, Idli Podi/Gun powdergreen chutney without coconut based on your preference and store in an air tight box. It will stay good for a week. You can use these chutneys as side dish for idli, dosa, appam and roti or use it as sandwich spread too. I usually make onion tomato chutney and stock it for my daughter’s breakfast and lunch box. For roti, you can prepare side dishes like capsicum-tomato curry, tomato thokku, pickles and even jam for your kids.  You can even cook Dal for making dal tadka or dal curry and refrigerate for 3 days. If you love to have pasta, you can make white sauce & pasta sauce ahead and store them.

Check out my 50 chutney recipes for more ideas.

For quick lunch, you can prepare and store Pulikachal paste/Puliyogare paste, Lemon rice paste, coriander thokku, thogayal varieties, Vathakuzhambu paste and podi/powder varieties like Dal powder/Paruppu podi, Dhania/coriander seeds powder, Angaya podi, Sundakkai podi, Poondu podi/Garlic powder, coconut podi etc.

Kuzhambu varieties like vatha kuzhambu, poondu kuzhambu, milagu kuzhambu, kara kuzhambu, tomato gravy, brinjal gravy stays good for even 2 -3 days with or without refrigeration. So you can make them once or twice in a week apart from sambar and rasam.
Check out my 30+ kuzhambu varieties post to get the links for the above recipes.

READYMADE BREAKFAST MIX

Roast rava and keep in bulk. It will help you to make upma quickly. You can also make Rava/sooji upma mix, Poha mix, pongal mix, rice upma mix in advance and store in the freezer. It helps you to make your breakfast or dinner quickly and easily. Always keep a packet of bread in stock for making quick sandwich or toast.

CHOP THE VEGETABLES AND FREEZE

Vegetables like carrot, beans, peas, cauliflower, sweet corn, cluster beans, spinach, broad beans can be diced or chopped & frozen for a week.If you want to use the vegetable for the next day morning, you can simply refrigerate the chopped veggies. Do not freeze them. Usually I keep frozen peas and frozen corn always in stock. Grate 2 coconuts and store 3/4th of the quantity in a zip lock cover.Deep freeze it. Store the remaining coconut in refrigerator. Just thaw it for few minutes before use or use warm water to grind the coconut. Take the required quantity of coconut, refrigerate it and keep the remaining in freezer immediately. De-stem coriander, curry leaves and mint leaves and store in an air tight box. Mostly I use palak leaves during weekdays as it is easy for cleaning, chopping and cooking. During weekends, I buy other greens/Keerai varieties, clean them and store in a ziplock cover.Do not chop onions and store. It attracts more bacteria when its cut.
Apart from chopping veggies, you can make some lemon juice and store in a glass bottle, peel garlic cloves, Peel &finely chop ginger, peel small onions and keep them ready for usage. But remember to store the chopped vegetables in a clean zip lock cover and refrigerate.

COOK PUREES, PASTE & LENTILSCook toor dal or moong dal in large quantity and store in a box for 2-3 days use. You can use them and make sambar instantly. Soak beans like rajma,dried peas and chana for 8 hours and refrigerate them for later use. You can easily cook a quick meal like pulao,  biryani or gravies & even make a healthy salad with it. Sprout green gram and other legumes based on your liking and keep them in the freezer. So whenever you want to have some salad, you can semi cook and have them ready.
Grind and keep tomato puree, homemade tamarind paste, ginger-garlic paste, onion paste, sauce varieties ready in hand. You can also keep some readymade seasoning, green chilli paste.Some people keep some sauteed, browned onions too. I have seen some of my friends making onion-tomato puree adding masala powders and keep the base ready for making North Indian gravies. If you have enough time in hand, you can even make two to three varieties of curries and refrigerate them.
Vegetables like potato, cauliflower, sweet corn and peas can be boiled in advance and refrigerated for later use. You can even cook pasta and store them in the fridge.
Keep curd, buttermilk, paneer, cheese and other essential milk products ready in hand so that you can use it for raita, buttermilk/ Chaas, lassi, gravies and sandwich.

TO DO LIST
I have summarized the above points and shared a TO-DO list for weekend. Do this according to your preference and time in hand.
  1. Grind idli, dosa batter and other batters if grinding.
  2. Make chapathi/ roti dough.
  3. Soak pulses & lentils like rajma, chana/ kabuli, peas.
  4. Chop all the required vegetables. Make frozen peas and sweet corn.
  5. De stem green leaves/Spinach, coriander leaves, mint leaves and curry leaves.
  6. Cook toor dal and moong dal in large quantity for making sambar & dal for roti.
  7. Make Tamarind paste, Tomato puree, Puliyogare paste, Tomato thokku, homemade powders like dal powder, curry leaves powder, coriander leaves thokku, thogayal varieties, Lemon rice mix, Chutney varieties according to your choice. ( I have shared the links in the above sections. please check it)
  8. Make white sauce and pasta sauce for cooking pasta recipes.
  9. Prepare rava/sooji upma mix, poha mix, dosa mix, pongal mix.
  10. Make onion tomato base for North Indian gravies.
  11. Purchase week’s grocery and vegetables.
  12. House cleaning if needed Happy.
Friends,I  hope this post will be helpful to you. Thanks for visiting this page !!

الأحد، 25 سبتمبر 2016

Turmeric Spiked Red Lentil and Spinach Dal

Turmeric Spiked Red Lentil and Spinach Dal

Turmeric is one of nature's most powerful healing and anti-inflammatory foods, which makes it convenient for those of us who like to cook Indian food that it is also such an essential ingredient in curries. Earthy, slightly bitter, and ranging from aromatic to pungent in taste, turmeric is difficult to take just on its own, but it makes for a delicious background to other Indian seeds and spices.

This simple, nourishing and easy-to-digest red lentil and spinach curry is seasoned with a flavorful variety of aromatic seeds and spices including fennel and fenugreek seeds and, if you can get them, peppery nigella seeds. As such, this creamy curry is spiked with a little more than the usual amount of turmeric, making it a great way to get more of this wonderful food in your diet.


Turmeric Spiked Red Lentil and Spinach DalTurmeric Spiked Red Lentil and Spinach Dal
Recipe by
Cuisine: Indian
Published on September 25, 2016

Simple, creamy and nourishing red lentil and spinach curry seasoned with Indian seeds, spices and turmeric

Print this recipePrint this recipe

Ingredients:
  • 1 cup dried red lentils, rinsed and drained
  • 2 teaspoons sesame oil
  • 1 teaspoon brown mustard seeds
  • 1 teaspoon cumin seeds
  • 1/2 teaspoon nigella (kalonji or black onion) seeds (optional)
  • 1/2 teaspoon fenugreek seeds
  • 1/2 teaspoon fennel seeds
  • 1 teaspoon turmeric
  • 1/2 teaspoon cayenne
  • 1/2 teaspoon amchoor (dried mango) powder
  • 1/2 teaspoon paprika
  • 1/2 teaspoon asafetida
  • 1 teaspoon fresh ginger, minced or grated
  • 1 small carrot, finely chopped
  • 2/3 cup coconut milk
  • 2 cups water, or more as needed
  • 1 teaspoon sea salt, or to taste
  • 1 1/2 cups baby spinach
Instructions:
  • Heat the oil in a medium heavy-bottomed saucepan over medium-high heat. When hot, add the mustard seeds, cumin seeds, nigella seeds if using, fenugreek seeds and fennel seeds. Fry until the seeds begin to splutter and pop. Turn the heat down to medium and stir in the turmeric, cayenne, amchoor, paprika, asafetida, ginger and carrot. Stir for another minute or two.

  • Stir in the lentils, coconut milk and water. Bring to a boil, reduce the heat to medium-low, and cover. Simmer until the lentils are tender and falling apart — about 20 minutes. Add a little more water for a soupier consistency.

  • Stir in the salt and add handfuls of spinach, stirring as you go, until wilted. Taste for seasoning and serve hot with rice or flatbreads.

Makes 4 servings

Red Lentils and Spinach Dal

This is my contribution to Meat Free Mondays, a weekly event hosting by Jacqueline of Tinned Tomatoes, and also My Legume Love Affair, a monthly event celebrating the goodness of legumes, administered by me and kindly hosted this month by Nupur of The Veggie Indian.

Other lentil dishes to enjoy from my kitchen:
Spicy Lentil Patties with Sun-Dried Tomatoes
Thai-Style Creamy Coconut Lentil Mushroom Soup
Curried Lentil Vegetable Soup with Roasted Chickpeas
Mixed Dal Palak (Lentils with Spinach and Tomato)

On the top of the reading stack: Superfoods 24/7: More Than 100 Easy and Inspired Recipes to Enjoy the World's Most Nutritious Foods at Every Meal, Every Day

الجمعة، 23 سبتمبر 2016

Chola Poori Recipe – How To Make Chola Puri

Chola poori recipe
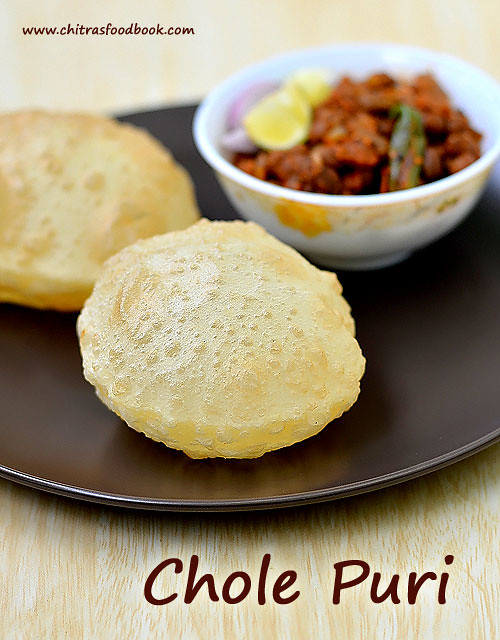
Recently I tasted a big sized, puffy Chola poori with chana masala in Hotel Saravana bhavan,SalemWinking.Actually speaking, Punjabi special chole bhatura was in my try list for years. But I haven’t tasted it so far.Soon I must taste it in North Indian restaurants to know its actual taste and then experiment at homeWaiting. I think Chola poori must be an adaptive version of chole bhatura in South. So I tried this Tamil nadu style chola poori at home. I was thinking chola poori is called as chole bhatura in Hindi. But there are variations in the ingredients for dough and preparation for making bhatura and chola poori. For making bhatura yeast, baking powder or soda water is used whereas chola puri is made without yeast or any raising agent. Only curd/yogurt is used. Bhatura dough needs a resting time of 3-4 hours whereas this one needs just 30 minutes. The method of preparation of chola poori is quite similar to our plain wheat flour poori. All the tips and tricks we follow for wheat flour poori is applicable to this as well.I got this awesome recipe from this blog.I have tried it thrice during weekends.It comes out very well with a puffy looking, soft texture. We all know the best, popular side dish for chola poori is chana masala or chole masala.So I prepared Punjabi chole following this recipe from my Punjabi thali post and served with chola poori. It was a yummy combo.We loved it to the core. Friends, do try this easy chola poori recipe. Don’t mind about calories, just enjoy with chana masalaLove Struck. Serve it for weekend breakfast or dinner. Ok, Lets see how to make Chola poori recipe with stepwise pictures. I will try to make a detailed video post soon.
Check out my beetroot poori and Palak poori recipes if interested !
Chola poori

Chola poori recipe


Chola poori recipe How to make Chola poori recipe - Delicious breakfast recipe for weekends
Cuisine: Indian
Category: Breakfast/Dinner recipe
Serves: Yields 12-14
Prep time: 30 Minutes
Cook time: 2 Minutes
Total time: 32 Minutes


INGREDIENTS
1 cup - 200ml
  • Maida/All purpose flour - 2 cups
  • Sooji/Rava – 1/4 cup ( Upma rava)
  • Wheat flour/Atta – 1/4 cup
  • Cooking oil - 1 tbsp
  • Fresh Curd/yogurt – 2 tbsp
  • Salt - as needed
  • Water - as needed
  • Cooking oil - to deep fry
METHOD

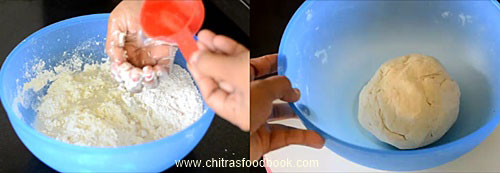
  • In a wide bowl, sift the maida and wheat flour.To this, add sooji, Oil, salt and curd. Mix well with your fingers. Oil and curd should spread well with flour and the mixture looks crumbly. ( Sooji helps to maintain puffiness for long time. Wheat flour helps to make perfect round shape. Oil  & curd is to give softness to the poori)
    How to make chola poori
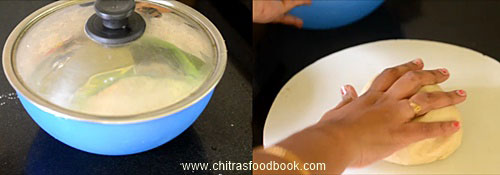
  • Add the required water little by little and make a stiff dough.Dough should be non-sticky, thick and stiff like our usual wheat flour poori.Cover it with a damp cloth. Let the dough rest for 30 minutes.
    How to make chola poori
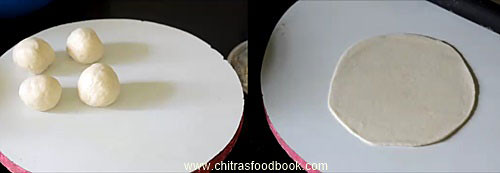
  • After 30 minutes, knead the dough for 2-3 minutes and make it smooth. Make small or big sized balls from the dough as per your wish. In hotels, they serve big sized poori. Roll it slightly thicker than the usual poori. Use wheat flour to dust the balls. Arrange them in a paper or a plate.
    How to make chola poori
    How to make chola poori
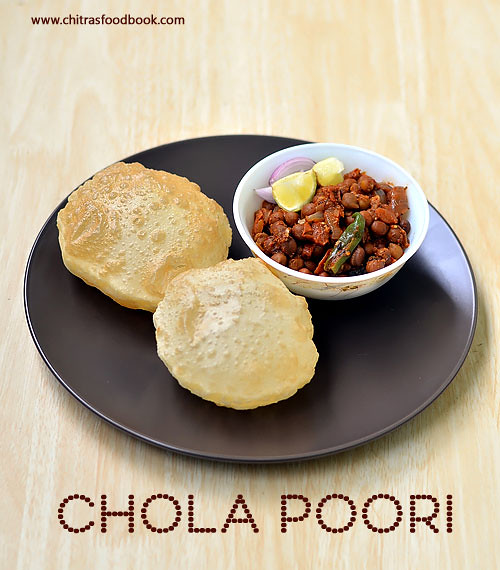
  • Heat oil in a kadai and when it gets heated, drop a pinch of dough to check the oil temperature.The dough should rise immediately to the top. Keep the flame medium high and drop one poori at a time. Poori will puff up immediately. If not, press the poori gently with a slotted ladle. It will puff up. Flip it and cook the other side till bubbles cease.It will look slightly golden in color.The color of poori will change based on the oil temperature. You can find the difference in color or pooris in the main picture. To maintain white colored pooris, switch off the heat after making 2-3 pooris, let the oil cool down slightly. Then heat it and check with a pinch of dough. Proceed as mentioned above and deep fry the poori.Remove the puri in a tissue paper. Drain and enjoy with chole masala or chana masala. Adjust the heat before frying each poori. Make sure oil is not smoking hot. Please check my POORI RECIPE for more details.
    How to make chola poori
    How to make chola poori
Enjoy !
Check out my beetroot poori and Palak poori recipes if interested !

Note
  • Make sure the dough is thick and hard but smooth.It should not be too soft like soft chapathi dough.So add water accordingly.
  • Resting time of 30 minutes is needed.
  • Poori will puff up only when its rolled thick.Thin poori will become like papad. So roll it thick.
  • The temperature of oil is very important to get puffy poori. If the oil temperature is too low,  poori will absorb more oil and does not puff up. If oil temperature is too high and smoky, poori will turn golden brown very soon and cook unevenly.
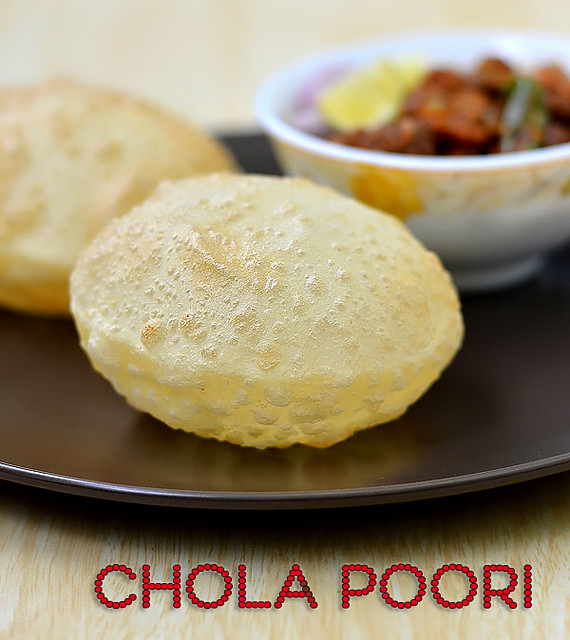
Enjoy this white, puffy chola poori at home with chana/chole masala Love Struck
How to make chola poori at home

الأربعاء، 21 سبتمبر 2016

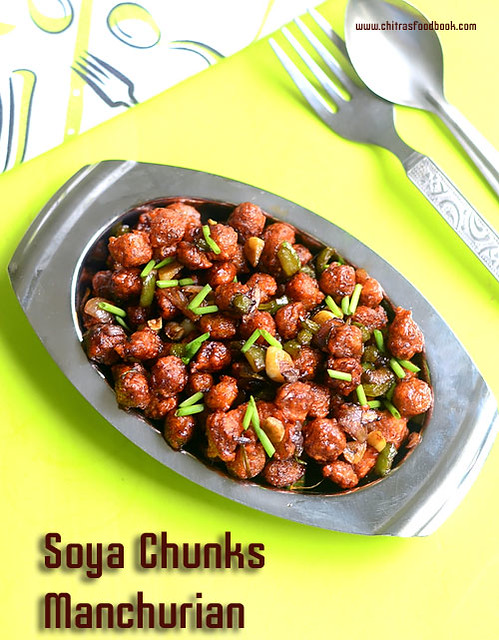
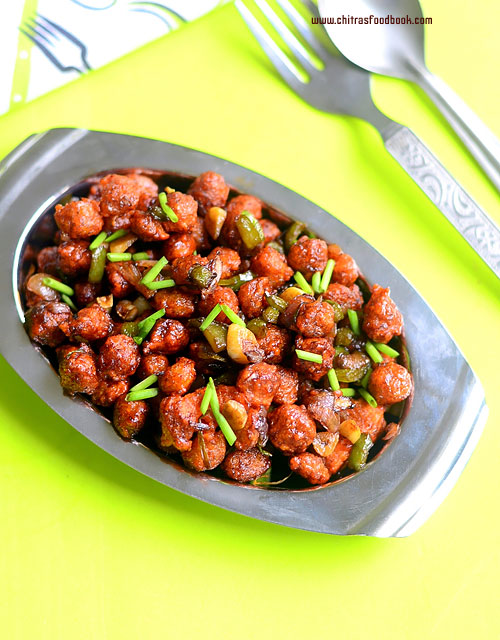
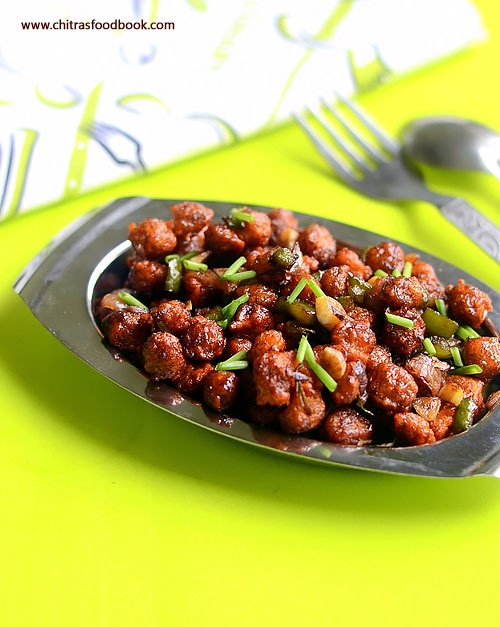
Soya Chunks Manchurian – Soya Chunks Recipes

How to make Soya chunks manchurian/ meal maker manchurian – Dry version with step by step pictures !
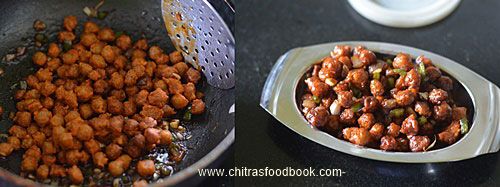
Soya chunks also known as meal maker & soya nuggets is a good source of protein for vegetarians. Usually I add them in biryani. Recently I bought a pack of mini soya chunks(Soya chunks nano) to try some curry or gravy with it. But I got tempted to make soya chunks Manchurian after watching Vahrevah Youtube video. Soya chunks fry came out very crispy like Gobi 65 and tasted great when hot.I made a dry Manchurian sauce and it stayed crispy for sometime even after adding in gravy. But It became slightly chewy and soft after its cooled down. So make and serve it hot to enjoy its actual taste because the moisture content inside the soya chunks makes it soft soon. Use mini soya chunks for best results.If you use big sized soya chunks, chop it after soaking in water to make a crispy fry. Do try this for your kids. I am sure they will love it. Lets see how to prepare Soya chunks Manchurian also known as meal maker Manchurian with step by step photos !
Check out my other Manchurian recipes

Gobi manchurian

Baby corn manchurian

Idli manchurian

Mixed vegetable manchurian


soya chunks manchurian recipe

Soya chunks manchurian recipe


Soya chunks manchurian recipe Soya chunks manchurian recipe - Meal maker manchurian - Soya chunks recipes
Cuisine: Indian
Category: Snacks
Serves: Serves 2
Prep time: 10 Minutes
Cook time: 20 Minutes
Total time: 30 Minutes


INGREDIENTS
1 cup - 200ml
  • Mini Soya chunks - 1 cup (Soya Nano, I used double horse brand)
  • Water – 3 cups ( to boil soya chunks)
  • Maida/All purpose flour - 3 tbsp
  • Corn flour - 1/4 cup
  • Red chilli powder - 1 tsp
  • Ginger-garlic paste - 1 tsp
  • Cooking oil – to deep fry
  • Salt - as needed
For manchurian sauce
  • Cooking oil - 1 tbsp
  • Garlic cloves - 5 nos ( finely chopped)
  • Big onion - 1 no ( finely chopped)
  • Capsicum - 1/4 no ( finely chopped)
  • Spring onion - 2 sprig ( finely chopped)
  • Soya sauce - 1/2 tsp
  • Tomato sauce – 1.5 tbsp
  • Red chilli sauce or red chilli powder - 1 tsp
  • Sugar - a pinch
  • Salt - as needed
METHOD

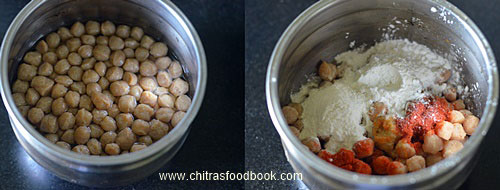
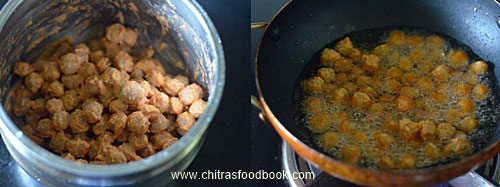
  • Boil 3 cups of water and add the soya chunks in hot water.Let it soak for 10 minutes. It becomes soft and doubles in size. Squeeze the chunks and drain the excess water( If using big sized soya chunks, chop them into small pieces after squeezing the water).Take them in a bowl.To this, add maida, corn flour or rice flour ( OR use 50/50), red chilli powder, g&g paste and required salt. DO NOT ADD WATER. Just mix everything well. The moisture content of soya chunks would be enough to coat the flour. Add more flour if the chunks are not coated properly.
    soya chunks manchurian recipe
  • Make sure the flour is well coated over soya chunks. Let it rest for 10 –15 minutes.
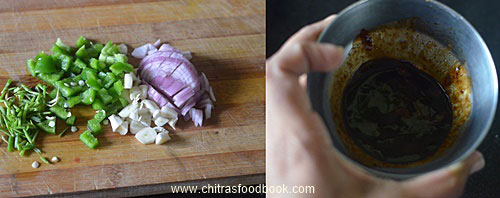
  • In the mean time, finely chop the garlic, big onion, spring onion and capsicum. Set aside.
  • Prepare sauce mix first. For this, take red chilli sauce or chilli powder, soya sauce, tomato sauce, sugar and salt.Mix well.
  •  soya chunks manchurian recipe
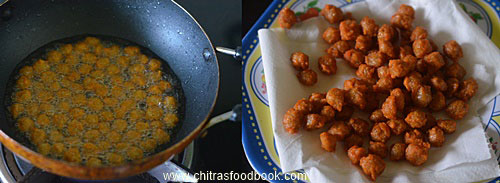
  • Heat oil to deep fry.Drop one soya to check the heat of oil. If it rises to the top immediately, oil temperature is just right. Reduce the flame to medium and drop a batch of soya chunks in a sprinkled manner in oil. Keep tossing them for uniform cooking. Fry them until the bubbles cease and soya chunks turn golden brown with a crispy texture. Remove in a tissue paper. Repeat the same and deep fry all the chunks. If you wish, you can serve this crispy, fried chunks as soya 65 with tomato sauce. Kids would love it. If you want to make manchurian, proceed to the next step.
    soya chunks manchurian recipe
    soya chunks manchurian recipe
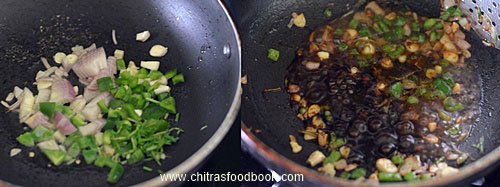
  • Heat oil in a kadai and when it gets heated, add the finely chopped garlic, big onion, spring onion and capsicum.Saute until onion turns transparent. Add the sauce mix. Add little water if needed.Mix well and check for taste. Add more tomato sauce or red chilli powder as per your taste. Add the fried soya chunks.Toss well and remove in a plate. Garnish with finely chopped spring onion or coriander leaves. Serve hot immediately !
    soya chunks manchurian recipe
    soya chunks manchurian recipe
Enjoy !

Note
  • Adjust the quantity of chilli powder as per your taste.
  • You can replace corn flour with rice flour or use 50/50 corn flour and rice flour.
  • Serve hot to enjoy its best taste because  soya chunks becomes chewy and soft after it cools down.

Try this yummy soya chunks manchurian dry at home. You will love it !
meal maker manchurian