الجمعة، 30 نوفمبر 2012

No Croutons Required - The Winner for November


The theme for November was to come up with a vegetarian soup or salad that would be especially suited to grace your holiday table. The entries came in and the winner this time around is Janet who submitted this Warm Balsamic Rosemary Cabbage Salad that is surely a pleaser anytime of year. Congrats and do check out her other offerings.


Jacqueline will be hosting the December edition of No Croutons Required. Check back soon for the theme.

الثلاثاء، 27 نوفمبر 2012

CORIANDER LEAVES CHUTNEY (FOR IDLI DOSA)


I have already posted a green chutney similar to restaurant style. This is my second version. I usually make this for idli. I use mint leaves or coriander leaves and sometimes with both. It tastes great in all the way..I got this recipe from a restaurant style recipes book..U’ll get a nice green color and i am sure u’ll like this a lot..

INGREDIENTS
1 cup - 250ml

  • Grated coconut  - 1/2 cup
  • Green chillies –  2- 3 nos ( add more if u want spicy)
  • Tamarind  - A small piece ( Half seed )
  • Coriander leaves or Mint leaves – 1/2 – 1 cup ( 1 bunch)
  • Turmeric powder – 1/8 tsp
  • Cooking oil – 1.5 tsp
  • Salt & water – as needed

To temper:
  • Mustard seeds – 1/2 tsp
  • Urad dal – 1/2 tsp
  • Red chilly – 1  no (optional)

METHOD

  • Heat oil in a kadai and saute the green chillies  and coriander/ mint leaves. Add turmeric powder , salt , tamarind and saute for a minute.
green chutney 1
  • Finally add the grated coconut, mix well and switch off the flame.Grind to a smooth paste after it cools down..
green chutney 2
  • Temper with the above said ingredients..Serve with hot idli /dosa !!

NOTE
  • This chutney can be made with mint leaves alone or with the combination of both the leaves in equal ratio..It can be made without seasoning too.
  • Turmeric powder gives the green color..Dont forget to add it..


Stuffed Eggplant Poriyal

stuffed South Indian Eggplant

It used to be that eggplant was something I hardly ever considered cooking with, but now that I have started, there is no stopping me. Even my family members who thought of eggplant as mushy and bland are willing to try my creations. Since I started playing around more, I have pretty much stuck with broiling or baking this versatile vegetable, but this time I wanted something spicy and went ahead with stuffing small eggplants with a spicy dry paste of coconut, cashews and lentils and simmering them in a tangy and fragrant tempering sauce. Certainly the most pleasing way I have prepared and enjoyed eggplant yet, and it is just perfect for dinner served with a steaming hot bed of buttered rice.

I adapted this recipe from one of my very favorite vegetarian cookbooks, Dakshin by Chandra Padmanabhan. If I could retain only a few of the books from my extensive collection, surely this would be one of them. Though I have cooked from this book on many occasions, each time I pick it up and glance through the beautiful illustrations, I am tempted again and again to keep exploring the authentic south Indian delights offered up. If you want to know about sambars, rasams, poriyals and kootus, beautiful rice dishes, aromatic spice blends that are an essential element of Indian cooking and just don't me started on the snack and appetizer section, this is the book you surely must have. The desserts and sweets are also too tempting, even for this savory girl.

stuffed eggplant poriyal

Stuffed Eggplant PoriyalStuffed Eggplant Poriyal
Recipe by
Adapted from Dakshin: Vegetarian Cuisine from South India
Cuisine: Indian
Published on November 27, 2012

Eggplants stuffed with a spicy dry coconut, cashew and lentil paste, simmered in a tangy and fragrant sauce

Print this recipePrint this recipe

Ingredients:
  • 1 lb (450 g) small eggplants
Stuffing:
  • 1/2 cup dried shredded unsweetened coconut
  • 1/2 cup raw cashews
  • 1 teaspoon sesame oil
  • 1 tablespoon coriander seeds
  • 1 teaspoon cumin seeds
  • 1 tablespoon urad dal, rinsed
  • 1 tablespoon toor dal or yellow split peas, rinsed
  • 8 dried whole red chilies, broken into pieces
  • 1/2 teaspoon asafetida
  • 2 tablespoons tamarind paste, seeds removed
  • 1/2 teaspoon sea salt, or to taste
  • water as needed
Tempering:
  • 3 tablespoons sesame oil
  • 1 teaspoon black mustard seeds
  • 1 teaspoon cumin seeds
  • 1 teaspoon urad dal, rinsed
  • 1 teaspoon toor dal or yellow split peas, rinsed
  • 2 dried whole red chilies, broken into pieces
  • handful of dried curry leaves
  • 1/2 teaspoon turmeric
  • 1 small tomato, finely chopped
  • water as needed
Instructions:
  • Begin by dry roasting the coconut in a small saucepan over medium heat, stirring or tossing until it is golden brown. Transfer to a small bowl. In the same pan, dry roast the cashews, stirring or tossing until they darken a few shades. Add to the bowl with the coconut.

  • In a heavy-bottomed frying pan, heat the oil for the stuffing over medium heat. When hot, add the coriander seeds, cumin seeds, urad dal, toor dal or yellow split peas, red chilies and asafetida, and stir for 5 minutes. Transfer this mixture, along with the salt, tamarind, and roasted coconut and cashews, to a food processor and process, adding water as needed, to make a thick, smooth and dry paste — be careful not to add too much water.

  • Cut the eggplants lengthwise, taking care not to slice them all the way through. Gently fill and cover each eggplant with the stuffing.

  • Wipe the frying pan clean and heat the oil for the tempering over medium heat. When hot, add the mustard seeds, cumin seeds, urad dal, toor dal or yellow split peas, and red chilies. Stir for 30 to 60 seconds or until the mustard seeds turn grey and begin to splutter and pop. Stir in the curry leaves, turmeric and tomato. Add the stuffed eggplants to the pan with a teaspoon or two of water and cover,. Simmer, gently turning the eggplants occasionally, for 15 minutes or until the eggplants are tender. Serve hot.

Makes 4 servings
stuffed eggplant

More eggplant recipes you are sure to enjoy from Lisa's Vegetarian Kitchen:
Baked Gingered Chickpea Stew with Eggplant and Spinach
Eggplant Quinoa Bites with Pesto
Eggplant and Tomato Caponata

الاثنين، 26 نوفمبر 2012

Aval Pori Urundai, Sweet Appam Recipe | Karthigai Deepam Recipes

Aval pori urundai

Pori urundai and sweet appam are prepared for karthigai deepam in every house.I learnt both these recipes from my MIL. In bangalore, we don’t get aval pori or nel pori . So we used to dry roast the thick aval and make pori urundai.This urundai can also be made using the ordinary puffed rice. It tastes great with both. Recipe & method are almost the same. The ratio of aval pori and jaggery is 8:1.Some people used to add the puffed rice to the jaggery syrup and some do the reverse. My MIL usually adds the jaggery syrup to the roasted poha. Sometimes we keep it as such without making balls ( pori kilari vaipathu).
Sweet appam can be made in many ways.It can be made using rice & coconut OR maida & rava OR wheat flour and rice flour. Here i’ve given the recipe using wheat flour and rice flour which makes the job easier and healthy too.Actually appam has to be deep fried but i make in paniyaram pan due to calorie consciousness ;). It stays soft for long time.
Update: This year I bought aval pori from Gandhi bazaar,Bangalore and made pori urundai. U can find that picture above.


Do try these recipe and share ur thoughts. Happy karthigai deepam :)

Aval pori urundai recipe


Aval pori urundai recipe Pori urundai using aval/poha for karthigai deepam
Cuisine: Indian Category: Sweet Yields: Serves 4
Prep Time: 10 Minutes Cook Time: 10 Minutes Total Time: 20 Minutes
INGREDIENTS
1 cup - 200ml
  • Aval pori –  3.5 cups
  • Grated jaggery - 3/4 cup
  • Water - 1/2 cup
  • Cardamom – 2 seeds ( powdered)
  • Black sesame seeds – 1.5 tsp
  • Fried gram dal – 1.5 tsp
  • Dry Coconut bits – 1 tbsp
  • Dry ginger powder – A pinch ( optional)
  • Rice flour/ghee - for greasing ur hands
METHOD
  • In a heavy bottomed kadai , dry roast the fried gram dal , sesame seeds .Roast coconut pieces in a tsp of ghee..If u are using poha/aval,dry roast thick poha in low flame carefully without changing the color.It may take around 10-15 mins. I roasted it in two batches ( 1/4 cup in each batch)..Roasting in batches helps uniform roasting. Aval will puff up and becomes crispy./Remove and keep it in a broad plate.\
  • If u are using ready made aval pori , u don't have to roast it. Roast coconut bits in a tsp of ghee and set aside.
pori urundai step by step
  • Now put the grated jaggery & the water in the bowl and after the jaggery is melted , strain it to remove the impurities.. Boil the jaggery syrup till it reaches the soft ball consistency. U should be able to make a soft ball out the syrup..Please be careful and dont miss this consistency.(suppose if u miss this stage,just add little water to syrup and boil again.wait for right consistency and Proceed)Switch off the flame immediately. Add cardamom powder & dry ginger powder to it.Mix well.

  • Now in a broad kadai, take the roasted poha, sesame seeds & fried gram dal & coconut bits. Add the syrup to this mixture and mix well. When the mixture is warm, grease ur hands withe ghee or rice flour and make balls.Roll it tightly to make a perfect round.Give a setting time of 30 minutes.

  • Crispy aval pori urundai is ready , Enjoy !!

Note
  • For making pori urundai with puffed rice , follow the same procedure. If ur puffed rice is soggy , Heat a kadai and then put the soggy puffed rice , mix well and switch off the flame. Allow the puffed rice to remain in the kadai and mix it in regular intervals. Puffed rice will become crispy..
  • Jaggery syrup consistency is very important here. Soft ball should be made out of jaggery..syrup will be frothy & thick to look.
  • Adjust the amount of jaggery as per the sweetness u require..The color of the pori urundai depends on the color of jaggery and the amount of jaggery u use.


Appam recipe

Appam recipe Appam using wheat flour and jaggery for karthigai deepam
Cuisine: Indian Category: Sweet Yields: Serves 4
Prep Time: 10 Minutes Cook Time: 20 Minutes Total Time: 30 Minutes

INGREDIENTS

  • Wheat flour – 1/2 cup
  • Rice flour – 1 tbsp
  • Powdered jaggery – 1/4 cup + 1/8 cup ( the ratio of wheat flour & jaggery should be 1:3/4)
  • Banana – 1 no ( small)
  • Cardamom powder – 2 pinches
  • Cooking soda – 1 big pinch
  • Water – 1/2 cup + 2 tbsp
METHOD
  • Grind the banana to a smooth paste adding little water in a mixie.
  • In a bowl take the flour , powdered jaggery , cardamom powder , ground banana and mix well. Add water to make a smooth batter. Finally before making the appam add the cooking soda , mix well.
karthigai appam recipe
  • Place the paniyaram pan  , add little oil/ghee and pour the batter. Cover & cook for sometime. flip it and again cook for sometime.I wanted mine to be brown in color and i kept in high flame for few seconds before removing it..
    appam step by step
  • Remove and serve.. Hot n soft appam is ready!!
Note

  1. Adding mashed banana gives the softness to the appam
  2. If desired coconut gratings can also be added.
  3. Ghee  can used to make this appam to make it more rich n flavourful.
  4. U can also deep fry this appam instead of making in paniyaram pan ..
  5. For getting nice round shape, use less oil while u deep fry and make it one by one…

الأحد، 25 نوفمبر 2012

Refried Beans with Sun-Dried Tomatoes

It will not likely come as a surprise to my readers that I adore spicy dishes from many cuisines around the world. Though Indian creations and variations on traditional dishes from India are my passion, I like to explore the world from my humble kitchen. There is no requirement that my experiments and offerings *must* be spicy, but I always find myself gravitating toward the spice cupboard and the hot chilies.

vegetarian refried beans

I turned my sights toward Mexican cooking for one of my most recent cooking sessions. Refried beans have always been a favorite of mine. I have made several versions over the years, and when the craving hit I came up with another recipe. Certainly not the most traditional version of this classic dish, but I have perfected the technique over the years to suit my palate. This time I have included sun-dried tomatoes. Yes, regular readers have probably noticed that I use sun-dried tomatoes A LOT. Such an important staple ingredient in my kitchen. They add extra flare to your food without overpowering the other ingredients if you are sparing with the quantity that you include.

Certainly distinct from Indian cuisine, Mexican food is actually more similar than you might think. For example, most Mexican dishes are hot and spicy and include plenty of hot chilies. The depth of flavor and complexity of the dishes that are nonetheless prepared with relative ease, also make these two rather distinct regions a perfect match for fusion style cooking. As in India, tomatoes are widely used and beans and rice are a common feature of the meal. A rough equivalent to Indian flatbreads are tortillas. Quesadillas are commonly stuffed with a variety of beans and vegetables that I consider to be a Mexican version of an Indian paratha. The spicing and choice of flours and ingredients surely vary, but I bet if you enjoy Indian cuisine, you already enjoy or will enjoy offerings from Latin America.

Consider serving these refried beans rolled up in a flour or corn tortilla, topped with some sour cream and hot sauce along with a bed of rice for a complete and satisfying vegetarian meal. Even your carnivorous friends and family will be delighted and asking for seconds.

Refried Beans with Sun-Dried TomatoesRefried Beans with Sun-Dried Tomatoes
Recipe by
Cuisine: Mexican
Published on November 25, 2012

Zesty and spicy hot homemade refried beans with sun-dried tomatoes

Print this recipePrint this recipe

Ingredients:
  • 1 1/4 cups dried pinto beans (3 cups cooked or 2 14 oz cans)
  • 4 to 5 sun-dried tomatoes
  • 2 tablespoons + 1 teaspoon oil or butter
  • 1/2-inch piece fresh ginger, minced, or a heaping 1/2 teaspoon powdered ginger
  • 2 to 3 jalapeños or fresh green chilies, seeded and finely chopped
  • 1 medium tomato, diced
  • 1/2 teaspoon cayenne
  • 1 teaspoon ground cumin
  • 1 to 2 teaspoons chili powder, to taste
  • 1/2 teaspoon hot paprika
  • 1 teaspoon sea salt, or to taste
  • 1 medium onion, chopped
  • 1/2 cup to 3/4 cup fresh or frozen corn
Instructions:
  • Rinse the beans and soak in several inches of water for 8 hours or overnight. Drain and rinse, then transfer to a medium saucepan and cover with several inches of fresh water. Bring to a boil, reduce the heat to low, cover, and simmer the beans for 1 hour or until very soft. Drain and transfer to a large bowl. Mash with a fork or potato masher and set aside.

  • Meanwhile, soak the sun-dried tomatoes in hot water for 20 to 30 minutes, then drain and chop.

  • Heat 1 teaspoon of oil or butter in a small saucepan over medium-low heat. Add the ginger, jalapeños or chilies, tomatoes, sun-dried tomatoes, spices and salt, and simmer for 15 minutes or until the mixture begins to thicken.

  • Heat the remaining oil or butter in a cast-iron skillet or large frying pan over medium heat. When hot, toss in the onions and fry for a 3 to 5 minutes or until the onions turn translucent. Add the mashed beans and cook for 5 minutes, stirring every minute or so.

  • Now add the tomato mixture and corn. Cook, flipping portions of the bean mixture every few minutes, until the beans begin to dry out and brown a bit, about 10 to 15 minutes.

  • Serve hot or warm over a bed of hot cooked brown rice or wrapped in warmed tortillas, with a little sour cream and a sprinkle of chili powder or a few dashes of hot sauce if desired.

Makes 6 servings
refried beans

More Mexican dishes you are sure to enjoy from Lisa's Vegetarian Kitchen:
Black Bean and Goat Cheese Quesadillas
Huevos Rancheros Con Frijoles
Tomato Corn Chowder
Guacamole

On the top of the reading stack: browsing

Audio Accompaniment: Vic Chesnutt

الخميس، 22 نوفمبر 2012

Indian-Style Roasted Squash Curry

Indian squash curry

Making good use of seasonal vegetables is an important component of my culinary adventures. Squash is my latest fetish and for some reason, in the past, I have rather neglected this wholesome and versatile veggie. Funny that as my brother, who used to eat no more than about 5 or 6 different things as a child and would enjoy potatoes but hardly any other vegetable — quite literally — really took to squash when he expanded his repertoire of "edible" food. Myself, I was not really a picky eater except when it came to meat and fish, so I guess it is no wonder that I have been a vegetarian for over 20 years now.

Squash is not only good for you, but surprising filling too, more so than most vegetables that appear on my table. Most recently I have been making soups with squash but this time around I wanted a rather dry hot curry squash dish to serve with a bed of rice and green peas. The only thing lacking for this meal was some savory flatbreads that I did not get around to making. Do consider using sweet dumpling squash if you can find it. Now a favorite of mine, it tastes a lot like pumpkin, more than most squashes I have tried.

sweet dumpling squash

Roasting the squash helps preserve the nutrients and brings out the natural sweetness. You may even wish to use a pumpkin instead of the squash varieties I recommend here as this curry would turn out just as well.

Indian-Style Roasted Squash CurryIndian-Style Roasted Squash Curry
Recipe by
Cuisine: Indian
Published on November 22, 2012

Fork-tender pieces of roasted squash simmered in a hot and fragrant Indian-spiced curry

Print this recipePrint this recipe

Squash:
  • 1 medium squash such as butternut, kabocha or sweet dumpling (about 1 lb)
  • butter or oil for brushing
  • 1/2 teaspoon turmeric
  • pinch or two of sea salt
Curry:
  • 1 tablespoon ghee, butter or oil
  • 1/2 teaspoon brown mustard seeds
  • 1/2 teaspoon fenugreek seeds
  • 2 to 3 fresh chilies, seeded and finely chopped
  • 1-inch piece fresh ginger, minced or grated
  • 2 teaspoons ground coriander
  • 1 teaspoon ground cumin
  • 1/2 teaspoon amchoor powder (optional)
  • 1/4 to 1/2 teaspoon cayenne
  • pinch of asafetida
  • 1/3 cup dried shredded unsweetened coconut
  • 1 large tomato, finely chopped
  • generous handful of dried curry leaves
  • 1/2 teaspoon sea salt, or to taste
  • fresh cracked black pepper to taste
Instructions:
  • Begin by roasting the squash. Preheat an oven to 400° and brush a broiling pan with butter or oil. Cut the squash in half, scoop out the membrane and seeds, and brush with butter or oil. Transfer to the broiling pan, sprinkle with turmeric and salt, and bake on the middle rack until just fork tender — about 40 minutes. Let cool before peeling, then cut into bite-sized pieces.

  • Heat the ghee, butter or oil in a heavy-bottomed saucepan over medium heat. When hot, toss in the mustard seeds and fenugreek seeds and stir for 30 seconds or until the mustard seeds turn grey and begin to splutter and pop. Add the chilies and ginger and stir for another minute. Add the ground spices and coconut and continue to stir for another minute. Now add the tomato and curry leaves and simmer, stirring frequently, for a few minutes or until the tomato is slightly reduced.

  • Add the cooked squash to the pan and continue simmering, stirring occasionally, for another 5 minutes to warm the vegetable, adding a little water if necessary. Taste and season with salt and black pepper as desired. Serve hot.

Makes 4 servings
Indian-Style Roasted Squash Curry

More delightful squash recipes from Lisa's Vegetarian Kitchen:
Roasted Butternut Squash & Cannellini Bean Soup with Spices and Toasted Pistachios
White Bean and Mushroom Soup with Butternut Squash and Kale
Butternut Squash Sambar
Roasted Butternut Squash and Herbed Cannellini and Artichokes with Fennel and Parsley Salad

الأربعاء، 21 نوفمبر 2012

No Croutons Required - Soups and Salads to Grace your Holiday Table

The challenge for November was to come up with a vegetarian soup or salad to adorn your holiday table. The roundup is short this month but surely lots of ideas to get you in the festive mood. Thanks to all who sent in a recipe. I will announce the most popular submission at the end of the month with input from friends and family. Please vote for your favorite via email or in the comment section to help us come up with the winner for this month's challenge. Neither my submission, nor Jacqueline's, is eligible for the vote.

cabbage salad

Our first entry is from Janet of the Taste Space with this heavenly Warm Balsamic Rosemary Cabbage Salad. Surely this warming and earthy salad consisting of red onion, garlic, cabbage, balsamic vinegar, fresh rosemary, raisins, green apples and nuts and or seeds would be a lovely dish to add to your holiday table on special occasions, or anytime for that matter. An additional bonus are Janet's reflections on the frustrations and joys of food blogging. (Toronto, Ontario, Canada)

Lentil Salad with Tempeh, Dried Cherries, Spinach and Gorgonzola

I'm up next with this unique and flavorful Lentil Salad with Tempeh, Dried Cherries, Spinach and Gorgonzola. Marinated and salty fried spiced up tempeh strips fill out this multi-layered salad consisting of puy lentils dressed with shallots, a hint of natural sugar, dried cherries, red wine vinegar, balsamic vinegar tossed with fresh spinach and garnished with creamy gorgonzola. My dining companions had no complaints whatsoever. Praise certainly encourages the cook to keep experimenting and offering up special dishes. (London, Ontario, Canada)
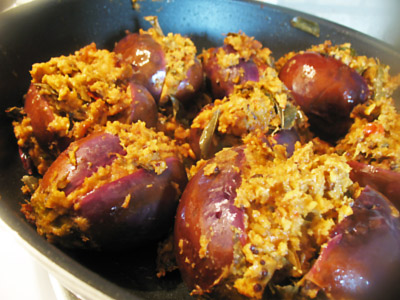
Italian veggies

Next up is Rita who cooks Italian food that is most appealing indeed. Her contribution this month is Vegetables Cooked the Italian way. I could not resist spinach, black cabbage and brussels dressed up with olive oil, garlic, chili, lemon juice and fresh parsley. I think you will agree that your table will be dressed up with this delightful side of goodness. (London, UK)

soya bean salad

More festive ideas for our dinner tables come from Nitu Didi. Check out this Soya Bean Salad with lots of different flavors and nutrients. Soya beans and veggies and even fruits, such as onions, tomatoes, cucumbers, avocado, peppers, radish, pineapple, apples, kiwi and parsley are dressed with olive oil, fresh lemon juice and a bit of salt. Take your pick when it comes to the produce you wish to include to make your own special holiday offering. (Spain)

sweet corn chowder

Janice dishes out delights from her Farmergirl Kitchen such as this Sweetcorn Chowder. Comfort in a bowl means shallots, potatoes, some flour to thicken up the mixture, sweetcorn, veggie stock, bay leaves, milk, herbed cheese and fresh parsley. So simple, but nourishing and no doubt a great idea to sweeten up your dinner. I'm totally smitten with the idea of the herbed cheese. (Scotland, UK)

spinach blue cheese pear soup

Finally, my dear friend Jac of Tinned Tomatoes and fellow partner for this ongoing event offers up a luscious Spinach, Pear & Blue Cheese Soup. Sauteed onions and garlic in olive oil with some potatoes added after and then spinach and pear, all dressed up with blue cheese, worcestershire sauce, seasoning, including nutmeg cannot fail to impress your guests. Of course, top with fresh herbs and a sprinkle of cayenne. This gal knows how to make a dish that is not only healthy but irresistible too. (Scotland, UK)

Jacqueline will be hosting the December edition of No Croutons Required. Check back at the beginning of the month for the theme.

SATHU MAAVU | HEALTH MIX POWDER RECIPE


SATHU MAAVU NEW
Health mix powder may not be new to u. Everybody will have their own recipe with the combo of grains and nuts. I  make it very simple with just 5 ingredients. I got this recipe from my friend swarna. I make porridge using this powder with salt & curd for my daughter. She loves this a lot.Even I too have this porridge at the time of fasting. My daughter was very lean and she was getting infected by cold and cough very often. My friend suggested me to give this porridge to gain weight & immunity.Now my daughter is feeling better and she has gained weight considerably.I started giving this porridge to her at the age of 2. My friend told this can be given for 10 months baby too but in small amount. I use 2 tbsp of this powder to make porridge for my daughter’s breakfast which is very filling for her..If u r planning to make for infants/ kids , do try with small amount say 1 tsp , make it watery first , then slowly increase the quantity and thickness.In the initial stages, i used to add more dal and rice compared to other ingredients. Nowadays i am using this proportion to make the powder in large quantity and store in an air tight box for 3 months.Click here for my version of sathu maavu dosa for adults if u r interested..
INGREDIENTS

  • RICE ( PUZHUNGAL ARISI / STEAMED RICE ) – 1 CUP
  • WHOLE WHEAT – 1 CUP
  • YELLOW MOONG DAL – 1/2 CUP
  • RAGI / FINGER MILLET – 1/4 CUP
  • FRIED GRAM DAL/ POTTUKADALAI – 1/4 CUP

METHOD

  • Dry roast all the ingredients in a kadai one by one in medium flame till nice aroma arises..
  • No need to roast the fried gram dal, just add it to the other hot , roasted ingredients , mix well and allow it to cool..
  • Allow it to cool and grind in mill. After the powder cools down , store it in an air tight box.
  • Transfer the required amount of powder in a small box for daily use .Handle with a clean spoon..It stays good for months.

sathu maavu NEW1

NOTE

  • For infants , dry roast rice and dal alone in 2:1 ratio , powder it in small quantity and make porridge using 1 tsp of this powder with salt or sugar by adding lots of water or milk.. When it suits ur kid , start to increase the amount gradually..
  • Slowly introduce ragi & wheat to the powder and practice them..
  • At the age of 2 u can follow the above said measurements…

الأحد، 18 نوفمبر 2012

Lentil Salad with Tempeh, Dried Cherries, Spinach and Gorgonzola

The layering of flavors and textures in this dish is really quite unique and surprising. My best friend Basil had a few bites and asked, "what am I eating?" but surely not in a disapproving way — indeed, he wanted seconds. I have encountered more than a few vegetarians and vegans who have expressed their dislike of tempeh, but it just depends on how you prepare it, much like tofu, only tempeh is a healthier alternative because of the fermentation process it undergoes. It has a meaty texture that surely will appeal to your carnivorous friends too, especially when you salt it up like I have here.

Lentil Salad with Tempeh, Dried Cherries, Spinach and Gorgonzola

Notes: For this recipe, I used a fairly mild and creamy Gorgonzola so as not to overpower the rest of the flavors in this dish. If you want to make this vegan, omit the cheese and it will still be a tasty and unique addition to your table. You will likely have more tempeh than you need for this salad, but the strips are delightful to snack on just on their own, so I opted to fry up the whole package.

Precisely because this is such a unique and flavourful salad, this is my submission this month to No Croutons Required. For the November edition I have asked for soups or salads that would grace your holiday table. A kind reminder that it not too late yet to submit your lovely recipes.

Lentil Salad with Tempeh, Dried Cherries, Spinach and GorgonzolaLentil Salad with Tempeh, Dried Cherries, Spinach and Gorgonzola
Recipe by
Published on November 18, 2012

Rich, filling and flavorful lentil salad dressed with fried marinated tempeh, dried cherries, fresh spinach and creamy Gorgonzola cheese

Print this recipePrint this recipe

Tempeh:
  • 12 oz (340 g) tempeh, cut into thin strips
  • 2 tablespoons olive oil
  • 3 tablespoons tamari (soy) sauce
  • 1 to 2 teaspoons chili or chipotle powder
  • 1 1/2 teaspoons sea salt, or to taste
  • 1/4 cup sesame oil
Other ingredients:
  • 2/3 cup Puy (French) lentils
  • 2 bay leaves
  • 2 tablespoons olive oil
  • 2 shallots, finely chopped
  • 1/4 cup water
  • 1 teaspoon sugar
  • 1/3 cup dried cherries or dried cranberries
  • 1/4 cup red wine vinegar
  • 1 teaspoon balsamic vinegar
  • 1 teaspoon sea salt, or to taste
  • fresh ground black pepper to taste
  • 2 - 3 cups fresh spinach, washed and trimmed
  • 4 1/2 oz (125 g) Gorgonzola cheese, crumbled or chopped
Instructions:
  • Begin by marinating the tempeh. In a small bowl, whisk together the olive oil and tamari. Transfer the tempeh strips to a large shallow pan and pour the olive oil and tamari mixture on top. Toss well to coat, sprinkle with chipotle and salt, toss again, and let sit for 30 minutes, turning occasionally.

  • Heat the sesame oil over medium-high heat in a large frying pan. When hot, add the marinated tempeh strips and fry until they are nicely browned on both sides, turning every few minutes. This should take about 10 to 15 minutes. Drain on paper towels and set aside.

  • Pick through the lentils to remove any small stones and rinse thoroughly. Combine in a medium saucepan with the bay leaves and 3 1/2 cups of water. Bring to a boil, reduce the heat to low, cover, and simmer for 20 minutes or until the lentils are tender but not falling apart. Drain and set aside.

  • While the lentils are cooking, prepare your dressing. Heat the olive oil over medium heat in a medium-sized saucepan. When hot, add the shallots and stir until they soften and turn golden brown. Now pour in the water and add the sugar, dried berries, vinegars and salt. Simmer until the mixture thickens up, stirring often. Remove from heat and season with black pepper.

  • To serve, toss together half of the tempeh with lentils, spinach and dressing. Add more seasoning and olive oil as desired. Transfer to serving plates and serve at room temperature garnished with pieces of creamy Gorgonzola and the remaining tempeh.

Makes 4 servings
lentil salad with tempeh

More tempeh based recipes you are sure to enjoy from Lisa's Vegetarian Kitchen:
Tempeh Stuffed Mushroom Tapas
Thai Tempeh Patties with a Red Chili Dipping Sauce
Oseng Oseng Tempe
Tempeh Breakfast Hash-Up

On the top of the reading stack: Dakshin: Vegetarian Cuisine from South India by Chandra Padmanabhan

Audio Accompaniment: Lux by the master of sound, Brian Eno

Brown Rice Idli Recipe - How To Make Soft Idli - South Indian Breakfast Recipes

Brown rice idli

We all know the amazing health benefits of brown rice but we don’t use it in our regular cooking. I wanted to start with idli. There is no much difference between this idli and our usual white rice idli. Colour of this idli will be slightly yellow..Do try this recipe , u’ll love for its softness..I also make dosa the next day which tastes good. The only thing which i feel bad is that the batter becomes sour very soon even refrigerated. So we have to make in lesser quantities & keep it for one day. Try the quantity i mentioned here. This will be enough for three people . U can make idli for breakfast & dinner the same day and dosa the next morning.I used poha to reduce the quantity of urad dal..U can make this idli more healthy by adding oats along with the other ingredients.Please go thro the health benefits section too.If u r interested, have a look at this oats barley idly recipe..Lets see how to make this healthy brown rice idli dosa recipe.

Brown rice


Brown rice idli recipe


Brown rice idli recipe Brown rice idli - Healthy breakfast recipe to kick start ur day :)
Cuisine: Indian
Category: Breakfast
Serves: Serves 4
Prep time: 4 hours
Cook time: 20 Minutes
Total time: 4h20m


INGREDIENTS
  1 cup = 200ml
  • Brown rice - 2.5 cups
  • Urad dal - 1/2 cup
  • Aval/poha-1/4 cup
  • Methi seeds - 1/2 tsp
  • Oats-2 tbsp(optional)
  • Salt & water - as needed
METHOD
    • Wash the brown rice 2-3 times to remove the debris.Soak rice, urad dal,methi seeds,poha  and oats together for 4 hours .
    • Now drain the water and grind them in the grinder adding salt & water. Add water in regular intervals. This takes nearly 20-25 minutes for grinding. It too 2.5 – 3 cups of water ..Remove the batter and allow it to ferment for 8 hours or overnight.
    brown rice idli tile1
    • The next day  the batter would have raised well.Mix the batter and make idlis..It takes around 15-18 mins to cook. Check with the spoon or wet ur finger and make a hole in the center of the idli , if ur finger comes out clean , it means idli is cooked..Serve hot with chutney or sambar !!
    brown rice idli tile2


Note
    • Please wash the rice 2-3 times. Otherwise the color of idlis will be brown ..
    • If u r planning to use mixie to grind the batter , use ice cold water. But the idli softness may be less..
    • Do not make the batter too thick or too thin. The consistency should be like our usual idli batter..
    • For making dosas, add little water ,  dilute the batter to get crispy dosas.

brown rice idli recipe


A picture of dosa i made with this batter
Brown rice dosa


HEALTH BENEFITS


BROWN RICE

Whole grains are important part of any diet and have often been labeled the healthiest grains that anybody can eat. One of those whole grains is brown rice, which is rice that is natural and unrefined. Many people choose to eat brown rice instead of white rice because of its health benefits. But what makes it so healthy? Read on to find out.

1. It Lowers The Risk Of Developing Diabetes

Harvard researchers have discovered that eating at least two servings of brown rice per week can lower the risk of developing diabetes. They found that by eating just 50 grams of brown rice a day, the risk of type 2 diabetes can be lowered by 16 percent, while other whole grains, such as barley and whole wheat, can lower the risk by 36 percent.

2. It’s High In Fiber

Brown rice supplies 14 percent of the recommended daily value for fiber, an important nutrient that protects against colon cancer and breast cancer. Fiber tends to latch onto the chemicals that cause cancer and steer them away from the cells in the colon and breasts, preventing cancer from developing in those areas. Fiber also has many other health benefits including promoting cardiovascular health.

3. It’s A Good Source Of Manganese And Selenium

One cup of brown rice contains 88 percent of the recommended daily value of manganese, a nutrient that plays an important part in fighting free radicals. Manganese is part of a compound known as superoxide dismutase, an antioxidant that prevents damage from free radicals created during the energy production process. Manganese is also important for deriving energy from protein and carbohydrates and plays a key role in the synthesis of fatty acids.
Selenium also plays a role in the antioxidant process and can destroy cancer cells and even repair DNA. Selenium is important for regulating the thyroid hormone metabolism and immune system function. Most people don’t take in the proper amount of selenium of which brown rice is a good source – it provides more than 27 percent of the daily recommended value.

4. It Can Prevent Weight Gain

A study conducted by Harvard researchers shows that women who incorporate whole grains, such as brown rice, into their diet were more likely to maintain a healthy body weight. They were also almost 50 percent more likely to not gain weight by eating a diet rich in whole grains.

5. It Can Lower Cholesterol

The oil in brown rice has been shown to lower levels of LDL cholesterol, also known as the bad cholesterol, by up to seven percent. At the same time, a diet high in whole grains can increase the level of HDL cholesterol, or the good cholesterol.

6. It Offers Many Cardiovascular Benefits

Studies have shown that brown rice can have many cardiovascular benefits for postmenopausal women, including slowing the progression of atherosclerosis, which is the build-up of plaque in the arteries, as well as slowing the progression of the narrowing of the arteries. But postmenopausal women aren’t the only ones who can benefit from the heart-healthy compounds in this whole grain. Brown rice also contains plant lignans, which can protect against heart disease and certain types of cancer.

7. It’s A Good Source Of Phytonutrients

Phytonutrients are compounds naturally found in plants that have anti-inflammatory properties and tend to act as an antioxidant. Brown rice is a great source of these plant compounds, especially phenolics. In fact, research has shown that brown rice contains almost as much phenolics as fruits and vegetables.

8. It Reduces The Risk Of Developing Metabolic Syndrome

Metabolic syndrome is a combination of factors that increases the risk for developing type 2 diabetes, heart disease and stroke. This condition is characterized by excess fat in the abdominal area and insulin resistance. Eating whole grains on a regular basis can reduce the risk of weight gain and insulin resistance by up to 38 percent.

9. It Reduces The Risk Of Childhood Asthma

Asthma is a very common condition among children and causes many children to miss numerous days of school. But children who eat plenty of whole grains along with fish can lower their risk of developing asthma by 50 percent. Studies show that fruits, vegetables and even dairy don’t have much of an effect in reducing asthma, but whole grains and fish do.

10. It Promotes Bone Health

Brown rice is a good source of magnesium, a mineral that is essential to bone health. Just one cup of brown rice contains 21 percent of the recommended daily value of magnesium. Most of the magnesium in the body is stored on or in the bones, so to keep a high level of magnesium in your bones, and to reap the other health benefits, eat plenty of brown rice each week.
Rice is a popular menu option in cultures all over the world. It goes well with seafood, chicken, beef and almost any vegetable. It is extremely popular due to its versatility and culinary simplicity. Unfortunately, most people do not stop to find out about the nutritional value of rice. When choosing the type of rice to serve with your meals, opt for the healthy whole grain - brown rice..
SOURCE: http://www.symptomfind.com/nutrition-supplements/brown-rice-health-benefits/

Technorati Tags: ,,,,,