I haven't been posting much because I have been making recipes that have already been documented in this space. That said, I do have a recipe to present that has been sitting in my draft folder for quite a while. That's a shame, because it is a good one and not difficult to prepare either.
I'm especially fascinated with different cuisines and African food certainly stimulates the palate. This Ethiopian-style stew is spicy and tart yet mellowed out with the addition of silky okra, a vegetable I don't use as often as I should. High in nutrients and antioxidants, the taste is rather difficult to describe, but it does nicely fill out soups and stews and is often enjoyed breaded and fried.
Homemade berbere is a must here. It's of blend of chilies and aromatic spices that takes very little time at all to make up and it keeps well in a sealed glass jar for a good few months.
Green beans can been used in place of the okra is you please.
I served this dish with
spiced teff cakes with sun-dried tomatoes but as with all Ethiopian vegetable dishes it would go also go well with injera bread, a spongey sourdough bread made with teff flour.
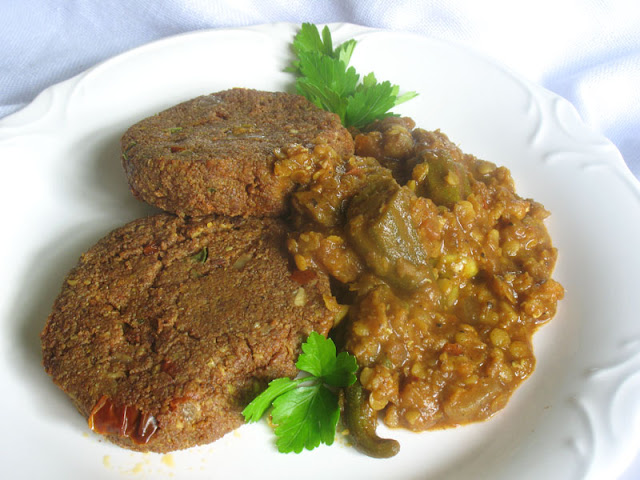
 Ethiopian-Style Red Lentil and Okra in a Spicy Tomato Sauce Ethiopian-Style Red Lentil and Okra in a Spicy Tomato Sauce |
Recipe by Lisa Turner
Adapted from Teff Love: Adventures in Vegan Ethiopian Cooking
Cuisine: Ethiopian
Published on April 22, 2016
Red lentils and okra simmered in a simple, spicy and aromatic Ethiopian-style tomato sauce
 Print this recipe Print this recipe
Ingredients:
- 1 cup dried red lentils
- 5 cups water
- 2 tablespoons olive oil
- 1 red onion, diced
- 2 cloves garlic, minced or crushed
- 1-inch fresh ginger, grated or minced
- 1 1/2 cups fresh or frozen okra, sliced into 1/2-inch pieces
- 1 large tomato, diced
- 1/2 teaspoon ground cumin
- 1/2 teaspoon ground cinnamon
- 1/4 teaspoon ground nutmeg
- 1/4 teaspoon ground cardamon
- 1/8 teaspoon ground cloves
- 3 tablespoons berbere powder
- 1 tablespoon paprika
- 1 teaspoon sea salt, or to taste
- fresh cracked black pepper, to taste
Instructions:
Rinse the lentils and add to a large heavy-bottomed saucepan. Pour in the water and bring to a boil over high heat. Reduce heat to medium and simmer, uncovered, for 10 minutes or until the lentils are cooked but still retain some firmness. Drain, reserving the cooking liquid, and set aside. Wipe the saucepan dry. Add the oil and heat over medium-high heat. When hot, add the onion and sauté for 5 minutes or until softened and slightly browned on the edges. Toss in the garlic and ginger and stir for another minute. Add the okra, tomato, cumin, cinnamon, nutmeg, cardamon and cloves, and stir well to combine. Reduce the heat to medium, cover, and simmer for about 10 minutes, stirring often, until the okra has started to soften. Stir in the berbere and paprika, increase the heat to high and add 2 cups of the reserved lentil cooking liquid. Bring to a boil, reduce heat to medium-low, cover, and simmer, stirring often, until the orka is tender, about 10 more minutes. Stir in the lentils and a bit more of the reserved cooking liquid if necessary to thin the sauce. Cover and simmer for 5 to 8 minutes, stirring occasionally, until the sauce has thickened. Season with sea salt and black pepper. Serve hot.
Makes 6 servings |

I'm sharing this with Jacquline's weekly
Meat Free Mondays event.
Other African recipes to try from Lisa's Vegetarian Kitchen:
Chickpea Patties Smothered in Vegetable GravyMixed Vegetables in a Basic Ethiopian Kulet SauceEthiopian-Style HummusVegetarian Harira (Moroccan Chickpea and Lentil Stew)

 Creamy Chickpea, Mushroom and Brown Rice Casserole


 . You too give a try and feel proud to make your own homemade vengaya vadagam recipe. Lets see how to make this easy and yummy Thalippu Vadagam/ Kari vadam at home.